Mastering Dental Exams: Your Complete Charting Checklist Template
Published: 09/10/2025 Updated: 04/03/2026
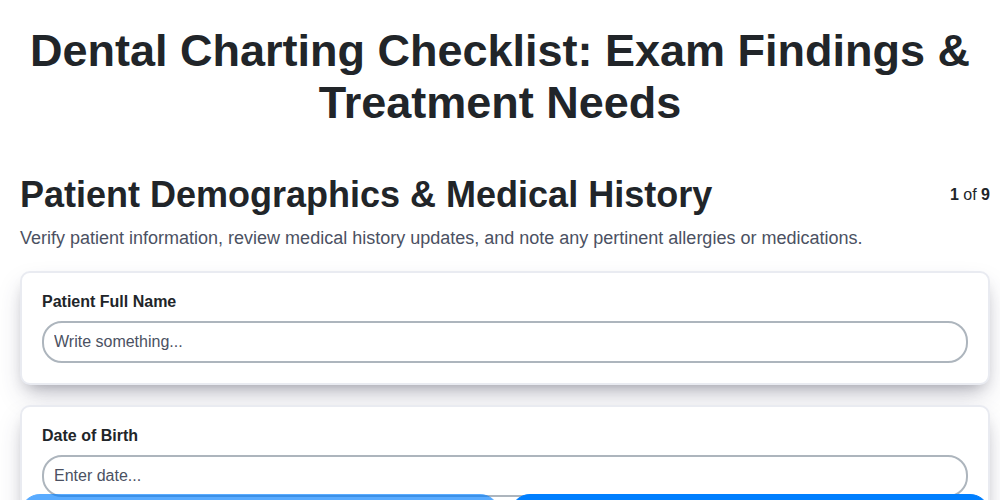
Table of Contents
- Why Accurate Charting is the Cornerstone of Excellent Dental Care
- Understanding the Components of a Comprehensive Dental Chart
- Patient Demographics & Medical History: Laying the Foundation
- Extraoral Examination: Assessing the Whole Picture
- Intraoral Soft Tissue Examination: A Detailed Look
- Hard Tissue Examination (Teeth): Identifying Issues
- Radiographic Assessment: Unveiling Hidden Details
- Periodontal Charting: Mapping Gum Health
- Occlusion & Bite Analysis: Analyzing Jaw Relationships
- Treatment Planning: From Findings to Recommendations
- Patient Communication & Consent: Ensuring Shared Understanding
- Leveraging Technology: Digital Charting Solutions
- Best Practices for Consistent Charting
- Resources & Links
TLDR: This checklist template is your guide to consistently thorough dental exams! It covers everything from patient history and oral tissues to bite analysis and treatment planning. Use it to standardize your charting, ensure nothing is missed, and improve patient care and legal protection-it's a game-changer for accurate diagnoses and personalized treatment plans.
Why Accurate Charting is the Cornerstone of Excellent Dental Care
Accurate charting transcends mere documentation; it's the bedrock upon which exceptional dental care is built. Imagine trying to construct a building without a blueprint - the result would be unstable and likely to fail. Similarly, attempting to provide comprehensive treatment without a detailed understanding of a patient's oral health is a recipe for less-than-optimal outcomes.
Detailed charting allows for a clear and longitudinal record of a patient's oral health trajectory. It enables us to track subtle changes over time, identify potential problems early on, and tailor treatment plans with precision. Furthermore, it fosters a collaborative approach - allowing different members of the dental team to seamlessly contribute to a patient's care, ensuring continuity and a unified treatment philosophy. Ultimately, it's about providing the best possible care, driven by a foundation of meticulous and accurate charting.
Understanding the Components of a Comprehensive Dental Chart
A comprehensive dental chart isn't just a collection of numbers and notes; it's a visual narrative of a patient's oral health journey. Breaking down the chart into its core components reveals a deeper understanding of its purpose and value. Let'm explore these elements in more detail.
Patient Data & Initial Impressions: This section forms the foundation, accurately recording demographics, medical history, and the patient's chief complaint. It's more than just data entry; it captures the patient's perspective and sets the context for the examination.
Extraoral & Intraoral Assessments: A Holistic View: These examinations extend beyond the teeth themselves, encompassing the surrounding tissues. Observing facial symmetry, TMJ function, and soft tissue health provides crucial clues about potential underlying issues. Abnormalities detected here can indicate systemic health concerns or guide further investigation.
The Teeth: Condition and Concerns: This detailed analysis goes beyond a simple glance. We evaluate each tooth for caries (decay), existing restorations, fractures, mobility, and discoloration. Consistent notation systems (like the Universal or FDI numbering) and standardized indices (ICCMS for caries) ensure clear communication and track changes over time.
Periodontal Health: The Supporting Structures: The periodontal assessment focuses on the gums, bone, and ligaments that support the teeth. Probing depths, recession levels, bleeding on probing - these measurements help us identify and monitor periodontal disease. Understanding the patient's plaque index and gingival index are also key indicators of oral hygiene practices.
Radiographic Interpretation: Seeing Beyond the Surface: Radiographs (X-rays) provide a window into the hidden structures of the mouth. These images allow us to identify bone loss, impacted teeth, cysts, and other abnormalities that are not visible during a clinical exam. Detailed descriptions of radiographic findings, linked to specific tooth numbers, are vital for diagnosis and treatment planning.
Occlusion: The Bite and How It Functions: Analyzing the patient's bite - the way their upper and lower teeth come together - is critical. Deviations from a Class I occlusion can contribute to jaw pain, tooth wear, and other problems. Identifying premature contacts and interferences guides restorative and orthodontic treatment.
Patient Demographics & Medical History: Laying the Foundation
Beyond simply recording a name and birthdate, the patient demographics and medical history section of your charting process serves as the cornerstone for accurate diagnosis and personalized treatment. It're more than just data points; they're vital clues that contribute to a complete picture of the patient's oral health needs.
Start with the basics: Name, date of birth, contact information. Double-check this information for accuracy - a simple typo can lead to communication errors or billing issues. Then, delve into the medical history. Be meticulous in documenting all relevant conditions - hypertension, diabetes, heart conditions, autoimmune diseases - and always note current medications and allergies. Don't assume this information remains unchanged from the last visit; actively inquire and update records.
The "Chief Complaint" section is equally important. While you're conducting a comprehensive exam, it's essential to document the patient's perspective - what prompted them to seek care today. This can provide invaluable insight into their concerns and priorities. Finally, don't overlook the social history; smoking, alcohol consumption, and dietary habits significantly impact oral health and should be noted for comprehensive care planning. This thorough grounding sets the stage for a successful and patient-centered examination.
Extraoral Examination: Assessing the Whole Picture
The extraoral exam goes beyond just looking at the teeth; it's about assessing the overall health and function of the patient's head and neck. This comprehensive evaluation helps identify potential systemic issues that may impact oral health, and vice versa. Begin by observing facial symmetry - any asymmetry could indicate underlying problems like TMJ dysfunction or nerve damage. Palpate the temporomandibular joints (TMJs) for range of motion, clicking, popping, or tenderness. Check the lymph nodes for swelling or abnormalities, which might suggest infection or inflammation. Don't forget to assess the muscles of mastication for tone and function; weakness or tightness can affect chewing ability and contribute to jaw pain. Finally, a quick scan of the skin for lesions, rashes, or unusual pigmentation can reveal important clues about the patient's general health. Paying close attention to these extraoral details paints a more complete picture of the patient's oral and overall well-being.
Intraoral Soft Tissue Examination: A Detailed Look
The intraoral soft tissue examination is a critical component of a comprehensive dental assessment, providing valuable insights into a patient's oral health beyond just the teeth. This section goes beyond a cursory glance; it requires a systematic and meticulous approach to identify potential issues early.
Begin by thoroughly inspecting the lips, noting their color, texture, and any signs of lesions, swelling, or ulcers. Proceed to examine the tongue, paying attention to its size, color, surface irregularities (like bumps or sores), and range of motion. It's important to gently depress the tongue to visualize the floor of the mouth, looking for any masses or abnormalities.
Next, assess the buccal mucosa (inner cheeks) and the palate (roof of the mouth), meticulously scanning for any discoloration, lesions, or signs of inflammation. Don't overlook the subtle details - even a slight change in color or texture can be significant. Finally, evaluate the salivary flow - is it adequate? Is the saliva frothy or thick? Any unusual characteristics should be documented. Remember, early detection is key, so a diligent and thorough intraoral soft tissue examination can be instrumental in safeguarding your patients' oral health.
Hard Tissue Examination (Teeth): Identifying Issues
A meticulous hard tissue examination is the cornerstone of accurate diagnosis and effective treatment planning. This isn't just about noting the presence of teeth; it's about observing their condition and identifying potential issues that could impact oral health. We're looking for more than just decay - we're assessing the entire lifespan of each tooth.
Start by systematically numbering each tooth, utilizing either the Universal or FDI numbering system to ensure consistent record-keeping. Then, carefully examine each tooth for signs of caries (decay). Note the location, extent (e.g., pit, fissure, surface), and severity of any decay identified. Beyond decay, look for existing restorations - are they intact, leaking, or fractured? Document the type of restoration (amalgam, composite, crown) and its condition. Missing teeth should be clearly indicated, and the mobility of each tooth should be assessed using a standardized scale like the Miller Index, noting any looseness or displacement. Keep a sharp eye out for fractures - even minor chips or cracks can compromise the tooth's structure. Finally, observe the overall color of each tooth, noting any discoloration that may indicate internal issues or previous trauma. Thorough documentation of these observations lays the groundwork for a proactive and patient-centered approach to dental care.
Radiographic Assessment: Unveiling Hidden Details
Radiographs are indispensable tools for a comprehensive dental assessment, offering a window into areas not readily visible during a clinical examination. While visual and tactile evaluations provide crucial information, radiographs reveal hidden details like bone loss, periapical lesions, impacted teeth, and early signs of decay between teeth.
When interpreting radiographs, it's vital to document the type of radiograph taken (e.g., periapical, bitewing, panoramic) and the date it was taken. A clear and concise description of any findings is essential. For instance, instead of simply noting "radiopacity," specify where the radiopacity is located (e.g., "radiopaque lesion distal to tooth #19") and its characteristics (size, shape, density). Similarly, describe any bone loss using standardized terminology and relate it to specific tooth numbers. Consistent, detailed radiographic documentation is critical not only for accurate diagnosis but also for tracking changes over time and demonstrating the efficacy of treatment. Remember to correlate radiographic findings with clinical observations to arrive at a complete and accurate assessment.
Periodontal Charting: Mapping Gum Health
Accurate periodontal charting is the cornerstone of effective gum disease management. It goes beyond just noting bleeding; it's about creating a comprehensive map of your patient's periodontal health. This detailed assessment guides treatment decisions and allows you to monitor progress effectively.
Here's what your periodontal charting should encompass:
- Probing Depths (PD): These are the primary measurements, indicating the distance from the gingival margin to the base of the pocket. Record these at six points around each tooth (mesiobuccal, mid-buccal, disto-buccal, mesio-lingual, mid-lingual, disto-lingual).
- Gingival Recession: Note the distance from the cementoenamel junction (CEJ) to the gingival margin. This, combined with probing depths, helps determine bone loss.
- Bleeding on Probing (BOP): Document bleeding with each probing measurement. BOP is a key indicator of inflammation.
- Furcation Involvement: Assess and record the degree of furcation involvement using a standardized classification (e.g., Glickman's classification - Class I to IV). This is crucial for multi-rooted teeth (molars and premolars).
- Mobility: Assess tooth mobility and document it using a standardized index, such as the Miller Index (Class 0 to Class III).
- Plaque Index: While often assessed separately, a general assessment of plaque accumulation can be noted alongside the periodontal charting.
- Attached Gingiva: This is the width of the keratinized tissue and can be measured to assess gingival biotype.
Consistent and thorough periodontal charting allows you to establish a baseline, track changes over time, and tailor treatment plans for optimal patient outcomes. Remember to clearly document any deviations from the norm and their potential impact on overall oral health.
Occlusion & Bite Analysis: Analyzing Jaw Relationships
Understanding your patient's bite, or occlusion, is paramount to a comprehensive dental assessment. It's more than just observing how the upper and lower teeth meet; it's about identifying any imbalances or interferences that could be contributing to discomfort, TMJ issues, or even tooth wear.
Here's what to look for during your occlusion and bite analysis:
- Occlusal Relationships: Classify the bite using the Angle classification (Class I, II, or III). Note any deviations from ideal alignment.
- Premature Contacts: Identify any teeth that contact before others when the jaw closes. These premature contacts can disrupt the bite and contribute to uneven wear.
- Interferences: Assess for interferences that prevent the bite from coming together smoothly. These can stem from restorations, misalignment, or other factors.
- Wear Patterns: Carefully examine the surfaces of the teeth for signs of wear. Specific wear patterns can indicate bruxism (teeth grinding), improper bite relationships, or parafunctional habits. Look for smooth, cupped areas, flat surfaces, or chipping.
- Midline Deviation: Note any deviation of the midline (the vertical line connecting the center of the upper and lower front teeth). A deviated midline can indicate underlying skeletal or muscular imbalances.
- TMJ Assessment (Revisited): Correlate any TMJ discomfort or clicking with the occlusal findings. An unstable bite can often exacerbate TMJ issues.
Detailed documentation of these observations is critical for developing a treatment plan that addresses not only the immediate concerns but also the underlying causes of any bite-related issues. Remember to explain your findings and proposed treatment options clearly to the patient, ensuring they understand the rationale behind your recommendations.
Treatment Planning: From Findings to Recommendations
The real power of comprehensive charting lies in its ability to inform a thoughtful and effective treatment plan. It's more than just listing procedures; it's about translating your observations into a roadmap for achieving optimal patient health.
Start by reviewing your entire chart - connect the dots between radiographic findings, soft tissue assessments, periodontal charting, and occlusion analysis. A seemingly minor finding in one area can have significant implications for treatment decisions elsewhere. For example, a slight deviation in occlusion might be contributing to TMJ discomfort or uneven wear on the teeth.
Prioritize your recommendations based on urgency and impact. Addressing acute problems like active decay should always take precedence. However, consider the long-term consequences of delaying restorative work or periodontal therapy. A well-structured treatment plan isn't just about fixing what's broken now; it's about preventing future problems.
Remember to present your findings and proposed treatment plan in a clear and understandable way to the patient. Explain the rationale behind each recommendation, outline the potential benefits and risks, and address any concerns they may have. A patient who understands their treatment plan is far more likely to be engaged in the process and achieve positive outcomes. Don't shy away from presenting alternatives; empower your patients to be active participants in their own care.
Finally, document the patient's consent for each proposed treatment. This is not only a legal necessity but also a sign of respect for their autonomy and informed decision-making.
Patient Communication & Consent: Ensuring Shared Understanding
Effective charting isn't just about creating a legal record; it's about fostering a collaborative partnership with your patient. This section focuses on transforming your thorough assessment into a shared understanding and obtaining informed consent.
The heart of this process lies in translating your findings into language the patient can grasp. Avoid technical jargon and instead, explain conditions and proposed treatments in clear, concise terms. Use visual aids, like radiographs or models, to illustrate the issues and demonstrate the benefits of the recommended plan. Encourage questions and actively listen to their concerns. Address any anxieties or misconceptions they may have.
Obtaining informed consent is a crucial legal and ethical responsibility. Ensure the patient understands the nature of their condition, the proposed treatment options (including the option of no treatment), the associated risks and benefits of each option, and the estimated costs. Document their understanding and their agreement to proceed with the recommended plan, either verbally and/or in writing. A clear and documented consent process not only protects your practice but also empowers your patients to be active participants in their oral health journey.
Leveraging Technology: Digital Charting Solutions
The days of paper charts are fading! While a well-crafted paper chart has its place, the benefits of digital charting solutions are becoming increasingly clear. Modern dental software offers a wealth of advantages, from enhanced legibility and data storage to streamlined workflows and improved patient communication.
Digital charting allows for real-time access to patient records for the entire team, reducing the risk of miscommunication and improving continuity of care. Many platforms integrate directly with practice management software, automating tasks like billing and insurance claims. Furthermore, features like voice-to-text dictation and pre-populated templates can significantly reduce charting time.
Beyond efficiency, digital charting improves data analysis capabilities. Practice analytics can be easily generated, allowing you to identify trends and areas for improvement in your practice. Integration with intraoral scanners and digital radiography further enhances the charting process, allowing for the inclusion of high-resolution images directly within the patient's record. Ultimately, embracing digital charting isn't just about modernizing your practice; it's about providing better, more efficient, and more patient-centered care.
Best Practices for Consistent Charting
Consistency isn't just about ticking boxes; it's about building a dependable foundation for patient care and practice efficiency. Here's how to build those habits:
- Develop a Charting Template: Don't reinvent the wheel every time. Create a standardized template with pre-populated fields and commonly used abbreviations. This minimizes time spent and reduces the risk of overlooking crucial information.
- Abbreviation Standardization: A shared language is key. Create a team-agreed upon list of abbreviations and ensure everyone uses them consistently. Publish this list visibly in your practice.
- Time Allocation: Recognize that a thorough charting process takes time. Schedule adequate time for each patient examination and don't rush the process.
- Leverage Technology: Explore Electronic Health Record (EHR) systems designed specifically for dentistry. Many offer built-in charting templates, automated calculations, and enhanced reporting capabilities.
- Regular Team Review: Hold periodic team meetings to review charting practices, address any challenges, and reinforce the importance of consistency. This provides a space for open communication and continuous improvement.
- Periodic Audits: Implement occasional internal audits of patient charts to identify any potential errors or inconsistencies and provide targeted training as needed.
- Focus on Clarity: Write legibly or type accurately. Unclear documentation can lead to misinterpretations and potential errors.
Resources & Links
- American Dental Association (ADA) : The ADA offers extensive resources for dental professionals, including guidelines on record keeping, charting, and best practices in dentistry. Their website provides access to publications, continuing education, and position statements relevant to comprehensive dental charting.
- MouthHealthy.org (ADA) : Provides patient-focused information, which can inform your explanations of the charting process and its importance during patient communication. Use it to simplify complex terminology.
- California Dental Association (CDA) : The CDA provides detailed information and resources, including sample charting forms and tutorials on proper documentation techniques. Their CDT (Code on Dental Terminology) is vital for accurate charting language.
- Dental Law Professional : This resource focuses on the legal implications of dental charting and documentation. It highlights the importance of thorough and accurate charting to protect both the dentist and the patient. Understanding legal considerations strengthens your charting protocol.
- Pearcey Dental : Offers a range of dental charting templates and guides. While some resources may require purchase, their website provides valuable insights into creating comprehensive and organized charts. Useful for form inspiration and understanding chart structure.
- RDH Magazine : A leading publication for dental hygienists, RDH Magazine offers articles and insights on all aspects of dental care, including charting techniques, periodontal assessment, and documentation best practices. Their search function can help find articles specifically related to charting.
- Dental Data Matrix : Offers comprehensive charting templates and software, providing a thorough understanding of charting elements and enabling efficient data organization. Their website showcases various charting options and the benefits of a structured approach.
- Curaprox : While primarily a dental hygiene product company, Curaprox provides educational resources on oral health, including comprehensive assessments and plaque management - relevant for Periodontal Charting and Intraoral Soft Tissue Examination sections.
- MyQ-it : Offers digital charting solutions for dental practices. Explore their website to understand the functionalities and benefits of digital charting systems and how they can streamline your workflow. Demonstrates technology in action.
- OpenVivosuite : Another provider of digital charting and practice management software, offering a glimpse into how technology is transforming dental documentation and improving efficiency. Can illustrate the potential of digital charting.
- Dental Care Products : Provides various dental assessment tools and supplies. Examining their range can reinforce understanding of what's needed to accurately perform a comprehensive oral examination.
Frequently Asked Questions
What is a dental charting checklist and why is it important?
A dental charting checklist is a structured guide used by dental professionals to ensure comprehensive and consistent documentation during dental exams. It's important for accurate diagnosis, treatment planning, tracking progress, and legal protection.
Who is this checklist template for?
This checklist template is designed for dental hygienists, dentists, and dental assistants who perform and document dental exams. It's useful for both experienced professionals and those new to charting.
What sections are included in the charting checklist template?
The template includes sections for periodontal charting (probing depths, bleeding on probing), clinical case presentation (chief complaint, medical history), soft tissue assessment (gums, tongue, oral mucosa), hard tissue assessment (teeth, bone), and radiographic assessment. It also incorporates spaces for overall summary and treatment plan considerations.
Can I customize the template to fit my practice's specific needs?
Absolutely! The template is designed to be a starting point. You can easily add, remove, or modify sections and fields to align with your practice's protocols and documentation requirements. Feel free to add notes, modify terminology, or include additional assessment areas.
What does 'probing depth' refer to in periodontal charting?
Probing depth refers to the measurement (in millimeters) of the distance between a reference point (usually the gingival margin) and the base of the gingival sulcus. It's a key indicator of periodontal health and disease.
What is 'bleeding on probing' (BOP)?
Bleeding on probing is the occurrence of bleeding when the periodontal probe gently touches the gingival tissue. It's often a sign of inflammation and potential periodontal disease.
How can this checklist template help with legal protection?
Thorough and accurate charting provides a detailed record of your findings and treatment recommendations. This documentation can serve as legal protection in case of disputes or claims.
Are there any specific tools I need to use with this checklist?
You will need standard dental charting tools, including a periodontal probe (e.g., Williams probe), a mirror, and good lighting. A digital charting system is also an option, and the template can be adapted for use with those systems.
Can I use this template for digital charting systems?
Yes, the template is designed to be adaptable. While it is initially presented as a paper-based checklist, the information and categories can easily be incorporated into digital charting software. You may need to adjust formatting depending on the software used.
Found this Article helpful?
Dental Management Solution Demo
Simplify your dental practice & enhance patient care! ChecklistGuro streamlines appointment scheduling, patient records, and billing. Improve efficiency, reduce errors, & boost patient satisfaction. Manage it all with our Work OS.
Related Articles

The Ultimate Dental Office Operations Checklist Template
Mastering Dental Recalls: Your Ultimate Checklist Template

Mastering Dental Case Presentations: Your Checklist Template for Success

Your Dental Compliance Checklist: A State & Federal Guide
Dental Operations Checklist: Boost Efficiency & Manage Risk

The Ultimate Dental Lab Case Checklist: Fabrication & Quality Assurance

Your Complete Dental Infection Control Checklist: PPE & Surface Disinfection
Your Dental Office Safety Net: The Compliance & Patient Safety Checklist Template
We can do it Together
Need help with
Dental Management?
Have a question? We're here to help. Please submit your inquiry, and we'll respond promptly.