Mastering Aviation Safety: Your Aerospace Inspection Checklist Template
Published: 10/18/2025 Updated: 12/13/2025
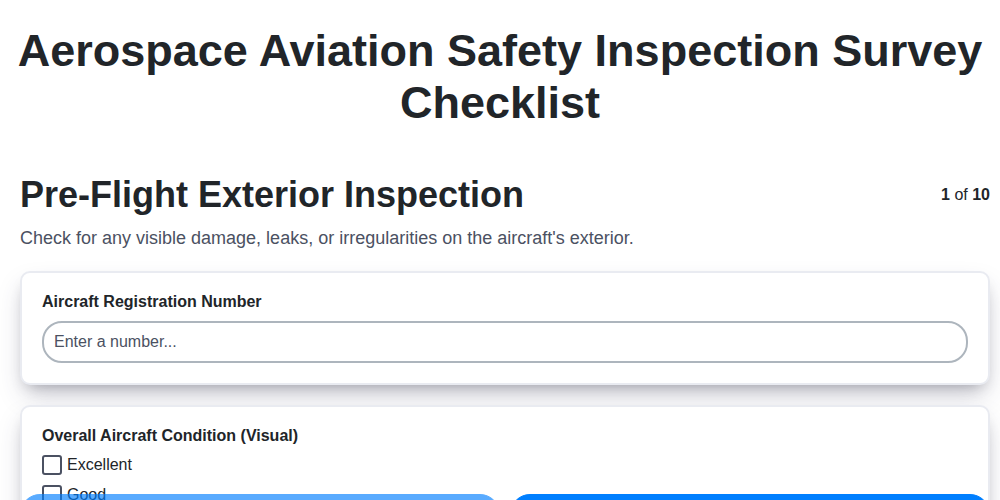
Table of Contents
- Why Aviation Safety Inspections Matter
- Understanding Your Aerospace Inspection Checklist
- Template Breakdown: Key Sections & Their Importance
- Pre-Flight Exterior Inspection: First Impressions
- Fuselage & Cabin Integrity: A Detailed Assessment
- Engine & Propulsion System: The Heart of the Aircraft
- Flight Control Surfaces: Ensuring Precise Maneuverability
- Avionics and Electrical Systems: Modern Flight Management
- Documentation Review: Staying Compliant
- Post-Inspection Verification & Sign-Off
- Continuous Improvement: Beyond the Checklist
- Resources & Links
TLDR: This template provides a structured guide for thorough aerospace inspections, covering everything from exterior checks to avionics. It helps ensure consistency, reduce errors, and maintain aircraft safety by providing a step-by-step process you can adapt for your specific aircraft and needs. Download it to streamline your inspections and stay compliant!
Why Aviation Safety Inspections Matter
Beyond the routine maintenance schedule, aviation safety inspections represent a critical layer of protection against unforeseen circumstances. They're not merely about ticking boxes; they's about proactively identifying and mitigating potential hazards before they can compromise flight safety. Consider that seemingly minor issues - a small crack in a fuselage panel, a slightly degraded fuel hose, a marginally misaligned control surface - can, if left unaddressed, escalate into serious, even catastrophic, events.
These inspections serve as a vital link in the chain of preventative measures, catching potential problems that might be missed during standard operational procedures. They provide a focused, systematic examination, often involving a fresh pair of eyes and a deeper level of scrutiny. Ultimately, robust safety inspections contribute directly to passenger and crew wellbeing, maintain the integrity of valuable aircraft assets, and uphold the reputation and trustworthiness of the entire aviation industry. Ignoring them isn't just a procedural oversight; it's a risk to lives and livelihoods.
Understanding Your Aerospace Inspection Checklist
A robust aerospace inspection checklist isn't a random collection of tasks; it's a meticulously designed framework built upon established engineering principles, regulatory mandates, and decades of operational experience. Think of it as a layered defense against potential failures, each item addressing a specific area of vulnerability.
At its core, your checklist is dictated by the aircraft's manufacturer's maintenance manual (AMM). This document, a cornerstone of aviation safety, provides detailed procedures for inspection, maintenance, and repair. Regulations, such as those from the FAA or EASA, often mandate specific inspections and frequencies, which are incorporated into the checklist.
Beyond these formal requirements, your checklist will typically be customized to reflect the aircraft's operational environment. An aircraft frequently exposed to harsh weather conditions, for example, will require more frequent corrosion inspections. Similarly, an aircraft used for specialized operations (like aerial firefighting or offshore transport) may have unique checklist items tailored to those tasks.
Understanding why each item is included, rather than just blindly checking it off, is crucial. This deeper understanding allows inspectors to identify subtle anomalies that might not be immediately obvious, and to proactively address potential issues before they escalate. It also fosters a culture of safety and continuous improvement within the maintenance team. Think of it as the difference between simply following instructions and actively contributing to the overall safety of the aircraft.
Template Breakdown: Key Sections & Their Importance
Let's dive deeper into the template itself. While the broad categories we outlined are essential, understanding the why behind each section is crucial for conducting a truly effective inspection. Here's a breakdown of key areas and their significance:
1. Pre-Flight Exterior Inspection - First Impressions Matter: This initial scan isn't just about ticking boxes; it's about developing a baseline understanding of the aircraft's current condition. Minor discrepancies noticed here can often flag more significant underlying issues. A keen eye for detail is paramount, looking for anything out of the ordinary - from minor scratches to potential fluid leaks.
2. Fuselage and Cabin Integrity - Structural Safety: The fuselage is the aircraft's skeleton. Any compromise here directly impacts structural integrity and passenger safety. Detailed inspection for cracks, corrosion, and proper seal integrity is critical, particularly around high-stress areas and emergency exits.
3. Flight Control Surfaces - The Art of Control: Smooth, precise control is non-negotiable. This section isn't simply about checking movement; it's about verifying the integrity of the control systems. Frayed cables, damaged fairings, and improper balancing all impact aircraft handling and require immediate attention.
4. Engine & Propulsion System - The Powerhouse: This area demands meticulous scrutiny. The engine is responsible for generating the force needed for flight. Visual inspection for leaks, cracks, and unusual wear, combined with a check of propeller or rotor blade condition, is vital for operational reliability and safety.
5. Landing Gear - The Final Descent: A safe landing begins with a well-maintained landing gear. This section focuses on ensuring smooth retraction/extension, verifying strut condition for leaks and damage, and checking the brake system's functionality.
6. Fuel System - The Lifeblood of Flight: Consistent and contamination-free fuel is essential. This area requires diligent monitoring of fuel levels, verification of fuel quality for signs of water or sediment, and a check for leaks and proper venting in the fuel tanks.
7. Avionics & Electrical Systems - Modern Flight's Nervous System: Modern aircraft rely heavily on complex electronic systems. This section verifies the functionality of navigation and communication equipment, checks for electrical wiring damage, and assesses battery health.
8. Emergency Equipment - Preparedness for the Unexpected: This isn't just about ensuring the equipment is present but also that it's in working order and has not expired. Regular checks and replacements are critical.
9. Documentation Review - Maintaining the Paper Trail: Logbooks and AD compliance aren't merely bureaucratic hurdles; they provide a critical historical record of maintenance and airworthiness.
10. Post-Inspection Verification - Closing the Loop: The final sign-off and communication process ensure accountability and facilitate timely reporting of any identified discrepancies.
Pre-Flight Exterior Inspection: First Impressions
The pre-flight exterior inspection is your opportunity to make a crucial first impression on the aircraft. It's more than a quick once-over; it's a systematic assessment that can reveal potential issues before they become serious problems. Start by walking around the aircraft, maintaining a consistent distance, and actively scanning the surfaces. Pay particular attention to the leading edges of wings and horizontal stabilizers - these are prime areas for bird strikes and ice accumulation. Visually inspect for any signs of damage, including dents, cracks, or delaminations. Look for discoloration or staining, which could indicate fluid leaks (fuel, oil, hydraulic fluid). Don't neglect the fuselage; check for any corrosion, especially in areas prone to moisture. Ensure all access panels are secure and properly closed. A thorough observation at this stage can often uncover minor issues that, if left unaddressed, could escalate into more significant and costly repairs later on. Remember, a keen eye and a methodical approach are key to a successful pre-flight exterior inspection.
Fuselage & Cabin Integrity: A Detailed Assessment
The fuselage and cabin represent the structural heart of the aircraft and the environment for passengers and crew. A thorough assessment goes beyond a superficial visual inspection. We's looking for subtle clues indicating potential stress or compromise.
Begin with a meticulous visual scan of the entire fuselage skin, paying particular attention to areas susceptible to corrosion, such as lap joints and around access panels. Look for any signs of:
- Cracking: Even hairline cracks warrant further investigation. Consider the location and how it might relate to stress points.
- Denting: Significant dents can indicate impact damage and require assessment for structural integrity. Note the depth and proximity to critical areas.
- Corrosion: Look for pitting, blistering, or discoloration, particularly in areas exposed to moisture or de-icing fluids.
- Delamination: (For composite structures) Look for separation of layers, which can be indicated by a change in sound when tapped.
Next, focus on cabin integrity. Evaluate the condition of:
- Emergency Exits: Ensure they are unobstructed, operate freely, and are clearly marked. Verify the integrity of the exit hatch seals.
- Window and Door Seals: Check for cracks, distortions, or signs of degradation. These seals are crucial for cabin pressurization and aerodynamic efficiency.
- Overhead Bins and Panels: Look for any signs of separation, cracking, or loose fasteners.
- Interior Linings: While primarily for passenger comfort, these linings can sometimes reveal underlying structural issues. Pay attention to any unusual bulges or separations.
- Cabin Pressurization System Components: (If accessible and within the scope of the inspection) Inspect pressure relief valves and ducting for signs of damage or leaks.
A subtle change in sound when tapping the fuselage skin can also be indicative of underlying problems. Familiarize yourself with the normal sound of your aircraft type to detect anomalies. Any suspicion of structural compromise requires a prompt and thorough investigation by qualified personnel.
Engine & Propulsion System: The Heart of the Aircraft
The engine and propulsion system are, quite literally, the heart of the aircraft, responsible for generating the thrust that allows it to take flight and sustain it. A thorough inspection of this critical system is paramount to safe operation. This section delves into the key areas of assessment, covering both reciprocating and turbine engine types, although specific procedures will vary greatly based on the engine manufacturer's guidelines.
Visual Inspection - Looking for the Obvious:
Start with a comprehensive visual inspection, paying close attention to the following:
- External Condition: Look for cracks, dents, or signs of excessive wear on the engine casing. Discoloration or unusual deposits can indicate overheating or internal issues.
- Propeller/Rotor Blade Condition (if applicable): Inspect for nicks, chips, cracks, or erosion. Check for proper balancing and ensure that all blades are free of significant damage. Blade erosion should be documented and assessed within manufacturer limits.
- Intake and Exhaust System: Ensure the intake is free of obstructions (birds' nests, ice, debris). Check exhaust stacks and turbine nozzles for damage or unusual wear. Look for signs of leaks around joints and connections.
- Fluid Leaks: Carefully inspect around all seals, gaskets, and connections for any signs of leakage - oil, fuel, or hydraulic fluid. Note the color and consistency of any leaks as this can provide valuable diagnostic clues.
Performance & Operational Checks:
Beyond the visual, operational checks are essential.
- Oil Pressure and Temperature: Monitor these parameters during engine start and run-up. Deviations from normal operating ranges should be investigated immediately.
- Turbine Exhaust Gas Temperature (EGT) (Turbine Engines): A critical indicator of engine health. Excessive EGT can signify overheating or combustion inefficiencies.
- Engine Vibration: Unusual engine vibration can indicate imbalance, damage, or mechanical problems.
- Fuel Consumption: Significant changes in fuel consumption without a corresponding change in power output may indicate engine inefficiency or problems with the fuel system.
Documentation & Record Keeping:
All findings, even seemingly minor ones, must be documented in the aircraft's maintenance logbook. This provides a historical record of the engine's condition and assists in identifying potential issues before they escalate. Always refer to the engine manufacturer's service manual for detailed inspection procedures and allowable limits.
Flight Control Surfaces: Ensuring Precise Maneuverability
Flight control surfaces - ailerons, elevators, rudder, flaps, and spoilers - are the aircraft's direct link to the pilot's commands, translating intention into movement. Their functionality is non-negotiable; any compromise in their integrity or operation can lead to catastrophic consequences. A meticulous inspection is therefore paramount.
During the visual inspection, examine each surface for obvious signs of damage: cracks, dents, corrosion, and any unusual wear patterns. Pay particular attention to leading and trailing edges, as these areas are particularly susceptible to impact and erosion. Check the freedom of movement; each surface should move smoothly and without binding throughout its full range of motion. Listen for any unusual noises - squeaks, groans, or clicks - which might indicate worn hinges, cables, or actuators.
Beyond the visual, it's crucial to verify the condition of the connecting hardware. Control cables should be inspected for fraying, corrosion, and proper routing. If the aircraft utilizes hydraulic or electric actuators, check for leaks and ensure they function correctly under pressure. Flap and spoiler systems require special attention, ensuring proper sequencing and extension/retraction. Misalignment or improper operation can significantly impact aircraft performance and stability. Finally, the balance weights (if present) should be securely attached and free from damage, as any shift in balance can affect control harmony and pilot workload.
Avionics and Electrical Systems: Modern Flight Management
Modern aircraft rely heavily on sophisticated avionics and electrical systems, demanding a thorough inspection to ensure safe and reliable operation. These systems aren't simply about navigation; they're integral to flight control, communication, and overall situational awareness.
The inspection process begins with a visual assessment of all external antennas and radar domes, checking for damage, cracks, or loose connections. Next, focus on the cockpit instrumentation: navigation displays (NDs), communication panels, flight management systems (FMS), and attitude heading reference systems (AHRS). Verify the functionality of each system, noting any unusual behavior or error messages. Pay close attention to the brightness and clarity of displays.
Crucially, the inspection must include a check of all wiring harnesses, looking for chafing, exposed wires, or signs of overheating. Electrical connectors should be examined for corrosion and secure attachment. Battery condition is paramount; check voltage, terminal connections, and overall physical condition. The generator and alternator should be assessed for proper output and any signs of malfunction. Backup power systems, such as auxiliary power units (APUs) and emergency generators, must be verified for operational readiness. Finally, ensure proper functioning of all emergency lighting and communication systems, vital for passenger safety and crew coordination in unforeseen circumstances. A malfunctioning system in this area can have cascading effects across the entire aircraft, so diligent inspection is essential.
Documentation Review: Staying Compliant
A thorough documentation review isn't just about ticking a box; it's a vital layer of safety and compliance. This section delves into the critical paperwork that supports safe aircraft operation.
Aircraft Logbooks: The Record of Life
These are the central repository of maintenance history. Scrutinize entries for recurring issues, repairs, modifications, and inspections. Pay close attention to dates, descriptions, and signatures - ensuring everything aligns with the aircraft's operational life. Discrepancies or missing information should be immediately investigated.
Airworthiness Directives (ADs): Mandatory Action
ADs are issued by aviation authorities (like the FAA or EASA) and mandate specific actions to address safety concerns. Ensure all applicable ADs have been complied with, verifying the correct parts were used and the work was performed by qualified personnel. Maintain meticulous records of AD compliance.
Service Bulletins (SBs): Manufacturer Recommendations
While not mandatory like ADs, SBs offer valuable insights from the aircraft manufacturer regarding potential issues and recommended actions. Review SBs regularly and consider implementing recommendations based on operational environment and risk assessment.
Weight and Balance Data: Knowing your limits.
Accurate weight and balance calculations are crucial for safe flight operations. Verify that the aircraft's current weight and center of gravity (CG) are within approved limits for the planned flight. Ensure all cargo and passenger weights are accurately accounted for.
Component Life Records: Tracking the clock.
Many aircraft components have limited service lives (e.g., propellers, batteries). Maintain accurate records of these life cycles and schedule replacements proactively to prevent in-flight failures.
Registration and Certificate of Airworthiness: The basics.
Confirm the aircraft's registration is current and that the Certificate of Airworthiness is valid. These documents verify legal ownership and airworthiness.
Maintaining a meticulous approach to documentation review not only satisfies regulatory requirements but also provides a critical foundation for continuous improvement in aircraft safety and operational reliability.
Post-Inspection Verification & Sign-Off
The final step, and arguably one of the most critical, is the Post-Inspection Verification and Sign-Off process. This isn't just about ticking a box; it's about ensuring the inspection was thorough, accurate, and any discrepancies were properly addressed.
Verification: After completing all checklist items, take a moment to review the entire inspection. Did you miss anything? Do the findings align with your observations and experience? This is a chance to catch any oversights. It's helpful to have a second set of eyes on the inspection, if possible - a fresh perspective can often identify details that were initially missed.
Addressing Discrepancies: Any findings of damage, wear, or non-conformance must be documented clearly and accurately within the aircraft's maintenance logbook. This documentation should include a detailed description of the issue, its location, and any corrective actions taken. Temporary fixes should be clearly marked as such, with plans for permanent repair outlined.
Sign-Off: The designated inspector must then sign and date the completed checklist, certifying that the inspection was performed to the required standards and all discrepancies were appropriately addressed. This signature serves as a legal record of the inspector's responsibility for the aircraft's airworthiness at the time of inspection. Remember that only authorized and qualified personnel can perform and sign off on these inspections. Incorrect or falsified signatures can have severe consequences.
Finally, ensure a copy of the completed checklist is retained for record-keeping purposes, enabling traceability and facilitating future audits.
Continuous Improvement: Beyond the Checklist
Simply completing a checklist, while essential, isn't the end of the story. True aviation safety thrives on a culture of continuous improvement. This means regularly evaluating the effectiveness of inspection procedures and actively seeking ways to enhance them.
Consider these proactive steps:
- Data Analysis: Track inspection findings. Are recurring issues surfacing? This signals a potential systemic problem that needs addressing.
- Feedback Loops: Encourage open communication between inspectors, maintenance personnel, and pilots. Their insights are invaluable.
- Technology Adoption: Explore digital inspection tools that can streamline processes, improve accuracy, and facilitate data sharing.
- Trend Monitoring: Stay abreast of industry best practices, new technologies, and evolving regulatory requirements.
- Root Cause Analysis: When discrepancies do occur, don't just fix the immediate problem; investigate the underlying causes to prevent recurrence.
- Training Updates: Regularly refresh inspector training to ensure they are equipped with the latest knowledge and skills.
A commitment to continuous improvement transforms the checklist from a reactive measure to a dynamic tool for proactive safety management. It acknowledges that aviation safety is an ongoing journey, not a destination.
Resources & Links
- Federal Aviation Administration (FAA) : The FAA is the primary regulatory authority for aviation in the United States. Their website provides access to regulations, advisory circulars, safety guidelines, and accident/incident reports crucial for understanding aviation safety requirements and best practices.
- European Union Aviation Safety Agency (EASA) : EASA provides a European perspective on aviation safety regulations, guidance materials, and publications, offering complementary information relevant for understanding international standards and best practices. Valuable for a broader perspective.
- International Civil Aviation Organization (ICAO) : ICAO sets international standards and recommended practices for aviation safety, ensuring a global approach to aviation safety. Useful for understanding international regulations and best practices, particularly when dealing with cross-border operations.
- Boeing : Boeing's website often provides technical publications, maintenance manuals, and safety resources related to their aircraft. While specific to Boeing aircraft, the principles often apply broadly. Look for maintenance publications and safety alerts.
- Airbus : Similar to Boeing, Airbus provides technical documentation and resources for their aircraft. Valuable for understanding maintenance procedures, safety recommendations, and best practices specific to Airbus aircraft. Focus on maintenance manuals and service bulletins.
- AviationPros : AviationPros is a comprehensive online resource for aviation professionals. It includes news, articles, training courses, and industry events related to aviation safety and maintenance. Good for staying up to date with current trends and best practices.
- FAA General Aviation : This FAA sub-site focuses specifically on general aviation safety. Provides targeted resources, checklists, and information relevant to owners and operators of smaller aircraft, many of whom perform their own inspections.
- Aviation Today : Aviation Today offers news, features, and in-depth reporting on various aviation topics, including safety, technology, and regulations. Stay informed about emerging safety concerns and advancements.
- Vertical Magazine : Focuses on helicopter aviation, but provides useful safety information and maintenance insights applicable to other rotorcraft and some fixed-wing applications. Relevant for inspections focusing on rotor systems and unique helicopter maintenance concerns.
- Aviation Maintenance Magazine : A dedicated resource for aviation maintenance professionals, offering technical articles, product reviews, and industry news. Provides deeper insights into inspection techniques and emerging technologies.
Frequently Asked Questions
What is the purpose of this Aviation Safety Inspection Checklist Template?
This template is designed to provide a structured and comprehensive guide for conducting thorough safety inspections of aerospace assets. It aims to ensure compliance with regulations, identify potential hazards, and promote a culture of safety within aviation operations. It's a tool to help consistently assess and document the condition of aircraft, ground support equipment, and related systems.
Who is this checklist template for?
This template is suitable for a wide range of aviation professionals, including maintenance technicians, inspectors, quality control personnel, pilots (for pre-flight checks), and safety managers. It's adaptable to various aircraft types and operational environments.
What types of assets can I use this checklist for?
The template can be adapted for use with various aerospace assets, including aircraft (fixed-wing and rotary-wing), ground support equipment (GSE), landing systems, engines, and related components. You'll need to customize it based on the specific asset being inspected.
How do I customize the checklist?
The template is designed for customization. You can add, remove, or modify checklist items to align with the specific asset being inspected, applicable regulations, and company procedures. Use the provided guidance notes within the template as a starting point. Consider adding manufacturer's recommended inspection points and specific procedural details.
What is the difference between a 'Pass', 'Fail', and 'Deferred' result?
* **Pass:** Indicates the item meets the required standards and is in acceptable condition.* **Fail:** Indicates the item does not meet the required standards and requires immediate corrective action.* **Deferred:** Indicates the item requires further inspection or repair at a later date, with appropriate documentation and follow-up scheduled.
What should I do if I find a 'Fail' during an inspection?
Immediately document the failure, including the specific details of the defect. Follow established procedures for reporting and escalating the issue. Corrective action must be taken before the asset can be returned to service. The inspection record must clearly indicate the fail and the resolution.
How should I document my inspections?
The template includes spaces for recording inspection results, dates, initials, and any corrective actions taken. Be detailed and accurate in your documentation. Ensure the record is readily accessible and properly archived for auditing purposes. Digital recording capabilities are recommended.
Can this checklist be used digitally?
Yes, the template is easily adaptable for digital use. It can be imported into electronic inspection systems or used in spreadsheet software for easy data entry and record-keeping. Digital formats facilitate data analysis and trend identification.
Found this Article helpful?
Survey Management Solution Demo
Gather valuable insights with ease! ChecklistGuro simplifies survey creation, distribution, and analysis. Automate data collection, improve response rates, and make data-driven decisions. Manage it all with our Work OS.
Related Articles
The Ultimate Veterinary Animal Health Checkup Survey Checklist Template
Your Guide to a Green Business: The Environmental Sustainability Audit Checklist

Paper vs ChecklistGuro in Survey Management
Construction Site Safety Survey Checklist Template
A Checklist for Congregant Feedback: Template for Religious Organizations

Excel vs ChecklistGuro in Survey Management

Mastering the Policyholder Journey: Your Insurance Experience Survey Checklist
Real Estate Property Condition Survey Checklist Template
We can do it Together
Need help with
Survey Management?
Have a question? We're here to help. Please submit your inquiry, and we'll respond promptly.