Ensuring Rider Safety: Your Bus Stop Inspection Checklist Template
Published: 09/26/2025 Updated: 12/13/2025
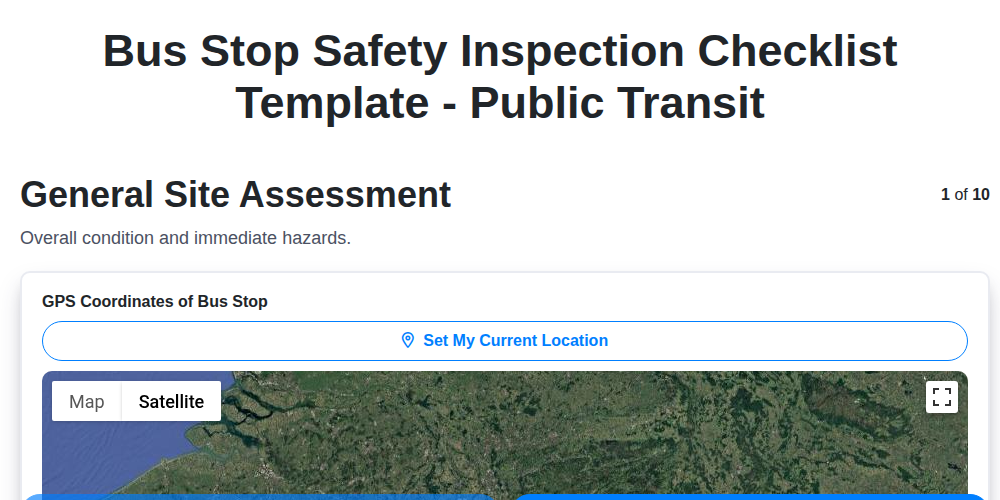
Table of Contents
- Why Regular Bus Stop Inspections Matter
- The Bus Stop Safety Inspection Checklist
- General Site Assessment: The Foundation
- Accessibility Compliance: Meeting ADA Standards
- Signage and Information: Keeping Riders Informed
- Surface and Pavement: Ensuring Safe Footing
- Lighting: Enhancing Visibility and Security
- Shelter and Seating: Providing Comfort and Protection
- Vegetation and Obstructive Elements: Maintaining Clear Sightlines
- Traffic Safety Considerations
- Reporting and Actionable Steps
- Resources & Links
TLDR: Keep riders safe and public transit running smoothly with our free Bus Stop Inspection Checklist! It's a step-by-step guide to identify hazards, ensure accessibility, and keep your bus stops clean, well-maintained, and rider-friendly - download it now and make a difference!
Why Regular Bus Stop Inspections Matter
Beyond the obvious safety concerns, regular bus stop inspections contribute to a more positive perception of public transportation within the community. A well-maintained bus stop signals that the transit system cares about its riders and is committed to providing a reliable and comfortable experience. This, in turn, encourages more people to choose public transit over private vehicles, reducing traffic congestion and improving air quality. Furthermore, these inspections help identify potential legal liabilities. Neglecting necessary repairs or failing to address accessibility issues can lead to costly lawsuits and damage to the transit agency's reputation. By proactively addressing these concerns, agencies can demonstrate their commitment to compliance and prioritize the safety and well-being of their riders.
The Bus Stop Safety Inspection Checklist
Ensuring bus stops are accessible to everyone, including individuals with disabilities, is paramount. This section focuses on compliance with the Americans with Disabilities Act (ADA) and related local regulations. Here's what to assess:
- Ramp Access: Carefully examine any ramps present. Are they in good repair, free from cracks or damage? Verify the slope adheres to ADA guidelines - typically a maximum slope of 1: 12.
- Level Landing: A level landing area is crucial for wheelchair users and those with mobility aids to safely board and disembark. Measure the dimensions - ADA requires a minimum of 60 inches wide and 24 inches deep. Ensure it's free of obstructions.
- Accessible Seating: If seating is provided, a portion of it must be accessible. This usually means at least one seat with armrests that do not obstruct transfers and a clear space beside it for maneuvering. Note any damage or instability in accessible seating.
- Clear Path of Travel: A continuous, unobstructed path leading to the bus stop is essential. This path should be at least 36 inches wide and free from any barriers like overgrown vegetation, protruding objects, or uneven surfaces. Pay attention to any changes in elevation and ensure they are manageable.
- Curb Ramp: Assess the presence and condition of curb ramps at intersections near the bus stop. Are they properly sloped, textured for slip resistance, and free from damage?
General Site Assessment: The Foundation
The general site assessment is more than just a cursory glance; it's the foundation for identifying potential hazards and ensuring the overall safety and functionality of the bus stop. This section requires a comprehensive evaluation of the surrounding environment and the immediate vicinity of the stop itself. Consider factors like pedestrian and vehicular traffic patterns - are there areas where conflicts are likely? Observe the ground conditions - is the area prone to flooding or erosion? Note the presence of any nearby businesses or structures that might impact safety, such as construction sites, loading docks, or areas with limited visibility. Pay attention to lighting conditions at different times of the day and night - is it well-lit enough to ensure rider safety and deter crime? This broad overview helps prioritize more detailed inspections and allows for a more holistic approach to improving the bus stop experience. Documenting your observations with photographs is critical, providing a visual record for future reference and facilitating communication with relevant stakeholders.
Accessibility Compliance: Meeting ADA Standards
The Americans with Disabilities Act (ADA) sets clear standards for accessibility in public spaces, and bus stops are no exception. Ensuring ADA compliance isn't just about legal obligation; it's about providing equitable access for all riders. During your inspection, carefully evaluate the following:
- Accessible Routes: The path leading to the bus stop must be accessible, with a firm, stable, and slip-resistant surface. It should have a maximum slope of 5%, and any cross-slopes should be no more than 2%.
- Level Landing Area: A level landing area, at least 60 inches wide and 72 inches long, is required where buses stop. This provides a safe and stable space for passengers using wheelchairs, walkers, or other mobility aids to board and alight.
- Accessible Seating: Provide at least one accessible seating space, securely fastened to the ground, with a clear floor space adjacent for maneuvering a wheelchair. The seating should be stable and provide adequate support.
- Detectable Warnings: Detectable warning surfaces (textured paving) should be installed at curb ramps and other hazardous locations to alert visually impaired individuals.
- Protruding Objects: Ensure that any protruding objects within the accessible route are located no higher than 27 inches above the walking surface.
- Signage: Accessible signage, including tactile and Braille elements where appropriate, should clearly identify the bus stop and provide relevant information.
Regularly review and update your inspection findings to ensure continuous ADA compliance and improve the accessibility of your public transit system.
Signage and Information: Keeping Riders Informed
Clear and accurate signage is the backbone of a user-friendly bus stop. Riders need to quickly and easily understand route information, schedules, and important announcements. Outdated or confusing signs can lead to missed connections, frustration, and a negative perception of the transit system.
Here's what to look for during your inspection:
- Route Identification: Is the bus route clearly displayed? Numbers should be large, legible, and consistently used. Consider adding route names alongside numbers for clarity, particularly in areas with multiple routes serving the stop.
- Schedules: Posted schedules must be current and easy to understand. Highlight peak and off-peak times. If schedules fluctuate seasonally, clearly indicate the applicable timeframe. QR codes linking to real-time schedule updates are a valuable modern addition.
- Real-Time Information: Increasingly, bus stops are equipped with real-time arrival information displays. Ensure these are functional and the information is accurate. Consider a backup plan if real-time systems fail.
- Accessibility: Signage should be positioned at a height accessible to people of all heights and abilities. Use high-contrast colors for readability.
- Language Support: In areas with diverse populations, providing signage in multiple languages can greatly improve rider comprehension.
- Emergency Information: Post clear instructions for reporting emergencies and contact information for transit authorities.
Surface and Pavement: Ensuring Safe Footing
Uneven pavement and damaged surfaces are a leading cause of trips and falls at bus stops. Regularly inspect the area surrounding the bus stop for cracks, potholes, raised sections, or any other irregularities. Pay particular attention to areas where riders are likely to step, such as the approach to the shelter and the crosswalk. Standing water from poor drainage can also create a slipping hazard, especially during wet weather. Consider the surface material itself - is it appropriate for the climate and expected usage? Cracked asphalt, loose concrete, or crumbling brick can all contribute to unsafe conditions. Prioritize repairs based on the severity of the damage and the potential risk to riders. Small cracks can often be filled, while larger potholes or significantly damaged sections may require more extensive repairs or even resurfacing. Don't forget to check for any protruding roots or other natural obstructions that might create a tripping hazard.
Lighting: Enhancing Visibility and Security
Proper lighting at bus stops is far more than just a convenience; it's a critical component of rider safety and security. Insufficient lighting creates an environment ripe for accidents, petty crime, and feelings of unease. A well-lit bus stop allows riders to clearly see their surroundings, identify approaching buses, and feel safer while waiting.
During your inspection, assess not only whether lights are present, but also their functionality and placement. Are all lights working, or are there burned-out bulbs? Is the light bright enough to illuminate the platform and surrounding area? Consider the angle of the lighting - are there any areas shrouded in shadow where someone could hide? Look for glare, which can be just as problematic as darkness, as it reduces visibility. Modern LED lighting is often a superior choice for bus stops, offering improved brightness, energy efficiency, and longer lifespan. Prioritize repairs and upgrades to ensure optimal lighting conditions, contributing to a safer and more welcoming transit experience for everyone.
Shelter and Seating: Providing Comfort and Protection
A well-maintained shelter and comfortable seating significantly enhance the rider experience, transforming a simple bus stop into a haven from the elements and a place of respite. Beyond mere convenience, these features contribute to safety and accessibility. We're looking for more than just a roof overhead; we need to assess the shelter's structural integrity. Are there signs of rust, cracks, or damage that could pose a hazard? Check for broken glass or loose panels. Seating should be stable and free from sharp edges or splinters. Consider the material - is it weather-resistant and easy to clean? Accessibility is key: ensure the shelter is spacious enough to accommodate wheelchairs, strollers, and those with mobility aids. Finally, note any instances of vandalism, as prompt removal helps deter further damage and maintains a welcoming environment for all riders.
Vegetation and Obstructive Elements: Maintaining Clear Sightlines
Overgrown vegetation and obstructive elements pose significant safety risks at bus stops. These hazards can severely limit visibility for both riders and approaching drivers, increasing the likelihood of accidents and creating a feeling of insecurity. It's not just about aesthetics; clear sightlines are paramount for pedestrian safety and efficient bus operation.
Our inspections should focus on identifying any plants, branches, or objects that impede views. This includes:
- Overhanging Branches: Trim any branches that obstruct the view of approaching buses or pedestrians attempting to cross the street.
- Tall Grass/Weeds: Keep grass and weeds neatly trimmed to a manageable height, ensuring clear visibility of the bus stop area.
- Parked Vehicles/Objects: Ensure no parked cars, delivery trucks, or other objects are blocking the view of the bus stop or surrounding roadway.
- Signage Obscuration: Check that vegetation isn't covering bus route or schedule information, making it difficult for riders to access vital information.
Regular trimming and proactive removal of these obstructions are crucial for maintaining a safe and welcoming environment for all bus stop users. Remember, visibility saves lives.
Traffic Safety Considerations
Traffic safety around bus stops isn't solely about the bus itself; it's about the entire ecosystem. A poorly designed or maintained area can create hazardous situations for pedestrians, cyclists, and other drivers. Here's a breakdown of key considerations:
- Crosswalk Visibility: Are crosswalks clearly marked, well-lit, and free of obstructions? Faded lines or overgrown vegetation can make it difficult for drivers to see pedestrians attempting to cross the street. Consider high-visibility crosswalk markings and pedestrian refuge islands where appropriate.
- Bus Stop Placement: The location of the bus stop itself is critical. Is it positioned to minimize conflicts with traffic flow? Ideally, it should be located away from sharp curves or intersections with limited visibility.
- Driver Sightlines: Ensure that drivers have a clear and unobstructed view of pedestrians approaching the bus stop. Overhanging trees or parked cars can significantly reduce visibility.
- Pedestrian Refuge Islands: These islands provide a safe place for pedestrians to pause while crossing a busy street, particularly helpful near intersections or areas with high traffic volume.
- Speed Management: Consider speed reduction measures in areas with bus stops, such as speed bumps or radar speed signs, to slow down approaching traffic.
- Bike Lanes: If bike lanes are present, ensure they are clearly delineated and separated from bus stop zones to prevent conflicts.
- Parking Restrictions: Enforce parking restrictions near bus stops to ensure clear visibility for both drivers and pedestrians. Clearly marked "No Parking" zones are essential.
- Signal Timing: Evaluate traffic signal timing to prioritize pedestrian crossing times, especially during peak bus arrival and departure hours.
Reporting and Actionable Steps
Identifying potential hazards is only the first step. A robust system for reporting and taking actionable steps is what truly transforms an inspection from a mere exercise into a catalyst for positive change. Here's a breakdown of the process:
1. Detailed Documentation is Key: Don't just note "pavement cracked." Document the location precisely (e.g., "North side of shelter, 3 feet from curb"), the size and severity of the crack, and include a clear photograph. This level of detail ensures the issue is easily understood and accurately addressed.
2. Establishing a Reporting Channel: Develop a clear and accessible reporting channel. This could be an online form, a dedicated email address, or a phone number. Make it widely publicized and easy to find. Consider using a QR code at each bus stop linking directly to the reporting form.
3. Prioritization & Severity Levels: Implement a system for prioritizing repairs based on the severity of the risk. A simple scale (e.g., Low, Medium, High) can help allocate resources effectively. High-priority issues (e.g., obstructed visibility, significant structural damage) should be addressed immediately.
4. Assigning Responsibility: Clearly assign responsibility for each reported issue to a specific team or individual. This ensures accountability and prevents items from falling through the cracks.
5. Tracking Progress & Follow-Up: Implement a tracking system to monitor the progress of repairs. Regularly follow up with the responsible party to ensure timely completion. Provide updates to the reporter (if possible and desired) to demonstrate responsiveness.
6. Review & Continuous Improvement: Periodically review the entire reporting and action process. Identify bottlenecks, assess the effectiveness of current procedures, and implement improvements to enhance efficiency and responsiveness. Consider a feedback mechanism to solicit input from reporters and stakeholders.
Resources & Links
- Federal Transit Administration (FTA) : The FTA provides guidelines, regulations, and resources related to transit safety and accessibility, including bus stop design and maintenance. A crucial resource for understanding federal requirements.
- American Public Transportation Association (APTA) : APTA offers best practices, publications, and training programs for public transportation agencies. Look for resources on transit safety and security.
- ADA National Network : This network provides comprehensive information and resources related to the Americans with Disabilities Act (ADA) and accessibility compliance. Essential for ensuring bus stops meet ADA standards.
- Transit Cooperative Research Program (TCRP) : TCRP conducts research and develops guidance on various transit-related topics. Search their reports for studies on bus stop safety and design.
- Federal Highway Administration (FHWA) - Safety : The FHWA's safety resources provide insights into pedestrian and traffic safety considerations relevant to bus stop locations and design. Useful for understanding traffic flow and visibility issues.
- National Highway Traffic Safety Administration (NHTSA) : While focused on vehicles, NHTSA provides data and resources on pedestrian safety that inform bus stop design and placement. Especially important for areas with high pedestrian traffic.
- Iowa Department of Human Services - Bus Stop Audit Tool : Iowa's bus stop audit tool is a practical example of a checklist and assessment tool, which can inspire your own checklist template. Even though it's state-specific, the principles are broadly applicable.
- Portland Bureau of Transportation - Bus Stop Audits : Portland's approach to bus stop audits emphasizes community involvement and accessibility, providing a model for collaborative safety improvements.
- Centers for Disease Control and Prevention (CDC) - Pedestrian Safety : CDC provides data and resources on pedestrian safety issues, providing context for safety improvements at bus stops.
- National Institute of Standards and Technology (NIST) : While NIST's work is often technical, their principles of safety and risk assessment can be applied to bus stop safety assessments. Focus on aspects related to visibility and environmental factors.
- Local Government Innovation : This website offers innovative solutions and best practices from local governments, potentially including strategies for bus stop safety and design.
- American Society of Landscape Architects (ASLA) : ASLA provides resources and expertise on landscape design, which can be crucial for creating safe, accessible, and aesthetically pleasing bus stop environments.
Frequently Asked Questions
What is the purpose of this bus stop inspection checklist?
This checklist is designed to help you systematically evaluate bus stop safety and identify potential hazards. It ensures consistent inspections and helps prioritize improvements to create a safer environment for riders, especially children, seniors, and people with disabilities.
Who should use this checklist?
This checklist is suitable for transit agencies, city planners, community groups, and anyone responsible for assessing and maintaining bus stops. It's helpful for both routine inspections and after-incident reviews.
Is this a mandatory checklist?
This checklist is a template; its use is not mandatory. However, utilizing it demonstrates a commitment to rider safety and can be beneficial for compliance with accessibility standards and best practices. It is recommended for consistent evaluations.
How often should bus stops be inspected using this checklist?
The frequency of inspections depends on factors like bus stop location, ridership volume, and local regulations. We recommend at least annual inspections, with more frequent checks (quarterly or monthly) for high-traffic stops or those identified as high-risk.
What types of hazards should I be looking for?
The checklist covers a wide range of hazards including visibility issues, sidewalk conditions, lighting, signage, shelter integrity, proximity to traffic, and accessibility features. Pay close attention to areas that could pose tripping hazards or obstruct rider visibility.
What does 'ADA compliant' mean in the context of this checklist?
'ADA compliant' refers to adhering to the Americans with Disabilities Act (ADA) standards. These standards ensure accessibility for people with disabilities, including accessible routes, ramps, and accessible shelters. The checklist includes specific points to verify ADA compliance.
If I find a hazard, what should I do?
Document the hazard clearly in the checklist's notes section, including photos if possible. Prioritize repairs based on severity and potential risk. Follow your organization's reporting procedure to ensure the issue is addressed and tracked to completion.
Can I modify this checklist?
Yes, absolutely. This is a template designed to be customized. Add or remove items to reflect local conditions, specific needs, and organizational priorities. Just ensure any modifications maintain the focus on rider safety.
Where can I find more information about bus stop safety standards?
Refer to your local transit agency's guidelines, the Americans with Disabilities Act (ADA) standards, and the Federal Transit Administration (FTA) resources for comprehensive information on bus stop safety and accessibility requirements. Your local government may also have specific codes or regulations.
What is the 'Visibility Rating' and how should it be assessed?
'Visibility Rating' assesses how clearly riders can see approaching traffic and oncoming buses. Rate it as 'Excellent,' 'Good,' 'Fair,' or 'Poor' based on obstructions like vegetation, parked cars, or poor lighting. A poor rating necessitates immediate action to improve sightlines.
Found this Article helpful?
Public Transport Management Solution Demo
Optimize public transport operations & enhance passenger experience! ChecklistGuro streamlines route planning, vehicle maintenance, and incident reporting. Improve efficiency, safety, and reliability. Manage it all with our Work OS.
Related Articles
Train Depot Emergency Audit: Your Checklist Template for Safety
Mastering the Crush: Your Public Transport Crowded Conditions Audit Checklist
Keeping Our Buses Clean: A Checklist for Air Quality Audits
The Ultimate Bus Route Audit Checklist: A Template for Public Transit Success
Keeping City Transit Rolling: Your Tram Maintenance Checklist Template
Keeping Wheels Turning Safely: Your Bus Depot Safety Checklist Template
Mastering ATP Safety: Your Train Inspection Checklist Template
Train Depot Safety Inspection Checklist Template: Your Guide to a Safer Facility
We can do it Together
Need help with
Public Transport Management?
Have a question? We're here to help. Please submit your inquiry, and we'll respond promptly.