The Ultimate First Article Inspection (FAI) Checklist Template
Published: 09/02/2025 Updated: 03/31/2026
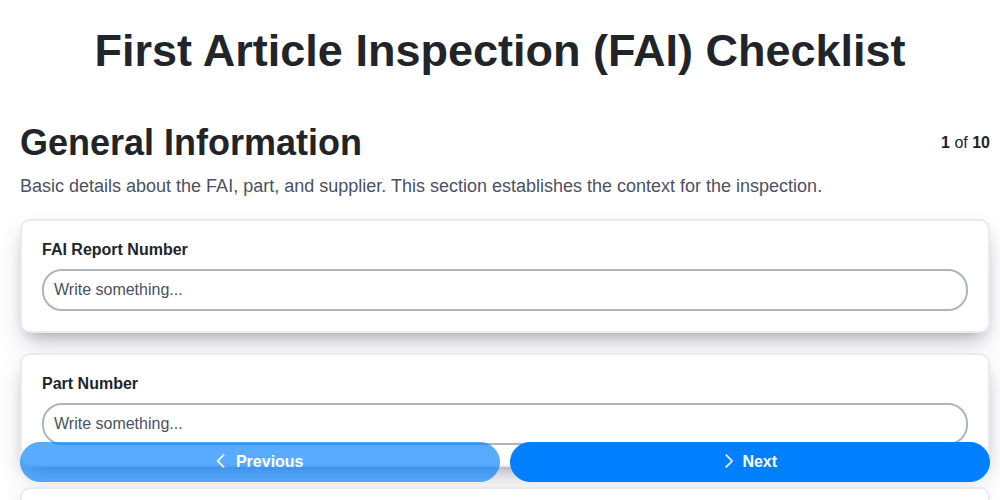
Table of Contents
- Introduction: Why an FAI Checklist is Essential
- Understanding the First Article Inspection (FAI) Process
- Key Components of a Robust FAI Checklist
- 1: General Information & Documentation
- 2: Material Verification & Traceability
- 3: Process Verification & Calibration
- 4: Dimensional & Geometric Verification
- 5: Functional & Performance Testing
- 6: Surface Finish and Appearance Assessment
- 7: Assembly Verification (If Applicable)
- 8: NDT Requirements (If Applicable)
- Using and Customizing Your FAI Checklist Template
- Resources & Links
TLDR: Need a reliable way to ensure your first production run is flawless? This template gives you a comprehensive checklist covering everything from material verification to functional testing, saving you time, reducing errors, and boosting product quality. Download it now and streamline your First Article Inspections!
Introduction: Why an FAI Checklist is Essential
The First Article Inspection (FAI) isn't just another box to tick; it's the cornerstone of a robust quality system and a vital safeguard against costly production errors. Imagine launching a full production run only to discover a critical design flaw, a material incompatibility, or a process deviation that compromises the final product's performance or safety. The ripple effect - recalls, rework, lost revenue, and damage to your reputation - can be devastating.
An FAI checklist provides a systematic and documented approach to validating that the initial production run of a new or modified part aligns perfectly with the approved design and specifications. It's a formal verification, conducted on the very first article produced, to identify and address any potential issues before they become widespread problems. Think of it as a proactive quality control measure, preventing surprises and ensuring a smooth transition to mass production while minimizing risk and maximizing efficiency. It's more than compliance; it's smart business.
Understanding the First Article Inspection (FAI) Process
The First Article Inspection (FAI) process isn't just a single event; it's a structured and documented evaluation designed to verify that a new or modified product, along with its associated manufacturing process, meets all specified requirements before full-scale production begins. Think of it as a detailed rehearsal before the main performance.
Here's a breakdown of what's involved:
- Planning & Preparation: This initial phase involves defining the scope of the FAI, identifying critical characteristics to be inspected, and establishing acceptance criteria. Drawings, specifications, process plans, and other relevant documentation are reviewed and understood.
- Inspection Execution: A trained inspector meticulously examines a first article - the very first production unit - against the established criteria. This includes dimensional measurements, functional testing, visual inspections, and potentially non-destructive testing, depending on the product and its intended use.
- Documentation & Reporting: All inspection data, observations, and any deviations from specifications are rigorously documented. A formal FAI report is generated, outlining the results and conclusions.
- Disposition & Corrective Action: Based on the FAI report, a decision is made: the article is either approved (meeting all requirements), rejected (failing to meet requirements), or reworked (corrective actions are implemented and re-inspection is performed). If rejected, a corrective action plan is developed and implemented to address the root causes of the discrepancies.
- Approval & Release: Once the article is approved and any necessary corrective actions are completed, formal approval is granted, allowing for the release of the production process and the commencement of full-scale manufacturing.
Key Components of a Robust FAI Checklist
A truly robust First Article Inspection (FAI) checklist isn't a static document; it's a dynamic tool reflecting the complexity and criticality of the product being manufactured. While the general categories we're covering are essential, their implementation is what separates a cursory check from a valuable quality gate. Here's a deeper look at key components and what makes them effective:
1. Measurable Acceptance Criteria: Don't just state requirements; define how they will be measured and what constitutes acceptable performance. Instead of "Surface finish acceptable," specify Ra ≤ 1.6 μm, measured with a profilometer at three locations. This removes ambiguity and provides a clear benchmark for the inspector.
2. Critical Characteristics Identification: Not all dimensions or features are created equal. Identify critical characteristics - those that directly impact functionality, safety, or regulatory compliance - and prioritize their inspection. These should have tighter tolerances and more rigorous verification methods. A risk assessment process can be invaluable here.
3. Traceability Matrices: Connect each inspection point to the relevant drawing revision, specification paragraph, and process plan. This creates a clear audit trail and simplifies troubleshooting if issues arise. Consider using a traceability matrix to visually map this connection.
4. Calibration Records Integration: Include links or references to the calibration certificates for all measurement equipment used. This verifies that equipment is operating within acceptable limits and provides documented evidence of accuracy.
5. Deviation Handling Protocol: Define a clear procedure for documenting and addressing any deviations from specified requirements. This should include a method for obtaining approval for deviations and a process for corrective action. Don't just identify discrepancies, outline how they are resolved.
6. Photographic Evidence: A picture is worth a thousand words. Mandatory photographic documentation of key features and measurements provides a visual record of the inspection process and facilitates communication among stakeholders. Ensure photos are properly labeled and linked to the inspection record.
7. Inspector Sign-off and Peer Review: Require sign-off from the inspector confirming completion and accuracy of the inspection. A peer review process adds an extra layer of scrutiny and helps identify potential errors.
1: General Information & Documentation
This section establishes the foundational details for the First Article Inspection, ensuring a clear and traceable record throughout the process. Accurate and complete information here is critical for future reference, auditing, and resolving any discrepancies that might arise.
Here's a template you can adapt for your own FAI checklists:
FAI Number: [Assign a unique identifier - e.g., FAI-2024-001] Date of Inspection: [YYYY-MM-DD] Revision Level of Part: [e.g., Rev A, Rev B1] - Crucial for confirming the correct documentation is being used. Part Number: [Specify the precise part number.] Part Description: [Provide a clear description of the part being inspected.] Drawing Number: [Reference the drawing number associated with the part.] Specification Number: [Reference any relevant specification documents.] Customer Purchase Order (PO) Number: [If applicable, include the PO number for traceability to the customer order.] Document Control Number: [Reference any relevant document control numbers (e.g., process plan, work instruction).] Inspector(s) Name(s) & Signature(s): [Record the name(s) and signature(s) of the inspector(s) performing the inspection. Multiple inspectors should be documented for collaborative inspections.] FAI Status: [Initial / Re-Inspection / Deviation Found / Approved] - Track the progress of the inspection. Deviation(s) / Non-Conformance(s) Log (If Applicable): [Leave space to document any deviations from the specified requirements. Each deviation should be clearly described with reference to the applicable drawing/specification and a proposed corrective action.]
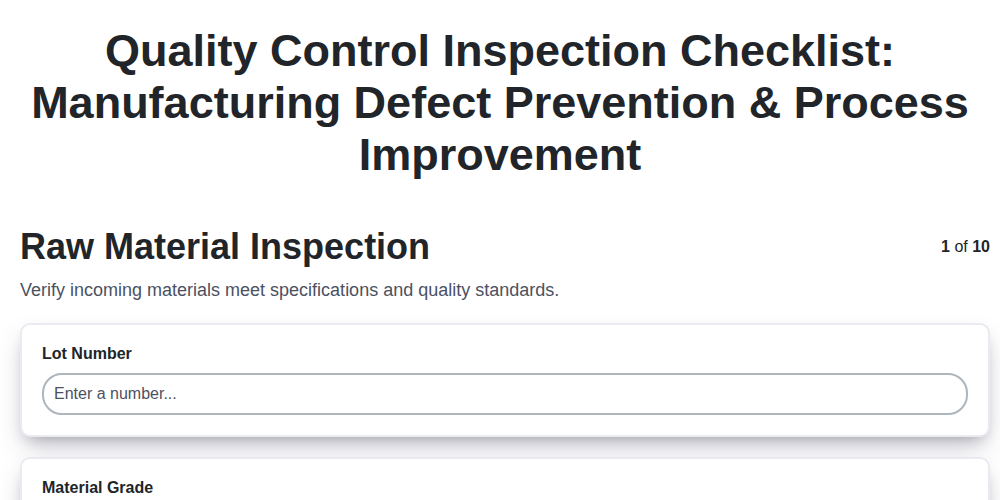
2: Material Verification & Traceability
Material verification is a cornerstone of any robust FAI process. It's not enough to simply assume the right material is being used; proactive verification ensures that the physical properties and characteristics of the material align precisely with engineering specifications. Traceability, intrinsically linked to verification, allows you to track a material's journey - from raw form to finished component - providing a critical safety net for investigations and continuous improvement.
1. Material Certificates & Documentation:
The first step is to rigorously examine the material certificates provided by your suppliers. These certificates should detail:
- Material Grade: Confirm it matches the specified grade (e.g., 6061-T6 aluminum, 304 stainless steel).
- Chemical Composition: Verify the elemental composition is within acceptable limits. Deviations, even seemingly minor, can significantly impact mechanical properties.
- Mechanical Properties: Check for parameters like tensile strength, yield strength, elongation, and hardness. These properties must meet or exceed specified values.
- Heat Treatment: Confirm the material has undergone the required heat treatment process.
- Supplier Accreditation: Consider the supplier's quality certifications (e.g., ISO 9001, AS9100) as indicators of their commitment to quality.
2. Visual Inspection & Identification:
Beyond the certificate, a visual inspection is crucial. This includes:
- Color & Finish: Note the color and surface finish. Discrepancies from expectations can be early warning signs.
- Markings & Stamping: Ensure parts are properly marked with material identification, heat numbers, and supplier information.
- Foreign Material: Check for any signs of contamination or foreign material embedded within the material.
3. Non-Destructive Testing (NDT):
Depending on the criticality of the material and application, NDT methods such as:
- Spark Testing: Identifies material composition and impurities.
- X-Ray Fluorescence (XRF): Determines elemental composition.
- Density Measurement: Verifies material density matches specifications.
May be required to provide additional verification.
4. Traceability Implementation:
Robust traceability requires a layered approach:
- Lot Number Tracking: Each material batch should be assigned a unique lot number.
- Receiving Inspection Records: Document all material receipt information, including lot numbers, supplier details, and inspection results.
- Process Documentation: Link material lot numbers to specific manufacturing processes.
- Final Product Records: Embed material lot numbers in the final product's documentation for complete lifecycle traceability.
- Digital Traceability Systems: Consider implementing a digital system to manage material records, streamline traceability, and improve data accessibility.
Effective material verification and traceability aren't merely compliance exercises; they're vital for ensuring product integrity, minimizing risk, and enabling continuous quality improvement.
3: Process Verification & Calibration
Process verification during an FAI isn't just about ticking a box; it's about demonstrating that your manufacturing process is stable, capable, and consistently produces parts that meet specifications. This section focuses on validating the process parameters and confirming equipment calibration, both critical for repeatable results.
1. Documented Process Parameters:
Start by meticulously documenting the specific process parameters used during the creation of the First Article. This includes, but isn't limited to:
- Machine Settings: Record the precise settings on all relevant machines (e.g., CNC mill spindle speed, feed rate, tool offsets; injection molding pressure and temperature).
- Environmental Conditions: Note any factors like temperature, humidity, and cleanliness, particularly if they've a known impact on the process.
- Operator Actions: Briefly document any specific operator actions or techniques employed during the process.
2. Calibration Records Review:
Critical equipment utilized in manufacturing MUST be properly calibrated. The FAI requires a review of calibration records to confirm:
- Calibration Due Dates: Verify that equipment hasn't exceeded its calibration due date. Calibration records should be readily available and traceable.
- Calibration Standards: Note the standards used for calibration. Traceability to national or international standards (e.g., NIST) is highly desirable.
- Calibration Results: Examine the calibration results to ensure that readings are within acceptable tolerances. Any deviations outside of these tolerances must be investigated and documented.
3. First Article Process Monitoring:
During the creation of the First Article, implement a simple monitoring system. This could involve:
- Statistical Process Control (SPC) Charts: For processes amenable to SPC, track key parameters over time to identify trends or shifts.
- Operator Log: Have the operator document any observations about the process, including any adjustments made and the rationale behind them.
- Visual Inspection: A trained quality technician should perform visual inspections at regular intervals to identify any process anomalies.
4. Documentation & Sign-Off:
All verification activities, calibration records, and monitoring data must be meticulously documented. A designated quality engineer or process owner should review this information and sign off, confirming that the process is under control and capable of consistently producing conforming parts. Any deviations or corrective actions taken should be clearly recorded and approved.
4: Dimensional & Geometric Verification
Dimensional verification isn't just about confirming numbers; it's about ensuring the part functions as intended. This section of your FAI checklist focuses on precise measurements and geometric tolerances, critical for both fit and performance.
Key Steps & Considerations:
- Critical Dimensions First: Prioritize dimensions most crucial to the part's functionality and those with tight tolerances. These should be clearly identified in the drawing's revision notes.
- Measurement Equipment Calibration: Absolutely essential. All measuring tools (calipers, micrometers, gauges, CMMs, etc.) must be recently calibrated and have valid certificates. Document the calibration dates and equipment serial numbers in your inspection record.
- Measurement Uncertainty: Acknowledge and account for measurement uncertainty. This is a statistical value that reflects the potential error in your measurements. It's especially important when dealing with tight tolerances.
- GD&T Interpretation: Geometric Dimensioning and Tolerancing (GD&T) dictates how features relate to each other. Thoroughly understand the symbols and their implications. Incorrect interpretation can lead to false pass/fail results. Consult with a GD&T expert if needed.
- Datum Identification & Establishment: Carefully establish datums as indicated on the drawing. Incorrect datum establishment can invalidate the entire measurement process.
- Feature Reporting: Document all measured dimensions, even those that pass. This provides a comprehensive record of the part's characteristics.
- Common Geometric Tolerances (and what to check for):
- Straightness: Check for deviations from a straight line.
- Flatness: Assess deviations from a perfect plane.
- Parallelism: Verify that surfaces remain parallel.
- Perpendicularity: Ensure surfaces are at right angles.
- Circular Runout: Check for consistent deviation from a circular profile.
- Total Runout: Evaluates combined circular and total runout.
- First Article Inspection (FAI) Software: Consider utilizing FAI software to streamline the process, automate calculations, and generate comprehensive reports. It can also help manage measurement uncertainty and track trends.
Example Checklist Items:
- Verify dimension A is within +/- 0.005 mm. (Equipment: Caliper, Serial #12345)
- Check perpendicularity of surface B to datum C. (Equipment: CMM, Serial #67890)
- Measure flatness of surface D. (Equipment: Gauge block, Serial #13579)
- Confirm circular runout of feature E. (Equipment: Indicator, Serial #24680)
5: Functional & Performance Testing
This section dives into ensuring your first article not only looks right, but performs as intended. Functional and performance testing validates that the part operates within its defined parameters and meets the user's needs. The specifics of this testing will vary drastically depending on the product's complexity and intended use.
Defining Your Testing Scope:
Before you begin, clearly define the testing scope. What are the critical functions this part must perform? What are the acceptable performance limits? Create a detailed test plan outlining:
- Test Objectives: What specific functions are being tested?
- Test Procedures: Step-by-step instructions for conducting the tests.
- Acceptance Criteria: Measurable parameters and limits for a successful test.
- Required Equipment: List of necessary tools, instruments, and fixtures.
- Data Recording: Method for documenting test results (e.g., spreadsheets, charts).
Examples of Functional & Performance Tests:
Here are some examples of testing categories, with specific test ideas within each:
- Mechanical Functionality:
- Range of Motion: If the part is a hinge or has moving components, measure the full range of motion and check for binding or obstruction.
- Load Testing: Subject the part to anticipated loads to verify structural integrity and deformation limits.
- Cycle Testing: Simulate repeated use cycles to assess fatigue life and identify potential failure points.
- Electrical Functionality:
- Voltage/Current Measurements: Verify correct voltage and current levels are delivered by electrical components.
- Signal Integrity: Check for signal distortion or loss in electronic circuits.
- Response Time: Measure the time it takes for the part to respond to a specific input or command.
- Environmental Testing: (Simulate real-world operating conditions)
- Temperature Testing: Evaluate performance at high and low temperatures.
- Humidity Testing: Assess resistance to moisture and condensation.
- Vibration Testing: Determine ability to withstand vibration during transport or operation.
- User Interface Testing: (For parts that interact with users)
- Ergonomics: Evaluate comfort and ease of use.
- Accessibility: Ensure usability for individuals with disabilities.
- Aesthetic Appeal: (Subjective, but important for user acceptance)
Documentation is Key: Meticulously document each test performed, including the date, operator, equipment used, test results, and any deviations from the expected results. Photographic evidence is highly recommended. This data is invaluable for identifying potential issues and for future reference.
6: Surface Finish and Appearance Assessment
This section focuses on the visual and tactile qualities of the First Article. It's about more than just "does it look good?"; it's about verifying that the surface characteristics meet specified requirements and contribute to the part's functionality and durability.
Visual Inspection:
Begin with a thorough visual inspection under adequate lighting. Look for any deviations from the specified surface finish, including:
- Scratches: Note the severity, frequency, and direction of any scratches. Document their location with photographs.
- Dents & Dings: Record the size, depth, and location of any surface imperfections.
- Pitting & Corrosion: Assess the presence and extent of pitting or corrosion.
- Discoloration: Note any uneven coloration or staining.
- Coating Defects: Examine coatings for issues like peeling, cracking, or bubbling.
- Orange Peel: Identify and document the presence and severity of orange peel texture.
Surface Roughness Measurements:
Use calibrated surface roughness measurement instruments (e.g., profilometer, roughness tester) to quantify the surface texture. Specify the measurement parameters (Ra, Rz, etc.) as defined in the drawing or specifications. Record the measured values and compare them to the acceptable limits. Indicate the measurement locations clearly.
Color Matching:
If color is a critical requirement, use a colorimeter or spectrophotometer to verify that the surface color matches the specified color standard (e.g., Pantone, RAL). Document the measured color values (e.g., L*, a*, b*) and the deviation from the target color.
Gloss Assessment:
If gloss is a critical requirement, use a gloss meter to quantify the surface reflectivity. Record the gloss values at specified angles (e.g., 20°, 60°, 85°) and compare them to the acceptable limits.
Tactile Assessment:
Carefully feel the surface to assess its texture. Note any unusual roughness, smoothness, or stickiness. This is a subjective assessment but can be valuable in identifying potential issues.
Documentation:
- Photographs: Take detailed photographs of any surface imperfections.
- Measurement Data: Record all surface roughness, color, and gloss measurements.
- Assessment Notes: Document any tactile assessment findings and overall surface condition.
7: Assembly Verification (If Applicable)
When your product involves the integration of multiple components, Assembly Verification becomes a critical step in the FAI. This isn't just about confirming parts fit together; it's about validating the combined functionality and ensuring the assembled unit performs as intended.
Here's what to examine within this section:
- Fit and Clearance: Verify that all components fit together correctly with appropriate clearances. Misalignment or binding can lead to premature failure or impaired performance. Document any measured clearances.
- Fasterner Torque & Installation: For bolted or fastened assemblies, confirm that all fasteners are tightened to the specified torque values. Improper torque can lead to loosening, stress fractures, or damage to the parts. Document fastener type, size, and torque values used. Check for correct fastener installation - correct orientation, proper engagement, etc.
- Component Alignment: Using precision measuring tools (e.g., laser alignment tools, precision levels, dial indicators), check the alignment of assembled parts. Misalignment can impact functionality, aesthetics, and durability.
- Wiring Harness Routing (if applicable): Ensure proper routing and securing of wiring harnesses to prevent chafing, shorts, or interference with moving parts.
- Sub-Assembly Functionality: If the final product is comprised of sub-assemblies, test the functionality of each sub-assembly within the final assembled unit.
- Bonding and Sealing (if applicable): Visually inspect and, where applicable, measure the integrity of bonded or sealed joints. Ensure proper coverage and adhesion.
- Aesthetic Considerations: While primarily focused on functionality, visually assess the assembled unit for any aesthetic defects that may have arisen during the assembly process.
Remember to document any discrepancies found during Assembly Verification and any corrective actions taken.
8: NDT Requirements (If Applicable)
Non-Destructive Testing (NDT) plays a crucial role in verifying the integrity of components without causing damage. Whether required by design specifications, industry standards, or customer requests, a tailored NDT plan is essential. This section details the considerations for incorporating NDT into your First Article Inspection.
1. Determine NDT Method(s): The specific NDT methods selected (Radiography, Ultrasonic Testing, Dye Penetrant, Magnetic Particle, Eddy Current, etc.) are dictated by the material, part geometry, criticality, and potential failure modes. Consult applicable codes and standards (e.g., ASTM, ISO, EN, NAS410) to define appropriate techniques.
2. Define Acceptance Criteria: Clear and measurable acceptance criteria must be established before NDT is performed. These criteria outline the maximum allowable defect size, type, and location for the part to be deemed acceptable. Reference industry codes and the engineering drawing for these specifics. Include criteria for surface and subsurface indications.
3. Personnel Qualification: NDT personnel must be certified and qualified according to recognized standards (e.g., ASNT, ISO 9712). Document their certifications and ensure they are within their validity periods. The Inspector's qualifications should be aligned with the specific NDT method used.
4. Equipment Calibration and Verification: All NDT equipment must be calibrated and verified periodically according to a documented procedure. Maintain calibration records and ensure they are readily available for review. This includes verification of film development processes for Radiography.
5. Record Keeping: Maintain comprehensive records of all NDT activities, including:
- Technique parameters (voltage, frequency, penetration, etc.)
- Equipment identification and serial numbers
- Film development logs (for Radiography)
- NDT personnel certifications
- Results and interpretations, including any indications found and their disposition.
- Photographic documentation of critical indications.
6. Reporting: A detailed NDT report should be generated, clearly stating the methods used, the results obtained, and the conclusions reached. This report should be readily available for review and should be part of the overall First Article Inspection documentation. Deviation from the defined NDT procedure must be documented and approved.
Using and Customizing Your FAI Checklist Template
While our provided template offers a solid foundation, remember that a truly effective FAI checklist is one that's perfectly aligned with your unique process and requirements. Here's how to put that template to work and personalize it:
1. Understand the Baseline:
Familiarize yourself with each section of the template. Even if a particular element doesn't immediately seem relevant to your product, consider why it's included. It might highlight a potential risk you hadn't considered.
2. Product-Specific Adjustments:
- Add or Remove Elements: If your product has specific critical features beyond what's covered in the template, add new inspection points. Conversely, if certain sections are irrelevant, remove them to streamline the process.
- Refine Acceptance Criteria: The template provides general acceptance criteria. Replace these with your specific, measurable, achievable, relevant, and time-bound (SMART) criteria. For example, instead of "Surface finish acceptable," specify "Surface roughness Ra ≤ 1.6 μm."
- Incorporate Drawings & Specifications: Link directly to your engineering drawings and relevant specifications within the checklist. This ensures inspectors always have the most up-to-date information.
3. Process Integration:
- Define Responsibilities: Clearly assign responsibility for each inspection point. Who is performing the inspection? Who is verifying the results?
- Frequency & Timing: Determine when the FAI should be performed (e.g., first article, production runs) and how often it needs to be repeated.
- Deviation Handling: Establish a clear procedure for documenting and resolving deviations from specifications. Include fields for root cause analysis and corrective actions.
4. Continuous Improvement:
- Review & Update Regularly: The FAI checklist shouldn't be static. Review it periodically (at least annually, or more frequently if process changes occur) and update it based on lessons learned and evolving requirements.
- Gather Feedback: Solicit feedback from inspectors, engineers, and other stakeholders to identify areas for improvement.
Pro-Tip: Consider using a digital checklist platform. These platforms often offer features like automated data collection, real-time reporting, and version control, which can significantly improve the efficiency and accuracy of your FAI process.
Resources & Links
- National Institute of Standards and Technology (NIST) : NIST provides standards, guidelines, and research related to measurement science and manufacturing processes, which are highly relevant to FAI requirements and quality assurance.
- International Organization for Standardization (ISO) : ISO develops and publishes international standards, including those related to quality management systems (e.g., ISO 9001) that underpin many FAI requirements. Understanding ISO standards is key to maintaining compliance.
- American Society for Quality (ASQ) : ASQ is a leading provider of quality training, resources, and certifications. Their website offers valuable insights on quality control, inspection techniques, and statistical process control, all relevant to a thorough FAI.
- Society of Automotive Engineers (SAE) : SAE International develops standards and technical information, particularly relevant to the automotive and aerospace industries. Their guidelines often influence FAI procedures and documentation.
- U.S. Food and Drug Administration (FDA) : For industries regulated by the FDA (e.g., medical devices), FAI is a critical component of regulatory compliance. The FDA website provides guidance on quality systems and documentation requirements.
- Quality Digest : Quality Digest is an online publication focused on quality control, manufacturing, and regulatory compliance. They provide articles, news, and resources related to FAI and similar processes.
- U.S. Department of Commerce - National Institute of Standards and Technology (NIST) : This resource focuses on manufacturing extension partnerships and offers resources on process improvement and manufacturing practices, often tied to quality control and FAI procedures.
- Aerospace Industries Association (AIA) : The AIA represents the aerospace and defense industry and provides information on standards, regulations, and best practices - vital for FAI in aerospace applications.
- Hexagon : Hexagon is a technology company specializing in measurement and automation solutions. Their website provides information about measurement equipment and software used for dimensional verification in FAIs.
- Mitutoyo : Mitutoyo is a leading manufacturer of precision measuring instruments. Their website details equipment relevant to dimensional and geometric verification steps in the FAI process.
- Keyence : Keyence is another leading manufacturer of measurement and inspection equipment. Their website offers information on sensors, systems, and software used for quality control and FAIs.
- NDT & E Equipment, Inc. : This website focuses on Non-Destructive Testing (NDT) equipment and techniques. Relevant for section 8 if NDT is required.
Frequently Asked Questions
Where can I find relevant industry standards related to FAIs?
Relevant standards may include ISO 10011 (Quality management - Guidelines for quality management of measuring equipment), AS9102 (Aerospace First Article Inspection Requirements), and other industry-specific standards. Consult your contract or regulatory requirements for specific standards.
Found this Article helpful?
Manufacturing Management Solution Demo
Stop chasing paperwork and wrestling with disconnected systems! Our solution brings clarity and control to your production process. From standard operating procedures (SOPs) and equipment maintenance to quality control and inventory tracking, we simplify every step.
Related Articles
Kaizen Checklist Template: Your Path to Continuous Improvement

Machine Safety Audit Checklist: Your Guide to a Safer Manufacturing Workplace
Mastering Supplier Performance: Your Free Supplier Scorecard Checklist Template
Your Ultimate RCM Checklist Template: A Step-by-Step Guide

LPA Checklist Template: Your Guide to Layered Process Audits

Your Ultimate Lockout/Tagout (LOTO) Checklist Template

Your Ultimate FSC 22000 Checklist Template
Quality Control Inspection Checklist Template: Prevent Defects & Improve Manufacturing Processes
We can do it Together
Need help with
Manufacturing?
Have a question? We're here to help. Please submit your inquiry, and we'll respond promptly.