Protect Your Furniture: The Ultimate Inventory & Damage Assessment Checklist Template
Published: 09/10/2025 Updated: 12/13/2025
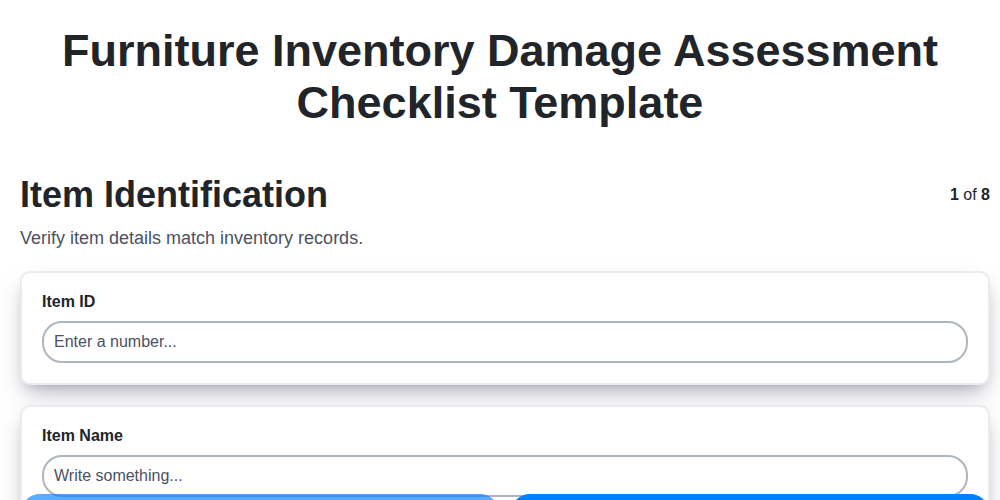
Table of Contents
- Why You Need a Furniture Inventory & Damage Assessment Checklist
- Step-by-Step: Your Ultimate Checklist Guide
- Item Identification: Laying the Foundation
- Initial Condition Assessment: Establishing the Baseline
- Damage Identification & Severity Rating: Documenting the Details
- Photographic Evidence: Visual Proof for Clear Records
- Reporting & Resolution: Tracking Progress and Accountability
- Final Status & Ongoing Management: Keeping Your Records Up-to-Date
- Resources & Links
TLDR: Worried about furniture damage and disputes? This checklist template helps you track furniture condition before, during, and after use. It's a simple way to document damage, assign severity ratings, take photos, and create a clear record, protecting your investment and simplifying resolutions - perfect for rentals, businesses, or home use!
Why You Need a Furniture Inventory & Damage Assessment Checklist
Let's be honest: furniture doesn't come cheap. Whether you're a homeowner, a landlord, a business owner, or managing a storage facility, your furniture represents a significant investment. Unexpected damage - whether caused by everyday wear and tear, accidents, or even natural disasters - can quickly depreciate its value and lead to costly disputes. A Furniture Inventory & Damage Assessment Checklist isn't just a formality; it's a proactive measure to safeguard your assets and maintain clear communication.
Think about it: how often do disagreements arise over the condition of furniture when someone moves out of a rental property? Or when transferring ownership of a business? Vague recollections and he said, she said scenarios rarely lead to satisfying resolutions. A detailed, documented assessment, completed before and after usage, provides concrete evidence of the furniture's condition, eliminating guesswork and fostering a transparent record. This isn't just about avoiding conflict; it's about proactively protecting your financial interests and building trust.
Step-by-Step: Your Ultimate Checklist Guide
Let's walk through each step of the Furniture Inventory & Damage Assessment Checklist, offering practical tips and examples to ensure accuracy and thoroughness. Consider this your hands-on guide to flawless furniture documentation.
1. Item Identification: Laying the Foundation
Don't just write chair. Be specific. Assign a unique identifier - Living Room Chair #001 works well. Record the manufacturer (if available - check labels!), model number (often found on a sticker), and any serial numbers. The location within the property is vital too; Master Bedroom - Dresser clarifies its whereabouts. A quick sketch or photo alongside the written description can also be helpful, especially for unique or antique pieces.
2. Initial Condition Assessment: Establishing the Baseline
This is your opportunity to document everything before use. Even a minor scratch becomes important context later. Use descriptive language. Instead of good, try "lightly used with no visible wear." For upholstery, note the fabric type (cotton, velvet, leather) and any existing patterns or imperfections. For wood furniture, note the finish (lacquer, oil, stain). Be meticulous - this initial assessment is your reference point.
3. Damage Identification: Detailed Documentation
When damage arises, precision is key. Don't say scratch. Instead, describe it: 3-inch scratch on the right armrest, appearing fresh, possibly from a pet's claws. Note the size, shape, and location of the damage. For stains, describe the color and potential cause (e.g., red wine stain on the sofa cushion). Photos are essential here - multiple angles and close-ups are your best defense.
4. Damage Severity Rating: Quantifying the Impact
Using a simple scale (Minor, Moderate, Severe) helps standardize the assessment. Minor might be a small scratch easily buffed out. Moderate could be a tear in the upholstery requiring repair. Severe might mean a broken leg or significant structural damage. This rating helps determine the appropriate course of action (repair, replacement, or financial settlement).
5. Reporting & Resolution: Tracking Accountability
Document who was notified about the damage (landlord, tenant, property manager) and the date of notification. Record the proposed resolution - is a repair scheduled? Is a replacement in order? The status field (pending, in progress, completed) keeps everyone informed and accountable.
6. Final Status: Completing the Lifecycle Record
Once the issue is resolved, document the final outcome. Repaired - upholstery professionally patched provides a clear record of the action taken. If a replacement occurred, note the replacement model and date. This final entry completes the furniture's lifecycle record, providing a valuable resource for future reference.
Item Identification: Laying the Foundation
Accurate item identification is the bedrock of a reliable furniture inventory. Without it, assessing damage, tracking responsibility, and resolving disputes becomes incredibly difficult, if not impossible. Don't just jot down chair - be specific. Think of it as creating a unique fingerprint for each piece.
Here's what we recommend documenting:
- Furniture Type: (e.g., Sofa, Sectional, Dining Table, Bed Frame, Armchair, Coffee Table). The more descriptive, the better. Instead of just Table, consider Round Coffee Table with Glass Top.
- Manufacturer (if known): Even partial information can be helpful. Look for labels or stamps.
- Model Number: Often found on a tag or sticker. This is crucial for warranty claims or sourcing replacement parts.
- Serial Number: Especially important for electronics or higher-value items.
- Unique Identification Number: Assign a sequential number to each piece (e.g., Unit 001, Living Room - 01). This allows for easy referencing.
- Location: Precisely where is the furniture located? (e.g., Living Room, West Wall, Bedroom 2, Office Suite 305).
- Photographic Reference: Include a photo of the item with any identifying labels visible.
By taking the time to meticulously identify each piece, you're setting the stage for a streamlined and defensible furniture management process.
Initial Condition Assessment: Establishing the Baseline
Before any use or relocation, meticulously documenting the furniture's initial condition is paramount. This step serves as your baseline for future comparisons and helps prevent disputes over pre-existing damage. Don't just write Good or Fair - be descriptive.
Consider these points when assessing the initial condition:
- Fabric/Upholstery: Note any existing stains, fading, pulls, or tears. Document the fabric type (e.g., velvet, microfiber, leather) as it impacts cleaning and repair methods.
- Wood Finishes: Carefully inspect for scratches, dents, chips, or discoloration. Note the type of finish (e.g., lacquer, varnish, stain).
- Metal Components: Check for rust, pitting, or loose screws.
- Overall Structure: Assess the stability and integrity of the furniture. Look for loose joints, wobbly legs, or any signs of previous repairs.
- Accessories: If the furniture includes accessories like cushions or pillows, note their condition as well - check for sagging, discoloration, or wear.
Remember, detailed and objective documentation at this stage is your best defense against future claims of damage that was already present. Take your time, be thorough, and don't hesitate to take close-up photographs to supplement your written assessment.
Damage Identification & Severity Rating: Documenting the Details
Simply noting "scratch" or "stain" isn't enough. Accurate damage identification is the cornerstone of a reliable furniture assessment. Think of yourself as a forensic investigator - precision and detail are paramount.
Beyond the Basics: Descriptive Language is Your Friend
Instead of a generic term, be specific. For example, instead of "scratch," document "a 4-inch linear scratch on the top surface of the table, running parallel to the grain of the wood. The scratch appears to have exposed the underlying wood layer and is approximately 1/8 inch deep." With stains, note the color, approximate size, and any discernible odor (which might suggest the source). For tears, describe the length, location, and the type of material affected.
The Severity Rating System: A Guide to Prioritization
The severity rating isn't just about assigning a number; it's about establishing a framework for addressing the damage. Here's a breakdown to guide your assessment:
- Minor: Cosmetic damage that doesn't impact functionality. Think light surface scratches, small scuffs, or very minor discoloration. These are often repairable with minimal effort and shouldn't significantly impact the furniture's usability. They rarely warrant compensation.
- Moderate: Noticeable damage that may affect functionality. This includes deeper scratches, tears in the fabric, loose joints, or minor dents. Repair might be necessary, or a professional assessment might be required. These issues often warrant discussion and potential compensation.
- Severe: Significant damage that directly impacts functionality or structural integrity. Examples include broken legs, large stains that cannot be removed, or substantial fabric tears. These issues typically require professional repair or replacement and are likely to result in financial compensation.
Combining Description and Rating
The true power comes from combining the descriptive detail with the severity rating. For example: A 6-inch tear along the armrest fabric (Moderate). The tear appears to be from sharp object penetration and compromises the structural integrity of the armrest padding. This paints a clear picture of the problem and its potential impact. Don't be afraid to add extra details if they are pertinent to a complete understanding.
Photographic Evidence: Visual Proof for Clear Records
Photos are your strongest ally when it comes to documenting furniture condition. Don't rely solely on written descriptions - a picture is worth a thousand words, especially when those words are being questioned. Here's how to take effective photographic evidence:
- Capture the Whole Picture: Begin with wide-angle shots of the entire furniture piece. This provides context and shows its overall condition within its environment.
- Zoom In on the Details: Follow up with close-up shots, focusing specifically on any areas of damage or existing imperfections. Ensure the damage is clearly visible.
- Scale is Crucial: Include a ruler, coin, or other common object in the close-up photos. This provides a visual reference for the size of the damage, eliminating any ambiguity.
- Lighting is Key: Ensure the furniture is well-lit, avoiding harsh shadows that can obscure details. Natural light is best, but if indoors, use adequate artificial lighting.
- Multiple Angles: Take photos from multiple angles to provide a comprehensive view of the damage.
- Date and Time Stamp (Highly Recommended): Most smartphone cameras have the option to automatically timestamp photos. This provides undeniable proof of when the photos were taken. If your camera doesn't offer this feature, manually record the date and time with each photo.
- File Naming Conventions: Adopt a consistent file naming system (e.g., "Sofa_Unit1_Exterior," "Table_Unit2_Scratch_CloseUp") to easily locate and organize your photos.
Reporting & Resolution: Tracking Progress and Accountability
Damage doesn't magically fix itself. The reporting and resolution phase is where the rubber meets the road, ensuring accountability and bringing the process to a satisfactory conclusion. This isn't just about noting the damage; it's about documenting who was informed, when, and what steps were taken to rectify the situation.
Here's how to effectively manage this crucial phase:
- Immediate Notification: Prompt reporting is paramount. Immediately notify the relevant party (landlord, tenant, owner, supervisor) as soon as damage is discovered. The checklist should include fields for the date and method of notification (email, phone call, in-person).
- Record Communication: Keep a detailed record of all communication regarding the damage. This includes dates, times, names of individuals involved, and a summary of the conversation. Even seemingly minor details can be important later.
- Proposed Resolution: Clearly outline the proposed solution. Will the damage be repaired, replaced, or is a financial settlement being considered? Assign responsibility for overseeing the resolution.
- Status Tracking: The checklist should incorporate a status tracking system. Common statuses might include: Reported, Under Review, Repair Scheduled, Repair in Progress, Replacement Ordered, Settled, Closed. Regularly update the status to reflect the progress.
- Follow-Up & Documentation: Don't assume a problem is solved just because it's been reported. Schedule follow-up checks to ensure the agreed-upon resolution is implemented effectively. Continue documenting all subsequent actions and communication.
- Sign-Off & Closure: Once the resolution is complete and all parties are satisfied, obtain a sign-off indicating acceptance of the outcome. This provides a clear record of closure and prevents future disputes.
Final Status & Ongoing Management: Keeping Your Records Up-to-Date
The beauty of a robust Furniture Inventory & Damage Assessment Checklist isn't just in the initial assessment; it's in the ongoing maintenance of those records. Marking the Final Status isn't the end of the process - it's a checkpoint for continued vigilance.
Consider these points for long-term management:
- Regular Reviews: Schedule periodic reviews of your inventory records, even if no damage is immediately apparent. This ensures accuracy and helps identify potential deterioration over time. A yearly check is a good starting point.
- Update with Movements: Whenever a piece of furniture is moved to a new location (room, unit, storage facility), update its record accordingly. This prevents confusion and keeps your inventory synchronized with reality.
- Track Maintenance: Record any regular maintenance performed on the furniture, such as cleaning, reupholstering, or repairs. This demonstrates responsible care and contributes to the furniture's longevity.
- Digital Archiving: If using a digital checklist, ensure your records are backed up regularly to prevent data loss. Cloud storage is a convenient and secure option.
- Transition of Ownership: If furniture is sold or transferred, thoroughly document its final condition and provide this record to the new owner. This clarifies responsibility and protects all parties involved.
Maintaining accurate and up-to-date records transforms your checklist from a reactive damage report into a proactive asset management tool.
Resources & Links
- IRS - Property Management Records : While primarily for tax purposes, the IRS guidance on property management records offers a solid foundation for understanding what constitutes necessary documentation for furniture and belongings. This helps justify deductions or claims later.
- Investopedia - Inventory Definition : Provides a basic understanding of inventory, its purpose, and the different types - which is helpful in understanding the rationale behind creating a furniture inventory.
- The Balance - How to Create a Home Inventory : A good introductory article about home inventories, covering the basics and rationale. Useful for readers new to the concept.
- Allstate - Home Inventory : Allstate's guide provides a homeowner-focused perspective on inventory creation, emphasizing insurance claims and recovery after loss. Reinforces the practical benefits of having a detailed record.
- Evernote : A popular note-taking app, excellent for digitally storing checklists, photos, and detailed descriptions of furniture. Offers organization and accessibility features.
- Google Sheets : A free, accessible spreadsheet program for creating and managing furniture inventories. Easy to share and collaborate with others.
- Microsoft Excel : Another widely used spreadsheet program, similar in functionality to Google Sheets. Provides robust features for organizing and analyzing inventory data.
- Smartsheet : A work management platform that offers customizable templates, including inventory templates. Good for more complex or collaborative inventory management.
- Canva : A graphic design platform. Useful for creating visually appealing checklists or summary reports derived from the inventory data.
- Adobe Acrobat : If primarily using a physical checklist and photographs, Adobe Acrobat allows for easy scanning, merging PDFs, and adding annotations to create a comprehensive inventory document.
- Shutterfly : Provides options for organizing and storing large quantities of photographs, which are crucial for visual proof of furniture condition.
- LegalZoom : While not directly about inventory, LegalZoom provides resources on legal documentation and property records, which may be relevant for disputes or claims.
Frequently Asked Questions
What is this checklist template for?
This checklist template is designed to help you create a detailed inventory of your furniture and assess any damage, whether for insurance purposes, moving, or simply for organization. It provides a structured way to document your furniture's condition and value.
Who is this checklist template for?
This template is beneficial for homeowners, renters, students, anyone moving, or anyone needing to document their furniture for insurance claims or record-keeping purposes.
What information should I include in the inventory section?
The inventory section should include details like furniture type, manufacturer (if known), model number, serial number (if applicable), purchase date, estimated value, and any unique identifying features.
How do I assess damage? What categories should I use?
The damage assessment section allows you to note any existing or new damage. Categories typically include scratches, dents, tears, stains, loose joints, and structural damage. Be as specific as possible and include photos if possible.
Why is it important to take photos of my furniture?
Photos provide visual evidence of your furniture's condition, which is crucial for insurance claims or resolving disputes. They help support your descriptions and provide a clear record of any damage.
Can I customize the checklist template?
Yes, absolutely! The template is designed to be flexible. You can add or remove items, adjust the categories, and add notes as needed to best suit your individual furniture and circumstances.
What is the best way to store the completed checklist and associated photos?
We recommend storing both the completed checklist and associated photos in multiple secure locations, such as a physical file, a password-protected digital folder (cloud storage is a good option), and a copy with a trusted family member or friend.
How often should I update my furniture inventory and damage assessment?
It's a good practice to update your inventory at least once a year, or whenever you acquire new furniture or notice significant damage. Updating after a move is also highly recommended.
Is this checklist suitable for antique or high-value furniture?
Yes, but we strongly recommend getting a professional appraisal for antique or high-value items. The checklist provides a starting point, but a professional appraisal will provide a more accurate valuation.
Where can I access the checklist template?
The link to download the checklist template is provided within the article. Look for the button or link labeled 'Download Checklist Template'.
Found this Article helpful?
Inventory Management Solution Demo
Optimize your inventory & boost profitability! ChecklistGuro streamlines tracking, ordering, & fulfillment. Reduce waste, minimize stockouts, & improve efficiency. Manage it all with our Work OS.
Related Articles
Warehouse Data Integrity: Your WMS Checklist Template

Mastering Inventory Turnover: Your Analysis Checklist Template
Seasonal Mulch & Gravel Checklist Template: Stay Stocked & Ready
Daily Shelf Stocking & Rotation Checklist: FIFO Made Easy
Order Picking Process Verification: Your Checklist Template
Monthly Stockroom Organization & Safety Checklist Template
Vendor Lead Time Validation: A Checklist Template for Supply Chain Success
Daily Warehouse Walkthrough Inspection Checklist Template
We can do it Together
Need help with
Inventory Management?
Have a question? We're here to help. Please submit your inquiry, and we'll respond promptly.