The Ultimate Furniture Store Inventory Damage Assessment Checklist Template
Published: 09/10/2025 Updated: 12/13/2025
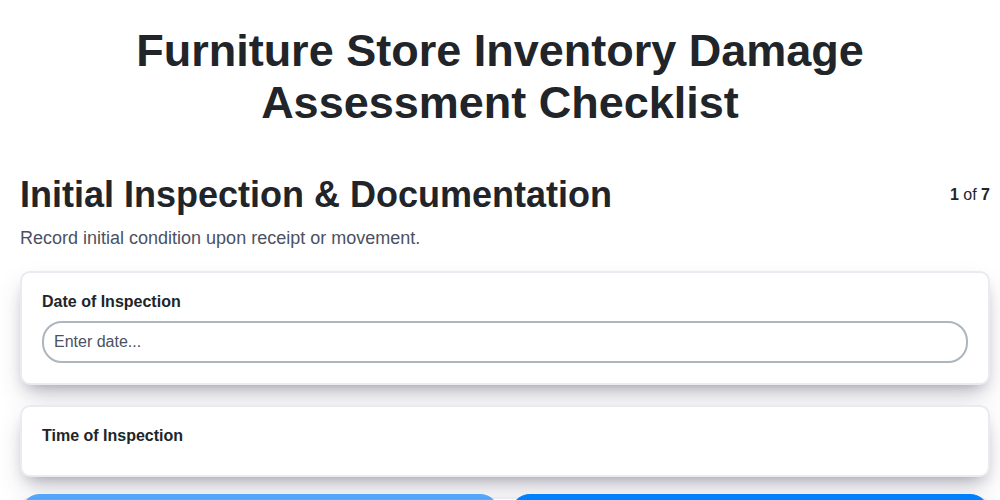
Table of Contents
- Why a Furniture Store Inventory Damage Assessment is Essential
- Step-by-Step: The Ultimate Damage Assessment Template
- Initial Inspection & Documentation: Setting the Stage
- Structural Integrity: Assessing the Frame & Joints
- Upholstery & Fabric Evaluation: Identifying Cosmetic Issues
- Hardware & Fixture Inspection: Small Details, Big Impact
- Finish & Surface Assessment: Evaluating Aesthetics
- Packaging Integrity: Examining Protection Measures
- Remediation & Reporting: Taking Action and Tracking Results
- Resources & Links
TLDR: Receiving damaged furniture? This checklist template helps you systematically assess incoming shipments, document damage thoroughly (with photos!), and file accurate claims. It covers everything from structural issues to finish flaws, protecting your business and streamlining your inventory process. Download it to avoid losses and build stronger vendor relationships!
Why a Furniture Store Inventory Damage Assessment is Essential
Beyond the immediate financial hit of a damaged shipment, failing to properly assess and document furniture inventory damage creates a ripple effect of problems. It impacts your reputation, complicates customer service, and can lead to long-term losses. Think about it: consistently accepting damaged goods without a formal assessment erodes customer trust - they're less likely to return if they perceive a lack of quality control. Furthermore, it makes vendor negotiations difficult; without consistent records, proving a pattern of substandard packaging or manufacturing flaws becomes nearly impossible. A robust assessment process provides leverage in these situations, allowing you to demand improvements and potentially secure better pricing or guarantees. Finally, accurate damage assessment is vital for insurance claims. A thorough, detailed checklist serves as irrefutable evidence, speeding up the claims process and maximizing your recovery. It's not just about the loss on a single item; it's about protecting the overall health and profitability of your furniture store.
Step-by-Step: The Ultimate Damage Assessment Template
Creating Your Go-To Checklist: A Structured Approach
While the areas of assessment outlined above are vital, the way you structure your assessment is equally important. Think of your checklist as more than just a list; it's a standardized process. Here's how to build an assessment template that's both thorough and user-friendly:
Clear Identification: Begin each assessment with the basics: shipment date, carrier name, tracking number, vendor name, product name/SKU, and a brief description of the item. This immediately creates a unique record for each shipment.
Categorized Sections: Mirror the sections we discussed earlier (Initial Inspection, Structural Damage, etc.). This ensures consistent evaluation across all shipments.
Specific, Actionable Questions: Avoid vague terms. Instead of Check for damage, use Inspect frame for cracks or warping. Note location and size if present. The more specific, the less room for interpretation.
Severity Rating Scale: Incorporate a simple rating scale (e.g., 1-5, with 1 being minor cosmetic damage and 5 being irreparable). This provides a standardized measure of damage severity.
Photo Log & Description Fields: Crucially, dedicate space for detailed descriptions of the damage and a field for attaching photos. Number each photo to correspond with the description.
Assessor & Date: Always include fields for the name and signature (or digital equivalent) of the person conducting the assessment, along with the date.
Internal Notes Section: Provide a dedicated space for any additional comments or observations that don't fit neatly into the structured sections.
Example Checklist Snippet:
| Area of Assessment: | Structural Damage (Frame) |
|---|---|
| Observation: | |
| Description: | [Space for detailed description of any cracks, warping, or instability] |
| Severity Rating (1-5): | [1-5] |
| Photo Reference: | [Photo Number(s)] |
| Assessor Signature: | _____________________ |
By following this structured approach, your damage assessment template becomes a powerful tool for protecting your business and ensuring consistent, accurate record-keeping.
Initial Inspection & Documentation: Setting the Stage
The first few minutes are critical. Don't rush the initial assessment - it sets the tone for everything that follows. Upon arrival, before unpacking a single item, meticulously record the basics: the date, time, carrier name, and the shipment number clearly indicated on the bill of lading. Then, conduct a thorough visual inspection of the exterior of the packaging. Look for obvious signs of trauma - crushed corners, tears, wet spots indicative of water damage, or compromised seals. Photographs are your best friend here; take several, from different angles, capturing the overall condition of the packaging. Pay close attention to the carrier's seal - if it's broken, tampered with, or missing, note it prominently and photograph it as evidence. Any discrepancies between the packing list and the actual quantity of boxes or pallets must be documented immediately. A detailed log, even of seemingly minor observations, can be invaluable when dealing with claims or vendor disputes later on.
Structural Integrity: Assessing the Frame & Joints
The frame is the backbone of any furniture piece, and its integrity is paramount. Begin by visually inspecting the entire frame for any signs of stress - cracks, warping, or bowing. Pay close attention to corners and areas where multiple pieces join. Use a flashlight to thoroughly examine the wood grain for hidden fractures.
Next, gently apply pressure to different areas of the frame. Listen for creaking or popping sounds, which could indicate loose joints or weakened wood. Examine the joinery method used (dowel, mortise and tenon, screws) and look for signs of failure. Dowels might be loose or broken, mortise and tenon joints could be separating, and screws may be stripped or protruding.
For upholstered pieces, examine the frame through the fabric if possible, or carefully lift the fabric in discreet areas to reveal the underlying structure. Even minor frame damage can compromise the furniture's stability and longevity, so err on the side of caution and document any concerns. Don't overlook the legs and supports; these are often points of concentrated stress and can be early indicators of larger structural issues.
Upholstery & Fabric Evaluation: Identifying Cosmetic Issues
Upholstery and fabric often bear the brunt of shipping stress, making thorough evaluation vital. Don't just glance - examine. Begin with a systematic visual sweep, working your way across the entire surface. Look beyond obvious tears; subtle issues can significantly impact a customer's perception of quality.
Here's what to be on the lookout for:
- Stains & Marks: Note the type of stain (ink, water, grease) and its size and location. Even seemingly minor spots can be dealbreakers for some customers.
- Tears & Rips: These range from small, almost imperceptible pulls to large, gaping holes. Document their dimensions and if possible, the direction of the tear.
- Seam Integrity: Carefully inspect all seams for loose stitching, unraveling, or puckering. These issues can quickly worsen with use. Gently pull on seams to check their strength - but do so carefully to avoid further damage!
- Pilling & Wear: While some pilling is normal, excessive or uneven pilling indicates lower quality fabric or inadequate protection during shipping. Assess the overall wear pattern.
- Colorfastness: Check for color transfer, particularly if the fabric is dark or vibrant. Gently rub a damp cloth on a discreet area to test for color bleeding.
- Odors: Unusual smells - mustiness, chemical odors - can indicate water damage, mold, or improper storage.
- Creasing & Wrinkling: While some wrinkling is inevitable, excessive or persistent creasing can detract from the fabric's appearance.
Hardware & Fixture Inspection: Small Details, Big Impact
Hardware and fixtures are often overlooked, but they can significantly impact the perceived value and functionality of a piece. A missing knob, a scratch on a handle, or a drawer that sticks - these seemingly minor issues can lead to customer dissatisfaction and costly returns.
Your inspection should be meticulous. Start by verifying every piece of hardware is present and accounted for against the manufacturer's parts list. Don't just look - feel the hardware. Are there any obvious scratches, dents, or signs of corrosion? Test the functionality of all moving parts: drawers, doors, hinges, and any attached mechanisms. Drawers should slide smoothly, doors should close properly, and any locking mechanisms should operate flawlessly. Pay close attention to the alignment of hinges and drawer slides - misalignment can indicate damage or poor manufacturing quality. Finally, note any loose screws or bolts, which could signal a potential structural issue. These small details add up to a big impression, and a thorough hardware inspection can prevent future headaches.
Finish & Surface Assessment: Evaluating Aesthetics
The finish and surface of a furniture piece are often the first things a customer notices-they contribute significantly to the overall aesthetic appeal and perceived value. A flawed finish can instantly detract from even the most structurally sound piece. Your assessment here needs to be meticulous.
Begin by examining the entire surface under good lighting. Look for scratches, which can range from hairline imperfections to deep gouges. Dents, even small ones, impact the smoothness and integrity of the finish. Color inconsistencies, whether due to variations in the staining process or uneven application of paint, should be documented. Pieces with veneer are particularly vulnerable - look for signs of peeling, bubbling, or cracking. Uneven gloss levels, where some areas are significantly shinier than others, can also detract from the piece's appearance. Finally, consider any unusual textures or imperfections that might not be immediately apparent. A magnifying glass can be invaluable in detecting subtle flaws. Categorize each finding by severity; a minor scratch may be acceptable, while a significant blemish may warrant a discount or return. Detailed photographs of each imperfection are critical for any subsequent claims or negotiations.
Packaging Integrity: Examining Protection Measures
The outer box might look fine, but what's happening inside? Often, damage isn't immediately apparent. We're talking about the internal packaging - the foam, bubble wrap, cardboard inserts, and other materials designed to cradle the furniture during transit.
Here's what to examine closely:
- Adequacy of Materials: Was the amount of protective material sufficient for the size and fragility of the item? A small piece of foam isn't going to protect a large, delicate headboard.
- Proper Placement: Was the furniture secured within the packaging to prevent shifting? Look for signs the item has moved around during transit - scratches from contact with the inside of the box, or crushed internal supports.
- Evidence of Shifting: Even if the outer box is intact, examine for signs the item has knocked against the sides. These could manifest as scuffs, dents, or crushed components.
- Condition of Internal Supports: Check that any internal supports (cardboard, foam, or other materials) haven't been crushed, torn, or otherwise compromised. Compromised supports indicate the furniture wasn't adequately protected.
- Missing Components: Sometimes, small protective elements are lost in transit. Note the absence of any intended cushioning or bracing.
Remediation & Reporting: Taking Action and Tracking Results
Once damage is identified and documented, the remediation process begins. This isn't just about filing a claim; it's about mitigating losses and preventing future incidents. Your chosen course of action will depend on the severity of the damage, the value of the item, and your vendor agreements. Here are common remediation pathways:
- Return to Vendor: For significantly damaged items, returning them is often the best option. Ensure you follow your vendor's return procedures precisely, including timelines and documentation requirements.
- Discounted Sale: Minor damage might warrant a discounted sale to a customer. Clearly disclose the damage upfront and adjust the price accordingly. This can be a win-win - you clear inventory, and the customer gets a good deal.
- Repair: Assess whether the damage can be repaired cost-effectively. Consider using a professional furniture repair service. Factor in repair costs and potential downtime when making this decision.
- Refusal of Shipment: If the damage is extensive and renders the item unusable, refusing the shipment is a legitimate option. This protects you from incurring unnecessary costs.
Reporting is Key to Improvement
Beyond the immediate remediation, consistent reporting is vital. Track the type of damage, the product affected, the carrier involved, and the resolution taken. This data allows you to:
- Identify Trends: Are certain manufacturers consistently shipping damaged goods? Are specific carriers more prone to mishandling?
- Negotiate Better Terms: Use this data in discussions with vendors and carriers to improve shipping practices.
- Refine Your Processes: Adjust your internal receiving procedures based on recurring issues.
- Calculate ROI: Assess the financial impact of damage and the effectiveness of your preventative measures.
A simple spreadsheet can be a powerful reporting tool. Regularly review this data to continuously improve your operations and protect your bottom line.
Resources & Links
- National Institute of Standards and Technology (NIST): NIST provides resources and standards related to quality control, metrology, and measurement science. While not furniture-specific, their principles are valuable for establishing consistent assessment methodologies.
- Quality Assurance Magazine: This magazine offers articles and insights into quality assurance processes across various industries. Useful for understanding broader quality control principles applicable to furniture inventory.
- ASQ (American Society for Quality): ASQ is a leading global authority on quality. Their website offers training, publications, and standards related to quality management and inspection processes that can inform damage assessment procedures.
- ISO (International Organization for Standardization): ISO develops and publishes international standards. While direct furniture-specific ISO standards might be limited, understanding ISO principles of standardization and documentation supports a robust assessment process.
- Furniture Today: A leading trade publication for the furniture industry. Keep an eye on industry trends, common damage types, and best practices that might influence your assessment criteria.
- Retail Dive: Retail Dive covers news and trends impacting the retail sector, including challenges related to inventory management and loss prevention - topics that intersect with furniture store damage assessment.
- SHRM (Society for Human Resource Management): Useful for establishing clear reporting procedures and accountability for damage assessment - crucial for remediation and loss prevention. Helps define roles and responsibilities.
- SAP: SAP offers inventory management software. Even if you don't use SAP, understanding inventory tracking systems and how they integrate with damage reporting informs your assessment's data-driven approach. Explore related modules.
- LexisNexis: Legal research service - useful for understanding liability issues relating to damaged goods in a retail environment, particularly warranties and consumer protection laws. (May require subscription).
- Label & Packaging Professionals: Information regarding packaging standards and best practices for furniture. Important for assessing package integrity - a crucial element of your damage assessment checklist.
- PMMA (Packaging Machinery Manufacturers Institute): Provides insights into packaging machinery and techniques, which is helpful in understanding how furniture is originally packaged and the potential vulnerabilities in that process. (Relevant for package integrity section).
Frequently Asked Questions
What is a furniture store inventory damage assessment?
A furniture store inventory damage assessment is a systematic process of inspecting and documenting any damage to your furniture inventory. This checklist template helps standardize the process to ensure all damage is recorded accurately and consistently.
Why is it important to conduct regular damage assessments?
Regular assessments help prevent financial losses, inform restocking decisions, identify potential issues with handling or storage, improve employee training, and provide accurate records for insurance claims or returns.
Who should use this checklist template?
This template is designed for furniture store employees responsible for receiving, storing, and selling furniture - including receiving clerks, warehouse personnel, and even sales associates occasionally involved in inventory management.
What types of damage should I look for when using the checklist?
The checklist covers a wide range of damage, including scratches, dents, tears, stains, structural issues, missing parts, packaging damage, and more. It's designed to be comprehensive.
Can I customize the checklist template?
Yes! The template is designed to be flexible. You can add or remove items to match your specific furniture types, store layout, and damage assessment procedures. Add notes to indicate severity of damage.
How do I use the 'Severity' rating in the checklist?
The 'Severity' rating (e.g., Minor, Moderate, Major) helps prioritize damage and informs decisions about whether to offer discounts, return the item to the supplier, or discard it. Provide clear definitions of each severity level within your store.
What should I do with the completed checklists?
Completed checklists should be stored securely and organized (e.g., by date, supplier, or product). They serve as vital records for inventory management, supplier communication, and insurance purposes.
How does this checklist template help with supplier communication?
The checklist provides detailed documentation of supplier-caused damage. This allows you to easily communicate the issues to your suppliers and potentially claim for compensation or replacements.
Is this checklist printable and digital?
Yes, the template is designed for both printable hard copies and digital use. You can easily adapt it for use with tablets or computers for streamlined data entry.
Where can I find the checklist template?
The article provides a link to download the checklist template. Please refer to the article for the direct download link.
Found this Article helpful?
Retail Management Solution Demo
Boost retail efficiency! ChecklistGuro simplifies store operations, inventory management, and employee training. Improve customer experience and maximize profitability. Manage it all with our Work OS.
Related Articles
Seasonal Mulch & Gravel Checklist Template: Stay Stocked & Ready
Elevator & Escalator Inspection Checklist Template: Your Guide to Safety & Compliance
Daily Prescription Dispening Area Inspection Checklist Template

Weekly Waste Management & Recycling Checklist Template
Keep Your Storefront Sparkling: Your Daily & Weekly Cleaning Checklist Template
Your Ultimate Landscaping & Groundskeeping Checklist: Weekly & Monthly Templates
Monthly Stockroom Organization & Safety Checklist Template

Daily Dairy Case Inspection Checklist Template
We can do it Together
Need help with
Retail?
Have a question? We're here to help. Please submit your inquiry, and we'll respond promptly.