Root Cause Analysis (RCA) Workflow for Manufacturing Issues
Published: 03/30/2026 Updated: 03/31/2026
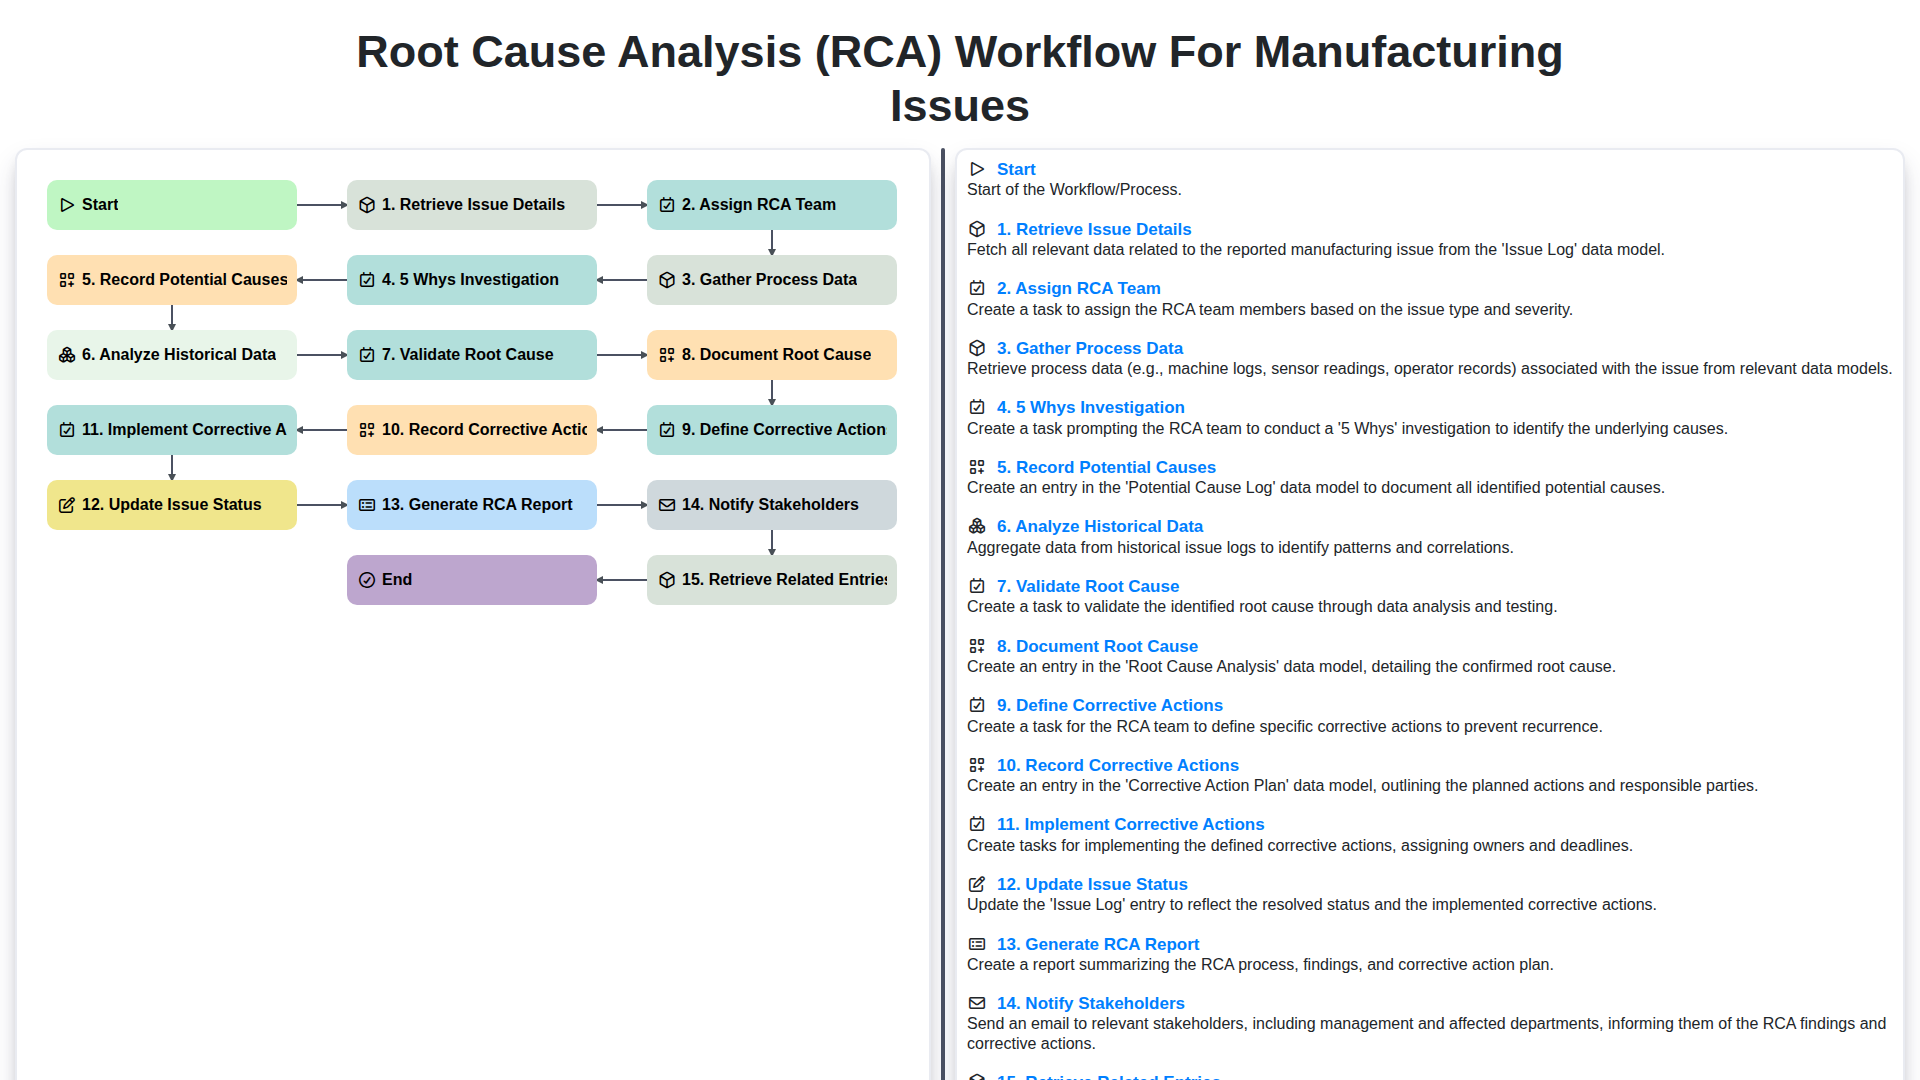
Table of Contents
- Introduction: Why RCA is Critical in Manufacturing
- Step 1: Retrieve Issue Details - The Foundation of RCA
- Step 2: Assembling the RCA Team - Expertise for Effective Analysis
- Step 2.1: Prioritizing Issues - Focusing on Impact
- Step 3: Gathering Process Data - Building a Comprehensive Picture
- Step 4: The 5 Whys Investigation - Drilling Down to the Core
- Step 5: Recording Potential Causes - Capturing All Possibilities
- Step 6: Analyzing Historical Data - Identifying Recurring Patterns
- Step 7: Validating the Root Cause - Confirming the True Problem
- Step 8: Documenting the Root Cause - Establishing a Clear Understanding
- Step 9: Defining Corrective Actions - Planning for Prevention
- Step 10: Implementing Corrective Actions - Putting Solutions into Practice
- Step 11: Updating Issue Status and Generating the RCA Report
- Step 12: Notification and Retrieval - Closing the Loop
- Resources & Links
TLDR: Manufacturing problems got you stumped? This workflow template provides a structured approach to pinpoint the real cause of issues - from gathering initial details and forming a team, through 5 Whys analysis and data review, to implementing fixes and sharing results. It ensures consistent RCA processes, prevents recurring problems, and boosts overall production efficiency.
Introduction: Why RCA is Critical in Manufacturing
In manufacturing, disruptions and defects are inevitable. However, simply addressing the symptoms - the visible problems - only provides temporary relief. True, lasting improvement comes from understanding why those issues arose in the first place. This is where Root Cause Analysis (RCA) becomes absolutely critical.
RCA isn't just about fixing a broken machine or a faulty part; it's a systematic process of identifying the underlying reasons behind manufacturing problems. Without it, you're destined to repeat the same mistakes, wasting valuable time, resources, and potentially damaging your reputation. A robust RCA program minimizes downtime, reduces scrap rates, improves product quality, and fosters a culture of continuous improvement within your organization. It transforms reactive problem-solving into proactive prevention. Investing in RCA isn't an expense; it's a strategic investment in the long-term health and efficiency of your manufacturing operations.
Step 1: Retrieve Issue Details - The Foundation of RCA
The RCA process begins with a thorough retrieval of issue details. This isn't just about noting what happened; it's about understanding the context surrounding the problem. Information gathered at this stage forms the foundation for the entire investigation. Key details to collect include:
- Precise Description of the Issue: What exactly went wrong? Be specific and avoid vague terms.
- Date and Time of Occurrence: When did the issue happen? Time-stamping is crucial for tracing back through production logs and shifts.
- Location within the Manufacturing Process: Which workstation, machine, or area was involved?
- Affected Product/Batch Number: Which product or batch was impacted? This allows for traceability and potential recall scenarios.
- Quantity Impacted: How many units were affected?
- Initial Observations & Symptoms: What were the initial signs of the problem?
- Personnel Involved: Who reported the issue and who was initially involved in addressing it?
- Relevant Documentation: Any existing reports, inspection records, or maintenance logs related to the issue.
This detailed collection of information helps the RCA team gain a clear picture of the problem and sets the stage for effective investigation. Without a strong base of issue details, the RCA process can easily become misdirected and unproductive.
Step 2: Assembling the RCA Team - Expertise for Effective Analysis
Choosing the right team is critical to a successful Root Cause Analysis (RCA). This isn't just about picking random people; it's about assembling a group with the diverse expertise needed to thoroughly investigate the issue. The ideal RCA team should include individuals with:
- Process Knowledge: Someone intimately familiar with the affected process, including its intricacies, standard operating procedures (SOPs), and potential failure points.
- Technical Expertise: Depending on the nature of the issue (mechanical, electrical, chemical, etc.), ensure someone with relevant technical skills is included.
- Data Analysis Skills: Someone comfortable working with data, interpreting trends, and identifying anomalies is essential.
- Cross-Functional Representation: Include individuals from different departments (e.g., operations, maintenance, quality, engineering) to provide a holistic perspective and ensure buy-in for corrective actions.
- Facilitation Skills (Optional but Recommended): A skilled facilitator can guide the team through the investigation, ensuring everyone's voice is heard and discussions remain productive.
Consider the complexity of the issue when determining team size. Smaller, more focused teams are often more effective, especially for less complex problems. Clearly define each team member's role and responsibilities upfront to ensure accountability and efficient collaboration.
Step 2.1: Prioritizing Issues - Focusing on Impact
Not all manufacturing issues demand the same level of immediate attention. Implementing a prioritization system before diving into a full Root Cause Analysis (RCA) workflow saves valuable time and resources. Issues should be ranked based on a combination of factors, ensuring the most impactful problems are addressed first.
Consider these key criteria for prioritization:
- Severity: How significantly does the issue impact product quality, safety, or regulatory compliance? A critical defect that halts production warrants immediate RCA.
- Frequency: How often does the issue occur? Recurring problems, even if individually minor, can collectively represent a significant loss.
- Impact on Production: Does the issue cause downtime, reduce throughput, or increase scrap rates? Quantify the impact on key production metrics.
- Financial Impact: Estimate the cost associated with the issue, including scrap, rework, lost sales, and potential penalties.
- Customer Impact: How does the issue affect customer satisfaction, warranty claims, or brand reputation?
Using a simple scoring system (e.g., 1-5 scale for each criteria) allows for a more objective assessment. Focus your RCA efforts on the issues with the highest scores, ensuring you tackle the problems that deliver the greatest return on investment. This proactive approach prevents smaller issues from escalating and optimizes the RCA process for maximum efficiency.
Step 3: Gathering Process Data - Building a Comprehensive Picture
Once the RCA team is assigned, the real data collection begins. This isn't just about collecting any data; it's about gathering the right data to illuminate the problem. This stage is critical for moving beyond superficial observations and uncovering underlying process flaws.
What kind of data are we talking about? It's broad and depends heavily on the issue. Consider these categories:
- Machine Data: This includes sensor readings, PLC data, temperature logs, pressure readings, vibration analysis - anything that captures the machine's behavior during the incident.
- Operator Logs: These provide valuable insights into the operator's perspective - what they observed, any unusual noises or behaviors, and actions taken.
- Material Records: Batch numbers, supplier information, material certifications - ensuring material integrity is a crucial step.
- Environmental Conditions: Temperature, humidity, and other environmental factors can significantly impact processes.
- Process Parameters: Settings for speed, feed rates, cycle times, and other key parameters.
- Visual Documentation: Photos and videos from the incident scene can provide crucial context.
The team must meticulously document where the data was gathered, when, and by whom. A central repository for all collected data is essential for easy access and analysis. Don't underestimate the power of seemingly minor details; they can often be the key to unlocking the root cause. This stage requires a structured approach - checklists and data request forms are helpful in ensuring consistency and completeness.
Step 4: The 5 Whys Investigation - Drilling Down to the Core
The 5 Whys is a deceptively simple yet powerful technique for uncovering root causes. It's exactly what it sounds like - repeatedly asking Why? until you're no longer addressing symptoms and have identified the fundamental issue.
Let's say a machine unexpectedly stopped during production. Here's a simple example of how the 5 Whys might be applied:
- Why did the machine stop? The circuit breaker tripped.
- Why did the circuit breaker trip? The motor drew too much current.
- Why did the motor draw too much current? The bearing was seized.
- Why was the bearing seized? There wasn't enough lubrication.
- Why wasn't there enough lubrication? The automated lubrication system malfunctioned due to a clogged filter.
Notice how each Why? progressively digs deeper. The initial symptom (machine stoppage) led us to the equipment malfunction, then to a lack of lubrication, and finally, to a clogged filter - the root cause.
During your RCA, encourage the team to rigorously apply the 5 Whys, challenging assumptions and pushing beyond superficial explanations. Don't be afraid to circle back and revisit earlier Why? answers as new information emerges. Remember, multiple root causes can often exist, so explore different lines of questioning to ensure a comprehensive investigation.
Step 5: Recording Potential Causes - Capturing All Possibilities
During the 5 Whys investigation and data gathering, numerous potential causes for the manufacturing issue will likely surface. It's absolutely critical to meticulously record every possibility, no matter how unlikely it initially seems. Don't dismiss anything at this stage - premature judgment can lead to overlooking the true root cause.
Use a dedicated RCA log or spreadsheet to systematically document these potential causes. Include details like:
- Description of the Potential Cause: Be specific - avoid vague statements like machine malfunction. Instead, describe how the machine malfunctioned (e.g., PLC error code 123 indicating sensor failure).
- Source of the Observation: Who identified the potential cause? (e.g., Operator, Quality Inspector, Maintenance Technician). This can be valuable later for further investigation and validation.
- Supporting Evidence: Briefly note any evidence that supports this potential cause (e.g., Operator reported unusual noise, Quality data shows increased variation).
- Severity/Impact: A preliminary assessment of how significant this potential cause appears to be.
This comprehensive recording ensures that no avenue is unexplored and provides a clear, documented record for the analysis phase. Remember, a seemingly minor detail can be the key to unlocking the true root cause.
Step 6: Analyzing Historical Data - Identifying Recurring Patterns
Analyzing historical data is a crucial step in a robust Root Cause Analysis (RCA) workflow, especially in manufacturing where seemingly isolated incidents can be symptoms of larger, systemic problems. This isn's just about looking back; it's about uncovering patterns and trends that the immediate issue might be masking.
During this phase, we dive into existing records, including:
- Production Logs: Examining output rates, downtime periods, and common error messages.
- Maintenance Records: Identifying frequently recurring equipment failures or maintenance needs.
- Quality Control Reports: Reviewing trends in defects, scrap rates, and customer complaints.
- Sensor Data: Analyzing machine performance metrics like temperature, pressure, and vibration over time.
- Previous RCA Reports: Looking for similar issues that have surfaced before and how they were addressed (or not).
The goal isn't just to see what happened, but when and how often. Are certain shifts experiencing more problems? Is there a correlation between supplier batches and defects? Is there a specific machine consistently flagged for issues? Statistical process control (SPC) charts and other analytical tools can be incredibly valuable here. By identifying these recurring patterns, we move beyond addressing the immediate symptom and start to pinpoint the underlying conditions creating the environment for problems to occur.
Step 7: Validating the Root Cause - Confirming the True Problem
Identifying a potential root cause is a significant step, but it's not the finish line. Before declaring victory and implementing corrective actions, rigorous validation is crucial. This phase ensures we've truly pinpointed the underlying issue and aren't just addressing a symptom.
Validation often involves a combination of methods. One common approach is to test the proposed root cause. This might mean simulating the scenario that triggered the issue, performing controlled experiments, or analyzing the impact of temporary fixes. Does removing or mitigating the proposed root cause demonstrably reduce the frequency or severity of the problem?
Another vital technique is cross-referencing with expert knowledge. Engaging experienced engineers, operators, or quality personnel who have deep understanding of the manufacturing process can provide valuable insights. They can challenge assumptions, identify potential blind spots, and offer alternative perspectives.
Furthermore, data triangulation strengthens validation. Comparing data from multiple sources-production records, quality control reports, maintenance logs-can confirm the consistency and accuracy of the identified root cause. Discrepancies should trigger further investigation and potential refinement of the hypothesis.
Finally, challenge the "gut feeling." While experience is valuable, it should be supported by evidence. Actively seek out information that could disprove the proposed root cause, even if it feels counterintuitive. This healthy skepticism prevents premature conclusions and ensures a truly validated solution. Failure to properly validate can lead to wasted effort, recurring issues, and potentially, even worsen the problem.
Step 8: Documenting the Root Cause - Establishing a Clear Understanding
This isn't just about writing a sentence; it's about creating a shared, unambiguous understanding of why the issue occurred. A poorly documented root cause is as good as no documentation at all.
Your documentation should clearly articulate:
- The Identified Root Cause: State it directly and concisely. Avoid jargon if possible.
- Supporting Evidence: Briefly summarize the data and analysis that led to this conclusion. Reference specific data points, 5 Whys branches, or historical data reviewed. Don't re-present the entire analysis, but offer enough context for someone unfamiliar with the investigation to understand the reasoning.
- Connection to the Original Issue: Explain precisely how the identified root cause directly resulted in the initial manufacturing problem. Show the causal link.
- Diagrams/Visuals (Optional but Recommended): A simple Ishikawa (fishbone) diagram or flow chart can powerfully illustrate the root cause and its contributing factors.
Example:
- Issue: Excessive scrap rate on Widget X.
- Identified Root Cause: Inconsistent raw material density due to supplier equipment malfunction.
- Supporting Evidence: Supplier confirmed equipment calibration issues. Density readings on received raw materials deviated from established tolerances by +/- 2%. 5 Whys investigation revealed a lack of automated density checks at the supplier's facility.
- Connection to Issue: The inconsistent density led to dimensional inaccuracies in the molded Widget X parts, exceeding acceptable tolerances and resulting in scrap.
This level of detail ensures everyone - from the RCA team to management - understands the problem and the reasons behind it, setting the stage for effective corrective actions.
Step 9: Defining Corrective Actions - Planning for Prevention
Defining corrective actions is where the RCA truly transitions from diagnosis to prevention. It's not enough to just identify the root cause; you need a concrete plan to ensure the issue doesn't resurface. This step requires a collaborative approach involving the RCA team, relevant process owners, and potentially maintenance or engineering personnel.
Here's what a robust corrective action definition looks like:
- Specificity is Key: Avoid vague solutions like improve training. Instead, define precisely what training needs to be provided, who will receive it, and how its effectiveness will be measured. For example, Develop a 2-hour training module on proper torque procedures for Machine X operators, including hands-on practice and a post-training competency assessment.
- Prioritization: Not all corrective actions are created equal. Rank actions based on impact (how much they will reduce risk and improve performance) and effort (how much time, resources, and cost are required). Focus on high-impact, low-effort actions first.
- Responsibility & Ownership: Clearly assign ownership for each corrective action. Who is responsible for completing the task, and who is accountable for its successful implementation?
- Timeline & Resources: Establish realistic timelines for completing each action, and identify the resources (personnel, budget, equipment) required. This helps ensure actions are implemented on schedule.
- Measurable Outcomes: Define how the effectiveness of each corrective action will be measured. What metrics will be tracked to verify that the issue is resolved and doesn't return?
- Consider Multiple Layers: Sometimes, a single corrective action isn't enough. Think about addressing systemic issues. This might involve changes to procedures, equipment upgrades, or even design modifications.
By meticulously defining corrective actions with these considerations, you move beyond simply fixing the immediate problem and build a proactive approach to continuous improvement within your manufacturing processes.
Step 10: Implementing Corrective Actions - Putting Solutions into Practice
Identifying the root cause is only half the battle; the true value comes from implementing effective corrective actions. This step transforms insights into tangible improvements and prevents recurrence. Implementation isn't simply about doing something; it requires careful planning and execution.
Here's what effective corrective action implementation looks like:
- Develop a Detailed Action Plan: Translate the defined corrective actions into a concrete plan. This should include specific tasks, responsible individuals (with clear accountability), timelines, required resources (budget, equipment, training), and measurable success criteria.
- Prioritize Actions: Not all corrective actions are created equal. Prioritize based on impact (potential reduction in issues), feasibility, and cost. Quick wins that address significant problems should be tackled first.
- Training and Communication: Ensure everyone involved understands the changes and their roles. Provide necessary training on new procedures, equipment, or processes. Clear communication minimizes errors and fosters buy-in.
- Pilot Testing (Recommended): Before a full-scale rollout, consider pilot testing the corrective action on a smaller scale. This allows for refinement and identification of unforeseen challenges.
- Documentation: Meticulously document the implementation process, including any deviations from the original plan and the reasons behind them. This provides valuable context for future audits and improvements.
- Monitor and Adjust: Track the effectiveness of the implemented actions. Regularly review metrics and performance indicators to confirm the desired results are achieved. Be prepared to make adjustments if the actions are not as effective as anticipated.
Step 11: Updating Issue Status and Generating the RCA Report
Once corrective actions are implemented, it's crucial to formally close the issue and communicate the results. Updating the Issue Status is the first part of this step. This involves marking the original issue as "resolved" or "closed" within your tracking system. Be sure to include a clear summary of the corrective actions taken and a link to the full RCA report. This allows anyone reviewing the history of the issue to quickly understand what transpired and the actions taken.
Following the status update, generating the RCA Report becomes the primary focus. This report shouldn't be a hurried afterthought; it should be a concise and comprehensive document detailing the entire RCA process. It should include:
- Issue Description: Briefly reiterate the original problem.
- RCA Team Members: List the individuals involved in the analysis.
- Investigation Steps: Summarize the data gathering and analysis performed.
- Potential Causes Identified: Highlight the initial list of possibilities.
- Validated Root Cause(s): Clearly state the confirmed root cause(s).
- Corrective Actions Defined & Implemented: Detail the actions taken and their rationale.
- Expected Results & Metrics: Outline the anticipated impact of the corrective actions.
- Date of Completion: Record the date the RCA was finalized and actions were implemented.
A well-structured RCA report provides valuable documentation for future reference, training, and continuous improvement efforts.
Step 12: Notification and Retrieval - Closing the Loop
The RCA process isn't complete until everyone who needs to know is informed, and related information is readily accessible. This step focuses on ensuring transparency and facilitating future learning.
Notify Stakeholders: Once the RCA report is finalized and corrective actions are defined, it's crucial to notify all relevant stakeholders. This includes production managers, engineering teams, quality control, and any other individuals or departments impacted by the initial issue. Clear, concise communication of the root cause and planned corrective actions builds trust and fosters a culture of continuous improvement. The method of notification (email, meetings, dashboards) should be determined by company protocol and the urgency of the situation.
Retrieve Related Entries: Simultaneously, the RCA data and report should be linked to existing systems - maintenance logs, quality records, machine performance dashboards, and any other relevant databases. This ensures that future investigations can quickly retrieve this information, preventing repeated analyses and accelerating problem resolution. Consider tagging the RCA with relevant keywords to aid in future searches. This closes the loop by integrating the learnings from this investigation into the organization's collective knowledge base, making it a valuable asset for ongoing operational excellence.
Resources & Links
- NIST Quality Engineering Laboratory : The NIST (National Institute of Standards and Technology) offers resources and research related to quality engineering and reliability, which is closely tied to RCA. Their site provides insights into measurement science and statistical methods relevant to manufacturing processes.
- ASQ (American Society for Quality) : ASQ is a leading global resource for quality professionals. They offer training, certifications, publications, and standards related to RCA and quality improvement methodologies. Their website is a central hub for all things quality.
- The Lean Enterprise Institute : Lean principles, often used in conjunction with RCA, focus on eliminating waste and improving efficiency. This site provides information and resources on Lean thinking and its application to manufacturing.
- Society for Reliability Engineering, Maintenance, and Asset Management (REM) : REM focuses on reliability engineering principles that are critical for effective RCA. Their website provides access to resources, publications, and events related to asset management and failure analysis.
- HSE (Health and Safety Executive - UK) : While primarily focused on health and safety, the HSE provides frameworks and methodologies for incident investigation that can be adapted for RCA in manufacturing, especially concerning safety-related issues.
- iSixSigma : iSixSigma provides resources and training on Six Sigma methodologies, a data-driven approach to process improvement that is often used in conjunction with RCA. They have articles and tools related to problem-solving and root cause analysis.
- Reliabilityweb.com : This site is a dedicated resource for maintenance, reliability, and asset management professionals. They provide articles, webinars, and forums discussing RCA methodologies and best practices within manufacturing environments.
- MindTools : MindTools offers a broad range of management tools and techniques, including explanations and guides for various problem-solving methods like the 5 Whys. Helpful for understanding the underlying principles of the investigation process.
Frequently Asked Questions
What is Root Cause Analysis (RCA) in a manufacturing context?
Root Cause Analysis (RCA) is a systematic process used in manufacturing to identify the underlying cause of a defect, machine failure, or process deviation, rather than simply addressing the immediate symptoms.
What are the key steps in a standard RCA workflow?
A typical RCA workflow involves defining the problem, collecting relevant data, identifying potential causes using tools like the '5 Whys' or Fishbone Diagram, determining the actual root cause, and implementing corrective and preventive actions (CAPA).
Which analytical tools are most effective for manufacturing RCA?
Commonly used tools include the 5 Whys technique, Fishbone (Ishikawa) Diagram, Failure Mode and Effects Analysis (FMEA), Pareto Charts, and Scatter Diagrams to visualize correlations.
What is the difference between a correction and a corrective action?
A correction is an immediate action taken to fix a detected problem (e.g., replacing a broken part), whereas a corrective action is a long-term measure designed to eliminate the root cause to prevent the problem from recurring.
How can a manufacturing team ensure the effectiveness of an RCA?
Effectiveness can be ensured by conducting thorough data verification, involving cross-functional teams (operators, engineers, and maintenance), and performing follow-up audits after implementing changes to confirm the issue has not returned.
Found this Article helpful?
Manufacturing Management Solution Demo
Stop chasing paperwork and wrestling with disconnected systems! Our solution brings clarity and control to your production process. From standard operating procedures (SOPs) and equipment maintenance to quality control and inventory tracking, we simplify every step.
Related Articles
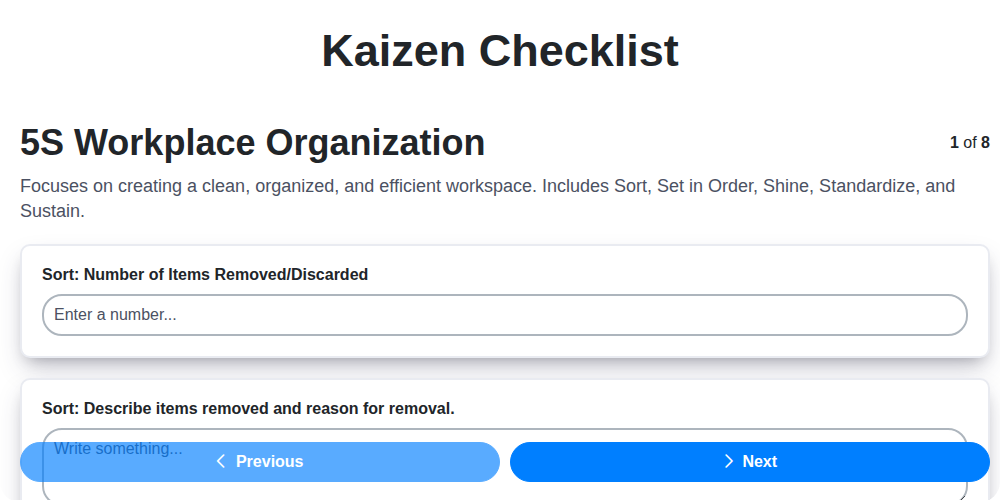
Kaizen Checklist Template: Your Path to Continuous Improvement

Machine Safety Audit Checklist: Your Guide to a Safer Manufacturing Workplace
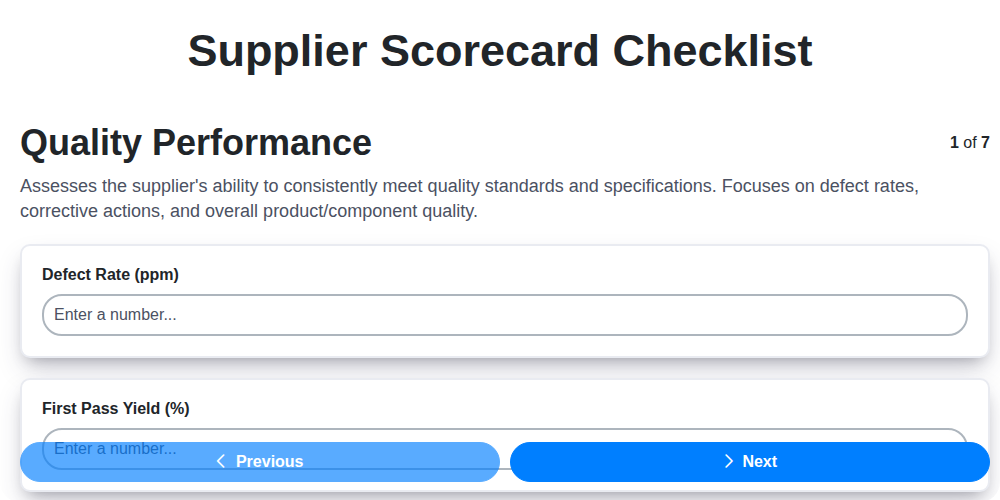
Mastering Supplier Performance: Your Free Supplier Scorecard Checklist Template
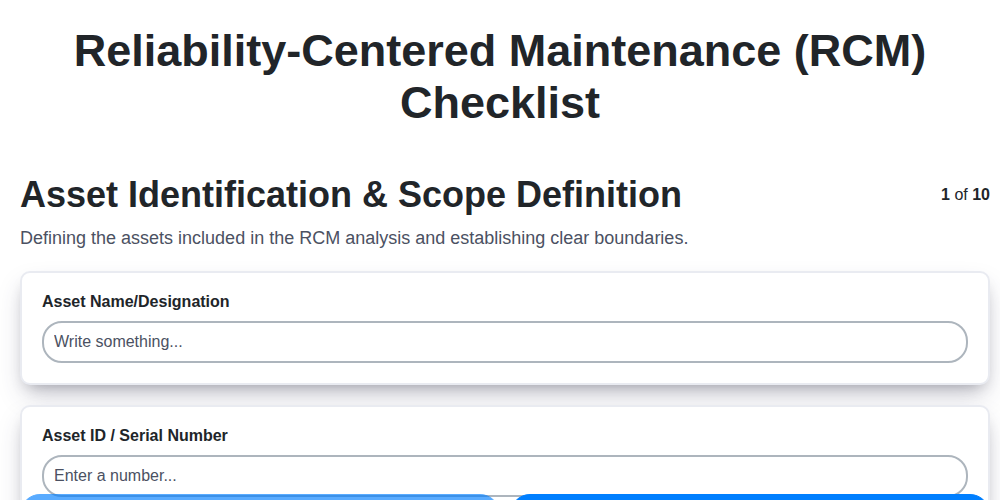
Your Ultimate RCM Checklist Template: A Step-by-Step Guide

LPA Checklist Template: Your Guide to Layered Process Audits

Your Ultimate Lockout/Tagout (LOTO) Checklist Template

Your Ultimate FSC 22000 Checklist Template
Quality Control Inspection Checklist Template: Prevent Defects & Improve Manufacturing Processes
We can do it Together
Need help with
Checklists?
Have a question? We're here to help. Please submit your inquiry, and we'll respond promptly.