Ace the Season: Your Sporting Goods Inventory Adjustment Checklist Template
Published: 09/10/2025 Updated: 12/13/2025
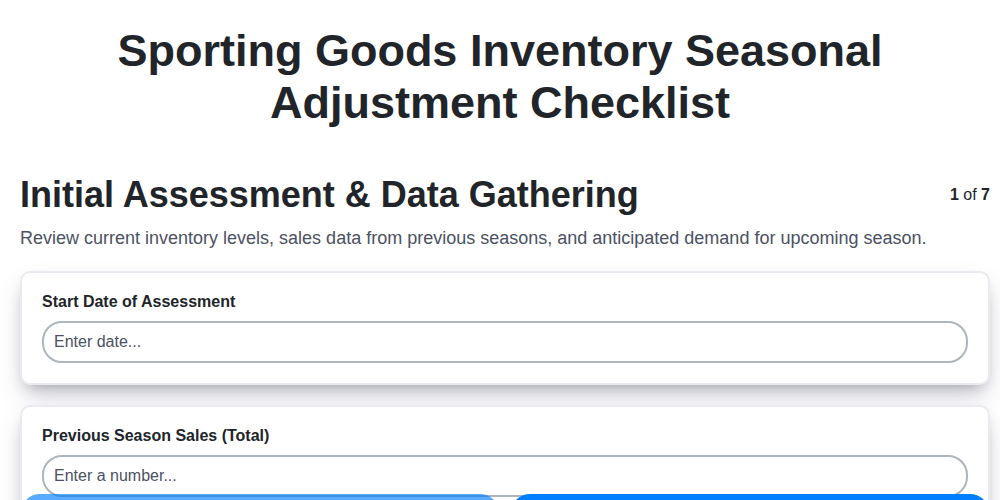
Table of Contents
- Introduction: Why Seasonal Adjustment Matters
- Step 1: Initial Data Dive - Assessing Last Year's Performance
- Step 2: Product Category Breakdown - Identifying Winners and Losers
- Step 3: Trendspotting - Anticipating the Coming Season
- Step 4: Markdown Strategy - Clearing Out the Old
- Step 5: Replenishment Order Adjustments - Staying Agile
- Step 6: Storage Optimization - Making Space
- Step 7: Visual Merchandising for Seasonal Shifts
- Step 8: Inventory Software Integration
- Step 9: Staff Training on Seasonal Adjustments
- Step 10: Documenting Your Process - A Record of Decisions
- Step 11: Local Event Impact Assessment
- Step 12: Economic Factor Considerations
- Step 13: Template Walkthrough: A Practical Guide
- Conclusion: Mastering the Seasonal Cycle
- Resources & Links
TLDR: Overwhelmed by seasonal shifts in your sporting goods store? This free checklist template walks you through everything from analyzing past sales and planning markdowns to adjusting replenishment orders and organizing your storage. It's your shortcut to avoiding costly inventory mistakes and maximizing profits, no matter the season!
Introduction: Why Seasonal Adjustment Matters
The sporting goods industry thrives on cycles. Winter's demand for skis and snowboards gives way to summer's thirst for swimsuits and hiking gear. Failing to recognize and proactively adjust to these seasonal shifts isn't just a minor inconvenience; it can significantly impact your bottom line. Overstocking slow-moving items ties up valuable capital, reduces storage space, and risks obsolescence. Conversely, understocking popular items leads to lost sales and frustrated customers. Effective seasonal adjustment isn't about reacting to what's already happening - it's about anticipating change, optimizing inventory levels, and ensuring you're always ready to meet your customers' evolving needs. This article will guide you through a comprehensive checklist to master seasonal adjustments and keep your sporting goods store thriving, year-round.
Step 1: Initial Data Dive - Assessing Last Year's Performance
Before you can accurately predict future demand, you need a crystal-clear understanding of what happened last year. Don't just glance at your sales reports - really analyze them. Start by pulling your sales data for the corresponding period last year (e.g., if you're preparing for summer, review sales from May-August last year). Look beyond the overall sales numbers. Break it down by:
- Product Category: Which categories performed exceptionally well? Which struggled?
- Specific Items: Identify your top 20% of best-selling items and your bottom 10% of slowest movers.
- Weekly/Daily Trends: Look for patterns. When did sales peak? When did they dip? Were there any unexpected spikes or lulls?
- Promotional Impact: How did past promotions affect sales? Which promotions were most effective, and which fell flat?
- Weather Correlations: Did unusually hot or cold weather impact sales of specific items (e.g., swimwear, winter gear)?
Spreadsheets are your friend here! Creating charts and graphs to visualize trends will make it much easier to spot patterns and make informed decisions. Don't be afraid to dig deep - the insights you uncover will be invaluable as you plan for the upcoming season.
Step 2: Product Category Breakdown - Identifying Winners and Losers
Let's be honest, not every product category will thrive year-round. A deep dive into your inventory reveals who the star players are and who needs to be benched. To accurately assess your product categories, we need to move beyond just total sales numbers. Consider these factors:
- Sales Trend Analysis: How have sales performed in the past for this category during the relevant seasonal window? A steadily declining trend is a major red flag.
- Gross Margin: High sales volume doesn't always equal profit. A category with low margins might not be worth the space it occupies, even if it moves quickly.
- Inventory Turnover: A low turnover rate indicates slow-moving stock, tying up capital and potentially leading to obsolescence.
- Customer Feedback: What are your customers saying? Negative reviews or a lack of demand signals potential issues.
- Competitive Landscape: Are competitors offering a better selection or lower prices in this category?
Create a simple rating system - High, Medium, or Low - based on these assessments. For example, a category with a declining sales trend, low margins, and negative customer feedback would likely receive a Low rating. This straightforward categorization gives you a clear picture of where to focus your attention - boosting winners and strategically managing (or reducing) exposure to laggards.
Step 3: Trendspotting - Anticipating the Coming Season
Staying ahead of the curve isn't just about reacting to what's already happening; it's about predicting what will happen. Trendspotting in the sporting goods industry requires a multi-faceted approach. Let's break down how to do it:
1. Social Media Monitoring: Platforms like Instagram, TikTok, and YouTube are goldmines for identifying emerging trends. Pay attention to hashtags related to specific sports, athletic apparel, and outdoor activities. Are you seeing a surge in videos showcasing a particular training technique? Is a new style of athletic shoe going viral? These signals can indicate growing demand. Tools like Google Trends and social listening software can help automate this process.
2. Industry Publications & Influencers: Subscribe to trade magazines, follow industry blogs, and engage with key influencers in your niche. They often provide insights into upcoming product releases, changing consumer preferences, and broader market shifts. Look beyond the surface - understand why a trend is emerging.
3. Athlete & Team Performance: Keep an eye on professional athletes and teams. What gear are they using? What training methods are they adopting? This provides a glimpse into what cutting-edge techniques and equipment are gaining traction.
4. Event Analysis: Examine attendance figures and trends at sporting events, races, and outdoor festivals. Are you seeing increased participation in a particular sport or activity? This can signal growing demand for related products.
5. Local Community Feedback: Don't underestimate the value of direct feedback from your customers. Engage with them on social media, conduct surveys, and simply ask them what they're interested in. They're often the best source of information about local trends and preferences.
By actively monitoring these channels, you'll be better equipped to anticipate the coming season and adjust your inventory accordingly.
Step 4: Markdown Strategy - Clearing Out the Old
Simply slashing prices isn't a winning markdown strategy. It can devalue your brand and erode profit margins. A well-planned approach ensures you clear out slow-moving inventory efficiently while maximizing recovery. Here's how to approach it:
Tiered Markdown System: Implement a tiered markdown system based on time and performance. For example:
- Tier 3 (10-20% off): Items that haven't moved in 30-45 days. This is your first warning.
- Tier 2 (30-40% off): Items that remain stagnant after another 30 days. Consider bundling these with faster-moving items.
- Tier 1 (50%+ off): Final clearance. These are the items you need to move quickly to free up valuable space.
Beyond Percentage Discounts: Don't limit yourself to straight percentage discounts. Explore creative markdown strategies:
- Buy-One-Get-One (BOGO): Great for moving larger quantities of items.
- Bundling: Combine slower-selling items with popular products. Buy a paddle and get 20% off a kayak!
- Clearance Events: Schedule dedicated clearance events to create urgency.
- Flash Sales: Offer limited-time, deeply discounted prices to generate excitement.
Visual Merchandising Matters: Clearance isn't just about price. Presentation is key. Use dedicated clearance racks or sections with clear signage. Create a sense of value and urgency. Limited Stock! Don't Miss Out!
Track and Analyze: Closely monitor the performance of your markdown strategies. Which tactics are most effective? Adjust your approach accordingly. Don't be afraid to experiment.
Step 5: Replenishment Order Adjustments - Staying Agile
Predicting seasonal demand is a good start, but truly staying agile means being prepared to pivot. Your initial projections are a baseline, not a rigid script. Real-time sales data is your compass, guiding you toward the adjustments needed to optimize your stock levels.
Here's how to implement a dynamic replenishment strategy:
- Real-Time Monitoring is Key: Don't just rely on weekly sales reports. Utilize your POS system to track sales daily (or even hourly for key categories during peak periods).
- Category-Specific Adjustments: Understand that different product categories will react differently. Winter apparel might be sluggish one week due to unseasonably warm weather, while team sports equipment could be booming due to a local tournament. Adjust orders accordingly.
- Safety Stock Re-evaluation: During slower seasons, you can potentially reduce your safety stock levels (the extra inventory you keep on hand to buffer against unexpected demand). As demand increases, gradually increase your safety stock.
- Lead Time Awareness: Factor in supplier lead times. If a trending item is selling like crazy and your supplier has a long lead time, you might need to place an expedited order to avoid stockouts.
- Communicate with Suppliers: Build strong relationships with your suppliers. Open communication about your sales trends allows them to better anticipate your needs and potentially offer expedited shipping or custom orders.
- Don't Be Afraid to Deviate: The best replenishment strategies are flexible. If you're seeing unexpectedly high demand, ignore your original order plan and place an order - even if it's a large one. Missing out on sales due to stockouts is far more costly than holding a little extra inventory.
Step 6: Storage Optimization - Making Space
As you clear out seasonal merchandise and prepare for the influx of new inventory, maximizing your storage space becomes paramount. Simply shoving items into the back room isn't a sustainable solution; it leads to disorganization, wasted space, and difficulty locating what you need. Here's how to optimize your storage:
- Categorize and Zone: Designate specific areas for different product categories. This makes it easier to locate items for replenishment and fulfillment. Clearly label each zone with large, visible signage.
- Vertical Advantage: Utilize vertical space with shelving units, racking systems, and even mezzanine levels if possible. Tall, narrow shelves are more space-efficient than wide, low ones.
- FIFO Implementation: Strictly adhere to the First-In, First-Out (FIFO) principle. This is critical for preventing older inventory from becoming obsolete or damaged. Ensure staff are trained and consistently follow this practice.
- Off-Site Storage (Consideration): If your retail space is severely limited, explore the possibility of renting off-site storage. Weigh the costs and logistical challenges carefully.
- Declutter Regularly: Make decluttering a recurring task. Remove broken items, outdated displays, and unnecessary packaging to free up valuable storage space.
- Creative Display Integration: Consider how some slower-moving, seasonal items can be incorporated into attractive displays, effectively utilizing space and potentially driving sales.
Step 7: Visual Merchandising for Seasonal Shifts
Visual merchandising isn't just about arranging products; it's about creating an experience that draws customers in and conveys the excitement of the changing seasons. A haphazard display of discounted winter gear next to vibrant summer swimwear simply won't do!
Here's how to leverage visual merchandising to amplify your seasonal adjustments:
- Create Dedicated Zones: Clearly define areas for each season or activity. "Winter Wonderland," "Summer Adventures," "Team Sports HQ" - use signage to guide shoppers and make navigation easy.
- Storytelling Through Props: Use props to create a scene. A miniature ski slope for winter sports, a beach towel and umbrella for swimwear, or a basketball hoop for team gear can instantly evoke the season and desired activity.
- Color Coordination: Embrace seasonal color palettes. Cool blues and silvers for winter, bright yellows and oranges for summer, earthy tones for fall.
- Mannequin Magic: Dress mannequins in seasonal outfits that showcase the latest styles and trends. Consider action shots to portray the thrill of participation.
- Window Displays are Key: Your window is your first impression. Ensure it screams seasonal excitement and draws customers inside. Rotate displays frequently to keep them fresh.
- Highlight Value: Don't just mark down prices. Display clearance items prominently and clearly communicate the savings ("Last Chance for Summer Savings!").
- Cross-Merchandising: Strategically place related items together. Place sunscreen near swimwear, hiking boots near outdoor apparel, and gloves near winter hats. This encourages impulse purchases.
Remember, effective visual merchandising isn't a one-time effort. Regularly evaluate your displays and adapt them to reflect the latest trends and customer feedback.
Step 8: Inventory Software Integration
While a well-crafted checklist provides a solid framework, the reality of modern retail often involves managing a lot of data. That's where inventory software integration becomes essential. Manually tracking seasonal adjustments is time-consuming, prone to errors, and simply not scalable.
Your seasonal adjustment checklist shouldn't exist in a vacuum; it should be seamlessly integrated with your inventory management system. Look for software that allows you to:
- Automate Reporduction Rules: Many systems let you create automated rules based on seasonal trends - reducing order quantities for slow-moving items and boosting orders for high-demand products.
- Schedule Markdowns & Promotions: Integrate markdown schedules directly into the software, triggering price changes at predetermined intervals.
- Real-Time Data Synchronization: Ensure your checklist's adjustments reflect in real-time sales data, allowing for dynamic adjustments.
- Reporting & Analytics: Leverage the software's reporting capabilities to analyze the effectiveness of your seasonal adjustments and identify areas for improvement.
- API Integration: If your existing software doesn't have built-in seasonal adjustment features, explore API integrations with third-party tools that can bridge the gap.
Investing in robust inventory software and properly integrating your seasonal adjustment checklist is not just about efficiency; it's about making data-driven decisions and maximizing your bottom line.
Step 9: Staff Training on Seasonal Adjustments
Your seasonal adjustment checklist is only as effective as the team implementing it. Don't assume everyone understands the why behind the changes - clear, consistent training is essential. This isn't just about showing them how to mark down an item; it's about fostering a proactive mindset.
Here's what your staff training should cover:
- The Big Picture: Explain why seasonal adjustments are necessary for the store's success, linking it to profit margins, inventory turnover, and customer satisfaction.
- Checklist Overview: Walk them through the entire checklist, explaining each step and its purpose.
- Data Interpretation: Teach them how to understand sales reports, identify trends, and recognize when adjustments are needed. (Simple visuals and real-life examples are key here!)
- Markdown Strategies: Cover pricing tiers, signage, and promotional ideas for moving slow-moving items.
- Replenishment Process: Clearly outline the procedures for adjusting order quantities based on seasonal demand.
- Communication Protocol: Establish a clear channel for staff to communicate concerns, observations, and ideas regarding seasonal adjustments.
- Ongoing Reinforcement: Seasonal adjustments aren't a "one and done" event. Regularly review procedures, share updates, and encourage ongoing learning. Consider short refresher sessions or quizzes to reinforce key concepts.
Regular and accessible training empowers your staff to become active participants in managing seasonal inventory, ultimately contributing to a more efficient and profitable business.
Step 10: Documenting Your Process - A Record of Decisions
Documenting your seasonal adjustment process isn't just about covering your bases; it's about learning and improving. A clear, accessible record of every decision made - from markdown percentages to replenishment order quantities - becomes an invaluable resource for future seasons.
Why is Documentation So Important?
- Accountability: Having a record ensures someone can understand the reasoning behind decisions if questions arise.
- Trend Identification: Over time, you're building a dataset that reveals patterns in customer behavior and the effectiveness of your strategies. You might discover that a certain markdown tier consistently outperforms another, or that a specific product category always requires more conservative ordering.
- Team Alignment: If you have multiple people involved in the process, documentation ensures everyone is on the same page and understands the logic behind the adjustments.
- Future Planning: When preparing for the next season, you're not starting from scratch. You have a baseline of what worked (and what didn't) to build upon.
What to Document:
- Date of Decision: When was the adjustment made?
- Product Category/SKU: Which items were affected?
- Type of Adjustment: Markdown, replenishment order change, storage relocation, etc.
- Details of Adjustment: Specific markdown percentage, order quantity change, storage location.
- Reasoning: Crucially, why was the adjustment made? Was it based on sales data, a weather forecast, a competitor's promotion, or a gut feeling?
- Person Responsible: Who initiated and approved the decision?
Tools for Documentation:
You don't need complex software to document your process. A simple spreadsheet (like Google Sheets or Microsoft Excel) can work wonders. Many inventory management systems also have built-in features for tracking adjustments. Whatever you choose, ensure the documentation is easily accessible and consistently updated.
Step 11: Local Event Impact Assessment
Local sporting events can be massive drivers of inventory demand - and often present a predictable opportunity if you're prepared. Think beyond the obvious: a marathon isn't just about running shoes; it's about compression socks, hydration packs, energy gels, and recovery gear. A little league tournament? Think batting gloves, helmets, and team apparel.
Start by identifying recurring events within a 50-mile radius of your store. Consult local event calendars, community websites, and even engage with local sports leagues directly. Once you've identified these events, estimate the potential impact on specific product categories. A large-scale triathlon might boost sales of wetsuits and swim goggles by 300%, while a local soccer tournament might only increase demand for shin guards and soccer balls by 20%.
Don't just order more product - think about how to market to these events. Consider sponsoring a local team or offering discounts to participants. Create bundled promotions (e.g., "Marathon Prep Kit") and display signage promoting event-related merchandise prominently in your store and online. Finally, be prepared for a surge in foot traffic and ensure you have adequate staff to handle the increased demand.
Step 12: Economic Factor Considerations
Beyond the predictable shifts in weather and sporting trends, broader economic factors can significantly impact your sporting goods inventory. Consumer spending is directly tied to economic health; a recession or period of high inflation can lead to reduced discretionary spending on non-essential items like athletic gear.
Consider these economic indicators:
- Consumer Confidence: Track consumer confidence indexes. Low confidence often translates to decreased spending on leisure activities and sporting goods.
- Inflation Rates: High inflation erodes purchasing power. Be prepared to adjust pricing strategies and potentially offer more budget-friendly options.
- Unemployment Rates: Higher unemployment can lead to reduced spending on non-essential items.
- Interest Rates: Rising interest rates can discourage purchases of big-ticket sporting goods items like bikes or kayaks.
- Disposable Income: Monitor changes in disposable income. This is the money consumers have left after paying essential bills.
To mitigate the impact of economic downturns, consider offering flexible payment options, highlighting the long-term value and durability of your products, and being prepared to adjust pricing strategies quickly. Staying informed about the economic landscape allows for proactive inventory decisions and helps protect your business from unforeseen challenges.
Step 13: Template Walkthrough: A Practical Guide
Okay, so you're armed with our Seasonal Adjustment Checklist - fantastic! But to truly make it work for your business, you'll want to leverage the accompanying template (available for download). Let's walk through it together, section by section.
1. Initial Data Input: The first tab is all about gathering your baseline information. You'll find fields to input last year's sales data (broken down by category and month), current market trends, and any anticipated external factors influencing demand. Be as detailed as possible here - the more accurate your inputs, the more effective your adjustments will be. We're looking for numbers, percentages, and even brief notes explaining any unusual circumstances.
2. Category Performance Assessment: This section automatically calculates performance metrics based on your initial data. You'll see ratings like High Potential, Moderate, and Low Priority assigned to each product category. Don't feel locked in! These are just starting points - use your own expertise to adjust these ratings as needed. There's a notes column here for you to add context. Summer apparel sales were surprisingly strong last year due to a heatwave is the kind of information that's valuable!
3. Markdown Planning: This is where you define your markdown strategy. You'll set markdown tiers (e.g., 25%, 50%, 75%) and assign timing guidelines based on category performance. The template includes suggested timelines, but you can easily customize them. We've added a Special Considerations column - for instance, Clearance sale tied to local marathon.
4. Replenishment Forecast: Using the category performance assessment, the template generates a preliminary replenishment forecast. You'll see suggested order quantities for each product, automatically adjusted based on projected demand. There's a Manual Override column for you to fine-tune these suggestions based on your specific needs and supplier lead times.
5. Storage Optimization: The final tab helps you plan your storage space allocation. Based on the predicted performance of each category, it suggests how much space to dedicate to each. Think about accessibility and prioritize frequently accessed items.
Pro-Tip: The template is designed to be interactive. Feel free to experiment with different scenarios and see how they impact your overall inventory plan. Regularly update the template throughout the season to reflect changing conditions.
Conclusion: Mastering the Seasonal Cycle
Ultimately, successfully navigating the seasonal cycle in the sporting goods industry isn't about luck; it's about preparation and a proactive approach. By consistently implementing and refining a seasonal adjustment checklist like the one outlined above, you're not just clearing out old merchandise - you're building a resilient and profitable business. Remember that adaptability is key; market trends shift, customer preferences evolve, and unexpected events can impact demand. Embrace the data, stay informed, and continuously optimize your strategies to not just survive, but thrive, through every seasonal change. The effort invested upfront will be repaid many times over in increased efficiency, reduced costs, and a loyal customer base eager for the next exciting season.
Resources & Links
- Tableau: Data visualization and business intelligence platform. Useful for analyzing sales data from previous seasons, identifying trends, and creating dashboards to monitor performance during seasonal adjustments. A strong visual representation of data can be crucial for informed decisions. Offers free trials.
- NetSuite: Cloud-based ERP system. Excellent for larger sporting goods retailers. Provides inventory management, order management, and financial management functionalities which are essential for comprehensive seasonal inventory adjustments and replenishment. Offers demos and webinars.
- Shopify: E-commerce platform suitable for smaller to mid-sized retailers. Provides inventory management tools and integrations with various apps for sales analysis and order management that can be leveraged during seasonal adjustments. Good for online businesses and those integrating online sales data.
- Square: Point-of-sale (POS) system and payment processor. Useful for tracking sales data and inventory levels, especially for smaller businesses and those with a significant in-person presence. Integrates with inventory management apps for enhanced functionality.
- Vend: Retail management software. Provides features for inventory management, sales tracking, and reporting that can be leveraged for seasonal adjustments and identifying slow-moving or top-performing products. Offers demos and case studies.
- Deloitte - Retail Industry Insights: Deloitte provides industry reports and insights regarding retail trends, including seasonal patterns. Provides external perspective on broader market influences.
- McKinsey - Retail & Consumer Practice: Similar to Deloitte, McKinsey offers strategic insights and analysis relevant to the retail sector. Understanding broader trends helps anticipate shifts in consumer demand.
- NIST - Manufacturing Extension Partnership (MEP): While focusing on manufacturing, the NIST MEP provides valuable information on process optimization and supply chain management, relevant for efficient inventory adjustments and reducing waste.
- U.S. Census Bureau: Provides data on population demographics and consumer spending patterns, useful for assessing local market demand and anticipating seasonal trends. Crucial for Step 11 (Local Event Impact Assessment).
- Bureau of Labor Statistics (BLS): Provides data on employment, inflation, and other economic indicators which are useful for understanding broader economic factors that impact consumer spending during seasonal adjustments (Step 12).
- Forbes - Retail: Forbes provides news and analysis on retail trends, including insights into seasonal sales patterns and strategies. Good for keeping up to date with industry best practices.
- Retail Dive: Retail Dive provides industry news and insights. Helpful for understanding current trends and challenges affecting sporting goods retailers. Focuses on actionable insights.
- Shopify Inventory Management: Provides in-depth resources from Shopify specifically regarding inventory management, suitable for retailers using the platform or looking for general best practices for inventory control.
- Indeed - Retail Job Descriptions: Researching common duties and required skills in retail job descriptions can inform staff training programs, specifically relating to seasonal inventory adjustments (Step 10).
Frequently Asked Questions
What is a sporting goods inventory adjustment and why is it important?
A sporting goods inventory adjustment is the process of reconciling your physical inventory count with your recorded inventory levels. It's important because it ensures accurate stock levels, minimizes losses due to theft or damage, prevents stockouts, and informs better purchasing decisions. It helps you understand discrepancies and make corrections to prevent future errors.
Who is this checklist template for?
This checklist template is designed for sporting goods retailers, managers, inventory clerks, and anyone responsible for managing sporting goods inventory. It's beneficial for businesses of all sizes, from small local shops to larger chains.
What types of adjustments should I include in this checklist?
The checklist covers a wide range of adjustments including: shrinkage (theft/loss), damage, returns, discrepancies from previous counts, obsolescence, and adjustments due to promotional activities or special events. It also includes space to note the reason for the adjustment.
How do I use the 'Reason for Adjustment' field?
The 'Reason for Adjustment' field is crucial for understanding *why* an adjustment was made. Be specific - instead of just 'Shrinkage,' write 'POS system error during discount application' or 'Suspected shoplifting.' This level of detail helps identify patterns and implement preventative measures.
Can I customize the checklist template?
Absolutely! This template is a starting point. Feel free to add or remove rows, modify categories, add specific item details (SKU, size, color), or add columns to track additional data relevant to your business.
What's the difference between a physical inventory count and an inventory adjustment?
A physical inventory count is the process of physically counting all your stock. An inventory adjustment is the reconciliation of that physical count with your recorded inventory, identifying and correcting any discrepancies found during the count.
How often should I perform inventory adjustments?
The frequency depends on your business volume and the value of your inventory. A monthly adjustment is often a good starting point, but high-volume retailers or those with high-value items may benefit from weekly or even daily adjustments.
What is the significance of documenting the person responsible for the adjustment?
Documenting the person responsible promotes accountability and helps identify training needs if adjustments are consistently high in a particular category or area. It also creates an audit trail.
How can this checklist help me prevent future discrepancies?
By carefully documenting the 'Reason for Adjustment,' you can identify recurring issues - poor stockroom organization, inaccurate labeling, POS system errors - and implement changes to prevent them. Regularly reviewing adjustment reports is key.
Are there any specific software or systems I need to use with this checklist?
This checklist is designed to be used independently of any specific inventory management software. However, the data collected can be valuable input for your inventory management system to improve its accuracy and efficiency.
Found this Article helpful?
Inventory Management Solution Demo
Optimize your inventory & boost profitability! ChecklistGuro streamlines tracking, ordering, & fulfillment. Reduce waste, minimize stockouts, & improve efficiency. Manage it all with our Work OS.
Related Articles
Warehouse Data Integrity: Your WMS Checklist Template

Mastering Inventory Turnover: Your Analysis Checklist Template
Seasonal Mulch & Gravel Checklist Template: Stay Stocked & Ready
Daily Shelf Stocking & Rotation Checklist: FIFO Made Easy
Order Picking Process Verification: Your Checklist Template
Monthly Stockroom Organization & Safety Checklist Template
Vendor Lead Time Validation: A Checklist Template for Supply Chain Success
Daily Warehouse Walkthrough Inspection Checklist Template
We can do it Together
Need help with
Inventory Management?
Have a question? We're here to help. Please submit your inquiry, and we'll respond promptly.