Brewery Cleaning & Sanitation Checklist Template: Your Guide to Sparkling Beer
Published: 09/10/2025 Updated: 12/13/2025
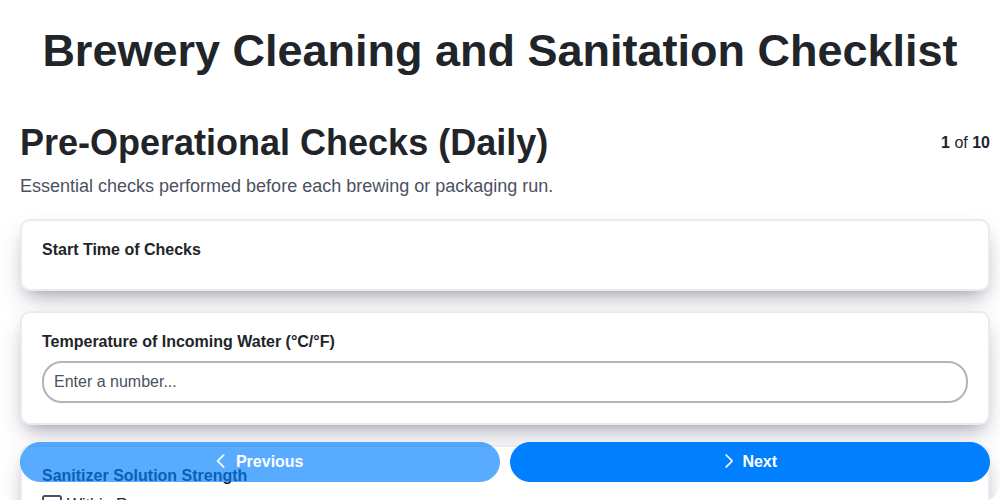
Table of Contents
- Introduction: Why Sparkling Beer Starts with a Clean Brewery
- Understanding Brewery Cleaning & Sanitation: A Foundation
- Daily Pre-Operational Checks: Setting the Stage
- Deep Dive: Fermentation Vessel Cleaning Procedures
- Sanitizing Brewing Equipment: A Step-by-Step Guide
- Packaging Line Sanitation: Bottling, Canning & Kegging
- Cellar & Cold Storage: Maintaining a Pristine Environment
- Floor & Drain Cleaning: Eliminating Hidden Contaminants
- CIP System Management: Optimizing Clean-In-Place Efficiency
- Chemical Handling & Safety: Protecting Your Team & Product
- Resources & Links
TLDR: This free checklist template simplifies brewery cleaning & sanitation - from daily checks to CIP system maintenance. It ensures consistent processes, helps you meet regulations, and ultimately leads to better, sparkling beer. Download it and customize it for your brewery today!
Introduction: Why Sparkling Beer Starts with a Clean Brewery
The joy of a perfectly effervescent beer-that satisfying fizz, the delicate release of aroma-isn't solely a result of fermentation or carbonation techniques. It's a culmination of meticulous care taken throughout the entire brewing process, and it fundamentally begins with a scrupulously clean brewery. Wild yeasts and bacteria aren't just unwelcome guests that can ruin flavor profiles; they can also compromise the stability of carbonation, leading to flat, lifeless beer or, worse, unpredictable and potentially explosive results. Maintaining pristine equipment minimizes the risk of these unwanted microorganisms taking hold, ensuring a consistent, bright, and wonderfully sparkling final product. Beyond just taste, proper sanitation protects your brand's reputation and consumer safety - a clean brewery is a foundation of quality and trust.
Understanding Brewery Cleaning & Sanitation: A Foundation
Brewery cleaning and sanitation isn't simply about scrubbing surfaces; it's a fundamental pillar of consistent beer quality and a cornerstone of your brand's reputation. Think of it as a defense against microbial invaders - unwanted bacteria, wild yeasts, and molds - that can sour your beer, introduce off-flavors, and even render entire batches unusable.
At its core, brewery sanitation revolves around preventing contamination, not just reacting to it. This means understanding the different types of microorganisms that pose a threat and knowing how to eliminate them effectively. Common culprits include Lactobacillus (responsible for lactic acid, a sour taste), Brettanomyces (a wild yeast that produces funky, barnyard flavors), and various molds that can impart musty or earthy notes.
The principles are relatively straightforward:
- Cleaning: This involves physically removing visible dirt, debris, and microorganisms from surfaces. It's the initial step in preparing a surface for sanitization. Think of it as sweeping and mopping your floors before putting down a disinfectant.
- Sanitizing: This significantly reduces the number of microorganisms to a safe level. Sanitizers don't necessarily kill all microorganisms, but they lower their populations to a point where they're unlikely to impact the beer.
The difference between cleaning and sanitizing is crucial. Cleaning alone often isn't enough; it simply removes the food source for microorganisms, allowing them to rebound quickly. Effective brewery sanitation requires a combined approach - thorough cleaning followed by robust sanitization. Choosing the right cleaning and sanitizing agents, understanding proper contact times, and employing best practices are all integral to ensuring a consistently clean and safe brewing environment.
Daily Pre-Operational Checks: Setting the Stage
The start of any brewing day should begin with a thorough series of pre-operational checks. These aren't just busywork; they're your first line of defense against contamination and equipment failure. Think of them as a diagnostic sweep - identifying potential problems before they impact your beer.
First, meticulously review temperature logs for all critical areas: fermentation tanks, cold storage, and your glycol chiller. Deviations from established ranges can significantly impact fermentation performance or compromise the cold chain. Note any fluctuations and investigate the cause.
Next, conduct a visual inspection of all brewing and packaging equipment. Look for signs of leaks, cracks, unusual noises, or anything that appears out of the ordinary. A quick glance now can prevent a costly breakdown later. Pay special attention to connections and seals.
Don't forget to check the sanitation levels of your water supply and any frequently used equipment. A simple chlorine test can quickly reveal issues with your water treatment system. Finally, ensure that all necessary tools and cleaning supplies are readily available and in good working order. A well-prepared workspace is a safe and efficient workspace.
Deep Dive: Fermentation Vessel Cleaning Procedures
Fermentation vessels represent a prime breeding ground for unwanted microorganisms - the nemesis of consistent, high-quality beer. A meticulous cleaning and sanitization process here is non-negotiable. This isn't just about scrubbing; it's a systematic approach to eliminate every trace of residual yeast, bacteria, and other contaminants.
1. Immediate Post-Fermentation Rinse:
As soon as fermentation is complete, initiate a thorough rinse with potable water. This crucial first step removes most of the spent yeast and trub, preventing them from drying and becoming more difficult to remove later. Hot water (around 180°F / 82°C) is ideal, as it effectively loosens stubborn deposits.
2. Initial Cleaning - The Alkaline Wash:
Following the rinse, an alkaline cleaning solution is introduced. This typically involves a caustic cleaner like sodium hydroxide (NaOH) or a specialized brewery cleaner formulated for this purpose. The concentration will depend on the cleaner's specifications and the level of buildup on the vessel. Ensure adequate contact time (often 30-60 minutes) and agitation - this can be achieved via a recirculating pump, spray nozzles, or manual scrubbing. Pay particular attention to corners, seams, and any areas prone to sediment accumulation.
3. Phosphate Removal (Critical for Darker Styles):
Darker beer styles (Stouts, Porters, Brown Ales) are particularly susceptible to phosphate buildup, which can lead to haze and off-flavors. A dedicated phosphate removal step is vital. This typically involves the use of a specialized acid cleaner, such as phosphoric acid (H3PO4), following the alkaline wash. Always follow the manufacturer's instructions regarding concentration and contact time.
4. Final Cleaning - The Acidic Wash:
An acidic cleaner, often lactic acid or another food-grade acid, is used to remove any remaining residue from the alkaline and phosphate cleaning steps. This ensures a neutral environment ready for sanitization.
5. Thorough Rinsing - Multiple Stages:
Following each cleaning stage (alkaline, phosphate, acid), rigorous rinsing with potable water is absolutely critical. Employ multiple rinse cycles to ensure complete removal of all cleaning agents. A final hot water (around 180°F / 82°C) rinse is highly recommended.
6. Sanitization - The Final Barrier:
The vessel must then be sanitized using a food-grade sanitizer, such as peracetic acid (PAA), Star San, or bromine. Follow the manufacturer's instructions precisely regarding concentration and contact time. Ensure complete coverage of all internal surfaces. No-rinse sanitizers like Star San are popular for their convenience, but verify the brewer's understanding of their usage and potential impact on subsequent brews.
Important Considerations:
- Documentation: Maintain detailed records of all cleaning and sanitization procedures, including chemicals used, concentrations, and contact times.
- Surface Compatibility: Always verify that cleaning and sanitizing agents are compatible with the vessel's material (stainless steel, plastic, etc.).
- Regular Inspection: Visually inspect the vessel's interior surfaces regularly for signs of corrosion, damage, or buildup.
Sanitizing Brewing Equipment: A Step-by-Step Guide
Sanitation isn't just about cleanliness; it's about eliminating the microorganisms that can spoil your beer. Proper sanitizing goes beyond a quick wipe-down. This guide breaks down the process, ensuring you're effectively protecting your brew. Remember: Cleaning always precedes sanitizing. Cleaning removes visible dirt and debris, allowing sanitizers to work effectively.
1. Choose the Right Sanitizer:
- Star San: A popular choice, Star San is a peracetic acid-based sanitizer that's effective at low concentrations and requires no rinsing in many applications. Follow the manufacturer's instructions for dilution.
- IO-Stat: Another peracetic acid-based sanitizer, IO-Stat offers fast kill times and a clean profile.
- Sodium Metabisulfite (SMBS): A more traditional option, SMBS requires a longer contact time and can leave a sulfurous aroma if not properly rinsed.
- Always consult the sanitizer's SDS (Safety Data Sheet) for safe handling and usage instructions.
2. Prepare Your Equipment:
- Thorough Cleaning: Ensure all equipment is thoroughly cleaned using a brewery-approved cleaner. This removes beer residue, hop debris, and any other contaminants.
- Rinsing: Rinse all equipment thoroughly with potable water to remove any residual cleaner.
- Drying (Optional): While not always necessary, allowing equipment to air dry can help prevent water spots and ensure proper sanitizer contact.
3. Sanitizing Process - Specific Equipment:
- Fermenters: Fill the fermenter with a sanitizing solution according to the sanitizer's instructions. Let it sit for the recommended contact time (typically 10-20 minutes). Drain and allow to air dry or rinse thoroughly.
- Kegs: Use a keg-specific sanitizing system or fill the keg with sanitizing solution, pressurize slightly, and allow it to soak for the recommended time. Drain and purge with CO2.
- Bottles: Submerge bottles in a sanitizing solution, ensuring all surfaces are covered. Alternatively, use a bottle rinser/sanitizer.
- Hoses & Tubing: Submerge hoses and tubing in a sanitizing solution or use a specialized hose sanitizer.
- Spoons & Utensils: Soak all spoons, paddles, and utensils in a sanitizing solution.
4. Important Considerations:
- Contact Time: Adhere strictly to the sanitizer's recommended contact time for effective sanitation.
- Concentration: Ensure the sanitizer is diluted to the correct concentration. Using too little sanitizer will render it ineffective, while using too much can leave a residue.
- Water Temperature: Water temperature can affect sanitizer effectiveness. Refer to the sanitizer's instructions for optimal temperature ranges.
- Regular Testing: Regularly test your sanitizer solution to ensure its potency. Test strips are readily available for this purpose.
- Never mix different sanitizers. This can create dangerous and unpredictable chemical reactions.
Packaging Line Sanitation: Bottling, Canning & Kegging
The packaging line is a critical point of contamination risk. It's where your carefully crafted beer finally meets its container, and any lapse in sanitation here can ruin entire batches. A rigorous cleaning and sanitizing routine is non-negotiable. Here's a breakdown of key areas and procedures:
Bottling:
- Bottle Washer: This is ground zero. Clean and sanitize the bottle washer before and after every bottling run. Pay special attention to nozzles and spray arms, as these harbor significant residue. Use a designated bottle washer cleaning solution and follow manufacturer instructions.
- Filler Heads: These are notoriously difficult to keep clean. Disassemble and thoroughly clean filler heads regularly, removing any residual beer or cleaning agents. Inspect O-rings and seals for wear and replace as needed.
- Labeling Machine: Clean the labeling machine's applicator and contact surfaces to prevent label adhesive residue from contaminating the beer.
- Bottle Conveyor: Wipe down the conveyor belt regularly to remove drips and debris.
Canning:
- Can Washer/Sanitizer: Similar to the bottle washer, the can washer requires a thorough cleaning before and after each canning run. This step removes any remaining debris or oils from the cans.
- Seamer Heads: The seamer is a primary source of potential contamination. Disassemble and clean the seamer heads frequently, ensuring all components are free from beer residue and scale.
- Capper Dies: Clean and inspect capper dies to prevent beer loss and contamination.
- Canned Product Conveyor: Maintain a clean conveyor system to prevent transfer of contamination.
Kegging:
- Keg Washer: Implement a strict keg washing protocol, either in-house or through a reputable keg supplier. Ensure kegs are thoroughly cleaned and sanitized before filling. Document the cleaning process.
- Keg Filler Nozzles: Clean and sanitize filler nozzles before each fill. Inspect for wear and tear, replacing as needed.
- Hoses & Connections: Inspect and clean all hoses and connections used in the kegging process.
- Keg Bottom & Top Fill Systems: For both bottom and top fill systems, ensure proper cleaning and sanitation of all components to prevent beer spoilage.
General Considerations for All Packaging Lines:
- Cleaning Agents: Use food-grade cleaning and sanitizing agents specifically designed for the beverage industry.
- Contact Times: Follow recommended contact times for all sanitizers to ensure effective kill rates.
- Rinse Thoroughly: Rinse all equipment thoroughly after cleaning and sanitizing to remove any residual chemicals.
- Documentation: Keep detailed records of all cleaning and sanitizing procedures, including dates, times, and products used.
Cellar & Cold Storage: Maintaining a Pristine Environment
The cellar and cold storage areas are critical hubs for your brewery, housing fermentation tanks, bright tanks, and often, significant reserves of finished beer. Maintaining these spaces isn't just about aesthetics; it's about preventing contamination, preserving flavor profiles, and ensuring consistent product quality. Neglecting cellar sanitation can lead to spoilage, off-flavors, and costly losses.
Here's a breakdown of essential cleaning and maintenance tasks:
- Floor Scrubbing & Mopping: Regular scrubbing is paramount. Spills, yeast sediment, and other debris accumulate quickly. Use a degreaser specifically formulated for brewery environments to tackle stubborn stains and oil buildup. Frequency: Weekly, or more often if spills are common.
- Tank Exterior Cleaning: Yeast and trub can build up on the exterior of tanks, providing a breeding ground for unwanted bacteria. A thorough scrubbing with a brewery-safe cleaner is necessary. Pay particular attention to valve areas and seams. Frequency: Weekly.
- Drain Cleaning: Blocked or foul-smelling drains are a major hygiene concern. Regularly flush drains with a suitable enzymatic cleaner to break down organic matter and eliminate odors. Frequency: Monthly.
- Wall & Ceiling Cleaning: While often overlooked, walls and ceilings can accumulate dust and mold. Periodic cleaning with a mild detergent solution helps maintain a hygienic environment. Frequency: Quarterly.
- Condensate Management: Condensation on cold tanks can lead to moisture buildup and potential mold growth. Ensure proper ventilation and consider using dehumidifiers to control humidity levels. Regularly inspect and clean condensate lines.
- Regular Inspections: Conduct frequent visual inspections for signs of mold, leaks, or other issues. Early detection allows for prompt corrective action, preventing larger problems down the line.
- Pest Control: Cold storage areas can be attractive to pests seeking warmth and food. Implement a comprehensive pest control program, including regular trap checks and professional services.
Floor & Drain Cleaning: Eliminating Hidden Contaminants
Your brewery floor and drains are often overlooked but are major contributors to contamination risk. They accumulate spills, hop debris, spent grain residue, and other organic matter - a breeding ground for bacteria, mold, and pests. A seemingly clean floor can hide a wealth of hidden contaminants.
Beyond the Scrub:
Simply sweeping or mopping isn't enough. Effective floor and drain cleaning involves a layered approach. Start with regular sweeping to remove loose debris. Then, utilize a degreasing agent specifically formulated for brewery environments to tackle oily residues and prevent slip hazards. These degreasers break down fats and oils that standard cleaners often leave behind.
Drain Deeper:
Drains are particularly problematic. They're dark, moist, and often clogged, creating ideal conditions for microbial growth. Implement a scheduled drain cleaning process that includes:
- Enzyme-based drain cleaners: These naturally break down organic matter without harsh chemicals.
- Pressure washing: For stubborn blockages and deep cleaning.
- Regular flushing with hot water: Helps to prevent buildup.
- Inspection with a borescope: This tool allows you to visually inspect the drain lines for blockages and excessive buildup.
Preventative Measures:
- Spill containment: Use drip trays and containment berms to prevent spills from reaching the floor.
- Prompt cleanup: Address spills immediately - don't let them linger.
- Proper waste disposal: Ensure spent grain and other waste materials are disposed of promptly and correctly.
Regular, thorough floor and drain cleaning isn't just about aesthetics-it's a critical component of a robust brewery sanitation program, contributing directly to beer quality and safety.
CIP System Management: Optimizing Clean-In-Place Efficiency
Your CIP system is a cornerstone of your brewery's sanitation program, but its effectiveness hinges on meticulous management. Simply running the cycle isn's enough; understanding and actively monitoring its performance is crucial for maximizing efficiency, minimizing waste, and ensuring a consistently sanitized environment.
Beyond the Basics: Key Performance Indicators (KPIs)
Regularly tracking specific KPIs provides valuable insights into your CIP system's health. These include:
- Water Usage: Monitoring water consumption helps identify potential leaks or inefficiencies in the system. Implement water-saving nozzles and optimize cycle times where possible.
- Chemical Consumption: Track the amount of cleaning and sanitizing chemicals used per batch or per cycle. This allows for adjustments to chemical concentrations and potential cost savings.
- Cycle Time: While shorter cycle times can improve throughput, ensure sanitation effectiveness isn't compromised. Analyze cycle times and look for opportunities to streamline without sacrificing results.
- Temperature & Pressure Readings: Consistent temperature and pressure are vital for effective cleaning and sanitization. Document these readings and investigate any deviations.
- Rinsing Efficiency: Residual chemical traces can negatively impact beer quality and safety. Implement rinsing verification methods (e.g., chemical indicator strips) to confirm thorough rinsing.
Preventative Maintenance: A Proactive Approach
Like any complex machinery, your CIP system requires regular maintenance to prevent breakdowns and maintain optimal performance. This includes:
- Filter Changes: Replace filters according to the manufacturer's recommendations to prevent clogging and ensure clean solutions.
- Pump Inspections: Regularly inspect pumps for wear and tear, leaks, and proper operation.
- Tank and Line Cleaning: Periodically clean tanks and lines to remove any buildup or scale.
- Valve Testing: Ensure all valves are functioning correctly and sealing properly.
- Flow Rate Verification: Regularly check and calibrate flow meters to ensure accurate chemical delivery.
Troubleshooting Common Issues
Even with preventative maintenance, issues can arise. Be prepared to address these promptly:
- Slow Cycle Times: Often caused by clogged filters or reduced flow rates.
- Inconsistent Sanitization: Could be due to improper chemical concentrations, insufficient contact time, or equipment malfunctions.
- High Chemical Consumption: May indicate leaks, inefficient pumps, or overly aggressive cleaning parameters.
By embracing a proactive CIP management strategy, you can optimize your brewery's sanitation process, reduce costs, and ultimately produce higher-quality beer.
Chemical Handling & Safety: Protecting Your Team & Product
Brewery operations rely on a range of chemicals - from cleaners and sanitizers to pH adjusters and process aids. While these are essential for producing high-quality beer, they also present potential hazards if not handled correctly. Prioritizing chemical safety isn't just about compliance; it's about protecting your team's health and preventing contamination that can ruin batches and damage your brand.
Understanding the Risks
Chemicals in a brewery can pose several risks:
- Skin and Eye Irritation: Direct contact with concentrated solutions can cause burns, rashes, and eye damage.
- Respiratory Issues: Inhaling fumes from certain chemicals can irritate the lungs and cause respiratory problems.
- Ingestion: Accidental ingestion, while rare, can be extremely dangerous.
- Product Contamination: Improperly stored or used chemicals can contaminate beer, leading to off-flavors and potential health risks.
- Environmental Hazards: Spills and improper disposal can harm the environment.
Essential Safety Practices
Safety Data Sheets (SDS): Always keep SDS readily accessible for every chemical used in the brewery. Team members must be trained on how to understand and utilize SDS information, including hazard warnings, first aid measures, and safe handling procedures.
Personal Protective Equipment (PPE): Mandate and enforce the use of appropriate PPE, including:
- Gloves: Chemical-resistant gloves appropriate for the specific chemical being handled (e.g., nitrile, neoprene).
- Eye Protection: Safety glasses, goggles, or face shields to prevent splashes.
- Aprons/Coveralls: To protect clothing and skin.
- Respirators: In situations where ventilation is inadequate or the chemical poses an inhalation hazard.
Proper Storage:
- Store chemicals in designated areas away from food and brewing ingredients.
- Ensure containers are properly labeled with the chemical name, concentration, and hazard warnings.
- Store incompatible chemicals separately to prevent dangerous reactions.
- Use secondary containment (e.g., trays, bins) to contain spills.
Dilution and Mixing: Always add chemicals to water, never water to chemicals. This helps prevent rapid heat generation and potential splattering.
Spill Response: Develop and practice a spill response plan. Keep spill kits readily available with appropriate absorbent materials and neutralizing agents.
Training: Provide regular training to all team members on chemical handling procedures, safety protocols, and emergency response.
Ventilation: Ensure adequate ventilation in areas where chemicals are used or stored to minimize exposure to fumes.
Waste Disposal: Follow proper waste disposal procedures to prevent environmental contamination. Consult local regulations for specific requirements.
Resources & Links
- Byers Brewing Solutions : Offers a wide range of brewing cleaning and sanitizing chemicals, equipment, and training resources. A good starting point for understanding professional-grade solutions.
- BSN Brewing & Beverage Solutions : Provides cleaning and sanitation products, equipment, and services specifically for the beverage industry, including breweries. Offers technical support and guides.
- Brewer's Friend : A resource for brewing supplies and information, including a section dedicated to cleaning and sanitation with product recommendations and how-to guides. Good for hobbyists and smaller breweries.
- MoreBeer! : Online retailer specializing in homebrewing supplies, including a vast selection of cleaning and sanitizing chemicals, alongside educational articles and videos.
- Clean Label Brewing : Focuses on clean label solutions for the brewing industry. Useful for understanding how cleaning processes impact beer flavor and meeting consumer demands for natural ingredients. Might offer insights on alternative sanitizers.
- Quality Assurance Magazine : Provides industry-specific articles and resources covering quality control and safety in food and beverage production, including sections relevant to brewery sanitation and regulatory compliance.
- Brewers Association : The trade association for small and independent craft brewers. Their website has resources, including guidelines and best practices, potentially covering sanitation protocols and regulatory compliance.
- Food Safety and Inspection Service (FSIS) : Provides information on food safety regulations and guidelines, which are relevant to brewery operations and sanitation practices. Important for compliance.
- Occupational Safety and Health Administration (OSHA) : Provides information on workplace safety and health regulations, particularly relevant for chemical handling and storage in a brewery environment.
- Centers for Disease Control and Prevention (CDC) : Provides information on microbiological safety and potential contaminants, which is vital for understanding sanitation processes and preventing spoilage.
- Labconco Corporation : Specializes in laboratory equipment, including glassware washers and sanitizers. Useful for understanding advanced cleaning technologies.
- Bio-Cide : Supplier of cleaning and sanitizing chemicals for industrial applications, including the brewery industry. Provides technical data sheets and product guides.
Frequently Asked Questions
What is the purpose of a brewery cleaning and sanitation checklist?
A checklist ensures consistent and thorough cleaning and sanitation practices, minimizing the risk of contamination, off-flavors, and potential health hazards. It helps maintain product quality and regulatory compliance.
Why is sanitation more important than cleaning in a brewery?
Cleaning removes visible dirt and debris, while sanitation reduces the number of microorganisms to a safe level. Beer is highly susceptible to contamination, so sanitation is crucial for preventing spoilage and ensuring a consistently good-tasting product.
What's the difference between cleaning and sanitizing?
Cleaning uses detergents and water to physically remove dirt and organic matter. Sanitizing uses chemicals or heat to kill or inhibit microbial growth. Both are necessary for a properly cleaned and sanitized brewery.
How often should I be cleaning versus sanitizing equipment?
Cleaning frequency depends on the equipment and its usage - daily cleaning is common for tanks and lines used frequently. Sanitizing frequency also varies, but typically occurs before each brewing cycle or transfer.
Can I use just one chemical for both cleaning and sanitizing?
Generally, no. Cleaning and sanitizing typically require different chemicals and processes. Using the wrong chemical can be ineffective or even damage your equipment.
What common brewery equipment needs to be included on a cleaning and sanitation checklist?
The checklist should include items like fermentation tanks, bright tanks, kegs, bottling/canning lines, pumps, hoses, cleaning-in-place (CIP) systems, and floors/walls.
What personal protective equipment (PPE) should be worn during cleaning and sanitation?
Gloves are essential. Eye protection (goggles or face shield) and potentially a respirator might be needed depending on the chemicals used. Refer to the Safety Data Sheets (SDS) for specific chemical hazards.
What does the "CIP" abbreviation stand for, and why is it important?
CIP stands for Cleaning-in-Place. It's a method of cleaning equipment without disassembly, saving time and ensuring consistent results. It's often automated and frequently included in a brewery's sanitation protocols.
Where can I find Safety Data Sheets (SDS) for the chemicals I'm using?
SDS should be provided by the chemical supplier. They are a critical resource for understanding chemical hazards, proper handling procedures, and emergency protocols.
My checklist template seems overwhelming. Where should I start?
Start by prioritizing equipment based on risk (e.g., tanks that contact beer directly). Gradually expand the checklist to include all critical areas. Focus on establishing routine and consistency.
Found this Article helpful?
Hospitality Management Solution Demo
Running a hotel, restaurant, or other hospitality business is demanding. ChecklistGuro's Work OS platform simplifies management, from reservations and guest services to inventory and staff scheduling. Improve efficiency, enhance guest experience, and boost profitability! See how ChecklistGuro can transform your hospitality operations.
Related Articles
Your Ultimate Security Camera Monitoring Log Checklist Template
Payroll Processing Verification Checklist Template: Your Guide to Accuracy
Complaint Handling Checklist Template: Resolve Issues & Retain Customers

Emergency Evacuation Drill Documentation: Your Checklist Template Guide

Mastering Incident Response: Your Free Reporting Protocol Checklist Template

Conquer Your Kitchen: A Monthly Deep Cleaning Checklist Template
Mastering Food Safety: Your Free Temperature Control Checklist Template
Mastering Hand Hygiene: Your Compliance Checklist Template
We can do it Together
Need help with
Hospitality?
Have a question? We're here to help. Please submit your inquiry, and we'll respond promptly.