Cross-Contamination Prevention Checklist Template: Your Essential Guide
Published: 09/02/2025 Updated: 12/13/2025
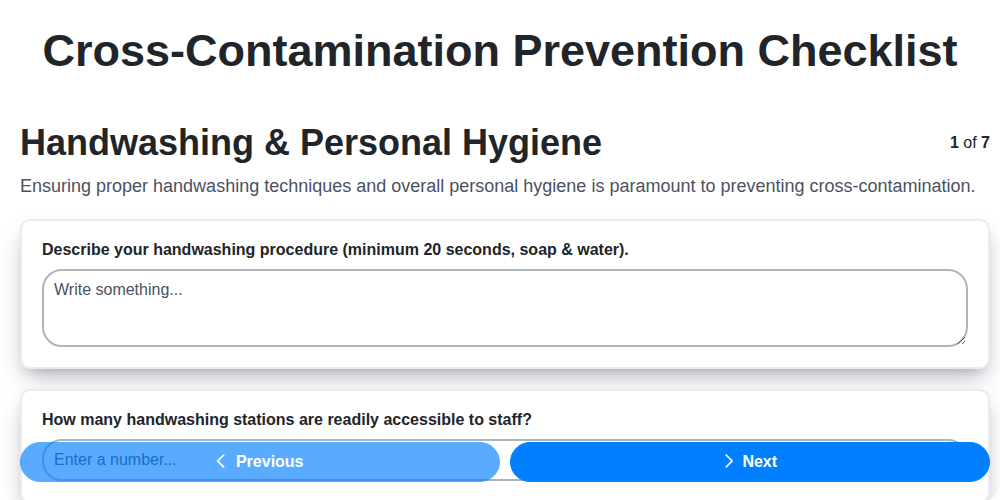
Table of Contents
- Understanding Cross-Contamination Risks
- Essential Handwashing & Hygiene Practices
- Color-Coded Cutting Boards & Utensil Management
- Safe Food Storage: Preventing Cross-Contact
- Raw vs. Cooked Food Separation: Critical Boundaries
- Cleaning & Sanitizing: Facility Hygiene Essentials
- Employee Training: Building a Food-Safe Team
- Receiving & Delivery Procedures: Maintaining Safety from Start to Finish
- Creating Your Customized Checklist: A Template for Success
- Resources & Links
TLDR: Prevent foodborne illness and protect your business with this free, easy-to-use cross-contamination prevention checklist template! It breaks down essential steps for kitchen safety, from handwashing and equipment management to proper food storage and employee training, ensuring you meet food safety standards and keep your customers healthy.
Understanding Cross-Contamination Risks
Cross-contamination isn't always obvious. It's not just about raw chicken touching cooked chicken - it's a much broader issue with several potential pathways. Think about the seemingly innocuous act of preparing a salad on a cutting board previously used for raw vegetables. Tiny particles of bacteria, like Salmonella or E. coli, can transfer to the salad, posing a risk to anyone who consumes it.
Here's a breakdown of common cross-contamination risks, categorized by source:
1. Direct Cross-Contamination: This is the most straightforward scenario - physical contact between raw and cooked foods. Examples include:
- Raw meat juices dripping onto ready-to-eat foods.
- Using the same knife or cutting board for raw and cooked ingredients without proper cleaning.
- Storing raw meats above cooked foods in the refrigerator.
2. Indirect Cross-Contamination: This is where things get trickier. It involves transferring bacteria through shared equipment or surfaces:
- Utensils: Spoons, tongs, and other utensils used to handle raw ingredients can easily contaminate cooked foods.
- Cutting Boards & Surfaces: Improperly cleaned cutting boards and work surfaces are breeding grounds for bacteria.
- Hands: Our hands are the most common vectors for cross-contamination.
- Cleaning Cloths & Sponges: These can spread bacteria from one area to another if not properly cleaned and sanitized.
- Airborne Particles: While less common, bacteria can become airborne during activities like grinding meat or mixing powdered ingredients.
Understanding these various pathways is the first step in preventing cross-contamination and protecting your customers.
Essential Handwashing & Hygiene Practices
Handwashing isn't just a courtesy; it's the single most effective way to prevent the spread of foodborne illnesses. But simply rinsing your hands isn't enough. Proper technique and frequency are paramount.
The 20-Second Rule: Wash your hands for at least 20 seconds. Use warm water and antibacterial soap, ensuring you scrub all surfaces - the backs of your hands, between your fingers, and under your fingernails. A simple trick is to sing Happy Birthday twice while you scrub.
Critical Wash Times: As mentioned earlier, handwashing isn't a one-and-done deal. Mandatory wash times include:
- Upon Arrival: Before you even begin working in the kitchen.
- After Bathroom Breaks: Always. No exceptions.
- After Handling Raw Ingredients: Especially meat, poultry, seafood, and eggs.
- After Touching Trash or Cleaning Supplies: These surfaces are breeding grounds for bacteria.
- After Touching Your Face, Hair, or Body: A surprising source of contamination.
- Between Tasks: Moving from prepping vegetables to handling cooked meat requires a thorough handwash.
Glove Usage - A Supplement, Not a Substitute: Gloves offer a barrier, but they aren't a replacement for proper handwashing. Wash your hands before putting on gloves, and change gloves frequently (at least every four hours, or more often if they become soiled or torn).
Nail Care Matters: Keep fingernails trimmed and clean. Long or chipped nails can harbor bacteria, making handwashing less effective. Avoid nail polish or artificial nails, as these can also trap contaminants.
Hand Sanitizer: A Quick Boost: While handwashing is preferred, hand sanitizer with at least 60% alcohol can be used as a quick supplement when soap and water aren't readily available.
Color-Coded Cutting Boards & Utensil Management
A robust color-coded system isn't just a nice-to-have; it's a fundamental layer of defense against cross-contamination. Imagine the chaos if your prep cooks were unknowingly using the same cutting board for raw chicken and a fresh salad! A well-implemented color-coding system dramatically reduces that risk by providing a clear visual guide.
Here's how to create and maintain an effective system:
Define Your Colors: Establish a clear and consistent color association for each food category. A common system might look like this:
- Red: Raw Meat (Beef, Pork, Lamb)
- Blue: Cooked Meats (Beef, Pork, Lamb)
- Yellow/Orange: Poultry (Chicken, Turkey, Duck)
- Green: Vegetables
- Purple: Fruits
- White: Dairy/Bread (use with caution, keep separate from other categories)
Dedicated Equipment: Each color should correspond to a set of dedicated cutting boards, knives, and utensils. Don't mix and match!
Visual Reminders: Label all cutting boards and utensils clearly with their corresponding color and food category. Consider using stickers or permanent markers. Post a visual guide near food prep areas.
Training is Key: Ensure all employees understand the color-coding system and its importance. Include this training in your initial onboarding and provide regular refresher courses.
Regular Audits: Periodically audit your food prep areas to ensure the system is being followed correctly. Address any deviations immediately.
Replacement & Maintenance: Replace damaged or worn-out color-coded equipment promptly. Clean and sanitize all equipment thoroughly after each use.
Safe Food Storage: Preventing Cross-Contact
Proper food storage is more than just stacking containers; it's a critical line of defense against cross-contact. Think of your refrigerator and pantry as a carefully orchestrated ecosystem - each item needs its designated space, and potential hazards need to be proactively managed.
The Refrigerator: A Cold-Chain Fortress
- Raw Meats on the Bottom: This is the golden rule. Raw meats, poultry, and seafood must be stored on the lowest shelves to prevent drips and juices from contaminating ready-to-eat foods above.
- Dedicated Containers: Store raw meats in leak-proof, tightly sealed containers. This provides an extra layer of protection against cross-contact, even if a spill occurs.
- Ready-to-Eat Foods Elevated: Position cooked foods, fruits, vegetables, and prepared dishes on higher shelves, away from potential contaminants.
- Clear Labeling: Clearly label all containers with contents and date of preparation. This helps prevent accidental misuse and ensures proper rotation.
- Temperature Monitoring: Regularly check refrigerator temperatures to ensure they remain at safe levels (typically below 40°F or 4°C). Use a thermometer to verify accuracy.
Pantry Perfection: Minimizing Risks
- Separate Dry Goods: Keep raw ingredients like nuts, dried beans, and spices separate from cooked or prepared foods.
- Airtight Containers: Transfer dry goods to airtight containers to prevent infestation and contamination.
- Cleanliness is Key: Regularly clean pantry shelves and containers to remove crumbs, dust, and potential allergens.
- Avoid Overcrowding: Don't cram the pantry! Allow for adequate airflow to prevent moisture buildup and spoilage.
Proper storage isn't just about keeping food fresh; it's a vital component of your overall food safety program.
Raw vs. Cooked Food Separation: Critical Boundaries
The potential for cross-contamination skyrockets when raw and cooked foods mingle. A single drip from thawing raw chicken onto a salad can introduce harmful bacteria and trigger foodborne illness. Establishing clear, physical and procedural boundaries is paramount.
Physical Separation: Think barriers, not just hoping for the best. Sneeze guards over buffets are a must. In the refrigerator, raw meats, poultry, and seafood must be stored on the lowest shelves, preventing any potential drips onto ready-to-eat foods above. Dedicated storage containers for thawing raw items are also highly recommended.
Utensil and Equipment Discipline: Never, under any circumstances, use the same cutting board, knife, or utensil to handle raw and cooked foods without rigorous cleaning and sanitizing in between. Designate specific colors for cutting boards (red for raw meats, blue for cooked, green for vegetables, etc.) to provide a visual reminder.
The One-Way Flow: Think about the natural progression in your kitchen. Raw ingredients should enter, be prepped, cooked, and then served-all in a unidirectional flow. This minimizes the opportunity for cross-contact. Staff training should reinforce this principle and emphasize the importance of not taking shortcuts. Even seemingly small actions, like moving a utensil from a raw meat prep area to a cooked dish without proper cleaning, can have significant consequences.
Cleaning & Sanitizing: Facility Hygiene Essentials
Beyond just wiping down surfaces, a robust cleaning and sanitizing program is the bedrock of preventing cross-contamination. It's not enough to be tidy; it needs to be thorough and consistent.
The Difference: Cleaning vs. Sanitizing
Understanding the distinction is vital. Cleaning removes dirt and debris, while sanitizing reduces harmful bacteria to safe levels. Both are essential and often go hand-in-hand.
Your Cleaning & Sanitizing Arsenal:
- Approved Chemicals: Use only cleaning and sanitizing chemicals approved for food service environments. Always follow manufacturer instructions regarding dilution ratios and contact times. Incorrect concentrations can be ineffective or even dangerous.
- Color-Coded Cleaning Supplies: Just as you color-code food preparation areas, implement a color-coding system for your cleaning cloths, sponges, and mop heads. This prevents transferring contaminants between different areas.
- Multi-Stage Cleaning Process: A good cleaning process involves several steps:
- Pre-Scrape: Remove loose food particles and debris.
- Wash: Use hot, soapy water to remove dirt and grease.
- Rinse: Thoroughly rinse away soap residue.
- Sanitize: Apply a food-safe sanitizer according to instructions.
- Air Dry: Allow surfaces to air dry completely - this minimizes contamination.
- Focus Areas: Prioritize cleaning and sanitizing these areas regularly:
- Food Contact Surfaces: Cutting boards, counters, tables, utensils, equipment.
- Floors: Especially around food preparation and storage areas.
- Walls & Ceilings: Remove any grease buildup or visible debris.
- Drains: Keep drains clean and free of blockages.
- Equipment Interiors: Regularly clean and sanitize ovens, refrigerators, freezers, and dishwashers.
- Cleaning Schedules: Establish a detailed cleaning schedule that outlines which areas to clean and sanitize, and how often. This ensures consistency and accountability. Daily, weekly, and monthly tasks should be clearly defined.
- Pest Control: Integrated pest management is crucial. Seal cracks and crevices, keep food stored properly, and work with a licensed pest control professional when necessary.
- Documentation: Maintain records of cleaning and sanitizing activities, including dates, times, chemicals used, and employee initials. These records serve as proof of compliance.
Employee Training: Building a Food-Safe Team
A comprehensive checklist and top-of-the-line equipment are useless without a team that understands and consistently follows food safety protocols. Employee training isn't just a formality; it's a vital investment in protecting your customers and the reputation of your business.
Beyond the Basics: What Effective Training Covers
Initial onboarding training should cover the fundamentals - proper handwashing techniques (demonstrate and have employees practice!), glove usage, preventing cross-contamination, and understanding temperature danger zones. But ongoing training is key to reinforcing these concepts and addressing new challenges. Consider these crucial topics:
- HACCP Principles: Introduce the principles of Hazard Analysis and Critical Control Points - a systematic approach to identifying and controlling food safety hazards.
- Allergen Awareness: Equip your team with the knowledge to identify allergens, prevent cross-contact, and respond effectively to customer inquiries and allergic reactions.
- Cleaning and Sanitation Procedures: Provide detailed training on cleaning and sanitizing equipment, surfaces, and the facility, including proper chemical usage and concentration.
- Receiving and Storage Protocols: Review best practices for receiving deliveries, checking temperatures, and storing food properly to prevent spoilage and contamination.
- Responding to Emergencies: Train employees on how to handle potential emergencies such as pest infestations, equipment malfunctions, and suspected foodborne illness outbreaks.
Making Training Stick: Engagement and Reinforcement
Simply delivering a lecture isn't enough. Engage your team with interactive training methods:
- Demonstrations & Hands-on Practice: Show, don't just tell.
- Quizzes and Assessments: Test knowledge and identify areas needing improvement.
- Regular Refresher Courses: Reinforce key concepts and update on new procedures.
- Posters and Visual Reminders: Keep food safety top-of-mind.
- Open Communication: Encourage employees to ask questions and report concerns without fear of reprisal.
Documentation is Key!
Maintain thorough records of all training sessions, including dates, topics covered, and employee attendance. These records serve as valuable evidence of your commitment to food safety and can be invaluable during inspections or in the event of a foodborne illness incident.
Receiving & Delivery Procedures: Maintaining Safety from Start to Finish
The journey of food safety doesn't end at your supplier's loading dock; it begins there. Receiving and delivery procedures are a critical point where contamination can easily slip in unnoticed. Here's how to maintain a safe and controlled process:
1. Pre-Delivery Communication: Establish clear communication with your suppliers regarding delivery schedules, temperature requirements, and any specific handling instructions.
2. Temperature Verification - The First Line of Defense: Upon arrival, immediately check the temperature of all incoming food items using a calibrated thermometer. Perishable goods should be within safe temperature ranges (e.g., refrigerated foods below 41°F (5°C), frozen foods at or below 0°F (-18°C)). Document all temperature readings meticulously. Any shipment arriving outside the acceptable range should be rejected or handled according to a pre-defined protocol.
3. Package Integrity is Key: Inspect all packaging for damage - rips, tears, dents, or signs of pest activity. Damaged packaging can compromise food safety and create an entry point for contaminants. Reject any shipments with compromised packaging.
4. Segregation is Essential: Immediately separate incoming deliveries from existing stock to prevent cross-contamination. Designate a specific receiving area, preferably away from food preparation zones.
5. FIFO Implementation: Immediately place newly received items into storage following the "First In, First Out" (FIFO) principle. This ensures older stock is used first, reducing the risk of spoilage.
6. Supplier Relationships: Build strong relationships with reputable suppliers who prioritize food safety. Regularly review their practices and certifications. Don't hesitate to request documentation and verification of their processes.
7. Record Keeping: Maintain detailed records of all deliveries, including supplier information, dates, times, temperatures, and any observations related to package integrity. These records provide valuable traceability and demonstrate due diligence.
Remember, a vigilant receiving process protects your entire operation and safeguards your customers.
Creating Your Customized Checklist: A Template for Success
While the checklist above offers a solid foundation, true food safety comes from adapting it to your unique environment. Every kitchen is different - its layout, menu, equipment, and staff all influence potential risks. Here's a template to help you build a checklist that's perfectly suited to your needs.
1. Hazard Analysis: Begin with a thorough hazard analysis. Walk through your kitchen, step-by-step, from receiving deliveries to serving customers. Identify every potential point where cross-contamination could occur. Don't just think about the obvious; consider less apparent risks too, like shared ice machines or improperly sealed containers.
2. Risk Assessment: Once you've identified potential hazards, assess the likelihood of them occurring and the severity of the potential consequence. A high-likelihood, high-severity risk requires immediate and robust control measures.
3. Control Measures - Your Action Plan: For each identified risk, detail the specific actions you'll take to eliminate or minimize it. This isn't just about checking boxes; it've got to be a tangible, actionable plan. Be specific! Instead of clean cutting boards, write Clean and sanitize red cutting boards with a 50ppm chlorine solution after each use of raw beef.
4. Responsibility & Frequency: Assign responsibility for each control measure to a specific individual or team. Clearly define how often each action should be performed (e.g., daily, weekly, monthly).
5. Documentation & Review: Keep meticulous records of all checklist items and any corrective actions taken. Schedule regular reviews (at least quarterly, or more frequently if needed) to assess the checklist's effectiveness and make necessary adjustments. This is a living document - evolve it as your operation changes.
Example Checklist Template (Partial):
| Task | Hazard | Control Measure | Responsible Party | Frequency | Documentation |
|---|---|---|---|---|---|
| Receive Beef Delivery | Temperature Above 40°F | Verify temperature with calibrated thermometer; reject if necessary. | Receiving Staff | Each Delivery | Delivery Log |
| Prepare Beef | Cross-contamination from other foods | Use dedicated cutting board and utensils; thoroughly clean and sanitize after use. | Cook | Each Preparation | Prep Log |
| Store Prepared Beef | Bacterial Growth | Refrigerate within 2 hours; maintain temperature below 41°F. | Kitchen Manager | Continuous | Temp Log |
Remember, a truly customized checklist isn't just about ticking boxes - it's about building a culture of food safety that protects your customers and your business.
Resources & Links
- U.S. Food and Drug Administration (FDA) : The FDA's website provides extensive information on food safety regulations, guidelines, and best practices, including detailed information on preventing cross-contamination. A critical resource for understanding legal requirements and current best practices. Look for sections on food safety modernizations.
- Centers for Disease Control and Prevention (CDC) : The CDC provides valuable information about foodborne illnesses, their causes, and preventative measures. Understanding the types of pathogens involved and how they spread helps illustrate the importance of cross-contamination prevention.
- FoodSafety.gov : A government website with comprehensive information on food safety, covering topics from farm to table. Includes resources for consumers and professionals, offering practical advice on preventing foodborne illness.
- ServSafe : ServSafe offers food safety training and certification programs for food service professionals. Their website includes helpful articles, resources, and information related to preventing foodborne illness and cross-contamination. Consider linking to specific ServSafe articles on cross-contamination prevention.
- NSF International : NSF International is a leading certification body for food equipment and processes. Their website provides information on food safety standards and equipment sanitation, important for creating a safe facility. May offer insights into proper cleaning and sanitizing processes.
- State Food Safety : State Food Safety provides online food handler training and resources. Their site has practical guides and information that supports a better understanding of food safety fundamentals, including cross-contamination prevention.
- National Restaurant Association : The NRA provides resources and guidance for restaurant owners and operators, including articles and best practices related to food safety, hygiene, and employee training. Useful for understanding industry standards and legal considerations.
- Purdue University - Food Science : Purdue's Food Science department offers research and information on food safety. Their site may have downloadable documents and research findings related to cross-contamination and effective prevention techniques.
- Ecolab : Ecolab provides water, hygiene, and infection prevention solutions and resources. Their website provides information on proper sanitation practices and products that can help prevent cross-contamination, particularly useful for discussing cleaning & sanitizing procedures.
- HACCP Mentor : Provides accessible information and resources related to Hazard Analysis and Critical Control Points (HACCP), a systematic preventive approach to food safety. Understanding HACCP principles is fundamental to designing effective cross-contamination prevention strategies.
Frequently Asked Questions
What is cross-contamination?
Cross-contamination is the transfer of harmful bacteria from one food or surface to another. It's a major cause of foodborne illnesses.
Why is this checklist template important?
The checklist template provides a structured and easy-to-follow guide to identify and prevent common cross-contamination risks, helping you maintain food safety and protect your customers or family.
Who is this checklist template for?
This template is beneficial for anyone handling food, including restaurants, caterers, food manufacturers, home cooks, and anyone responsible for food preparation and storage.
What types of cross-contamination does the checklist cover?
The checklist covers various aspects, including raw vs. cooked food separation, proper utensil usage, cleaning and sanitizing procedures, and handling allergens.
Can I customize the checklist template?
Yes! The template is designed to be flexible. You can add or remove items to tailor it to your specific environment, processes, and potential risks.
What are some key steps to prevent cross-contamination?
Key steps include separating raw and cooked foods, using separate cutting boards and utensils for different food types, thoroughly washing hands, and regularly cleaning and sanitizing surfaces.
What's the difference between cleaning and sanitizing?
Cleaning removes dirt and debris, while sanitizing reduces the number of harmful bacteria to a safe level. Both are essential for preventing cross-contamination.
What materials are recommended for cutting boards to prevent cross-contamination?
Non-porous cutting boards like plastic or acrylic are best for preventing cross-contamination as they are easier to clean and sanitize effectively. Wood cutting boards can be more porous and harbor bacteria.
How often should I be cleaning and sanitizing surfaces?
Surfaces should be cleaned and sanitized frequently, especially after handling raw meats, poultry, or seafood. It's also good practice to clean and sanitize at the beginning and end of each shift or food preparation session.
Where can I find more information on food safety?
You can find reliable information from resources like the FDA (Food and Drug Administration), USDA (United States Department of Agriculture), and your local health department.
Found this Article helpful?
Hospitality Management Solution Demo
Running a hotel, restaurant, or other hospitality business is demanding. ChecklistGuro's Work OS platform simplifies management, from reservations and guest services to inventory and staff scheduling. Improve efficiency, enhance guest experience, and boost profitability! See how ChecklistGuro can transform your hospitality operations.
Related Articles
Your Ultimate Security Camera Monitoring Log Checklist Template
Payroll Processing Verification Checklist Template: Your Guide to Accuracy
Complaint Handling Checklist Template: Resolve Issues & Retain Customers

Emergency Evacuation Drill Documentation: Your Checklist Template Guide

Mastering Incident Response: Your Free Reporting Protocol Checklist Template

Conquer Your Kitchen: A Monthly Deep Cleaning Checklist Template
Mastering Food Safety: Your Free Temperature Control Checklist Template
Mastering Hand Hygiene: Your Compliance Checklist Template
We can do it Together
Need help with
Hospitality?
Have a question? We're here to help. Please submit your inquiry, and we'll respond promptly.