Daily Room Cleaning Protocol: Your Essential Checklist Template
Published: 09/02/2025 Updated: 12/13/2025
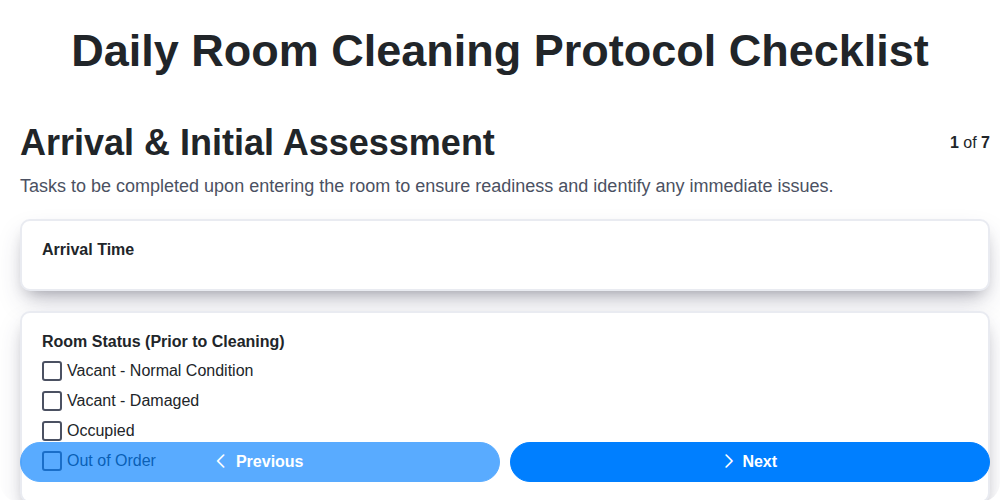
Table of Contents
- Introduction: Why a Daily Room Cleaning Protocol Matters
- Understanding Your Checklist Template
- Step 1: Arrival & Initial Assessment - Setting the Stage
- Step 2: Linen & Waste Removal - A Fresh Start
- Step 3: Bathroom Deep Dive - Hygiene is Key
- Step 4: Surface Cleaning & Dusting - The Details Matter
- Step 5: Floor Care - From Vacuum to Mop
- Step 6: Amenities & Guest Comfort - The Finishing Touches
- Step 7: Quality Check & Documentation - Ensuring Excellence
- Common Pitfalls & How to Avoid Them
- Training Your Housekeeping Team: Best Practices
- Maintaining Your Checklist: Updates & Improvements
- Resources & Links
TLDR: Need to ensure consistently clean hotel rooms? This blog post provides a detailed checklist template breaking down room cleaning into manageable steps, from arrival assessment to final touches. It covers everything from linen removal and bathroom sanitation to floor care and quality checks, ultimately boosting guest satisfaction and streamlining your housekeeping operations. Download it, customize it, and elevate your cleaning standards!
Introduction: Why a Daily Room Cleaning Protocol Matters
In the world of hospitality, a spotless room isn't just about aesthetics; it's a fundamental pillar of a positive guest experience and a reflection of your brand's commitment to quality. Imagine a guest arriving after a long journey, eager to relax, only to be greeted by lingering odors, visible dust, or a less-than-pristine bathroom. That initial impression can significantly impact their entire stay and, ultimately, their willingness to return - or recommend - your establishment.
A well-defined Daily Room Cleaning Protocol isn't merely a list of chores; it's a strategic investment in guest satisfaction, operational efficiency, and brand reputation. It ensures consistency, minimizes errors, and provides a clear framework for training and accountability within your housekeeping team. Ultimately, it's about exceeding expectations and creating a haven of comfort and cleanliness for every guest, every time.
Understanding Your Checklist Template
The checklist you're about to implement isn't just a list of tasks; it's a roadmap to consistently high-quality room cleaning. Before diving into the specifics of each step, let's clarify what this template provides and how to best utilize it. Think of this as a flexible framework - it's designed to be adapted to your property's unique needs and operational procedures.
Key Components and Customization:
- Modular Design: The checklist is broken down into logical phases, allowing for adjustments. If certain steps are irrelevant to a particular room type (e.g., a room without a bathtub), you can easily remove or modify them.
- Detailed Instructions: While brevity is important, we're aiming for clarity. Each item includes enough detail to guide the cleaning staff, especially those new to the role.
- Observation & Reporting: The Quality Check & Documentation phase isn't just about verifying cleanliness. It's a critical opportunity to identify maintenance issues and track overall performance. Accurate documentation allows for continuous improvement.
- Brand Alignment: This template should be viewed as a starting point. Integrate your brand's specific cleaning product recommendations, frequencies for certain tasks (e.g., dusting frequency), and any unique service standards you provide.
- Team Collaboration: Involve your housekeeping team in the review and customization process. Their practical experience and insights are invaluable. They know the nuances of your property and can help ensure the checklist is truly effective and practical.
Step 1: Arrival & Initial Assessment - Setting the Stage
Before a single cleaning product is even opened, the arrival and initial assessment phase is absolutely crucial. It's more than just knocking on the door; it's about proactively identifying potential challenges and laying the groundwork for a truly exceptional clean. This initial walkthrough provides invaluable insights that directly impact the efficiency and thoroughness of the entire process.
Begin by verifying the room's vacancy - a quick knock and a verbal confirmation eliminates any awkward surprises. Once inside, take a moment for a comprehensive visual scan. Look beyond the obvious - are there any signs of damage, spills, or unusual conditions that require immediate attention? Don't just look at things, look for things. A dropped item under the bed, a stain on the carpet, a malfunctioning light fixture - these details, however seemingly small, can significantly alter your cleaning approach.
Crucially, document any observations! A quick note on a digital checklist or a written record helps ensure that maintenance is alerted to necessary repairs and prevents these issues from being overlooked during subsequent cleaning cycles. Finally, open the windows or activate the ventilation system to air out the room, removing stale odors and prepping the space for a fresh start. Gathering all the necessary cleaning supplies before commencing the cleaning process will also save valuable time and maintain a more organized workflow.
Step 2: Linen & Waste Removal - A Fresh Start
Removing soiled linens and trash isn't just about tidiness; it's about creating a truly fresh start for the next guest. This initial clearing sets the stage for a thorough and hygienic clean. Start by stripping the bed completely - sheets, blankets, duvet covers, and pillowcases - ensuring all items are placed in the designated laundry area. Next, empty all trash receptacles, replacing liners with fresh ones. Don't neglect a quick check under the bed and behind furniture; these often-overlooked areas can harbor lost items or hidden messes. Finally, ensure fresh towels are readily available for the guest's arrival - a small detail that speaks volumes about your commitment to comfort. Proper linen and waste removal is the essential first step towards a flawlessly clean and welcoming room.
Step 3: Bathroom Deep Dive - Hygiene is Key
The bathroom demands the highest level of scrutiny - it's arguably the most important space for maintaining hygiene and directly influencing guest perception. A superficial wipe-down simply won't cut it. This deep dive focuses on tackling grime, eliminating bacteria, and creating a truly refreshing experience.
First, tackle the toilet. Scrub the bowl thoroughly, paying attention to the waterline and any stubborn stains. Don't forget the exterior - the seat, lid, and base require meticulous cleaning. Next, move on to the shower or tub. Soap scum and mildew are common culprits; use a dedicated cleaner and a scrub brush to remove them effectively. Pay close attention to grout lines, as they can harbor bacteria. Shower doors or curtains should be cleaned both inside and out.
The sink and countertop need to be disinfected to prevent the spread of germs. A sparkling mirror completes the transformation - use a streak-free cleaner and a clean cloth. Finally, meticulously mop the bathroom floor, ensuring every tile is clean and dry. Replenishing amenities - toilet paper, soap, shampoo, and conditioner - is the finishing touch to a pristine bathroom. Remember: a deep-cleaned bathroom translates to a guest feeling refreshed and reassured.
Step 4: Surface Cleaning & Dusting - The Details Matter
Dusting and surface cleaning often get overlooked, but they're crucial for creating that 'wow' factor for your guests. It's the difference between a room that's merely clean and a room that feels genuinely cared for. Don't just swipe - thoroughly clean.
Here's a breakdown of what's involved:
- High & Low: Start with high surfaces like lampshades, picture frames, and air vents, allowing dust to fall below. Then, tackle lower surfaces like bedside tables, desks, and TV stands.
- Microfiber Magic: Invest in good quality microfiber cloths. They trap dust and dirt far more effectively than traditional cloths and reduce the need for harsh chemicals.
- Product Specificity: Use appropriate cleaning products based on the surface. Wood furniture requires polish, while glass surfaces need a glass cleaner for a streak-free shine. Check manufacturer guidelines for recommended products.
- Spot Cleaning is Key: Be vigilant for spots and marks - fingerprints on glass, water rings on wood, and scuffs on walls. Address these promptly with appropriate spot cleaners.
- Remote Controls & Electronics: Don't forget to thoroughly clean remote controls and other electronics, as these are high-touch areas for guests. Use an electronics-safe cleaner.
- Behind & Under: Take a moment to clean behind furniture and under lamps, as these often accumulate dust.
Remember, meticulous surface cleaning demonstrates attention to detail and elevates the overall guest experience.
Step 5: Floor Care - From Vacuum to Mop
The floor is often the largest surface area in a guest room, and its cleanliness significantly impacts the overall impression. A neglected floor can detract from an otherwise spotless room, so meticulous floor care is essential. This step isn't just about a quick sweep; it's about a thorough process.
1. Initial Debris Removal: Vacuuming & Sweeping
Start by thoroughly vacuuming or sweeping the entire room. Don't just focus on the center of the floor. Pay close attention to corners, edges, and under furniture (beds, chairs, desks). Use a vacuum with appropriate attachments to reach difficult areas. For carpeted floors, a beater bar attachment is crucial for lifting dirt and debris. For hard floors, a broom with stiff bristles will effectively sweep away dust and particles.
2. Addressing Specific Floor Types:
- Carpet: Beyond a standard vacuum, consider using a spot treatment solution for any visible stains. Follow the product's instructions carefully, ensuring proper ventilation and rinsing.
- Hardwood: Use a hardwood-specific cleaner to avoid damaging the finish. Avoid excessive moisture, which can warp the wood. A microfiber mop is ideal for hardwood floors.
- Tile: Tile floors are generally more durable, but grout lines can harbor dirt and grime. Use a grout brush to scrub the grout lines clean.
- Vinyl/Laminate: These floors are relatively easy to clean, but always check the manufacturer's recommendations for appropriate cleaning solutions.
3. The Mopping Process (For Hard Floors Only):
For hard floors (tile, vinyl, laminate, and sealed hardwood), mopping is the final step. Always use a fresh bucket of warm water mixed with a floor cleaner specifically designed for the floor type. Wring the mop head thoroughly to prevent excessive moisture. Over-wetting can damage certain floor types and create a slipping hazard. Mop in overlapping strokes, ensuring even coverage. Allow the floor to air dry completely before allowing guests to occupy the room.
Pro Tip: Consider using a two-bucket system - one for cleaning solution and one for rinsing the mop head - to avoid spreading dirty water around the room.
Step 6: Amenities & Guest Comfort - The Finishing Touches
Creating a truly memorable guest experience extends far beyond just a clean room - it's about anticipating needs and providing thoughtful comforts. This final step is where you elevate the room from merely tidy to genuinely welcoming. Beyond replenishing basic necessities like toilet paper, soap, and fresh towels, consider these details that contribute to guest satisfaction. Ensure coffee and tea supplies are readily available, along with bottled water or a carafe of filtered water. A thoughtfully placed stationery set with a pen and notepad can be surprisingly appreciated, especially for business travelers. Check the functionality of the television and remote, and ensure adequate lighting options are available - bedside lamps, reading lights, and overall room illumination. A comfortable room temperature, verified by checking the HVAC system, is also crucial for guest well-being. Finally, a quick scan for any misplaced items or distracting elements demonstrates a commitment to meticulousness and guest comfort. These small touches significantly contribute to a positive impression and a desire to return.
Step 7: Quality Check & Documentation - Ensuring Excellence
The final step isn't truly final - it's a critical opportunity to guarantee consistent excellence and provide accountability. A thorough quality check is the last line of defense against missed details and ensures the room meets your established standards.
Begin with a slow, deliberate walk-through, viewing the room from a guest's perspective. Are surfaces spotless? Are linens perfectly arranged? Does everything function as it should? Pay close attention to often-overlooked areas like corners, behind furniture, and under the beds.
Simultaneously, meticulous documentation is vital. Our checklist form (or digital system) requires the room cleaner's initials and the date upon completion. Crucially, any maintenance issues - a leaky faucet, a loose fixture, a stained carpet - must be clearly noted on the checklist and reported to the maintenance department immediately. A brief description of the issue is sufficient; detailed reports can follow. Finally, update the room status in your Property Management System (PMS) to indicate Clean and ready for the next guest. This final step isn't just about ticking a box; it's about upholding our commitment to providing a consistently exceptional guest experience.
Common Pitfalls & How to Avoid Them
Even with a meticulously crafted checklist, overlooked details can creep in. Here are some of the most frequent pitfalls we're seeing in hotel housekeeping, and how to steer clear of them:
1. The Quick Scan Mentality: Rushing through the cleaning process to get more rooms done often leads to missed spots. Solution: Emphasize quality over quantity during training. Implement a room-by-room timing system that allows adequate time for thorough cleaning, without creating undue pressure.
2. Neglecting Hard-to-Reach Areas: Dusting under the bed, behind furniture, or inside drawers is often skipped. Solution: Specifically include these areas in the checklist with clear instructions. Incorporate regular "deep clean" cycles dedicated to these areas.
3. Improper Product Dilution: Using too much or too little cleaning solution can be ineffective or even damage surfaces. Solution: Provide clearly labeled containers with correct dilutions and offer refresher training on product usage.
4. Overlooking Bathroom Details: Focusing on the toilet and shower while missing the sink or mirror creates a less-than-satisfactory experience. Solution: Break down the bathroom cleaning section into smaller, more manageable tasks on the checklist.
5. Ignoring Maintenance Issues: A leaky faucet or a malfunctioning light fixture can detract from a clean room. Solution: Create a clear and simple reporting system for housekeeping to flag maintenance issues. Ensure prompt responses from maintenance.
6. Lack of Consistency in Linen Handling: Inconsistent linen folding or improper disposal can impact the overall appearance. Solution: Provide clear visual guides for linen handling and disposal.
7. Disregarding Guest Requests: Failing to address specific guest requests (extra towels, specific temperatures) can negatively impact guest satisfaction. Solution: Reinforce the importance of attentive service and prompt response to guest requests within the housekeeping team's training.
By being aware of these common errors and implementing preventative measures, your housekeeping team can deliver consistently exceptional results and elevate the guest experience.
Training Your Housekeeping Team: Best Practices
A robust cleaning protocol is only as effective as the team executing it. Investing in thorough and ongoing training is crucial for ensuring consistency, quality, and efficiency. Here's how to best equip your housekeeping team:
1. Beyond the Basics: Demonstrations and Practice
Don't just hand over a checklist - show them how to do it. Provide detailed demonstrations of each cleaning task, emphasizing proper techniques and product usage. Follow up with supervised practice sessions, allowing team members to apply what they've learned under observation. Real-world room scenarios are invaluable.
2. Product Knowledge is Power
Properly train your team on the correct cleaning products, their intended uses, dilution ratios (where applicable), and safety precautions. Misusing chemicals can damage surfaces, pose health risks, and ultimately compromise cleaning effectiveness. Provide Safety Data Sheets (SDS) and ensure everyone understands them.
3. Ongoing Refresher Courses
Cleaning best practices evolve. Schedule regular refresher courses to reinforce learned skills, introduce new products or techniques, and address any challenges identified in the field. These can be short, focused sessions delivered during team meetings.
4. Cross-Training for Versatility
Develop a system where team members are cross-trained to perform various tasks - laundry, public area cleaning, and potentially even basic maintenance. This increases team flexibility and ensures coverage during absences.
5. Constructive Feedback and Recognition
Provide regular, constructive feedback on performance. Acknowledge and reward exemplary work to motivate the team and reinforce desired behaviors. Celebrate achievements to foster a positive and engaged workforce.
6. Empowering Team Members: Addressing Concerns
Create a culture where team members feel comfortable raising concerns about cleaning supplies, equipment, or maintenance issues. Actively listen to their input and take prompt action to resolve problems. This empowers them to be proactive in maintaining high cleaning standards.
Maintaining Your Checklist: Updates & Improvements
A static checklist is a useless checklist. Your Daily Room Cleaning Protocol isn't a document you create once and forget about. It's a living, breathing guide that needs regular maintenance to remain effective. Several factors necessitate updates - new product introductions, changes in guest expectations, shifts in operational procedures, or even feedback from your housekeeping team.
Here's how to keep your checklist vibrant and relevant:
- Gather Feedback: Regularly solicit input from your cleaning staff. They are on the front lines and witness firsthand what works well and what could be improved.
- Stay Informed About Cleaning Products: New cleaning technologies and eco-friendly alternatives emerge frequently. Evaluate these and incorporate them when appropriate.
- Review Guest Feedback: Pay close attention to guest comments and online reviews regarding cleanliness. Are there recurring themes or specific areas of concern?
- Observe Seasonal Changes: Adjust your checklist to address seasonal challenges like pollen, humidity, or increased foot traffic.
- Annual Review: Schedule an annual review of the entire checklist to ensure it aligns with current best practices and regulatory requirements.
- Document Changes: Whenever a change is made, document the date, the reason for the change, and who approved it. This creates a valuable audit trail.
Remember, a continuously improving checklist translates to consistently exceptional results.
Resources & Links
- Prophub : Offers property management software which often includes checklist functionalities and room cleaning management tools. Good for understanding integrated solutions.
- Hotel Management : A leading hospitality industry resource providing articles, trends and best practices relating to hotel operations, including housekeeping. Provides insights into professional standards.
- Cleanlink : Dedicated to the cleaning industry, Cleanlink provides articles, products and best practices relevant to commercial and residential cleaning, offering practical tips and techniques.
- ISS World : A global facility services company. Their website provides information and insights into cleaning and hygiene standards on a large scale, which can inform a daily protocol.
- OSHA (Occupational Safety and Health Administration) : Provides information on safety protocols and best practices for cleaning staff, including chemical handling and ergonomics. Crucial for ensuring team safety.
- CDC (Centers for Disease Control and Prevention) : Provides guidelines and information about infectious disease prevention and cleaning practices. Especially important in the current climate.
- Hotelogix : Provides hotel property management software. Their blog and resources often cover operational efficiency including housekeeping checklists and workflow management.
- Hcareers : A hospitality job board. Examining sample job descriptions for Housekeeping positions can offer insight into the typical duties and standards expected.
- SupplyClean : A cleaning supply distributor. Their website often features articles about cleaning techniques, product recommendations and industry trends - helpful for selecting appropriate supplies.
- LinkedIn : Search for hospitality housekeeping groups to connect with other professionals and learn about best practices, challenges, and solutions in real-time.
Frequently Asked Questions
What is the purpose of a daily room cleaning protocol?
A daily room cleaning protocol ensures consistent cleanliness, guest satisfaction, and helps maintain hygiene standards in hotels, rentals, or similar accommodations. It provides a structured checklist for housekeepers, ensuring no step is missed and promoting efficiency.
Who is this checklist template designed for?
This template is primarily designed for hotel housekeeping staff, vacation rental cleaners, and anyone responsible for daily room cleaning tasks. It can be adapted for various accommodation types and sizes.
Can I customize the checklist template?
Absolutely! The provided checklist is a starting point. Feel free to add, remove, or modify tasks to match the specific needs of your property, room type, and cleaning standards. Consider adding specific product names or detailed instructions.
What are the key sections included in the checklist?
The checklist typically includes sections for initial room assessment, bathroom cleaning, bedroom cleaning, living area cleaning (if applicable), amenities replenishment, and final inspection/notes. Each section outlines specific tasks to be completed.
What does 'Initial Room Assessment' entail?
The 'Initial Room Assessment' involves quickly evaluating the room's condition upon entry. This includes checking for any existing damage, safety hazards, or unusual situations that need to be reported before cleaning begins.
What are some examples of 'Amenities Replenishment' tasks?
Amenities replenishment involves replacing used toiletries (shampoo, conditioner, soap), restocking towels and linens, refilling coffee/tea supplies, and ensuring adequate drinking water is provided.
How important is the 'Final Inspection/Notes' section?
The 'Final Inspection/Notes' section is crucial. It allows for a final quality check before marking the room as clean. Any issues, maintenance requests, or observations should be documented here to ensure follow-up.
How can I ensure the cleaning team follows the protocol consistently?
Training is essential. Clearly explain the protocol to the cleaning team, provide them with the checklist template, and regularly monitor their performance. Providing feedback and addressing concerns will also promote adherence.
Are there any specific safety precautions I should include in the protocol?
Yes! Include reminders about proper handling of cleaning chemicals (wearing gloves, eye protection), safe disposal of hazardous waste, and reporting any maintenance issues that could pose a safety risk (e.g., leaky faucets, broken tiles).
What information should be recorded in the 'Notes' section?
Record anything unusual found in the room (e.g., broken items, spills), maintenance requests (e.g., leaky faucet, burnt-out lightbulb), specific cleaning issues encountered, or anything that deviates from the standard room condition.
Found this Article helpful?
Hospitality Management Solution Demo
Running a hotel, restaurant, or other hospitality business is demanding. ChecklistGuro's Work OS platform simplifies management, from reservations and guest services to inventory and staff scheduling. Improve efficiency, enhance guest experience, and boost profitability! See how ChecklistGuro can transform your hospitality operations.
Related Articles
Your Ultimate Security Camera Monitoring Log Checklist Template
Payroll Processing Verification Checklist Template: Your Guide to Accuracy
Complaint Handling Checklist Template: Resolve Issues & Retain Customers

Emergency Evacuation Drill Documentation: Your Checklist Template Guide

Mastering Incident Response: Your Free Reporting Protocol Checklist Template

Conquer Your Kitchen: A Monthly Deep Cleaning Checklist Template
Mastering Food Safety: Your Free Temperature Control Checklist Template
Mastering Hand Hygiene: Your Compliance Checklist Template
We can do it Together
Need help with
Hospitality?
Have a question? We're here to help. Please submit your inquiry, and we'll respond promptly.