Tech Support Simplified: Your Education Student Technology Checklist Template
Published: 10/23/2025 Updated: 12/13/2025
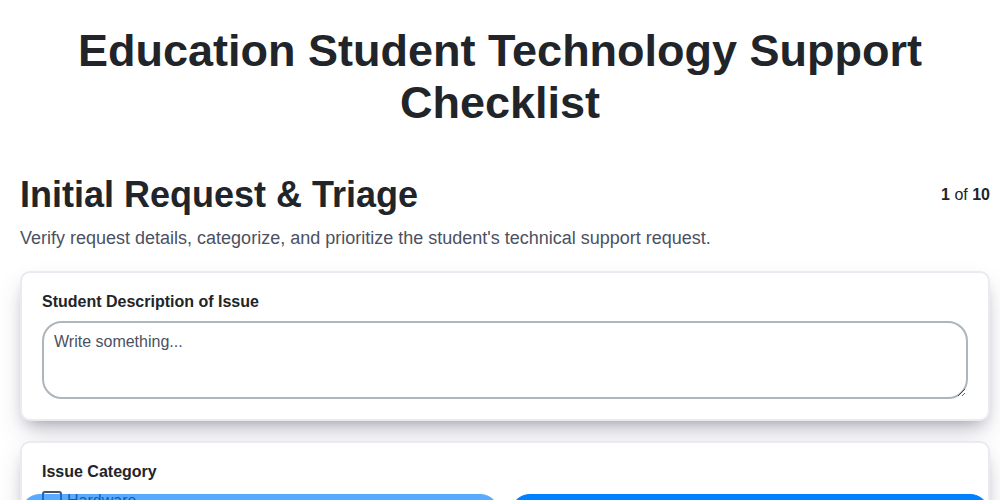
Table of Contents
- Tech Support Simplified: Your Education Student Technology Checklist Template
- Introduction: Why a Tech Support Checklist Matters
- 1. Initial Request & Triage: Gathering Essential Information
- 2. Account Verification & Access: Ensuring Proper Authorization
- 3. Hardware Troubleshooting (Device): Diagnosing Device Issues
- 4. Software Troubleshooting (Application): Resolving Application Errors
- 5. Network Connectivity & Internet Access: Fixing Connection Problems
- 6. Learning Management System (LMS) Support: LMS-Specific Assistance
- 7. Email & Collaboration Tools: Troubleshooting Communication Issues
- 8. Security & Privacy: Protecting Student Data and Devices
- 9. Resolution & Documentation: Recording Solutions for Future Reference
- 10. Escalation & Follow-up: Handling Complex Cases
- Conclusion: Empowering Students with Tech Support Resources
- Resources & Links
TLDR: Feeling overwhelmed by student tech support requests? This checklist template streamlines the process, covering everything from initial requests and account access to LMS issues, security concerns, and follow-up. It's a one-stop guide to consistent, efficient tech support for education students - saving you time and ensuring a better experience for everyone!
Tech Support Simplified: Your Education Student Technology Checklist Template
As an education student, you're constantly juggling coursework, research, and - increasingly - technology. When tech hiccups inevitably arise, a clear and structured support process can be a lifesaver. This checklist outlines the steps your institution's IT support team should follow, and understanding it can help you articulate your issue effectively and expedite resolution. Here's a breakdown of what to expect:
1. Initial Request & Triage: This is your first point of contact. Describe your issue clearly and concisely. Be ready to provide details about the device, application, and what you were trying to do when the problem occurred. Initial triage helps determine the urgency and assign the request to the appropriate specialist.
2. Account Verification & Access: Before any technical support can begin, your identity and access rights need to be verified. This ensures security and prevents unauthorized access. Be prepared to provide student ID or other identifying information.
3. Hardware Troubleshooting (Device): If the problem relates to your computer, tablet, or other device, support will guide you through basic troubleshooting steps. This might include checking cables, restarting the device, or running diagnostics.
4. Software Troubleshooting (Application): Is a specific application causing problems? This stage focuses on troubleshooting the application itself - checking for updates, reinstalling, or diagnosing compatibility issues.
5. Network Connectivity & Internet Access: Issues with connecting to the internet or accessing network resources will be investigated here. Support will likely check your network settings and troubleshoot potential Wi-Fi or wired connection problems.
6. Learning Management System (LMS) Support: If you're having trouble with your institution's LMS (like Canvas, Blackboard, or Moodle), this stage addresses issues like accessing course materials, submitting assignments, or participating in online discussions.
7. Email & Collaboration Tools: This step addresses issues with accessing your student email, using collaboration platforms (like Microsoft Teams or Google Workspace), or experiencing problems with file sharing.
8. Security & Privacy: Any concerns related to account security, data privacy, or suspicious activity will be addressed with the appropriate protocols and security measures.
9. Resolution & Documentation: Once the issue is resolved, the solution and steps taken will be documented for future reference and to ensure consistency in support.
10. Escalation & Follow-up: If a resolution cannot be found immediately, the request may be escalated to a specialist or a higher-level support team. Follow-up communication is essential to keep you informed of the progress.
Knowing this checklist empowers you to navigate tech support with confidence and helps ensure you receive the timely and effective assistance you need to succeed in your education journey.
Introduction: Why a Tech Support Checklist Matters
For education students navigating the digital learning landscape, technology hiccups are inevitable. A dropped Wi-Fi connection during a crucial online exam, a malfunctioning laptop right before a presentation, or an inability to access essential software - these situations can be incredibly stressful and disruptive. That's where a well-structured technology support checklist becomes invaluable. This isn't just about providing solutions; it's about creating a consistent, efficient, and user-friendly experience for students. A checklist ensures that every request receives a standardized level of support, preventing frustration and minimizing downtime. By following a clear process, we can quickly identify and resolve issues, empowering students to focus on their studies and succeed. This post outlines a comprehensive checklist designed to streamline the tech support journey for education students, ensuring a smoother and more productive learning experience.
1. Initial Request & Triage: Gathering Essential Information
The first point of contact is crucial. A well-structured initial triage process sets the stage for efficient and effective support. Don't jump to solutions immediately; focus on understanding the problem first.
When a student submits a tech support request, equip your team with a standardized approach. This should include gathering the following information before attempting any troubleshooting:
- Student Identification: Full name, student ID number. This ensures you're providing support to the correct individual and can verify access rights.
- Device Information: What type of device are they using? (Laptop, tablet, phone, etc.) Include the operating system (Windows, macOS, iOS, Android) and version number if possible.
- Detailed Problem Description: Ask the student to clearly and concisely explain what is happening and when it started. Encourage specifics! My computer is slow is less helpful than My computer is slow when I'm using [Specific Application] and it started happening this morning after I updated [Something].
- Error Messages: If applicable, ask for the exact wording of any error messages. Screenshots are incredibly valuable here.
- What Steps Have Been Taken? Has the student already attempted any troubleshooting steps? Knowing what's been tried avoids repetition and highlights potential misunderstandings.
- Urgency: Is this impacting a class deadline or a critical assignment? Understanding the urgency helps prioritize requests.
By meticulously gathering this information upfront, you're not just collecting data; you're establishing a foundation for a faster, more accurate resolution.
2. Account Verification & Access: Ensuring Proper Authorization
Before diving into troubleshooting, confirming a student has the correct accounts and access is paramount. This step not only prevents wasted time but also ensures adherence to university policies and data security protocols.
Here's a breakdown of what's involved:
- Verify Enrollment Status: Confirm the student is currently enrolled and eligible for university resources. A simple check against the official student roster is usually sufficient.
- Confirm Account Existence: Ensure the student has the necessary university accounts (e.g., student email, network login, LMS access). If an account doesn't exist, initiate the creation process following established procedures.
- Validate User Permissions: Check the student's access permissions within various systems (LMS, software, specific online resources). Are they assigned to the correct courses/groups? Do they have the required licenses?
- Password Resets & Unlock Accounts: Password resets are a frequent request. Follow established procedures for secure password resets and account unlocks. Never directly provide passwords; guide the student through the self-service reset options where possible.
- Two-Factor Authentication (2FA) Support: Assist students with 2FA setup and troubleshooting. Common issues include lost devices, incorrect codes, and account recovery.
- Address Account Locking: Some systems lock accounts after multiple failed login attempts. Verify the reason for the lock and follow the established unlock process.
This verification stage significantly reduces the chance of chasing a solution for a problem stemming from insufficient or incorrect permissions.
3. Hardware Troubleshooting (Device): Diagnosing Device Issues
When a student reports a hardware problem with their assigned device (laptop, tablet, etc.), a systematic approach is crucial. This section outlines a troubleshooting checklist designed to efficiently identify and resolve common hardware issues.
1. Visual Inspection: Start with a thorough visual check. Look for physical damage like cracks, loose hinges, or signs of liquid spills. Note any visible anomalies.
2. Power Issues:
- Charging: Verify the device is properly connected to a power source and that the charger is functioning. Try a different outlet and charging cable.
- Battery Health: If applicable, check the battery health status. A significantly degraded battery might require replacement.
- Power Button: Ensure the power button is functioning correctly. Try a hard reset (power button held down for an extended period - consult device documentation).
3. Display Issues:
- Brightness: Check and adjust the brightness settings.
- External Monitor: Connect the device to an external monitor to determine if the issue is with the device's screen or the internal hardware.
- Screen Flickering/Distortion: Note if the flickering or distortion appears consistently or intermittently. This may indicate a graphics card or screen issue.
4. Peripheral Checks:
- Keyboard: Test each key to ensure proper functionality.
- Mouse/Trackpad: Verify responsiveness and accuracy. Clean if necessary.
- Webcam/Microphone: Test functionality (often through a test recording or call).
5. Driver Issues: While often linked to software (see Software Troubleshooting), driver conflicts can sometimes manifest as hardware problems. Briefly check for driver updates within the device manager (Windows) or System Information (macOS).
6. Overheating: Check if the device is overheating. Ensure vents are clear of obstructions. Prolonged overheating can cause performance issues and hardware damage.
7. Diagnostics Tools: Utilize built-in diagnostic tools (if available) provided by the device manufacturer. These can often pinpoint specific hardware failures.
Important Note: If the issue appears to be a major hardware failure (e.g., broken screen, unresponsive components), advise the student to escalate the issue according to the established protocol (see Escalation & Follow-up). Avoid attempting repairs beyond your level of expertise.
4. Software Troubleshooting (Application): Resolving Application Errors
Software glitches are a common frustration for education students relying on applications for coursework, research, and collaboration. This section guides you through common troubleshooting steps when you encounter application errors.
First Steps: The Basics
- Check for Updates: Outdated software is a frequent culprit. Verify the application has the latest version installed. Most applications have a built-in Check for Updates option.
- Restart the Application: A simple restart can often resolve temporary conflicts. Close the application completely (don't just minimize it) and re-open.
- Restart Your Computer: Sometimes the issue isn't the application itself but a broader system problem. Restarting your computer clears temporary files and resets processes.
- Check System Requirements: Ensure your computer meets the minimum system requirements for the application. Running demanding software on underpowered hardware can lead to errors.
Digging Deeper:
- Error Messages: Carefully read any error messages. They often provide clues about the problem's nature. Note the exact wording; this is helpful when reporting the issue.
- Application Logs: Some applications maintain log files that record errors and events. Consult the application's help documentation to learn how to access these logs.
- Compatibility Mode: If the application is older, try running it in Compatibility Mode for an earlier version of Windows. (Right-click the application icon, select Properties, go to the Compatibility tab.)
- Reinstall the Application: A corrupted installation can cause problems. Uninstall the application completely (using the Control Panel or Settings), then download and reinstall the latest version from a trusted source.
- Check for Conflicting Software: Certain security software, VPNs, or other applications might interfere with the functioning of the problematic software. Try temporarily disabling them (one at a time) to see if the issue resolves.
Reporting the Problem:
If these steps don't work, be prepared to provide the following information when reporting the issue:
- Application Name and Version
- Operating System and Version
- Error Message (exact wording)
- Steps taken to reproduce the error
- Any recent changes to your computer or software installation
5. Network Connectivity & Internet Access: Fixing Connection Problems
Network issues are a common headache for education students relying on technology. A dropped connection during an online lecture or a slow download for research materials can derail progress. This section outlines troubleshooting steps to get you back online.
First, the Basics:
- Check the Obvious: Is Wi-Fi enabled on your device? Are you connected to the correct network? Double-check the network name and password.
- Physical Connections: If using a wired connection, ensure the cable is securely plugged into both your device and the wall or network port. Try a different cable and port if possible.
- Restart Your Device: This simple step often resolves temporary glitches. Reboot your laptop, tablet, or phone.
- Restart Your Router/Modem (If Possible): If you have access to your router/modem, power it off, wait 30 seconds, and then power it back on. (Important: Only do this if permitted and understand the potential impact on others using the network.)
Troubleshooting Deeper:
- Check Other Devices: Can other devices on the same network connect to the internet? If not, the problem likely lies with the network itself (e.g., internet service provider outage) and is beyond your immediate control. Contact your IT support.
- Signal Strength: Assess your Wi-Fi signal strength. A weak signal can cause intermittent connectivity. Move closer to the router.
- Run Network Diagnostics: Most operating systems have built-in network diagnostics tools. These can help identify specific issues (e.g., DNS errors, IP address conflicts). Search for network troubleshooter in your OS.
- Flush DNS Cache: Corrupted DNS cache can cause connectivity problems. Instructions for flushing DNS vary by operating system; search online for instructions specific to your device.
- Check Firewall Settings: Occasionally, firewall settings might be blocking internet access. Temporarily disable your firewall (with caution!) to see if it resolves the issue. Remember to re-enable it afterward.
- Proxy Settings: If you are using a proxy server, verify that the settings are correct.
If these steps don't resolve the problem, it's time to escalate to your school's IT support team. Be prepared to provide details about the steps you've already taken.
6. Learning Management System (LMS) Support: LMS-Specific Assistance
Learning Management Systems (LMS) like Canvas, Blackboard, Moodle, or Google Classroom are vital for education students. However, navigating these platforms can sometimes be tricky. This section of the support checklist focuses on troubleshooting issues specifically related to the LMS.
Common LMS Support Requests We Handle:
- Course Access Issues: Students are unable to see or join their assigned courses. We verify enrollment status and troubleshoot potential registration errors.
- Assignment Submission Problems: Difficulty uploading files, incorrect submission links, or issues with assignment formatting.
- Gradebook Visibility: Concerns about grade synchronization, missing grades, or questions about grading policies within the LMS.
- Discussion Forum Errors: Problems with posting, replying, or accessing discussion forums.
- Content Display Issues: Course materials (videos, documents, presentations) not displaying correctly.
- Notification Problems: Students not receiving important notifications from the LMS.
- Integration Issues: Difficulties with tools or applications integrated within the LMS (e.g., video conferencing links not working).
Troubleshooting Steps:
- Browser Compatibility: Ensure the LMS is accessed through a supported browser and that it's updated.
- Cache Clearing: Clearing browser cache and cookies often resolves display and functionality errors.
- LMS Announcements: Check for any system-wide announcements or maintenance notices affecting the LMS.
- Instructor Communication: When issues pertain to specific course content or assignments, we're happy to facilitate communication with the instructor.
- LMS-Specific Guides & Tutorials: We're equipped to guide students through LMS-specific support documentation.
7. Email & Collaboration Tools: Troubleshooting Communication Issues
Communication is key to success for education students, and when email and collaboration tools fail, it can derail assignments, group projects, and important announcements. This section addresses common issues and provides troubleshooting steps to get you back online.
Common Problems:
- Unable to Send/Receive Emails: This could be due to server issues, incorrect settings, or a full mailbox.
- Problems with Microsoft Teams/Google Workspace: Issues like inability to join meetings, share files, or access chats.
- Calendar Sync Problems: Missing appointments or incorrect meeting times across devices.
- Attachment Errors: Difficulty sending or receiving attachments due to file size limits or format issues.
Troubleshooting Steps:
- Check Internet Connectivity: Ensure you have a stable internet connection. Try accessing a website to confirm.
- Verify Account Settings: Double-check your email address, password, and server settings within the email client or web interface. Refer to your institution's IT documentation for correct settings.
- Check Spam/Junk Folders: Ensure legitimate emails haven't been mistakenly filtered.
- Clear Cache & Cookies: Outdated cached data can sometimes interfere with email and collaboration tools.
- Restart the Application: A simple restart can often resolve temporary glitches.
- Check Storage Space: A full mailbox can prevent you from sending or receiving emails. Delete unnecessary emails or archive older ones.
- Update Software: Ensure you are using the latest version of your email client or collaboration tools.
- Check Group Permissions: For Teams or Workspace issues, confirm you have the necessary permissions to access specific channels, documents, or groups.
If you've tried these steps and are still experiencing problems, please move to the Escalation & Follow-up section.
8. Security & Privacy: Protecting Student Data and Devices
For education technology support, security and privacy aren't just technical considerations - they's critical ethical and legal responsibilities. Our checklist includes dedicated steps to ensure we're handling student data and devices responsibly.
Key Actions & Reminders:
- Password Hygiene: Reinforce the importance of strong, unique passwords. Guide students on creating and managing them safely. Offer links to password management tools if appropriate and permissible by district policy.
- Phishing Awareness: Regularly remind students about phishing scams and how to identify suspicious emails or links. Provide resources on reporting suspicious activity.
- Device Security: Encourage students to secure their devices with passcodes or biometric authentication. Remind them about the importance of updating operating systems and software.
- Data Encryption: Confirm that sensitive data stored on devices or in cloud services is appropriately encrypted (where applicable and within policy).
- Privacy Settings: Help students understand and adjust privacy settings on applications and platforms, ensuring they're comfortable with data sharing.
- Acceptable Use Policy (AUP) Review: Briefly review relevant sections of the district's AUP when assisting with technology issues, reinforcing acceptable usage guidelines.
- Reporting Concerns: Provide a clear and accessible process for students to report security or privacy concerns to the appropriate channels.
- Data Handling Protocols: Ensure adherence to district and institutional policies regarding data storage, access, and disposal. Remember student data is often protected by FERPA and other relevant laws.
9. Resolution & Documentation: Recording Solutions for Future Reference
Once a solution is implemented and the student confirms their issue is resolved, proper documentation is absolutely critical. This isn't just about ticking a box; it's about building a knowledge base that benefits everyone.
Here's what effective resolution documentation should include:
- Brief Description of the Issue: A concise summary of the problem the student was experiencing.
- Troubleshooting Steps Taken: A clear, step-by-step account of exactly what was done to resolve the issue. This includes commands entered, settings changed, or applications used.
- Solution Implemented: Specifically, what ultimately fixed the problem.
- Student Confirmation: A note confirming the student verified the resolution.
- Date & Time of Resolution: Essential for tracking trends and identifying recurring issues.
- Support Staff Initials/ID: Identifies who provided the assistance.
This information should be logged in a centralized system - whether that's a ticketing system, a shared document, or another designated location. Over time, this creates a valuable resource for new support staff and can even preemptively address similar issues that arise. Encourage your team to be meticulous and descriptive; a few extra seconds documenting accurately can save significant time later.
10. Escalation & Follow-up: Handling Complex Cases
Sometimes, despite our best efforts, an issue requires more specialized attention. This section outlines the escalation and follow-up procedures we employ when a student's technology support request can't be resolved within the standard troubleshooting steps.
Escalation Process:
- Identifying Escalation Needs: If a ticket remains unresolved after a reasonable troubleshooting period (typically 24-48 hours) and the support specialist has exhausted available resources, it's time to escalate. This could be due to complex hardware failures, intricate software conflicts, or issues requiring deeper network expertise.
- Tiered Support: We operate with a tiered support system. Initial requests are handled by Level 1 specialists. Escalations move to Level 2 specialists possessing advanced technical skills and specialized knowledge. In rare cases, issues are escalated to Level 3, which involves vendor support or dedicated IT infrastructure teams.
- Detailed Escalation Notes: When escalating a ticket, providing comprehensive notes is critical. Include:
- A clear summary of the issue and what troubleshooting steps have already been attempted.
- Any error messages encountered.
- The student's operating system and application versions.
- Any relevant logs or screenshots.
- Communication with the Student: We prioritize keeping students informed. Upon escalating a ticket, the student receives a notification explaining the situation, estimated resolution timeframe, and contact information for the escalated support team. Regular updates will be provided as progress is made.
Follow-Up is Key:
- Confirmation of Resolution: Once a resolution is achieved, we actively verify with the student to ensure the issue is completely resolved and they are satisfied with the support received.
- Knowledge Base Updates: Complex issues and their solutions are documented in our internal knowledge base. This allows us to quickly resolve similar issues in the future and improve our overall support efficiency.
- Feedback Loop: We welcome feedback from students regarding their support experience. This feedback helps us identify areas for improvement and continuously refine our processes.
Conclusion: Empowering Students with Tech Support Resources
Ultimately, a proactive and well-defined technology support checklist like the one outlined above is invaluable for education students. It's not just about fixing broken devices or resolving software glitches; it's about fostering a learning environment where technology empowers, not frustrates. By providing clear steps for requesting support, verifying access, and resolving common issues, we reduce student stress and allow them to focus on what truly matters: their education. This checklist is a living document - continually review and update it based on student feedback and emerging technologies to ensure its continued relevance and effectiveness. Remember, student success is intrinsically linked to their ability to utilize technology effectively, and a robust support system is a cornerstone of that success.
Resources & Links
- Microsoft Support : Official Microsoft support website. Covers a vast range of Microsoft products commonly used by education students, including Windows, Office Suite (Word, Excel, PowerPoint), Teams, and more. A good starting point for basic troubleshooting.
- Apple Support : Official Apple support website. Essential for students using Mac devices, covering macOS, Apple software (Pages, Keynote), iCloud, and Apple hardware.
- Google Help : Google's support portal provides assistance for Google Workspace for Education (Gmail, Google Drive, Google Docs, Google Sheets, Google Slides, Meet, Classroom) and other Google services.
- Zoom Support & Community : Zoom's official help center and community forums. Useful for resolving issues with Zoom meetings, webinars, and video conferencing - a crucial tool for many education students.
- Canvas Support : Canvas is a popular Learning Management System (LMS). This link provides access to Canvas's official help documentation, FAQs, and community forums. Crucial for LMS-specific troubleshooting.
- Blackboard Support : Another common LMS. This link directs to Blackboard's support resources covering their Learning Management System. Useful if students are using Blackboard as their LMS.
- Institution IT Support (Placeholder) : Replace 'https://www.its.edu/' with the *actual* IT support website of the education institution. This is the primary resource for institution-specific software, hardware, and network issues.
- Cybersecurity & Privacy Education : Provides resources and information about cybersecurity best practices and data privacy, addressing the 'Security & Privacy' section of the checklist. Important for educating students on responsible technology use.
- CommonLook : For students with accessibility needs, CommonLook provides resources and testing tools to ensure digital content is accessible. Relevant for addressing inclusivity in technology use.
- How-To Geek : A general tech website with tutorials and explanations for a wide range of common computer problems. Can be helpful for students encountering unfamiliar error messages or needing basic instruction.
- WikiHow : Offers step-by-step instructions for many common technical tasks. While not always perfectly accurate, it can sometimes provide a quick solution to simple issues.
- Ninite : A tool for easily downloading and installing multiple software applications simultaneously. Useful for students who need to install several programs at once.
- VirusTotal : A website that analyzes files and URLs for malware. Helpful if a student suspects a file or website is malicious.
Frequently Asked Questions
What is this Technology Checklist Template for?
This template is designed specifically for education students to ensure they have all the necessary technology skills and tools ready for their coursework, practicum, and future teaching careers. It simplifies the process of identifying, practicing, and documenting tech proficiency.
Who should use this checklist?
This checklist is ideal for all education students, regardless of specialization (elementary, secondary, special education, etc.). It's useful for students who feel unsure about their tech skills or want a structured way to improve.
What types of technology are covered in the checklist?
The checklist covers a range of technologies, including core productivity tools (Google Workspace, Microsoft Office), learning management systems (LMS) like Canvas or Moodle, assistive technologies, presentation software, online communication tools, and basic troubleshooting skills. The template is customizable so you can add more relevant technologies.
Is this checklist a complete list of every possible technology I might need?
No, this is a comprehensive starting point. The specific technologies required will vary depending on your program, university, and the specific courses you're taking. The template is designed to be adaptable and customizable to your individual needs.
How do I customize the checklist template?
The template is designed to be easily edited. You can add or remove items, adjust proficiency levels, add notes, and tailor it to your program's requirements. Look for editable sections within the document - typically highlighted or indicated with instructions on how to customize.
What do the proficiency levels (e.g., Basic, Intermediate, Advanced) mean?
The proficiency levels provide a guideline for your skill level in each technology. 'Basic' indicates a functional understanding. 'Intermediate' suggests you can use the technology independently for common tasks. 'Advanced' implies a deep understanding and the ability to troubleshoot and teach others. These are guidelines; interpret them based on your own understanding and course expectations.
Where can I find more detailed instructions or tutorials for specific technologies?
The checklist includes links to helpful resources and tutorials for many of the technologies listed. Additionally, your university's IT department, online learning support, or Google/Microsoft help centers are great sources for further assistance.
What if I don't have access to certain technologies listed on the checklist?
Contact your university's IT department or your instructor to request access or explore alternatives. The checklist is a guide, and adjustments may be necessary depending on available resources.
Found this Article helpful?
Support Management Solution Demo
Struggling to keep up with support requests? ChecklistGuro provides a centralized system for managing tickets, tracking progress, & ensuring customer satisfaction. Improve efficiency & reduce resolution times.
Related Articles
Legal Case Management Support Checklist: Your Guide to Seamless Implementation
Mastering Aircraft Maintenance: Your Aerospace Support Checklist Template
Ensuring Excellence: Your Zoo Animal Welfare Support Checklist Guide
Keeping Your Fish Farm Running Smoothly: The Aquaculture Support Checklist
Mastering Citizen Service: Your Government Helpdesk Checklist Template
Streamlining Support: The Financial Services Help Desk Escalation Checklist You Need

Navigating Shipping & Fulfillment Mishaps: Your Resolution Checklist
Mastering Guest Service Recovery: Your Hospitality Issue Checklist Template
We can do it Together
Need help with
Support Management?
Have a question? We're here to help. Please submit your inquiry, and we'll respond promptly.