Your Guide to a Pain-Free Workspace: The Ergonomic Assessment Checklist
Published: 09/01/2025 Updated: 04/23/2026
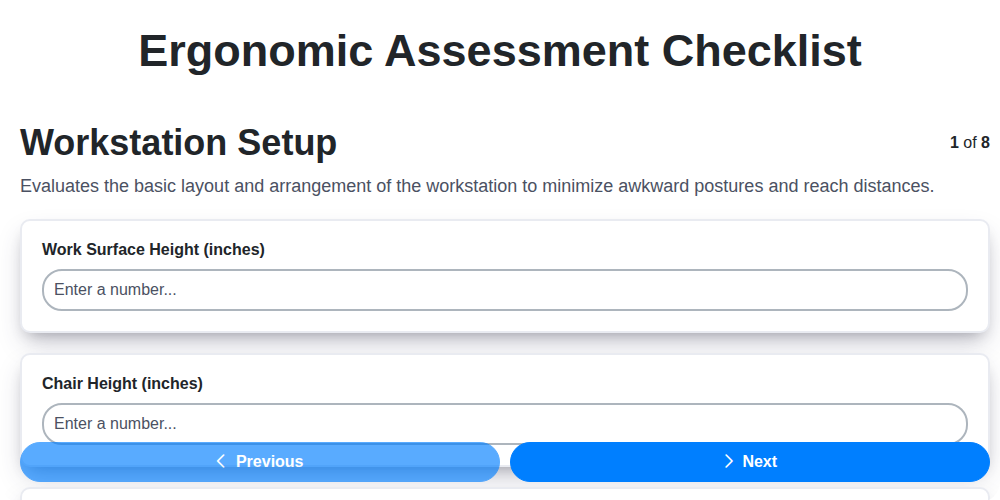
Table of Contents
- Why Ergonomics Matters: Beyond Just a Fancy Chair
- The Ergonomic Assessment Checklist: A Step-by-Step Approach
- Workstation Wonders: Optimizing Your Setup
- Material Handling Mastery: Lifting and Moving Safely
- Taming Repetitive Tasks: Breaking the Cycle
- Posture Perfect: Finding Your Neutral Position
- Tools & Tech: Choosing Ergonomic Equipment
- Light It Right: Minimizing Eye Strain
- Employee Involvement: Getting Everyone On Board
- Continuous Improvement: Keeping Your Workspace Pain-Free
- Resources & Links
TLDR: Feeling aches and pains at work? This checklist walks you through a simple assessment of your workstation (chair, monitor, tools, etc.) and work habits (lifting, posture) to identify potential ergonomic issues. It's your first step to a more comfortable and productive workspace - preventing pain and boosting well-being!
Why Ergonomics Matters: Beyond Just a Fancy Chair
It's easy to think of ergonomics as simply investing in a high-end office chair. While a comfortable chair is certainly part of the picture, true ergonomics goes far deeper than just aesthetics or fleeting comfort. It's about a holistic approach to designing workspaces and work practices to minimize risk, maximize efficiency, and boost overall well-being.
Think about the cumulative effect of small, seemingly insignificant discomforts throughout the workday. A slightly awkward wrist angle when typing, a poorly positioned monitor leading to neck strain, or constantly reaching for materials - these can lead to gradual, but serious, consequences. Over time, these issues can contribute to musculoskeletal disorders (MSDs) like carpal tunnel syndrome, back pain, tendinitis, and other debilitating conditions.
But the benefits extend beyond just avoiding injury. A thoughtfully designed ergonomic setup can significantly improve productivity. When employees aren't battling discomfort, they're better able to focus on their tasks. It also fosters a culture of care and demonstrates a commitment to employee well-being, boosting morale and reducing absenteeism. Ultimately, investing in ergonomics is an investment in your most valuable asset: your people. It's not just about comfort; it's about sustainability, productivity, and a healthier, happier workforce.
The Ergonomic Assessment Checklist: A Step-by-Step Approach
Let's walk through each element of the checklist, providing a little more detail on what to look for and potential solutions. Remember, this is a guide-a true ergonomic assessment is often best conducted by a trained professional.
1. Workstation Setup: Beyond just adjusting height, observe how the setup feels to the user. Are they constantly reaching or twisting? A poorly positioned monitor can cause neck strain; ensure the top of the screen is at or slightly below eye level, approximately an arm's length away. Keyboards and mice should be close enough to avoid reaching, and consider ergonomic alternatives like split keyboards or vertical mice for those experiencing wrist discomfort.
2. Material Handling: Evaluate not only the weight of materials but also the frequency and distance they're moved. Can heavier items be broken down into smaller loads? Are carts or dollies readily available and properly utilized? Always emphasize proper lifting techniques: bend your knees, keep your back straight, and lift with your legs. Regular training on safe lifting practices is crucial.
3. Reppetitive Tasks: Identify tasks that are performed repeatedly and quickly. Look for opportunities to rotate tasks, enlarge job duties, or adjust work methods to reduce strain. If a particular movement is unavoidable, ensure proper posture and consider ergonomic tools that minimize force and repetition. Short, frequent breaks are essential for preventing fatigue.
4. Employee Training & Awareness: Ergonomic principles aren't just about equipment; they're about behavior. Regular training empowers employees to recognize and report potential hazards. A clear and accessible reporting system ensures concerns are addressed promptly. Foster a culture where employees feel comfortable suggesting improvements.
5. Work Organization & Scheduling: A demanding workload and tight deadlines can contribute to poor posture and rushed movements. Review schedules to ensure realistic deadlines and adequate break times. Consider task rotation to prevent prolonged static postures and reduce the risk of musculoskeletal disorders. Distributing workload fairly among team members is also a key factor.
Workstation Wonders: Optimizing Your Setup
Your workstation isn't just a desk and a chair; it's the foundation of your workday. A poorly designed setup can lead to discomfort, fatigue, and even long-term health issues. Let's dive into practical adjustments you can make right now to transform your workspace into an ergonomic haven.
Chair Savvy: Your chair is your throne - treat it accordingly! Ensure it's adjustable in height, backrest, and armrests. Feet should rest flat on the floor or a footrest. Aim for a posture where your thighs are parallel to the floor and your lower back is supported. Don't be afraid to experiment with the lumbar support - it's there to be utilized!
Monitor Magic: Eye strain is a common complaint. Position your monitor at arm's length, with the top of the screen at or slightly below eye level. This prevents you from craning your neck upwards. Consider a monitor arm to allow for greater flexibility in positioning.
Keyboard & Mouse Mastery: Keep your keyboard and mouse close to your body to avoid reaching. A neutral wrist posture is key - avoid bending your wrists up or down. Explore ergonomic keyboards and mice if you experience discomfort. A little wrist support can make a big difference!
Desk Dynamics: Make sure you have ample space for your keyboard, mouse, and any frequently used items. A standing desk or a desk converter can offer the benefits of both sitting and standing throughout the day, promoting better posture and reducing fatigue.
The Little Things Matter: Don't overlook the details. Keep frequently used items within easy reach to minimize unnecessary stretching and reaching. Proper lighting can also significantly reduce eye strain.
Remember, optimizing your workstation is an ongoing process. Pay attention to how your body feels and make adjustments as needed. Your body will thank you!
Material Handling Mastery: Lifting and Moving Safely
Moving materials is a frequent and often overlooked contributor to workplace injuries. Whether it's boxes, equipment, or supplies, improper lifting and carrying techniques can lead to strains, sprains, and more serious musculoskeletal disorders. Let's break down how to handle materials safely and minimize risk.
The Core Principles: A Gentle Reminder
Before we dive into specifics, remember these fundamental principles:
- Plan Ahead: Assess the load. Is it too heavy or bulky to handle alone? Clear a path to avoid obstacles.
- Mechanical Aids are Your Friend: Utilize carts, dollies, forklifts, hoists, or other equipment whenever possible. Don't be a hero - use the tools available to you.
- Teamwork Makes the Dream Work: Ask for help with heavy or awkward loads. Two or more people can share the burden and reduce individual strain.
The Perfect Lift: Technique is Everything
The following steps outline the perfect lift, though adaptations may be needed based on the specific situation.
- Foot Positioning: Stand close to the load with your feet shoulder-width apart, one foot slightly ahead of the other for stability.
- Bend Your Knees: Never bend at the waist. Keep your back straight and bend primarily at your knees and hips.
- Grip Securely: Get a firm grip on the load, using your whole hand.
- Keep it Close: Hold the load as close to your body as possible to minimize leverage and strain.
- Straighten Your Legs: Use your leg muscles to lift, keeping your back straight and core engaged.
- Turn with Your Feet: Avoid twisting your body while lifting or carrying. Turn by pivoting your feet instead.
- Lower with Control: Reverse the lifting process, bending your knees and keeping the load close as you lower it.
Carrying Considerations
- Visibility: Keep your head up and look in the direction you are traveling.
- Route Planning: Choose a clear path, free of obstacles.
- Frequent Breaks: If carrying heavy loads for extended periods, take frequent breaks to rest your muscles.
- Awkward Loads: When dealing with awkward or unbalanced loads, distribute the weight as evenly as possible and be extra cautious.
When in Doubt, Ask! If you're unsure about how to safely handle a particular load, don't hesitate to ask for guidance from a supervisor or experienced colleague.
Taming Repetitive Tasks: Breaking the Cycle
Repetitive tasks are a common culprit in musculoskeletal discomfort and reduced productivity. Performing the same motions repeatedly, even if seemingly minor, can lead to fatigue, strain, and ultimately, injuries. But it doesn't have to be a relentless cycle! Here's how we can start taming those repetitive tasks:
Analyze the Task: The first step is understanding exactly what movements are being repeated and how frequently. Break down the task into its individual components. Are there any unnecessary motions? Can any steps be eliminated or combined? Video recording the task can be incredibly helpful for identifying inefficiencies.
Micro-Breaks & Rotation: Short, frequent breaks - even 30 seconds to stretch or refocus - can make a significant difference. Job rotation, where employees alternate between different tasks, is also highly effective in distributing the workload and preventing overuse. Consider implementing a 5-5-5 rule: every 5 minutes, take a 5-second micro-break, a 5-second stretch, and a few deep breaths.
Task Modification & Redesign: Can the task itself be redesigned to reduce repetition? This might involve changing the sequence of steps, introducing automation (where appropriate), or using different tools. Explore alternative gripping methods, adjust heights to minimize reaching, or optimize hand positioning.
Workstation Optimization: A poorly designed workstation can exacerbate the impact of repetitive tasks. Ensure the workstation is ergonomically sound, allowing for neutral postures and minimizing unnecessary movements. Adjustable chairs, monitor arms, and keyboard trays can all contribute to a more comfortable and efficient workspace.
Tooling & Automation: Consider investing in tools or implementing automation to reduce manual effort. Specialized grips, power tools (used safely and with proper training), or even simple jigs can significantly lighten the load.
Employee Involvement: Encourage employees to actively participate in identifying and solving problems related to repetitive tasks. They often have valuable insights into the task itself and potential solutions.
Posture Perfect: Finding Your Neutral Position
Understanding neutral posture is the cornerstone of ergonomic comfort. It's the position where your joints are aligned naturally, minimizing stress and strain on your muscles and ligaments. Think of it as your body's reset button.
So, what does a neutral posture look like?
- Head: Your ears should be roughly aligned with your shoulders, and your chin should be parallel to the floor. Avoid jutting your head forward - a common culprit for neck pain.
- Shoulders: Relaxed and down, not hunched or rounded forward. Imagine gently squeezing your shoulder blades together.
- Back: Maintain the natural curves of your spine. A slight "S" shape is ideal. Avoid slouching or over-arching your back. Lumbar support is key here.
- Elbows: Bent at a 90-110 degree angle, close to your body.
- Wrists: Straight and in line with your forearms. Avoid bending your wrists up, down, or sideways.
- Hips: Supported and aligned with your knees.
- Legs: Knees bent at a 90-degree angle, feet flat on the floor or a footrest.
How to Find Your Neutral:
It's not always easy to feel neutral posture, especially if you're accustomed to poor habits. Here are a few tips:
- Mirror Check: Use a mirror to observe your posture.
- Wall Test: Stand with your back against a wall. Your heels, buttocks, and shoulders should touch the wall, but your head may not. This gives you a sense of proper spinal alignment.
- Mindfulness: Regularly check in with your body throughout the day. Are you hunching? Are your shoulders tense? Make adjustments as needed.
Remember, finding your neutral position isn't a one-time fix. It's an ongoing process that requires awareness and consistent effort.
Tools & Tech: Choosing Ergonomic Equipment
Investing in the right equipment can significantly reduce strain and boost comfort. But with so many options, where do you start? Here's a breakdown of key categories and features to consider:
1. Chairs: Beyond Adjustable Height
Look for chairs with adjustable lumbar support (crucial!), seat depth, armrests (height, width, and pivot), and tilt tension. Mesh backing allows for better ventilation, a bonus for warmer climates. Consider a dynamic or task chair, designed to encourage movement throughout the day.
2. Keyboards & Mice: Minimizing Wrist Strain
Traditional keyboards often force your wrists into awkward angles. Explore ergonomic keyboards: split designs, contoured shapes, and tenting features can promote a more neutral posture. Vertical mice, trackball mice, and pen mice are alternatives to traditional mice, reducing pronation and wrist strain. Don't underestimate the benefit of a good wrist rest, but remember it shouldn't compensate for proper posture.
3. Monitor Arms & Stands:
Free up desk space and optimize viewing angles with a monitor arm. They allow for a full range of adjustments - height, tilt, swivel, and rotation - ensuring the top of the screen is at eye level and the monitor is an arm's length away. Dual monitor arms are a great option for those needing multiple screens.
4. Standing Desks & Converters:
Alternating between sitting and standing throughout the day offers numerous health benefits. Full standing desks are an investment but offer the most flexibility. Desk converters sit on top of your existing desk, allowing you to easily switch between sitting and standing positions.
5. Accessories: The Finishing Touches
- Footrests: Promote better posture and reduce pressure on your lower back.
- Document Holders: Position documents at eye level to avoid neck strain.
- Headsets: Essential for call centers and anyone who spends a lot of time on the phone. Choose lightweight models with comfortable earcups.
Pro Tip: Don't just buy the latest gadget. Consider a trial period or demo unit before making a large investment. What feels good for one person may not work for another.
Light It Right: Minimizing Eye Strain
Poor lighting is a silent productivity killer and a major contributor to eye strain, headaches, and fatigue. It's not just about having enough light; it's about the right kind of light in the right places. Here's how to optimize your lighting for better vision and a more comfortable workspace.
Understanding the Culprits:
- Glare: The biggest offender! Glare comes from light reflecting off surfaces like computer screens, desks, and windows. It forces your eyes to work harder to see clearly.
- Insufficient Lighting: Working in dim conditions strains your eyes and can lead to fatigue.
- Harsh, Direct Light: Can cause discomfort and squinting.
- Blue Light Emission: Screens emit blue light, which can disrupt sleep patterns and contribute to eye strain.
Practical Solutions:
- Position Your Monitor: Avoid glare by placing your monitor perpendicular to windows and bright light sources. Consider window coverings like blinds or curtains.
- Layer Your Lighting: Combine ambient (general room lighting), task lighting (focused on your work area), and accent lighting to create a balanced and comfortable environment.
- Use Task Lighting: A desk lamp with an adjustable arm allows you to direct light exactly where you need it, reducing overall room brightness and minimizing glare.
- Adjust Brightness and Contrast: Optimize your screen's brightness and contrast settings to match the ambient light levels. Most operating systems have built-in tools for this.
- Consider Blue Light Filters: Use screen filters or software to reduce blue light emission, especially in the evening. Many computers and smartphones have built-in blue light filter settings (Night Shift on Apple devices, Night Light on Windows).
- Regularly Adjust Your Lighting: Lighting needs change throughout the day and year. Take time to assess and adjust your lighting as needed.
- Invest in Quality Bulbs: LED bulbs are energy-efficient and offer various color temperatures. Opt for warmer tones (around 2700K-3000K) for a more comfortable and relaxing atmosphere.
Employee Involvement: Getting Everyone On Board
Ergonomics isn't a top-down initiative; it thrives on collaboration. Getting employees actively involved isn't just a nice to have-it's crucial for a successful and sustainable ergonomics program. After all, they're the ones performing the tasks and experiencing the potential issues firsthand.
Here's how to foster genuine employee involvement:
- Open Communication Channels: Establish clear and accessible ways for employees to report concerns, suggest improvements, and ask questions. This could be through a dedicated email address, suggestion boxes (physical or digital), or regular team meetings.
- Participatory Assessments: Invite employees to participate directly in workstation assessments. Their insights are invaluable in identifying potential problem areas that might be overlooked by an external observer.
- Ergonomics Champions: Identify and train ergonomics champions within different departments or teams. These individuals can serve as local points of contact, promote awareness, and facilitate communication.
- Feedback Loops: Don't just collect feedback - act on it. Demonstrate that employee concerns are being taken seriously by implementing changes and communicating the results back to the team. Even if a suggestion isn't feasible, explaining the reasoning fosters trust and encourages continued participation.
- Ergonomics Committee: Consider forming an ergonomics committee comprised of employees from various departments. This provides a formal structure for ongoing input and helps ensure that the ergonomics program reflects the needs of the entire workforce.
- Celebrate Successes: Recognize and celebrate ergonomics improvements, both big and small. This reinforces the value of employee involvement and motivates others to contribute.
Continuous Improvement: Keeping Your Workspace Pain-Free
Ergonomics isn't a "set it and forget it" deal. Your bodies change, tasks evolve, and new technologies emerge. What felt comfortable and efficient six months ago might be contributing to discomfort today. That's why a culture of continuous improvement is essential for maintaining a pain-free workspace.
Here's how to keep the momentum going:
- Regular Check-ins: Schedule brief, informal check-ins with employees to solicit feedback on their comfort and workspace. These can be as simple as a quick survey or a brief conversation.
- Annual (or Bi-Annual) Reassessments: Conduct a more formal ergonomic assessment at least annually, or even bi-annually in high-risk environments or with frequently changing tasks.
- Stay Updated on Best Practices: Ergonomics is an evolving field. Subscribe to industry publications, attend webinars, and keep abreast of the latest research and best practices.
- Embrace New Technology: Explore ergonomic tools and technologies as they become available. Consider trials or pilot programs before widespread adoption.
- Analyze Incident Reports: Any reports of discomfort or injury should trigger a review of the relevant workstation and tasks. Treat these as opportunities to learn and improve.
- Encourage Employee Suggestions: Create an open door policy for employees to submit their suggestions for improving the workspace. Recognize and reward innovative ideas.
By fostering a commitment to ongoing assessment and refinement, you can ensure your workspace remains a supportive and comfortable environment for everyone.
Resources & Links
- OSHA Ergonomics : The Occupational Safety and Health Administration (OSHA) provides comprehensive information, guidelines, and resources on ergonomics in the workplace, including assessment tools and best practices.
- HSE - Musculoskeletal Disorders : The UK Health and Safety Executive (HSE) offers detailed advice, assessments, and resources related to musculoskeletal disorders (MSDs) and ergonomics.
- The Ergonomics Society : The UK's leading ergonomics professional body. Their website contains information, resources, and a directory of qualified ergonomists.
- Human Factors & Ergonomics Society : This site from the HFES (Human Factors and Ergonomics Society) has research and resources related to ergonomics and human-machine interaction.
- Workplace Answers : A UK-based resource offering practical advice and guidance on workplace health and safety, including ergonomics. Offers tools and articles.
- NIOSH Ergonomics Program : The National Institute for Occupational Safety and Health (NIOSH) offers research, resources, and tools related to ergonomics and prevention of work-related musculoskeletal disorders.
- Ergo Expert : A company offering ergonomic assessments and equipment - their website provides informative articles and resources on workspace ergonomics.
- Corporate Training Solutions - Ergonomics : This site offers ergonomic training and resources for businesses, with various articles on different ergonomic aspects.
- Posturite : A supplier of ergonomic products and services. Their site includes guides and articles on ergonomic best practices.
- Humantech : Humantech provides ergonomic solutions, including assessments, training, and equipment. Their website has articles and resources related to ergonomic design.
- Ergonomic Mall : An online retailer of ergonomic products with informative articles and guides related to ergonomic workspace design.
Frequently Asked Questions
What is an ergonomic assessment?
An ergonomic assessment is a process of evaluating your workspace and work practices to identify and reduce risk factors that can cause musculoskeletal discomfort or injury. It focuses on fitting the job to the worker, rather than forcing the worker to adapt to a poorly designed environment.
Why is an ergonomic assessment checklist helpful?
The checklist provides a structured approach to identify potential ergonomic hazards in your workspace. It ensures you systematically evaluate key areas and don't overlook important factors contributing to discomfort or potential injury. It's a practical tool for anyone wanting to improve their workspace.
Who should use this ergonomic assessment checklist?
This checklist is beneficial for anyone who spends significant time working at a desk or workstation - employees, freelancers, students, or even those working from home. It's particularly useful if you're experiencing discomfort, pain, or stiffness related to your work.
How often should I conduct an ergonomic assessment?
Ideally, you should conduct an ergonomic assessment when you first set up a workspace, whenever you experience pain or discomfort, after any significant changes to your work tasks or equipment, and at least annually as a preventative measure.
What if I'm not sure how to interpret the checklist's findings?
The checklist provides guidance and suggestions, but if you're unsure about the findings or require further assistance, consider consulting with an occupational therapist, ergonomist, or safety professional. They can provide personalized recommendations and solutions.
Does this checklist cover all possible ergonomic issues?
While this checklist is comprehensive, it may not cover every conceivable ergonomic issue. It's important to be aware of your own body and report any concerns to a qualified professional.
What's the difference between static and dynamic posture?
Static posture refers to a position you maintain for an extended period (like sitting at your desk). Dynamic posture involves movement and changes in position. Ergonomics encourages dynamic posture to reduce strain and fatigue. The checklist prompts you to assess both.
The checklist mentions 'neutral posture'. What does that mean?
Neutral posture means your joints are aligned in a way that minimizes stress and strain. For example, your wrists should be straight when typing, your elbows should be bent at roughly 90 degrees, and your head should be level. The checklist helps you evaluate if you're achieving this in various postures.
What if I can't afford to replace all the equipment recommended by the checklist?
Start with the most critical adjustments first, like chair height and monitor placement. Small adjustments can make a big difference. Consider using simple and inexpensive solutions, such as using cushions or adjustable monitor stands before investing in new equipment.
Where can I find additional resources on ergonomics?
Many resources are available online, including websites from organizations like the Occupational Safety and Health Administration (OSHA), the National Institute for Occupational Safety and Health (NIOSH), and the Ergonomics Society. Your company's HR department may also offer resources.
Found this Article helpful?
Manufacturing Management Solution Demo
Stop chasing paperwork and wrestling with disconnected systems! Our solution brings clarity and control to your production process. From standard operating procedures (SOPs) and equipment maintenance to quality control and inventory tracking, we simplify every step.
Related Articles
Kaizen Checklist Template: Your Path to Continuous Improvement

Machine Safety Audit Checklist: Your Guide to a Safer Manufacturing Workplace
Mastering Supplier Performance: Your Free Supplier Scorecard Checklist Template
Your Ultimate RCM Checklist Template: A Step-by-Step Guide

LPA Checklist Template: Your Guide to Layered Process Audits

Your Ultimate Lockout/Tagout (LOTO) Checklist Template

Your Ultimate FSC 22000 Checklist Template
Quality Control Inspection Checklist Template: Prevent Defects & Improve Manufacturing Processes
We can do it Together
Need help with
Manufacturing?
Have a question? We're here to help. Please submit your inquiry, and we'll respond promptly.