JSA Checklist Template: Your Guide to Safer Job Analysis
Published: 09/02/2025 Updated: 05/11/2026
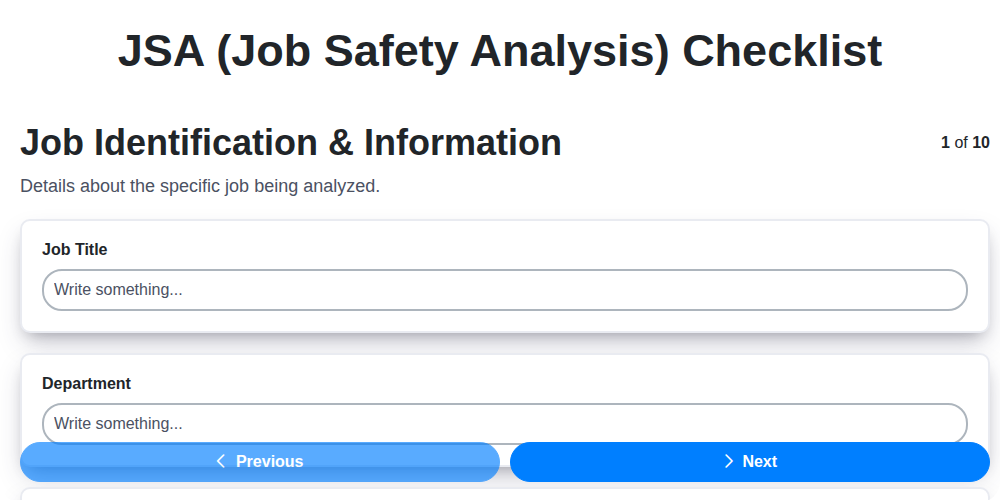
Table of Contents
- What is a JSA Checklist and Why Do You Need One?
- Benefits of Using a JSA Checklist
- Key Components of a Comprehensive JSA Checklist
- Step-by-Step Guide: Filling Out Your JSA Checklist
- Job Identification & Information: Setting the Foundation
- Breaking Down Job Steps: A Detailed Approach
- Hazard Identification: Recognizing Potential Risks
- Risk Assessment: Prioritizing Hazards
- Implementing Control Measures: Minimizing Risks
- Personal Protective Equipment (PPE): Ensuring Worker Safety
- Training and Communication: Sharing the JSA
- Review, Revision & Continuous Improvement
- Resources & Links
TLDR: Analyze jobs safely and consistently with our free JSA checklist template! Break down tasks, identify hazards, assess risks, and implement controls - all in one easy-to-use document. Protect your team and ensure compliance by making job safety analysis a proactive and structured process.
What is a JSA Checklist and Why Do You Need One?
A JSA checklist isn't just a formality; it's the backbone of a truly effective Job Safety Analysis. Think of it as a structured guide that ensures no critical step is overlooked. It're essentially a document that organizes the JSA process, breaking it down into manageable sections that cover everything from identifying job steps to documenting control measures and ensuring proper training.
Without a checklist, the JSA process can become ad-hoc, inconsistent, and prone to errors. Different people might analyze the same job differently, potentially missing key hazards or implementing inadequate controls. A checklist promotes standardization, ensuring everyone follows the same process and considers the same factors. It acts as a memory jogger, reminding analysts to look for all potential risks and document the steps taken to mitigate them. Ultimately, a JSA checklist transforms a potentially chaotic analysis into a clear, repeatable, and reliable process - a vital ingredient for creating a safer workplace for everyone.
Benefits of Using a JSA Checklist
Beyond simply fulfilling a safety requirement, consistently using a JSA checklist unlocks a wealth of practical benefits for your organization and workforce. It fosters a culture of proactive safety, moves beyond reactive responses to incidents, and strengthens overall operational efficiency.
Here's how:
- Reduced Incident Rates: A thorough JSA, guided by a checklist, systematically identifies and mitigates hazards, directly leading to fewer accidents and injuries.
- Improved Employee Morale & Engagement: Knowing their concerns are heard and addressed through the JSA process increases employee confidence and fosters a sense of ownership in safety.
- Enhanced Training Effectiveness: The checklist serves as a valuable training tool, providing a clear and concise overview of job hazards and control measures for new and existing employees alike.
- Streamlined Operations: Identifying potential bottlenecks and inefficiencies during the JSA process can lead to optimized workflows and increased productivity.
- Cost Savings: Reducing incident rates translates into lower workers' compensation claims, reduced downtime, and decreased equipment repair costs.
- Stronger Compliance: Utilizing a documented, checklist-driven approach simplifies audits and demonstrates a commitment to regulatory compliance.
- Increased Standardization: The checklist ensures consistency across different job roles and locations, minimizing variations in safety practices.
Key Components of a Comprehensive JSA Checklist
A truly effective JSA checklist isn't just a formality; it's a detailed roadmap for safety. Let's break down the essential elements that transform a basic form into a powerful tool for hazard mitigation.
Job Identification & Information: This is the foundation. Don't just state welding; specify what is being welded, where, and by whom. Including related documents - SOPs, equipment manuals, permit requirements - centralizes crucial information.
Detailed Job Steps Breakdown: Avoid vague descriptions. Operating machinery is insufficient; instead, list precise actions like Engage safety interlocks, Adjust cutting depth, and Inspect workpiece dimensions. Involve the worker performing the task - their practical knowledge is invaluable.
Hazard Identification - Beyond the Obvious: Encourage a mindset of constant vigilance. Use prompts like What if this failed? or What are the potential human error points? Consider not only immediate hazards but also secondary and latent risks. Think about ergonomic stresses, psychosocial factors like fatigue, and potential environmental impacts.
Risk Assessment with Clarity: A robust risk assessment goes beyond simply multiplying severity and probability. Define your risk level thresholds explicitly (e.g., Low, Moderate, High) and outline the specific actions required for each level. This provides clear guidance for prioritizing control measures.
Control Measures - The Hierarchy in Action: Clearly articulate how each hazard will be addressed, prioritizing the hierarchy of controls: elimination, substitution, engineering controls, administrative controls, and finally, PPE. Assign specific responsibility for implementation and include timelines where appropriate.
PPE Specification & Verification: Don't just list safety glasses; specify the ANSI rating and type required. Include verification steps to ensure proper fit and condition.
Training & Communication - Ensuring Understanding: Documenting training is vital, but equally important is verifying comprehension. Use checklists, quizzes, or observation to confirm that employees fully understand the identified hazards and associated control measures.
Revision History & Continuous Improvement: A dynamic JSA isn't static. Regularly review and update it based on incident reports, near misses, changes in processes, or new regulatory requirements. A detailed revision history demonstrates a commitment to ongoing safety improvements.
Step-by-Step Guide: Filling Out Your JSA Checklist
Let's walk through a practical example of filling out your JSA checklist. We'll use a seemingly simple task: Cleaning a Commercial Kitchen Floor.
1. Job Identification & Information:
- Job Title: Commercial Kitchen Floor Cleaning
- Location: Kitchen Area - [Specific location within the kitchen]
- Employee Performing Job: [Employee Name or Job Title - e.g., Cleaning Staff]
- Frequency of Job: Daily
- Related Documents: Kitchen Cleaning SOP - [Link to SOP]
2. Job Steps Breakdown:
- Gather cleaning supplies (mop, bucket, cleaning solution).
- Sweep the floor to remove debris.
- Fill the bucket with hot water and cleaning solution.
- Mop the floor in sections.
- Rinse the mop frequently.
- Allow the floor to air dry.
3. Hazard Identification:
- Step 2 (Sweeping): Slips, trips, back strain.
- Step 3 (Mixing Solution): Chemical splash, skin irritation.
- Step 4 (Mopping): Wet floor, back strain, contact with cleaning solution.
4. Risk Assessment:
(Using a 1-5 scale for both Severity and Probability - adjust to your company's system)
| Step | Hazard | Severity (1-5) | Probability (1-5) | Risk Level |
|---|---|---|---|---|
| 2 | Slips, Trips | 3 | 2 | 6 |
| 3 | Chemical Splash | 4 | 1 | 4 |
| 4 | Wet Floor | 2 | 3 | 6 |
5. Control Measures:
| Step | Hazard | Control Measure | Responsibility |
|---|---|---|---|
| 2 | Slips, Trips | Use caution, keep area clear of obstacles. | Cleaner |
| 3 | Chemical Splash | Wear gloves and eye protection. | Cleaner |
| 4 | Wet Floor | Use caution, place wet floor signage. | Cleaner/Supervisor |
6. PPE:
- Gloves (chemical resistant)
- Safety Glasses/Face Shield
- Non-slip shoes
7. Training & Communication: This task requires training on chemical handling and safe lifting practices. Documentation of this training is available in [Training Records Location].
8. Review & Approval: (Signatures and Date would be added here)
This example illustrates the process. Remember to adapt it to the specifics of your jobs and workplace. The key is a thorough assessment and clearly defined controls.
Job Identification & Information: Setting the Foundation
Before diving into the specific steps of a job, it's crucial to lay a solid foundation with comprehensive job identification and information. This isn't just about assigning a title; it's about understanding the context of the task. Begin by clearly defining the job title - be as specific as possible. Instead of Maintenance, consider Replacing Pump Motor in Production Line 3. Next, meticulously document the location where the job takes place. Is it an outdoor site, a confined space, or a specific area within a facility? Identifying the employee(s) performing the task is also essential, particularly for the initial JSA; remember that multiple individuals may be involved. Note the frequency with which the job is conducted - a daily routine demands different considerations than an infrequent, specialized task. Finally, and critically, link the JSA to any existing relevant documents. Standard Operating Procedures (SOPs), permits required for the work, and equipment manuals are all vital resources to include; referencing them ensures consistency and provides a wealth of background information. This groundwork allows for a more accurate and thorough hazard identification process later on.
Breaking Down Job Steps: A Detailed Approach
The most common pitfall in JSAs is a lack of detail when breaking down job steps. Install scaffolding isn't a step; it's a task. We need to dissect it. Think about every action the worker takes, from start to finish.
Let's illustrate with an example: imagine we're analyzing the task of "connecting a guardrail to scaffolding." Here's how a vague step becomes a detailed one:
Vague: Connect guardrail. Detailed:
- Inspect the guardrail for damage (dents, cracks, loose fasteners).
- Position the guardrail upright, aligning it with the scaffold uprights.
- Attach the guardrail bracket to the scaffold upright using bolts and washers, tightening to specified torque.
- Repeat for the other side of the guardrail.
- Visually inspect the connection to ensure stability.
See the difference? Detailed steps allow for more accurate hazard identification and the development of targeted control measures. When in doubt, add more detail! Involve the worker performing the task in this process - they are the experts and can provide invaluable insights into the nuances of the job. This collaborative approach ensures a more complete and accurate job breakdown.
Hazard Identification: Recognizing Potential Risks
Identifying hazards isn't about guesswork; it's a proactive, systematic approach. Start by thoroughly examining each job step outlined in your JSA. Don't limit your thinking to just the obvious dangers - dig deeper. Consider the 'what ifs?' - what could realistically go wrong?
Here's a breakdown of hazard categories to guide your identification:
- Physical Hazards: These are often the first to come to mind - noise, vibration, extreme temperatures, unguarded machinery, slips, trips, and falls. Think about confined spaces, working at heights, and the potential for struck-by objects.
- Chemical Hazards: Consider exposure to dusts, fumes, vapors, liquids, and gases. Are Material Safety Data Sheets (MSDS/SDS) readily available and understood?
- Biological Hazards: Think about potential exposure to bacteria, viruses, insects, plants, or animals. This is especially relevant in healthcare, agriculture, and landscaping.
- Ergonomic Hazards: Look for awkward postures, repetitive motions, forceful exertions, and prolonged sitting or standing. These can lead to musculoskeletal disorders.
- Psychosocial Hazards: While less visible, factors like stress, workload, bullying, and harassment can significantly impact worker safety and well-being.
- Environmental Hazards: Consider weather conditions, lighting, and ventilation.
Involve the worker performing the job - they are often the first to identify potential risks because they are the ones performing the task daily. Use a checklist, conduct a job hazard analysis (JHA), or hold a brainstorming session to ensure you cover all bases. Remember, being observant and asking the right questions are crucial to successful hazard identification.
Risk Assessment: Prioritizing Hazards
Not all hazards pose equal threats. A robust risk assessment process is crucial for prioritizing your efforts and ensuring you address the most significant dangers first. This involves more than just identifying hazards; it's about quantifying the potential harm and likelihood of it occurring.
We use a straightforward matrix combining Severity and Probability to determine a Risk Level.
Severity assesses the potential consequences of an incident. We typically categorize severity as:
- 1 - Minor: First aid required, minimal impact on operations.
- 2 - Moderate: Medical treatment required, some disruption to operations.
- 3 - Serious: Significant injury or illness, potential for long-term effects, substantial operational impact.
- 4 - Severe/Permanent: Life-threatening injury or illness, potential for permanent disability, catastrophic operational consequences.
Probability estimates how likely an incident is to occur:
- 1 - Rare: Unlikely to occur during the job's lifetime.
- 2 - Unlikely: Could occur, but not expected.
- 3 - Possible: Might occur during the job's lifetime.
- 4 - Likely: Expected to occur.
By multiplying Severity and Probability, we arrive at a Risk Level score. This score dictates the urgency of implementing control measures. For example, a hazard with a Severity of 4 (Severe/Permanent) and a Probability of 2 (Unlikely) will be addressed with a higher priority than a hazard with a Severity of 1 (Minor) and a Probability of 1 (Rare). Control measures should be implemented based on this ranking, focusing resources on reducing risks that have the highest potential for harm. It's not just about preventing accidents; it's about minimizing overall risk to your workforce and operations.
Implementing Control Measures: Minimizing Risks
The heart of a successful JSA lies in the control measures you implement. Simply identifying hazards isn't enough; you need a plan to actively reduce or eliminate the associated risks. We adhere to the Hierarchy of Controls, a proven framework prioritizing the most effective solutions.
Let's break down the hierarchy and how it applies to your JSA:
- Elimination: This is the gold standard - can you remove the hazard entirely? Perhaps a task can be automated, or a dangerous chemical replaced with a safer alternative.
- Substitution: If elimination isn't possible, can you substitute a less hazardous option? This might involve using a different material or employing a different process.
- Engineering Controls: These are physical changes to the workplace that isolate workers from hazards. Think machine guarding, ventilation systems, or noise barriers. These are often the most reliable solutions.
- Administrative Controls: These involve changes to work practices and procedures. Examples include safe work permits, lockout/tagout procedures, and regular safety training. While valuable, they rely on consistent adherence.
- Personal Protective Equipment (PPE): PPE is the last line of defense. It should always be used in conjunction with other controls, not as a replacement. Ensure your PPE selection is appropriate for the specific hazard and that workers are properly trained on its use and maintenance.
When documenting control measures in your JSA, be specific. Instead of "wear gloves," write "Wear nitrile gloves, ANSI/ISEA 5320:2019 rated, when handling solvent X." Assign responsibility for implementing each control measure and set timelines for completion. Regularly evaluate the effectiveness of your controls and make adjustments as needed. Remember, a living JSA is a safer workplace.
Personal Protective Equipment (PPE): Ensuring Worker Safety
Personal Protective Equipment (PPE) isn't just a formality; it's the last line of defense between your team and potential harm. Simply listing "safety glasses" isn't enough. A thorough JSA ensures the right PPE is selected, properly fitted, and consistently used.
Here's what to consider when outlining PPE requirements in your JSA:
- Specificity is Key: Don't just say gloves. Specify the type: Cut-resistant nitrile gloves, ANSI/ISEA 5319 compliant. The more detail, the better.
- Hazard-Specific Selection: PPE should be chosen based on the specific hazards identified. A noisy environment requires hearing protection; a chemical splash necessitates appropriate gloves and eye/face shields.
- Fit Matters: Ill-fitting PPE is ineffective and often discarded. Regular fit checks and training on proper adjustment are crucial.
- Maintenance and Inspection: PPE needs to be maintained and inspected regularly. Document inspection schedules in the JSA and train workers on how to identify damaged or worn equipment.
- Training and Awareness: Workers need to understand why they're using specific PPE and how to use it correctly. This includes proper donning and doffing procedures.
- Beyond the List: Consider the ergonomic aspects of PPE. Bulky or uncomfortable equipment can lead to worker fatigue and reduced compliance.
- Regular Review: PPE requirements should be reviewed and updated whenever the job or hazards change.
Training and Communication: Sharing the JSA
Sharing the JSA isn't just about distributing a document; it's about fostering a culture of safety. Effective communication ensures everyone understands the hazards, controls, and their roles in maintaining a safe work environment.
Here'm some key strategies:
- JSA Briefings: Conduct regular briefings with employees before and during the job, verbally reviewing the identified hazards and control measures. This is particularly important for new team members or when performing the job infrequently.
- Visual Aids: Post the JSA or key points from it in visible locations, such as near the work area or in break rooms. Consider using posters, infographics, or laminated copies.
- Toolbox Talks: Incorporate JSA elements into your toolbox talks, dedicating a portion to discuss specific hazards and best practices.
- Interactive Sessions: Host interactive training sessions where employees can ask questions, share their experiences, and actively participate in developing safe work procedures.
- Digital Accessibility: Make the JSA readily accessible digitally through your company's intranet or a dedicated safety platform.
- Regular Refreshers: Don't let the JSA gather dust. Schedule regular refresher training and communication sessions to reinforce the information and address any changes or concerns.
- Feedback Loop: Encourage open communication and provide a mechanism for employees to report hazards, suggest improvements to the JSA, and provide feedback on the effectiveness of the controls. A simple suggestion box or an online form can be incredibly valuable.
Review, Revision & Continuous Improvement
A Job Safety Analysis isn't a static document; it's a living, breathing part of your safety program. The initial assessment is just the starting point. To truly maximize its effectiveness, a robust review and revision process is essential.
Why Review and Revise?
Things change. Equipment gets upgraded, processes are tweaked, new hazards emerge, and employees gain experience. Without regular reviews, your JSA can quickly become outdated and ineffective.
How to Keep Your JSAs Current:
- Scheduled Reviews: Establish a schedule for reviewing each JSA. Annual reviews are a good starting point, but higher-risk jobs may require more frequent evaluations (e.g., every six months).
- Incident/Near Miss Trigger: Immediately review a JSA whenever an incident or near miss occurs during the job. This is a critical opportunity to identify weaknesses in the existing controls and implement corrective actions.
- Process/Equipment Changes: Any alterations to the job process, equipment used, or materials handled warrant a prompt JSA review.
- Employee Feedback: Encourage workers to provide feedback on the JSA. They are often the first to notice potential hazards or inefficiencies. Create a clear channel for reporting concerns.
- Regulatory Updates: Stay informed of any changes to relevant regulations or industry best practices and update JSAs accordingly.
- Documentation is Key: Every review and revision should be documented in the Revision History section of the JSA, detailing the date, changes made, and the person responsible. This provides a clear audit trail and demonstrates continuous improvement.
Beyond Revision: Continuous Improvement
Think of JSAs as part of a larger cycle of continuous improvement. Regularly analyzing your JSAs - not just for revisions, but for opportunities to refine them - strengthens your entire safety culture and proactively mitigates risks.
Resources & Links
- Occupational Safety and Health Administration (OSHA): The primary federal agency responsible for workplace safety and health. Provides regulations, guidelines, and resources related to Job Safety Analysis (JSA) and hazard prevention. Essential for understanding legal requirements.
- Centers for Disease Control and Prevention (CDC): Offers resources on occupational health and safety, including information on hazard identification, risk assessment, and control measures - critical for developing a thorough JSA checklist.
- American Industrial Hygiene Association (AIHA): A professional organization for industrial hygienists. Provides resources, certifications, and best practices related to workplace hazard assessment and control, offering expert insights for robust JSA development.
- American Society of Safety Professionals (ASSP): ASSP is a professional society for safety professionals. Their website features articles, webinars, and resources related to safety management, including elements important for JSAs.
- National Safety Council (NSC): NSC is a non-profit organization dedicated to safety. Offers safety training, tools, and resources, including guides that may inform JSA development and implementation.
- Safety Management Group: This website provides safety training courses and resources, including templates and guides for JSAs. While often commercially oriented, they offer practical advice and examples.
- All American Safety: Provides safety equipment and training, but also offers downloadable safety resources and templates, including potential JSA checklist examples or frameworks (check specifics on their site).
- National Institutes of Health (NIH) Environmental Health & Safety: NIH EHS often has publicly available guidelines and best practices for safety programs, which can be helpful in crafting a comprehensive JSA checklist.
- Construction Safety Foundation (CSF): If your JSA is related to construction, CSF offers valuable resources and research focused on construction safety best practices, including identifying hazards specific to construction tasks.
- International Organization for Standardization (ISO): ISO standards (e.g., ISO 45001 for occupational health and safety management systems) provide a framework for ensuring a systematic and continuous improvement approach to JSA and safety management.
Frequently Asked Questions
What if I'm unsure about identifying hazards or assessing risk?
Your company's safety team or a qualified safety professional can provide guidance. Training courses on hazard identification and risk assessment are also readily available. It's always better to err on the side of caution.
Found this Article helpful?
Manufacturing Management Solution Demo
Stop chasing paperwork and wrestling with disconnected systems! Our solution brings clarity and control to your production process. From standard operating procedures (SOPs) and equipment maintenance to quality control and inventory tracking, we simplify every step.
Related Articles
Kaizen Checklist Template: Your Path to Continuous Improvement

Machine Safety Audit Checklist: Your Guide to a Safer Manufacturing Workplace
Mastering Supplier Performance: Your Free Supplier Scorecard Checklist Template
Your Ultimate RCM Checklist Template: A Step-by-Step Guide

LPA Checklist Template: Your Guide to Layered Process Audits

Your Ultimate Lockout/Tagout (LOTO) Checklist Template

Your Ultimate FSC 22000 Checklist Template
Quality Control Inspection Checklist Template: Prevent Defects & Improve Manufacturing Processes
We can do it Together
Need help with
Manufacturing?
Have a question? We're here to help. Please submit your inquiry, and we'll respond promptly.