Parking Lot Safety & Lighting Inspection Checklist Template
Published: 09/01/2025 Updated: 04/23/2026
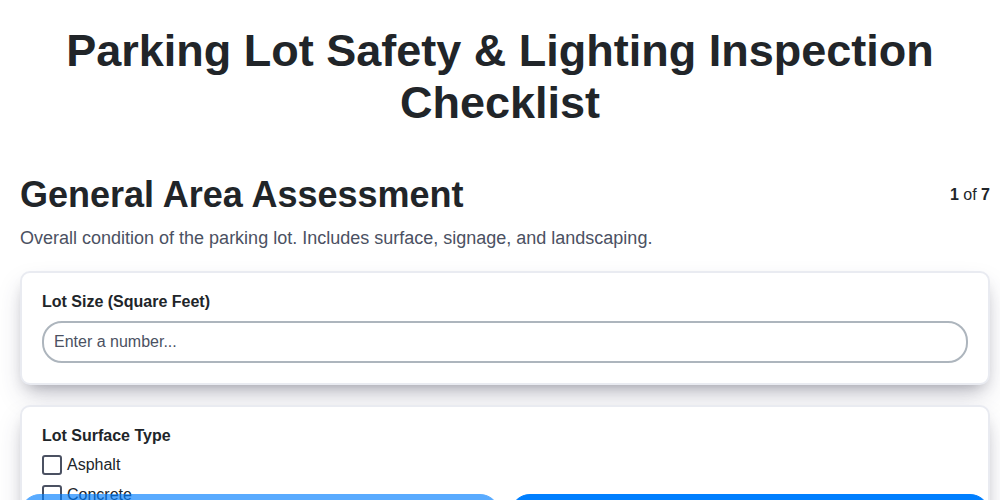
Table of Contents
- Introduction: Why Parking Lot Safety Matters
- Understanding the Scope of Your Inspection
- Template Overview: What's Included
- Section 1: General Area Assessment
- Section 2: Lighting Inspection Details
- Section 3: Pavement and Surface Condition Evaluation
- Section 4: Signage and Marking Verification
- Section 5: Obstacle and Hazard Identification
- Section 6: Security Feature Review
- Section 7: ADA Compliance Checklist
- Inspection Frequency and Record Keeping
- Addressing Findings and Corrective Actions
- Utilizing the Template: Best Practices
- Resources & Links
TLDR: Ensure your parking lot is safe and compliant with this free, easy-to-use checklist! It covers lighting, pavement, ADA accessibility, and more - helping you identify and fix potential hazards, prevent accidents, and protect your business.
Introduction: Why Parking Lot Safety Matters
More than just a place to park, your parking lot is a vital part of your property's overall safety and impression. It's often the first and last interaction visitors have with your business, and a poorly maintained or inadequately lit lot can create a negative experience - or worse, lead to accidents, injuries, and security concerns. Beyond the potential for liability and legal ramifications, prioritizing parking lot safety demonstrates a genuine commitment to the well-being of your employees, customers, and community. This isn's just about avoiding lawsuits; it's about fostering a secure and welcoming environment where people feel comfortable and protected. Ignoring these crucial aspects can impact your reputation, create a sense of unease, and potentially expose you to avoidable risks. Let's explore why taking a proactive approach to parking lot safety is paramount.
Understanding the Scope of Your Inspection
Before diving into the specific checklist items, it's crucial to define the geographical boundaries of your inspection. Is it just the immediate parking area adjacent to your building, or does it encompass a larger, more dispersed lot? Consider factors like pedestrian traffic flow, proximity to roadways, and potential hazards extending beyond the obvious parking spaces. A comprehensive approach means evaluating everything from the entrance points to the furthest reaches of your lot. Furthermore, identify any unique characteristics of your property. Are there slopes, curves, or specific features (like loading docks or landscaping) that require special attention? Understanding this scope upfront ensures you're not overlooking critical areas and provides a clearer picture of the overall safety and maintenance needs of your parking facilities.
Template Overview: What's Included
Our comprehensive Parking Lot Safety & Lighting Inspection Checklist is designed for ease of use and thoroughness. Here's a breakdown of what you're getting:
- Area Breakdown: The template is structured around the key areas we outlined earlier: General Area, Lighting, Pavement, Signage, Obstacles, Security, and ADA Compliance.
- Specific Inspection Points: Each area is further broken down into specific items to inspect, ensuring you don't miss a crucial detail. For example, under Lighting, you'll find prompts for checking bulb functionality, light direction, and color temperature.
- Pass/Fail Column: A clear "Pass/Fail" column allows for a quick and objective assessment of each inspection point.
- Notes Section: A dedicated Notes section provides space to document observations, potential issues, or any relevant information about the condition of the parking lot.
- Corrective Action Field: The Corrective Action field prompts you to outline the specific steps needed to address any identified issues. This ensures accountability and tracks progress.
- Date & Inspector Fields: Track inspections with fields for the date of the inspection and the name of the inspector. This allows for trending and assigns responsibility.
Section 1: General Area Assessment
A comprehensive safety inspection begins with a broad overview. Step back and assess the entire parking lot area - not just individual spots, but the overall impression. Look for signs of neglect or potential hazards that might not be immediately obvious. This includes a thorough visual sweep for accumulated trash and debris (paper, plastic, food wrappers), overgrown vegetation encroaching on walkways or obstructing visibility for drivers, and any instances of vandalism like graffiti or damage to property. Pay attention to the general level of cleanliness - a dirty parking lot can be a sign of broader maintenance issues. Also, be mindful of the overall condition of fences or barriers, if present, ensuring they are secure and in good repair. A well-maintained general area fosters a sense of safety and respect for visitors.
Section 2: Lighting Inspection Details
Beyond simply ensuring lights are on, a thorough lighting inspection requires a more detailed approach. Start by noting the type of lighting fixture present - LED, fluorescent, or older technologies. This impacts efficiency and maintenance considerations. Then, systematically evaluate each fixture, checking not only for functionality (burnout, flickering) but also for light distribution. Are there areas of significant shadow or insufficient illumination? Use a light meter (a relatively inexpensive tool) to measure foot-candles (lux) in key areas like walkways, entrances, and parking spaces. Local regulations and best practices often dictate minimum light level requirements - be sure you know and adhere to these. Don't forget to check the direction of the light; fixtures angled inappropriately can create glare or shine into neighboring properties, causing nuisance and potential safety concerns. Finally, document any issues and prioritize repairs, considering factors like safety risks and energy efficiency gains. Regular cleaning of fixtures is also crucial; accumulated dust and debris can significantly reduce light output.
Section 3: Pavement and Surface Condition Evaluation
The pavement and surface condition of your parking lot directly impacts safety and accessibility. Beyond aesthetics, cracks, potholes, and uneven surfaces present significant trip hazards for pedestrians and can cause damage to vehicles. A thorough evaluation involves more than just a quick glance; it requires a systematic approach.
Begin by walking the entire parking lot, paying close attention to areas with high traffic volume and those exposed to harsh weather conditions. Look for signs of deterioration, including:
- Cracking: Note the type (e.g., hairline, alligator, block) and severity of cracking. This provides insights into the underlying issues, such as poor drainage or subgrade instability.
- Potholes: Measure the size and depth of any potholes, as these are immediate hazards.
- Settlement & Heaving: Identify areas where the pavement has sunk or risen unevenly.
- Drainage Issues: Look for standing water, which can accelerate deterioration and create slippery conditions. Ensure drainage inlets are clear and functioning correctly.
- Surface Wear: Assess the overall smoothness and texture of the pavement. Significant wear can indicate the need for resurfacing.
Document your findings with photographs, noting the location and severity of each issue. This record will be invaluable when planning repairs and preventative maintenance. Remember that proactive maintenance, like sealing cracks and promptly patching potholes, can extend the lifespan of your parking lot and prevent costly repairs down the road.
Section 4: Signage and Marking Verification
Clear, visible, and well-maintained signage and pavement markings are the unsung heroes of a safe and efficient parking lot. They guide drivers, pedestrians, and cyclists, preventing confusion and reducing the risk of accidents. During your inspection, meticulously examine all signs and markings for clarity, condition, and compliance.
What to Look For:
- Legibility: Ensure all signs are easily readable, with appropriate font sizes and contrasting colors. Faded or damaged signs should be replaced immediately.
- Placement: Verify that signs are strategically placed to provide adequate warning and direction. Obstructed signs are essentially useless.
- Compliance: Confirm that signage meets local ordinances and regulations, including those related to speed limits, parking restrictions, and accessible parking.
- Pavement Markings: Evaluate the condition of pavement stripes, arrows, and other markings. Repaint faded or worn markings promptly, especially those designating accessible parking spaces and directional flow.
- Sign Illumination: For nighttime visibility, check that illuminated signs are functioning correctly and provide sufficient light.
Corrective Actions:
- Replace damaged or faded signs.
- Repaint pavement markings as needed.
- Adjust the placement of signs for improved visibility.
- Ensure compliance with local signage regulations.
- Regularly clean signs to remove dirt and debris.
Section 5: Obstacle and Hazard Identification
Identifying obstacles and hazards in your parking lot is about proactively preventing trips, falls, and potential injuries. It's more than just looking for obvious things; it's about a careful, observant sweep of the entire area.
Think beyond parked cars. Consider dumpsters, storage containers, landscaping features (like protruding shrubs or decorative rocks), delivery staging areas, and even temporary fixtures related to events or construction. Are these items positioned in a way that creates a clear and safe path for pedestrians? Do they obstruct visibility for drivers?
Pay particular attention to areas with limited lighting or high foot traffic. Regularly check for unexpected hazards that may have been introduced, such as dropped items, ice or snow accumulation, or construction debris. Even seemingly minor obstructions, like a misplaced traffic cone, can pose a risk.
Remember, the goal is to create a parking environment that is not only functional but also thoughtfully designed to minimize potential dangers for everyone using the space. A little extra attention to detail can go a long way in preventing accidents.
Section 6: Security Feature Review
Beyond just deterring crime, well-implemented security features offer peace of mind for your visitors and staff. This review goes beyond simply checking if cameras are present; it's about evaluating their effectiveness and the overall security posture of your parking lot.
What to Examine:
- Security Cameras: Verify cameras are operational, properly angled (covering all critical areas, including entrances and exits), and free from obstructions like overgrown vegetation. Confirm recording capabilities are functioning and that footage is regularly reviewed by designated personnel. Consider if blind spots exist and if additional cameras are needed. Are cameras vandal-resistant?
- Lighting (Overlap with Section 5): While discussed previously for safety, adequate lighting is a crucial security deterrent. Shadows create hiding places; ensure all areas are well-lit.
- Perimeter Control: Assess fences, gates, and barriers. Are they in good repair and effectively controlling access? Are any openings easily exploitable?
- Visibility: Can security personnel or passersby easily observe the parking lot? Limited visibility creates opportunities for undetected activity.
- Alarm Systems: If present, verify functionality and that alarm responses are appropriate. Test alarm systems regularly.
- Security Personnel (If Applicable): Observe patrols and interaction with visitors. Are personnel adequately trained and equipped? Is their presence a visible deterrent?
- Emergency Call Boxes: Ensure these are easily accessible, clearly marked, and functioning correctly.
Remember to document any deficiencies and prioritize corrective actions to enhance the overall security of your parking area.
Section 7: ADA Compliance Checklist
Ensuring your parking lot is ADA compliant isn't just about legal obligation; it's about providing equitable access for all visitors. Here's a focused checklist to guide your assessment:
- Accessible Parking Space Quantity: Verify you have the correct number of accessible parking spaces based on your total number of spaces. Refer to ADA guidelines for specific requirements.
- Signage: Confirm accessible parking spaces are clearly marked with the International Symbol of Accessibility. Signage should be visible, well-maintained, and located appropriately.
- Access Aisle Width: The access aisle adjacent to accessible spaces must be wide enough (typically 8 feet) to allow for wheelchair transfers and vehicle maneuvering.
- Surface Stability: The surface of accessible spaces and access aisles should be stable, firm, and slip-resistant.
- Slope: Ensure accessible spaces and access aisles don't have a slope exceeding 1: 50.
- Location: Accessible spaces should be located as close as possible to the building entrance and on the shortest accessible route.
- Van Accessible Spaces: A percentage of your accessible spaces must be van accessible, with a wider access aisle to accommodate wheelchair lifts.
- Curb Ramps: Check curb ramps leading to accessible routes are present, functional, and compliant with ADA standards (slope, tactile warning surfaces).
- Path of Travel: The path from the accessible parking space to the building entrance must be accessible, free of obstructions, and have a stable, slip-resistant surface.
Remember to regularly review and update your ADA compliance practices to ensure ongoing accessibility for all.
Inspection Frequency and Record Keeping
Regular inspections aren't a one-and-done deal; consistency is key to maintaining a safe and well-maintained parking lot. Here's a suggested schedule, recognizing that your specific needs might vary based on factors like local climate, traffic volume, and past incident history.
- Daily (5-10 minutes): A quick walk-through to spot any immediate hazards like debris, obstructions, or malfunctioning lights. This is often best delegated to a staff member already present in the area.
- Monthly (30-60 minutes): A more detailed inspection covering all areas outlined in the checklist. This should involve a systematic review, noting any potential issues.
- Quarterly (1-2 hours): Review security camera footage, assess the overall effectiveness of your maintenance plan, and address any recurring problems.
- Annually (2-4 hours): A comprehensive assessment, potentially involving a professional inspection to evaluate pavement conditions, lighting efficiency, and overall compliance.
Record Keeping: Your Safety Logbook
Documenting your inspections is just as important as performing them. A well-maintained record provides valuable insight into recurring issues, demonstrates due diligence in case of an incident, and simplifies future planning. Your records should include:
- Date and Time of Inspection
- Name of Inspector
- Detailed Findings: Be specific about what was observed (e.g., "Light pole #3 flickering," "Pothole near entrance," "Signage faded").
- Corrective Actions Taken: Clearly outline the steps taken to resolve each issue.
- Follow-Up Dates: If a problem requires a more extensive repair or ongoing monitoring, note a date to revisit the issue.
- Photographs: Visual documentation can be extremely helpful in illustrating the condition of the parking lot and the effectiveness of corrective actions.
Consider using a digital spreadsheet, a dedicated inspection software, or even a physical logbook to maintain accurate and organized records.
Addressing Findings and Corrective Actions
Once your inspection is complete, the real work begins: addressing the findings. Don't let the checklist gather dust - it's a roadmap for improvement. Prioritize corrective actions based on severity and potential risk. A cracked walkway presenting a clear trip hazard should be addressed immediately, while a minor paint fade on a non-critical sign can be scheduled for a less urgent timeframe.
Document all identified issues and the corrective actions taken. This creates a valuable record for tracking progress, demonstrating due diligence, and assisting with future inspections. Assign responsibility for each corrective action and set realistic deadlines for completion. Follow up to ensure tasks are completed and verify that the solution is effective. Regularly review the corrective action log to identify recurring problems that may indicate underlying maintenance issues requiring a more comprehensive approach. Remember, continuous improvement is key to maintaining a safe and well-maintained parking environment.
Utilizing the Template: Best Practices
To get the most out of your parking lot safety inspection template, consistency and detail are key. Here are some best practices to ensure thorough and actionable results:
- Assign Responsibility: Clearly designate who is responsible for conducting the inspections and tracking corrective actions. This accountability fosters ownership and encourages follow-through.
- Standardize the Process: Train all inspectors on the template and observation criteria. This minimizes subjectivity and ensures a consistent level of detail across all inspections.
- Document Everything: Don't just mark Pass or Fail. Use the Notes section liberally. Describe the issue in detail - the specific location, the severity of the problem, and any contributing factors. Photos are incredibly valuable here.
- Prioritize Corrective Actions: Not all issues require immediate attention. Use the "Corrective Action" column to assign priority levels (e.g., "High - Immediate Action," "Medium - Within 1 Week," "Low - Scheduled Maintenance").
- Track Progress & Follow-Up: Regularly review the inspection reports and monitor the completion of corrective actions. Create a system for tracking progress and ensuring that issues are resolved in a timely manner. Re-inspect areas after repairs to verify effectiveness.
- Regularly Review & Update: Parking lot conditions and regulations can change. Periodically review and update your template and inspection procedures to reflect these changes.
Resources & Links
- OSHA (Occupational Safety and Health Administration) : The primary federal agency responsible for workplace safety. Their website provides regulations, guidelines, and resources related to safety, including potential relevance to parking lot hazards and employee safety.
- FEMA (Federal Emergency Management Agency) : While primarily known for disaster response, FEMA offers resources on risk assessment and mitigation, which can be helpful in identifying and reducing parking lot hazards. They provide insight into planning and preparedness.
- ADA (Americans with Disabilities Act) : The ADA website provides comprehensive information and resources on accessibility guidelines, essential for ensuring parking lot compliance with ADA standards, covered in detail within the ADA Compliance Checklist section of the template.
- I-Lux Lighting : This company specializes in exterior lighting and offers helpful information and resources about lighting design and maintenance, helpful for section 2 related to lighting inspection.
- NLED (National Lighting Education and Development) : Offers education and resources related to lighting, including best practices for safety and security, relevant to the lighting inspection details section.
- ASLA (American Society of Landscape Architects) : Provides standards and resources related to landscape design, which can inform best practices for parking lot layout, surface materials, and overall safety considerations, especially in the general area assessment section.
- APWA (American Public Works Association) : Provides resources and best practices for public works professionals, including those responsible for maintaining parking lots and roadways. Helpful for pavement condition evaluation.
- NCSI (National Center for Safety Initiatives) : This organization specializes in safety and risk management, and often publishes white papers and articles on related topics. Could offer advanced insights on hazard identification and security features.
- ASIS International (Security Industry) : Provides resources and best practices for security professionals, relevant for reviewing security features in the parking lot and informing corrective actions. Helps inform section 2 and 6.
- USGBC (U.S. Green Building Council) : While focused on green building, the USGBC often addresses safety and accessibility aspects of outdoor spaces, which can be useful for holistic parking lot safety planning. Relevant for general area assessment and signage.
- U.S. Department of Transportation (DOT) : Provides information and resources related to road safety, pavement maintenance, and traffic control devices, which is relevant to Section 2 and 3.
- ATAP (Asphalt Pavement Association) : This is a resource for asphalt pavement information, maintenance, and repair which is relevant when reviewing and evaluating pavements conditions.
Frequently Asked Questions
What is the purpose of a parking lot safety and lighting inspection?
The purpose is to identify potential hazards and ensure adequate lighting to prevent accidents, deter crime, and maintain a safe environment for employees, customers, and visitors.
Who should use this checklist?
Property managers, security personnel, maintenance staff, and anyone responsible for ensuring the safety and security of a parking lot.
How often should I perform a parking lot inspection?
The frequency depends on factors like the location, usage, and local regulations. We recommend monthly inspections, with more frequent checks (weekly or even daily) in high-risk areas or during periods of increased activity.
What does the checklist cover?
The checklist covers areas such as lighting functionality, surface conditions (cracks, potholes), signage, security features (cameras, fences), visibility, and potential hazards like uneven surfaces or obstructions.
Can I customize this checklist?
Yes, absolutely! This is a template. You should modify it to reflect the specific features and potential hazards of your parking lot. Add or remove items as needed.
What do I do if I find a safety hazard during the inspection?
Document the hazard clearly on the checklist. Prioritize repairs based on the severity of the risk. Immediately address any hazards that pose an imminent danger. Track the corrective actions taken and ensure they are completed.
What should I include in the 'comments' section of the checklist?
The comments section should be used to provide details about observed issues, note any corrective actions taken, and record any unusual circumstances that might influence safety.
Are there any legal requirements for parking lot lighting?
Yes, lighting often falls under local ordinances, building codes, and accessibility guidelines (like ADA). It's crucial to be aware of and comply with these regulations. Consult local authorities for specific requirements.
What does ADA compliance regarding lighting mean?
ADA guidelines specify lighting levels and uniformity for accessible parking spaces and pedestrian routes to ensure safe navigation for individuals with disabilities. The checklist helps ensure you are meeting these requirements.
What is a 'lux' measurement and why is it used in the lighting section?
'Lux' is a unit of illuminance, measuring the amount of light falling on a surface. Using a lux meter helps quantify the lighting levels and ensure they meet minimum standards for visibility and safety.
Found this Article helpful?
Retail Management Solution Demo
Boost retail efficiency! ChecklistGuro simplifies store operations, inventory management, and employee training. Improve customer experience and maximize profitability. Manage it all with our Work OS.
Related Articles
Seasonal Mulch & Gravel Checklist Template: Stay Stocked & Ready
Elevator & Escalator Inspection Checklist Template: Your Guide to Safety & Compliance
Daily Prescription Dispening Area Inspection Checklist Template

Weekly Waste Management & Recycling Checklist Template
Keep Your Storefront Sparkling: Your Daily & Weekly Cleaning Checklist Template
Your Ultimate Landscaping & Groundskeeping Checklist: Weekly & Monthly Templates
Monthly Stockroom Organization & Safety Checklist Template

Daily Dairy Case Inspection Checklist Template
We can do it Together
Need help with
Retail?
Have a question? We're here to help. Please submit your inquiry, and we'll respond promptly.