Your Go-To Spill Response Checklist: Immediate Action Guide
Published: 09/02/2025 Updated: 12/13/2025
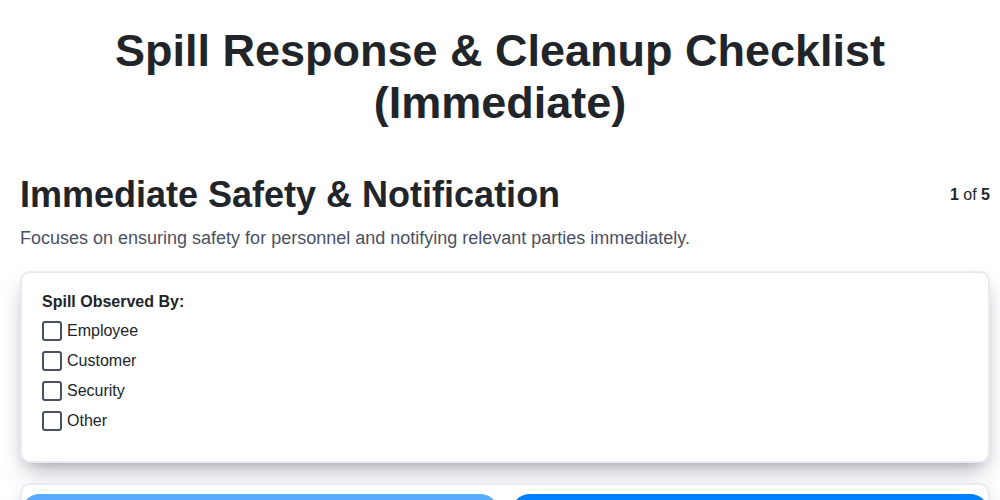
Table of Contents
- Immediate Action: Why a Spill Response Checklist Matters
- Step 1: Assess & Alert - The Critical First Moments
- Step 2: Containment is Key - Stopping the Spread
- Step 3: Gear Up - Your Personal Protective Equipment (PPE)
- Step 4: Initial Cleanup - Absorption and Control
- Step 5: Documentation - Recording the Incident
- Step 6: Securing the Area - Preventing Further Contamination
- Step 7: Identifying the Spill - Material Safety and Hazards
- Step 8: Ventilation and Air Quality - Ensuring Safety
- Step 9: Protecting Water Sources - Preventing Environmental Impact
- Step 10: Waste Handling - Proper Disposal of Contaminated Materials
- Step 11: Post-Cleanup Review - Lessons Learned and Improvements
- Resources & Links
TLDR: Spills happen! This checklist provides a quick, step-by-step guide to *immediately* respond-safety first, contain the mess, report, and document. It's your first line of defense before a thorough cleanup and investigation, ensuring safety and minimizing environmental impact.
Immediate Action: Why a Spill Response Checklist Matters
A spill isn't just an inconvenience; it's a potential hazard with consequences ranging from minor cleanup to serious environmental or health risks. The first few minutes following a spill are critical in mitigating those risks. That's where a clear, concise spill response checklist becomes invaluable.
Think of it as your emergency playbook. Without a pre-defined checklist, panic and confusion can easily set in. People might hesitate, unsure of what to do or in what order. This delay can allow the spill to spread, contaminating a wider area and increasing the complexity and cost of the cleanup. It can also put individuals at risk of injury or exposure.
A well-executed checklist provides structure, ensures key safety measures are taken immediately, and helps contain the situation before it escalates. It's not about being rigid; it's about creating a reliable framework that empowers everyone to respond confidently and effectively, minimizing harm and protecting people, property, and the environment. Ultimately, a checklist transforms a potentially chaotic situation into a controlled and manageable response.
Step 1: Assess & Alert - The Critical First Moments
The first few moments after a spill are the most crucial. Panic can lead to mistakes that exacerbate the situation, so staying calm and following a structured approach is paramount. This isn't about speed; it's about safety and control.
1. Stop & Observe: Immediately halt what you're doing and take a moment to assess the situation. What spilled? How much? Where did it spread? Are there any immediate dangers, such as fire, fumes, or the potential for injury to yourself or others? Don't rush into the spill area before you have a basic understanding of what you're dealing with.
2. Alert Those in Danger: Prioritize the safety of people. If anyone is directly affected or at risk, immediately warn them and guide them to safety. Shouting clear instructions - Spill! Evacuate the area! - can be vital.
3. Notify the Right People: This is arguably the most important step. Know your organization's spill response plan and follow it. Typically, this means notifying your supervisor, the safety officer, and potentially emergency services (like 911) or environmental regulatory agencies. Don't delay notification - prompt reporting minimizes potential damage and legal consequences. Keep a list of emergency contact numbers readily available.
4. Secure the Area: Prevent further contamination or injury by restricting access to the spill area. Use barriers, cones, caution tape, or assign personnel to act as safety monitors. Clear signage indicating "Spill - Do Not Enter" is essential.
Step 2: Containment is Key - Stopping the Spread
Containment isn't just about putting a barrier around the spill; it's about preventing further environmental impact and protecting personnel. Think of it as the critical first line of defense. The immediate goal is to stop the spill from spreading - into drains, waterways, or across a wider area.
Here's how to effectively contain a spill:
- Identify the Source (Safely): If it's safe to do so without putting yourself at risk, try to identify the source of the spill and, if possible, stop it. A quick fix can dramatically reduce the overall volume you need to deal with.
- Create a Perimeter: Use readily available materials like absorbent socks, booms (longer, sausage-shaped absorbent devices), or even piles of sand to create a physical barrier around the spill. Picture drawing a circle or square around it - the larger the better, as long as it's safe.
- Protect Drains and Waterways: This is absolutely crucial. Cover storm drains, floor drains, and any nearby waterways with absorbent materials or drain covers. Preventing the spill from entering these pathways avoids costly and potentially damaging environmental consequences.
- Ventilation: If the spill involves volatile chemicals, ensure adequate ventilation to prevent the build-up of dangerous fumes. Open windows, use fans, or utilize appropriate respiratory protection, as dictated by the SDS.
- Working from the Edges: When applying containment materials, always work from the outer edges of the spill inwards. This minimizes the risk of spreading the spill further while you're working.
- Consider the Spill's Characteristics: Different substances behave differently. Lightweight liquids will spread quickly; heavier liquids might pool. Adapt your containment strategy accordingly.
Remember, effective containment buys you time and minimizes the scope of the cleanup effort.
Step 3: Gear Up - Your Personal Protective Equipment (PPE)
Choosing the right Personal Protective Equipment (PPE) is paramount to your safety during a spill response. It's not about just grabbing something; it's about selecting the gear specifically designed to protect you from the hazards presented by the spilled substance. The Safety Data Sheet (SDS) for the spilled material is your primary guide. It will outline potential hazards and recommend appropriate PPE.
Here's a breakdown of common PPE and when it's typically required. Remember, this is a general guide. Always refer to the SDS and your organization's PPE guidelines.
- Gloves: Chemical-resistant gloves are almost always necessary. Nitrile, neoprene, or Viton gloves are common choices, but the SDS will specify the best material for the specific chemical. Check for punctures and degradation before each use.
- Eye Protection: Safety glasses with side shields are a minimum. For splashing or fumes, wear tightly fitting goggles or a full face shield.
- Respiratory Protection: Respiratory protection requires proper training, fit testing, and medical evaluation. A simple dust mask is not sufficient for most chemical spills. A respirator with appropriate cartridges may be necessary, but consult a qualified safety professional for selection.
- Protective Clothing: Coveralls or an apron made of chemical-resistant material are essential to protect your clothing and skin. Consider disposable options for easier cleanup and contamination control.
- Foot Protection: Chemical-resistant boots or shoe covers may be required, especially if the spill involves corrosive materials.
Don't underestimate the importance of a proper fit! Ill-fitting PPE offers inadequate protection. Regularly inspect your PPE for damage and replace it as needed.
Step 4: Initial Cleanup - Absorption and Control
Once the immediate area is contained and personnel are safe, the focus shifts to absorbing and controlling the spill. This isn't about a deep clean; it's about minimizing the spread and containing the contamination.
The choice of absorbent material is crucial. Always refer to the Safety Data Sheet (SDS) for the spilled substance-it will often recommend specific absorbents. Common options include:
- Absorbent Pads/Mats: Excellent for smaller spills and quick absorption on smooth surfaces.
- Absorbent Granules (e.g., clay, vermiculite): Effective for larger spills on floors or rough terrain. Be mindful of dust generation when using granular absorbents.
- Absorbent Booms & Socks: Ideal for diking and containing spills around drains, equipment, or along walls.
- Loose Absorbent Material (e.g., sand, sawdust): Can be used in a pinch for larger spills but be aware that some materials may react with the spilled substance.
Here's how to proceed:
- Work from the Outside In: Start applying absorbent material around the perimeter of the spill and work your way towards the center. This prevents further spreading as you clean.
- Don't Over-Saturate: Apply enough absorbent to fully soak up the spill without leaving a puddle.
- Containment is Key: Prioritize containing the spill, especially near drains, waterways, or sensitive equipment. Use booms or socks to create a barrier.
- Document the Process: Take photographs of the absorption process for documentation and reporting purposes.
- Proper Disposal: Once the absorbent material is saturated, carefully collect it and place it in a designated container for proper disposal in accordance with local regulations. Do not dispose of contaminated materials in regular trash.
Step 5: Documentation - Recording the Incident
Accurate and thorough documentation is paramount following any spill incident. It's not just about fulfilling reporting requirements; it's crucial for understanding what happened, preventing recurrence, and demonstrating due diligence. Here's what you need to record immediately:
- Date and Time: Precisely note when the spill occurred.
- Location: Specify the exact location of the spill within the facility. Be as detailed as possible (e.g., Loading Dock B, near Tank 3).
- Material Involved: Identify the spilled substance. Include the name, chemical formula (if known), and approximate quantity released. Reference the SDS for critical information.
- Cause of Spill (Initial Assessment): Briefly document the apparent cause of the spill. This might be valve failure, human error, or unknown at this time. A more detailed investigation will follow.
- Actions Taken: Record all immediate actions taken to contain and mitigate the spill, including the deployment of absorbents, evacuation procedures, and notification of personnel.
- Personnel Involved: List the names and roles of all individuals who responded to the spill.
- Photographic/Video Evidence: Capture photos and videos of the spill area before, during, and after cleanup efforts. These visuals are invaluable for reporting and investigation. Secure these files and maintain a clear record of their location.
- Witness Statements: If possible, obtain brief statements from witnesses to the incident.
- Reporting Forms: Complete any required internal or external reporting forms accurately and completely. Keep copies of all submitted forms.
This initial documentation provides a critical foundation for subsequent investigations and helps ensure a safer environment moving forward.
Step 6: Securing the Area - Preventing Further Contamination
The immediate aftermath of a spill demands a focus on containment, but that begins with securing the area. Preventing further contamination - and protecting personnel - is paramount. This isn't just about roping off the immediate spill zone; it's a proactive measure to control the situation before it escalates.
First, create a clearly defined perimeter around the spill. Use caution tape, barriers, or strategically position personnel to prevent unauthorized access. Consider the potential for fumes or vapors and expand the restricted area accordingly. It's far better to err on the side of caution.
Next, address any immediate hazards that could worsen the situation. For example, if the spill involves a flammable liquid, eliminate ignition sources like open flames or electrical equipment within the secured area. Similarly, if the spill is near a drain, cover it immediately to prevent the substance from entering the wastewater system.
Communication is key. Clearly mark the area with signs indicating the presence of a spill and warning of potential hazards. This is especially important in shared workspaces where others might unknowingly enter the zone. Remember, a properly secured area reduces the risk of further contamination and protects those who are not directly involved in the response.
Step 7: Identifying the Spill - Material Safety and Hazards
The very first step in any spill response isn't about cleaning; it's about understanding what you're dealing with. Incorrectly identifying the spilled material can lead to using the wrong cleanup methods, endangering yourself and others, and potentially escalating the situation.
What to Look For:
- Name and Label: The most straightforward clue is usually the container itself. Look for clear labeling indicating the chemical name, concentration, and any hazard warnings. Don't assume - always read the label carefully.
- Appearance: Note the spilled material's physical state (liquid, solid, gas), color, and odor. Unusual colors or strong smells can indicate a hazard.
- SDS (Safety Data Sheet): If the container is missing or the label is unreadable, locate the Safety Data Sheet (SDS) for the suspected substance. SDSs provide crucial information about the material's properties, hazards, safe handling procedures, and appropriate cleanup methods. Your organization should have a readily accessible SDS library.
- Potential Hazards: Based on the identified material, consider the potential hazards:
- Flammability: Is the material flammable or explosive?
- Toxicity: Is the material poisonous or corrosive?
- Reactivity: Does the material react dangerously with other substances (e.g., water, air)?
- Environmental Hazards: Does the material pose a threat to the environment (e.g., water contamination)?
Important Reminders:
- Never touch or inhale spilled material without appropriate Personal Protective Equipment (PPE).
- If you're unsure about the material's identity, treat it as a potentially hazardous substance and seek expert assistance.
- Err on the side of caution. A cautious approach is always safer than risking exposure to an unknown chemical.
Step 8: Ventilation and Air Quality - Ensuring Safety
Before any cleanup efforts begin, prioritizing ventilation and assessing air quality is paramount. Many spilled substances release hazardous vapors that can pose significant health risks through inhalation. These risks range from respiratory irritation and headaches to more serious conditions depending on the spilled material's toxicity.
Immediate Actions:
- Open Windows and Doors: Increase natural ventilation by opening nearby windows and doors, provided this doesn't spread the vapors to other areas.
- Activate Exhaust Fans: Turn on exhaust fans and ventilation systems in the affected area to remove airborne contaminants.
- Use Portable Ventilation: If available, deploy portable ventilation units or air scrubbers to actively draw contaminated air away from personnel.
- Air Quality Monitoring (If Available): If equipped with air quality monitoring devices, use them to assess the levels of hazardous vapors in the area. This provides data to inform further ventilation measures.
Important Considerations:
- Confined Spaces: Ventilation is especially critical in confined spaces where vapors can accumulate rapidly.
- Wind Direction: Be mindful of wind direction to ensure ventilation is effective and doesn't simply spread the vapors elsewhere.
- Respiratory Protection: Even with increased ventilation, respiratory protection (like a respirator) might still be necessary, particularly for prolonged exposure or high concentrations of hazardous vapors. Refer to the Safety Data Sheet (SDS) for the spilled material to determine appropriate respiratory protection.
Always prioritize safety-adequate ventilation is the first line of defense against airborne hazards.
Step 9: Protecting Water Sources - Preventing Environmental Impact
Protecting our water sources is paramount during any spill response. Contamination can have devastating consequences for ecosystems and communities. Here's how to prioritize that protection during the immediate response:
- Immediate Drain Covering: The absolute first action is to cover any storm drains, floor drains, or other pathways that could lead the spilled material into waterways. Use absorbent socks, booms, or any readily available material to create a physical barrier.
- Containment Near Waterways: If the spill occurs near a river, lake, or stream, implement containment measures to prevent the spill from reaching the water. Use booms and other containment devices to create a perimeter.
- Alert Local Authorities: Notify the appropriate local authorities (e.g., environmental protection agencies, fire department) if the spill has the potential to impact water sources. Prompt reporting allows for coordinated response efforts.
- Observation & Monitoring: Designate personnel to observe and monitor the area around water sources, looking for any signs of contamination. Document any observations with photos and notes.
- Prevent Runoff: Implement measures to prevent runoff from carrying spilled material into drains or waterways. This may involve creating diversion channels or applying absorbent materials to surrounding areas.
- Documentation is Key: Thoroughly document all actions taken to protect water sources, including the location of barriers, the materials used, and the names of personnel involved. This documentation is critical for regulatory compliance and potential investigation.
Step 10: Waste Handling - Proper Disposal of Contaminated Materials
Once you're finished absorbing the spill, you're left with contaminated materials: absorbent pads, booms, rags, and potentially even protective gear. Improper disposal of these materials can create new hazards, violate environmental regulations, and spread contamination. Here's how to handle it correctly:
Segregation is Key: Don't mix contaminated materials with regular waste. Keep them separate to prevent cross-contamination.
Proper Labeling: Clearly label all containers holding contaminated materials. Use labels that explicitly state:
- The type of spilled substance (e.g., "Used Absorbent - Oil Spill")
- Hazard warnings (e.g., "Hazardous Waste," "Do Not Ingest")
- Date of accumulation
Container Requirements: Utilize appropriate containers that are:
- Compatible with the spilled substance (refer to the SDS for guidance)
- Leak-proof and securely sealed
- Sturdy enough to prevent damage during handling and transport
Hazardous Waste Determination: It's crucial to determine if the contaminated materials are classified as hazardous waste. This often depends on the spilled substance's properties and local regulations. Contact your environmental health and safety department or a qualified waste management professional for assistance.
Waste Manifesting and Transportation: If classified as hazardous waste, proper manifesting and transportation are required. Follow all applicable regulations for recordkeeping, shipping papers, and licensed waste haulers.
Non-Hazardous Waste Disposal: Even if classified as non-hazardous, dispose of contaminated materials according to your organization's standard waste disposal procedures, ensuring proper landfill acceptance.
Documentation: Meticulously document the disposal process, including dates, quantities, and disposal methods. This record-keeping is vital for regulatory compliance and potential audits.
Step 11: Post-Cleanup Review - Lessons Learned and Improvements
Once the immediate cleanup is complete and the affected area is restored, the crucial work of preventing future incidents begins. A thorough post-cleanup review isn't just about ticking a box; it's about genuine learning and proactive improvement. This review should involve all personnel involved in the spill response, from the initial responders to the incident investigators.
Here's what a robust post-cleanup review should cover:
- Root Cause Analysis: Don't just ask what happened? Ask why did it happen? Dig deep to uncover the underlying causes. Was it equipment failure, human error, inadequate training, or a combination? The "Five Whys" technique (repeatedly asking why? to drill down to the root) can be very helpful.
- Process Evaluation: Analyze the effectiveness of the spill response. Did the team follow procedures correctly? Were there any bottlenecks or delays? Were resources readily available? Identify areas where the response could have been faster or more efficient.
- Equipment and Training Assessment: Evaluate the condition of equipment used in the response. Was it adequate for the task? Did personnel receive adequate training on equipment operation and spill response procedures? Consider refresher training or specialized equipment for future incidents.
- Procedural Adjustments: Based on the review findings, update the spill response plan and related procedures. This might involve clarifying instructions, revising training materials, or incorporating new equipment or techniques.
- Documentation of Changes: Meticulously document all changes made to the spill response plan and training materials. Ensure that all personnel are informed of these updates and understand their revised responsibilities.
- Feedback Loop: Create a system for ongoing feedback and continuous improvement. Regularly review the effectiveness of the updated procedures and solicit input from personnel involved in spill response.
Remember, every spill is a learning opportunity. By embracing a culture of continuous improvement, you can significantly reduce the risk of future incidents and create a safer workplace.
Resources & Links
- U.S. Environmental Protection Agency (EPA) : The EPA provides comprehensive information on spill prevention, control, and countermeasures (SPCC) plans, reporting requirements, and regulations for various spills. Excellent resource for understanding legal obligations and best practices.
- Occupational Safety and Health Administration (OSHA) : OSHA provides guidance on workplace safety, including spill response protocols and the use of personal protective equipment (PPE). Crucial for ensuring the safety of personnel during cleanup efforts.
- Centers for Disease Control and Prevention (CDC) : The CDC offers valuable information on the health hazards associated with different chemicals and provides guidance on safe handling and exposure limits. Helpful for understanding the risks involved in various spill scenarios.
- National Institute of Standards and Technology (NIST) : NIST offers research and standards related to chemical safety and spill containment technologies. While not a direct 'checklist' source, their research informs best practices in spill response.
- Chemical Safety Supply : Provides information and resources on chemical handling, spill response kits, and PPE selection. They offer useful guides and training materials.
- Rahman Chemical Co. : Rahman Chemical Co. offers resources and expertise related to industrial chemical handling and spill control, including SDS information and training materials.
- International Safety Institute (ISI) : ISI provides a variety of safety training courses, including those focused on hazardous materials response and spill control. Useful for employee training and competency development.
- Grainger Industrial Supply : A major supplier of spill response kits, PPE, and cleanup supplies. Useful for finding the necessary equipment to execute your spill response checklist effectively.
- Meyer and Sons Chemical : Meyer and Sons provides technical information and expertise for chemical spill response and cleanup. They may offer specialized services and product recommendations.
- American National Standards Institute (ANSI) : ANSI develops standards and guidelines related to safety and chemical handling. Provides technical information and best practices to build a robust spill response program.
Frequently Asked Questions
What is the purpose of this spill response checklist?
This checklist provides a quick guide to immediate actions you should take when a spill occurs, minimizing potential harm and facilitating a swift and effective response. It's designed for quick reference and doesn't cover all possible scenarios.
What types of spills does this checklist apply to?
This checklist is suitable for a wide range of spills, including liquids, solids, and gases. However, it's most effective for relatively minor, contained spills. Large or hazardous spills require specialized response procedures and should be handled by trained professionals.
What's the first priority when a spill happens?
Safety is always the top priority. Ensure your safety and the safety of others by assessing the situation and evacuating if necessary. Do not attempt to clean up a spill if it poses an immediate threat to your health or well-being.
What does 'containing' a spill mean?
Containing a spill means preventing it from spreading further. This might involve using absorbent materials, building barriers, or covering drains to limit its reach.
What should I do if I'm unsure about the substance that spilled?
Treat the spilled substance as potentially hazardous. Do not attempt to identify or clean it up without proper training and protective equipment. Report the spill to the appropriate personnel (supervisor, safety officer) immediately.
What kind of PPE (Personal Protective Equipment) should I wear?
The required PPE depends on the spilled substance. Common items include gloves, eye protection (goggles or face shield), and respirators. Consult the SDS (Safety Data Sheet) for the specific substance for guidance.
Where can I find the SDS (Safety Data Sheet) for a chemical?
Safety Data Sheets are typically available from the chemical supplier, your employer's safety department, or online databases. The SDS provides crucial information about the chemical's hazards and safe handling procedures.
What should I do after cleaning up the spill?
Properly dispose of contaminated materials according to local regulations and company procedures. Thoroughly clean the affected area and document the spill incident. Report the incident to the relevant authorities if required.
Who should I contact if I need help with a spill?
Contact your supervisor, safety officer, or emergency services (911) depending on the severity and nature of the spill. Always prioritize safety and seek assistance when needed.
Found this Article helpful?
Retail Management Solution Demo
Boost retail efficiency! ChecklistGuro simplifies store operations, inventory management, and employee training. Improve customer experience and maximize profitability. Manage it all with our Work OS.
Related Articles
Seasonal Mulch & Gravel Checklist Template: Stay Stocked & Ready
Elevator & Escalator Inspection Checklist Template: Your Guide to Safety & Compliance
Daily Prescription Dispening Area Inspection Checklist Template

Weekly Waste Management & Recycling Checklist Template
Keep Your Storefront Sparkling: Your Daily & Weekly Cleaning Checklist Template
Your Ultimate Landscaping & Groundskeeping Checklist: Weekly & Monthly Templates
Monthly Stockroom Organization & Safety Checklist Template

Daily Dairy Case Inspection Checklist Template
We can do it Together
Need help with
Retail?
Have a question? We're here to help. Please submit your inquiry, and we'll respond promptly.