Mastering Food Safety: Your Temperature Control Checklist Template
Published: 09/02/2025 Updated: 12/13/2025

Table of Contents
- Introduction: Why Temperature Control Matters
- Receiving & Storage: The First Line of Defense
- Cold Holding Temperatures: Maintaining Refrigeration Safety
- Hot Holding Temperatures: Keeping Food at Safe Heat
- Cooling Procedures: Rapid and Safe Cooling Techniques
- Thawing Procedures: Safe Methods for Defrosting Food
- Equipment Calibration & Maintenance: Ensuring Accuracy
- Record Keeping & Documentation: Your Safety Net
- Resources & Links
TLDR: This checklist template helps you stay on top of food safety by ensuring proper temperatures during receiving, storage, hot/cold holding, cooling, thawing, and equipment maintenance. It's a simple way to prevent foodborne illnesses and keep your customers safe - just fill it in regularly and train your staff!
Introduction: Why Temperature Control Matters
Foodborne illnesses impact countless people each year, and often, the root cause is preventable. While hygiene and ingredient quality are crucial, maintaining proper food temperatures throughout the preparation process is a critical first line of defense. Think of it this way: bacteria thrive in warm environments. Allowing food to linger in the "danger zone" - between 40°F (4°C) and 140°F (60°C) - provides the perfect breeding ground for harmful pathogens. This isn't just about avoiding a bad review; it's about protecting your customers' health and safeguarding your business's reputation. This article provides a detailed checklist to help you master temperature control and minimize risk.
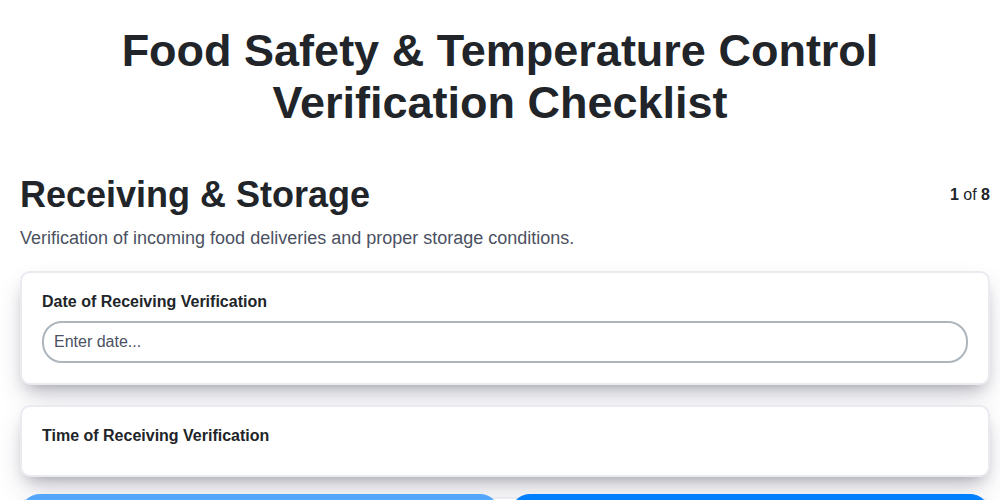
Receiving & Storage: The First Line of Defense
The journey of safe food begins the moment it arrives at your establishment. Receiving and proper storage are the first critical steps in preventing contamination and maintaining food safety. Think of this as your first line of defense - a weak link here can compromise everything that follows.
Upon Arrival: The Immediate Check
Don't just unload and store! Each delivery, from produce to proteins, deserves immediate scrutiny. Use a calibrated thermometer to verify temperatures immediately upon arrival.
- Cold Foods: Should be 41°F (5°C) or below. If temperatures exceed this threshold, reject the delivery. Don't hesitate - your customers' health depends on it.
- Hot Foods: Should be 135°F (57°C) or above. Any hot food below this temperature is a red flag.
Beyond Temperature: Visual Inspection
Temperature isn't everything. Conduct a visual inspection of all received items, looking for:
- Signs of Damage: Bruising, crushing, or tearing in packaging.
- Pest Infestation: Evidence of insects or rodents.
- Unpleasant Odors: Indicate spoilage.
- Damaged or Compromised Packaging: Can increase the risk of contamination.
Storage Best Practices
- Rapid Transfer: Immediately move received food to designated storage areas - refrigerators, freezers, or dry storage. Don't let it linger.
- FIFO (First In, First Out): Rotate stock systematically. Older items should be placed at the front, ensuring they're used before newer deliveries. This minimizes spoilage and waste.
- Proper Labeling & Dating: Clearly label all food items with the receiving date and, ideally, a "use by" or "expiration" date. This simple step avoids confusion and encourages proper rotation.
- Dry Storage: Keep dry storage areas clean, cool, and well-ventilated. Store food off the floor to prevent pest access.
- Dedicated Storage: Designate separate storage areas for different food types (raw meats, produce, ready-to-eat foods) to prevent cross-contamination.
Cold Holding Temperatures: Maintaining Refrigeration Safety
Maintaining consistently low temperatures in your refrigerators and freezers isn't just about keeping food cold-it's about preserving its safety and extending its shelf life. Temperature fluctuations can create ideal conditions for bacterial growth, even if the overall temperature seems acceptable. Here's a breakdown of best practices to ensure your cold holding temperatures remain reliably low.
Regular Monitoring is Key: Don't just set it and forget it! Check refrigerator and freezer temperatures at least every two to four hours. More frequent checks are recommended for equipment known to be less reliable or during warmer weather. Use a calibrated thermometer - more on calibration later - and document these readings meticulously on a temperature log.
Placement Matters: Proper placement of food within the refrigerator is vital for airflow. Avoid overcrowding shelves; this restricts air circulation and creates "hot spots." Store frequently accessed items towards the front, and less frequently used items in the back. Always ensure vents are not blocked by food containers.
Door Discipline: Minimize door openings. Each time the door is opened, cold air escapes, and warm air enters, increasing the internal temperature. Train staff to be efficient when retrieving items.
Equipment Checks - Beyond the Temperature Display: Observe your refrigeration units closely. Listen for unusual noises (like excessive humming, clicking, or rattling) which could indicate mechanical problems. Look for signs of ice buildup, which reduces efficiency. Ensure door gaskets are clean and sealing properly - a simple check is to place a dollar bill halfway between the door and the frame; if you can easily pull it out, the gasket may need replacing.
Troubleshooting Temperature Spikes: If you notice a sudden temperature increase, investigate immediately. Possible causes include:
- Equipment Malfunction: A refrigerant leak or compressor failure.
- Door Seal Failure: A compromised door gasket.
- Overloading: Too much food in the unit at once.
- Warm Room Temperature: External heat impacting the unit.
Remember: Consistent cold holding temperatures are your first line of defense against foodborne illness. Regular monitoring, preventative maintenance, and proper food storage practices are critical to success.
Hot Holding Temperatures: Keeping Food at Safe Heat
Maintaining proper hot holding temperatures is crucial for preventing bacterial growth and ensuring food safety. It's not enough to simply put food in a warmer; consistent monitoring and adherence to guidelines are essential.
Here's what you need to know:
- Target Temperature: Hot foods must be held at a minimum internal temperature of 135°F (57°C). This isn't just a suggestion; it's a critical safety threshold.
- Regular Monitoring - Every Two Hours: Check the temperature of hot-held foods at least every two hours using a calibrated thermometer. Document these checks meticulously. A temperature log should record the time and temperature for each check.
- Stirring is Your Friend: Stir hot foods frequently - ideally every hour - to ensure even heat distribution throughout the product. This prevents cold spots where bacteria could thrive.
- Equipment Matters: Verify that your hot holding equipment (warming cabinets, steam tables, etc.) is functioning correctly. Regular maintenance and inspections are vital. Report any malfunctions immediately.
- Avoid Overcrowding: Don't overload hot holding units. Proper airflow is necessary for consistent temperature maintenance.
- Recovery Time: Be mindful of recovery time after adding fresh food. The temperature will drop, and it will take time to return to the target range. Account for this in your monitoring schedule.
- Corrective Actions: If the temperature falls below 135°F (57°C), take immediate corrective action. This might include adjusting the warmer's settings, removing excess food, or discarding the product if it's been out of range for an extended period. Document the corrective action taken.
Cooling Procedures: Rapid and Safe Cooling Techniques
Getting food to a safe temperature quickly after cooking is paramount to preventing bacterial growth. The two-stage cooling method is the gold standard, ensuring efficient temperature reduction while maintaining safety. Here's a breakdown of why it matters and how to execute it effectively:
The Two-Stage Cooling Timeline - Why the Rush?
The two-stage cooling process isn't arbitrary; it's designed to limit the time food spends in the temperature danger zone (41°F - 135°F / 5°C - 57°C). This timeframe is when bacteria thrive.
- Stage 1: From 135°F (57°C) to 70°F (21°C) - Within 2 Hours This initial rapid cooling phase is crucial for quickly removing heat and slowing bacterial growth.
- Stage 2: From 70°F (21°C) to 41°F (5°C) or Below - Within the Next 4 Hours This phase ensures the food enters safe refrigeration temperatures and remains there.
Practical Cooling Methods - Choose What Works Best:
- Ice Baths: Submerge food containers in ice water, ensuring the water level is above the food. Replace the ice as it melts. This is highly effective for soups, sauces, and stews.
- Shallow Containers: Dividing food into shallow containers (no more than 2-3 inches deep) drastically increases surface area, accelerating heat loss.
- Ice Paddles: Stirring food with ice paddles provides direct contact with cold temperatures, especially useful for larger portions of liquids or sauces.
- Blast Chillers: These specialized machines rapidly cool food using high-velocity air. They're a significant investment but offer the most efficient cooling for larger volumes and ensure consistent results.
- Ventilation: Covering food loosely allows for airflow, which aids in cooling, but avoid sealing containers tightly until completely chilled.
Important Considerations:
- Container Material: Metal containers generally cool faster than plastic.
- Food Density: Denser foods take longer to cool; consider portion sizes accordingly.
- Record Keeping: Document the start and end times of the cooling process for each batch of food to ensure compliance and identify any potential issues.
Thawing Procedures: Safe Methods for Defrosting Food
Thawing food safely is just as critical as proper cooking and cooling. Leaving food to thaw on the counter or in warm water creates a breeding ground for bacteria, putting your customers at risk. Here's a breakdown of the approved and safest thawing methods:
1. Refrigerator Thawing: The Gold Standard
This is the most recommended method because it keeps the food at a consistently safe temperature, inhibiting bacterial growth. Plan ahead, though, as it takes time!
- How it Works: Place frozen food in its original packaging or a leak-proof container on the bottom shelf of your refrigerator.
- Timeframe: The thawing time varies based on the size and type of food. Smaller items, like ground meat, may thaw in 12-24 hours. Larger items, such as turkeys, can take several days.
- Important: Food thawed in the refrigerator can remain safely refrigerated for 1-2 days before cooking.
2. Cold Running Water Thawing: A Faster Alternative
This method is suitable when you need food thawed more quickly, but requires careful monitoring.
- How it Works: Place the frozen food in a leak-proof bag and submerge it in cold, running water (70°F/21°C or colder). Change the water every 30 minutes to ensure it remains cold.
- Timeframe: Smaller items typically thaw within 1-2 hours.
- Crucial: Food thawed this way must be cooked immediately after thawing.
3. Microwave Thawing: Use with Caution
Microwave thawing should only be used when the food will be cooked immediately afterward. The uneven thawing can result in some parts of the food being cooked while others remain frozen.
- How it Works: Follow your microwave's instructions for defrosting.
- Mandatory: Cook the food immediately after thawing in the microwave.
4. As Part of the Cooking Process: For Certain Items
Small items like individual frozen shrimp or steak fillets can be thawed directly in the cooking process. This works well for recipes that require shorter cooking times.
What NOT to Do: Unsafe Thawing Practices
- Counter Thawing: Leaving food at room temperature is dangerous and should never be done.
- Warm Water Thawing: Similar to counter thawing, warm water creates an environment conducive to bacterial growth.
Equipment Calibration & Maintenance: Ensuring Accuracy
Accurate temperature readings are only as good as the equipment providing them. That's why regular calibration and maintenance of your thermometers, refrigerators, freezers, and hot holding units are absolutely critical. Think of it this way: a faulty thermometer can mislead you into believing food is safe when it's actually in the danger zone.
Thermometer Calibration: Your First Line of Defense
Thermometers drift over time. They can become inaccurate due to wear and tear, exposure to extreme temperatures, or even minor impacts. Here's a simple guide:
- Frequency: Aim to calibrate your thermometers at least weekly. If you use them frequently or they're critical to your process (like verifying cook temperatures), consider calibrating even more often.
- Methods:
- Ice Bath Method: This is a common and reliable method. Fill a container with crushed ice and water (the water should barely cover the ice). Ensure the water is at 0°C (32°F). Immerse the thermometer's sensing area in the ice water and adjust the calibration nut (if applicable) until the thermometer reads 0°C (32°F).
- Calibration Solution: You can purchase calibrated solutions with known temperatures. Immerse the thermometer's sensing area and adjust accordingly.
- Documentation: Keep a record of your calibration dates and any adjustments made.
Beyond Thermometers: Maintaining Your Equipment
- Refrigeration & Freezers: Regularly check door seals for leaks. Clean condenser coils (usually located in the back or bottom) to ensure efficient cooling. Monitor temperature fluctuations and address any issues promptly.
- Hot Holding Units: Ensure heating elements are functioning correctly and that temperature is consistent throughout the unit. Clean regularly to prevent buildup and maintain airflow.
- Preventative Maintenance: Follow manufacturer's recommendations for cleaning and servicing all temperature-controlled equipment. Don't wait for a breakdown - schedule regular preventative maintenance checks.
A well-maintained and accurately calibrated system isn't just about compliance; it's about safeguarding your business and the health of your customers.
Record Keeping & Documentation: Your Safety Net
Maintaining thorough and accurate records isn't just about ticking boxes; it's your primary defense against potential food safety issues. Detailed documentation provides a clear picture of your operations, allowing you to identify trends, troubleshoot problems, and demonstrate due diligence in the event of an audit or investigation.
Here's what you need to be documenting:
- Temperature Logs: These are the backbone of your record-keeping. Log temperatures for receiving, cold holding, hot holding, and cooling processes at the required intervals (as outlined in your local regulations). Include the date, time, food item, temperature reading, and initials of the person taking the reading.
- Cooling Records: Specifically document the start and end times of cooling stages, along with the corresponding temperatures. This confirms you've met the critical cooling timelines.
- Corrective Action Logs: If a temperature falls outside the safe range, immediately take corrective action. Record what was done (e.g., discarded the food, adjusted equipment, re-cooled the item), the date and time, and the person responsible.
- Equipment Calibration & Maintenance Records: Document when thermometers were calibrated (using an ice bath or calibration solution) and when equipment was serviced. Keep records of repairs and maintenance performed by qualified technicians.
- Employee Training Records: Maintain records verifying that all food handlers have received adequate training on proper food safety procedures, including temperature control. Include dates of training and topics covered.
Pro-Tip: Consider using pre-printed log sheets or digital temperature monitoring systems to simplify the record-keeping process and reduce the risk of errors. Consistency is key - ensure everyone on your team understands the importance of accurate and complete documentation.
Resources & Links
- FoodSafety.gov : The official website of the U.S. government's food safety initiative. Provides comprehensive information on food safety guidelines, recalls, and resources for consumers and industry professionals. Excellent for foundational understanding and current regulations.
- U.S. Food and Drug Administration (FDA) : The FDA regulates food safety and labeling in the United States. This site offers detailed information on food safety regulations, compliance guidelines, and specific food safety concerns. Useful for understanding legal requirements.
- Centers for Disease Control and Prevention (CDC) - Food Safety : The CDC provides information about foodborne illnesses, outbreaks, and prevention strategies. Includes data on common pathogens and resources for safe food handling.
- USDA Food Safety and Inspection Service (FSIS) : Focuses specifically on meat, poultry, and egg products. Provides guidelines, regulations, and educational resources related to the safe handling of these products.
- State Food Safety : Offers food handler certifications and online training courses. A good resource for employees needing to learn the basics or needing to obtain certifications, covering a wide range of topics including temperature control.
- National Food Safety and Inspection Network (NFSIN) : A collaborative platform that allows stakeholders to share information and contribute to food safety research. Useful for finding the latest trends and updates in food safety practices.
- Purdue University Food Safety Extension : Provides research-based information and resources on food safety practices. Their website features articles, fact sheets, and webinars covering various topics.
- Ecolab - Food Retail : Ecolab provides sanitation and hygiene solutions for the food industry. Their website offers insights into best practices for food safety and temperature control, often with a focus on operational aspects.
- ThermoWorks : A reputable supplier of professional-grade thermometers and temperature measurement tools for the food industry. Their site provides information on choosing the right tools and understanding temperature accuracy.
- National Restaurant Association : Provides resources and training for restaurant professionals, including food safety guidelines and best practices.
- ServSafe : ServSafe is a leading provider of food safety training and certification. Offers comprehensive courses covering a range of food safety topics, including temperature control. Great for formal training programs.
Frequently Asked Questions
What is the purpose of this temperature control checklist template?
This template is designed to help you consistently monitor and record food temperatures, ensuring food safety and minimizing the risk of foodborne illnesses. It provides a structured approach for tracking temperatures across various points in food preparation and storage.
Who should use this checklist?
This checklist is useful for anyone involved in food handling, including restaurant staff, caterers, food truck operators, grocery stores, and even individuals preparing food for large events. It's especially helpful for those who need to demonstrate adherence to food safety regulations.
What types of temperatures should I be tracking with this checklist?
The checklist covers crucial temperatures like receiving temperatures, cooking temperatures (for different meat types), holding temperatures (hot and cold), and cooling temperatures. You should also track temperatures of refrigerators, freezers, and dishwashing equipment.
How often should I update the checklist?
Frequency depends on local regulations and the nature of your food operations. Generally, temperatures should be checked at least every hour for holding and cooking, and upon receiving food shipments. Daily checks of refrigerator and freezer temperatures are essential.
Can I customize the checklist template?
Absolutely! The template is designed to be flexible. You can add or remove rows, adjust temperature ranges, add specific food items, and customize notes sections to suit your unique food handling processes and local requirements.
What do I do if a temperature falls outside the acceptable range?
Immediately investigate the cause of the temperature deviation. For high temperatures, take corrective actions like adjusting cooking times or equipment. For low temperatures, check equipment functionality and consider discarding the affected food if safety is compromised. Document all actions taken in the 'Notes' section.
Where can I find information about safe food temperature ranges?
Refer to your local food safety regulations and guidelines. Resources like the FDA Food Safety Modernization Act (FSMA) and USDA Food Safety and Inspection Service (FSIS) websites provide detailed information on safe food temperature ranges for various food items.
How can I best store and organize my completed checklists?
Keep completed checklists organized and readily accessible for inspections. Digital storage is ideal for easy retrieval and sharing, but physical copies in a designated file are also acceptable. Retain records for the duration required by local regulations.
Found this Article helpful?
Hospitality Management Solution Demo
Running a hotel, restaurant, or other hospitality business is demanding. ChecklistGuro's Work OS platform simplifies management, from reservations and guest services to inventory and staff scheduling. Improve efficiency, enhance guest experience, and boost profitability! See how ChecklistGuro can transform your hospitality operations.
Related Articles
Your Ultimate Security Camera Monitoring Log Checklist Template
Payroll Processing Verification Checklist Template: Your Guide to Accuracy
Complaint Handling Checklist Template: Resolve Issues & Retain Customers

Emergency Evacuation Drill Documentation: Your Checklist Template Guide

Mastering Incident Response: Your Free Reporting Protocol Checklist Template

Conquer Your Kitchen: A Monthly Deep Cleaning Checklist Template
Mastering Food Safety: Your Free Temperature Control Checklist Template
Mastering Hand Hygiene: Your Compliance Checklist Template
We can do it Together
Need help with
Hospitality?
Have a question? We're here to help. Please submit your inquiry, and we'll respond promptly.