Accessibility Compliance Inspection Checklist Template
Published: 09/01/2025 Updated: 12/13/2025
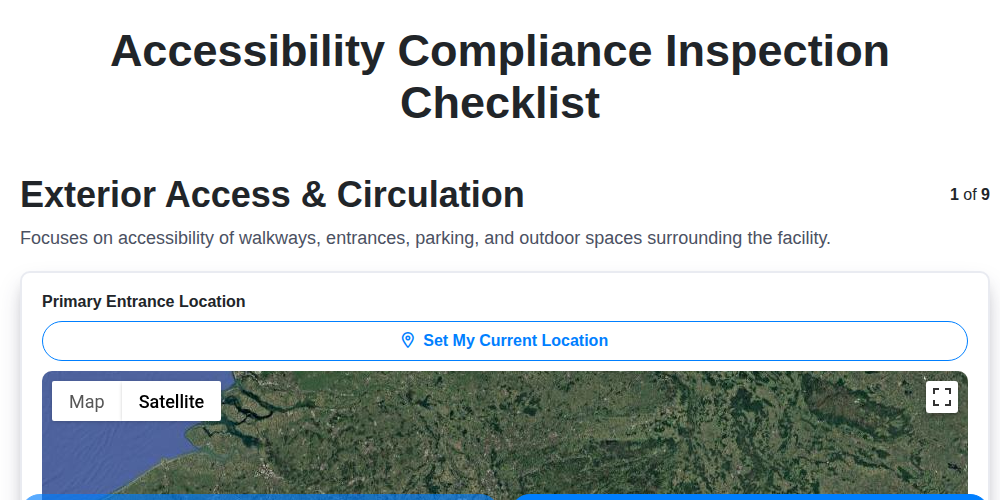
Table of Contents
- Introduction: Why Accessibility Compliance Matters
- Understanding Accessibility Standards (ADA & Beyond)
- Exterior Access & Circulation Assessment
- Entrance and Doorway Inspection Checklist
- Ramp and Elevator Accessibility Evaluation
- Interior Wayfinding & Circulation Assessment
- Restroom Accessibility: A Detailed Inspection
- Emergency Egress & Safety Compliance
- Common Areas & Amenities Accessibility Checklist
- Mechanical & Service Areas: Limited Access Considerations
- Resources & Links
TLDR: Need to ensure your building meets accessibility standards? This checklist template guides you through a comprehensive inspection - from entrances and ramps to restrooms and emergency exits - helping you identify potential issues and take action to create a more inclusive and accessible space. Download it and start your compliance journey!
Introduction: Why Accessibility Compliance Matters
Accessibility compliance isn't just about ticking boxes or avoiding legal trouble-it's about creating truly inclusive spaces that welcome everyone. While adherence to the Americans with Disabilities Act (ADA) and similar regulations is legally essential, the benefits extend far beyond mere compliance. Thoughtful accessibility design improves the user experience for all individuals, regardless of their abilities. It fosters a sense of belonging, promotes equity, and reflects a commitment to social responsibility. Beyond the ethical and legal reasons, accessible environments often enhance usability for families with young children, seniors, and anyone carrying items, proving that good design is inherently inclusive design. Ultimately, prioritizing accessibility is an investment in a more equitable and welcoming community.
Understanding Accessibility Standards (ADA & Beyond)
The Americans with Disabilities Act (ADA) serves as the cornerstone of accessibility standards in the United States, but it's not the whole picture. Understanding the nuances of these regulations, and recognizing how they're evolving, is crucial for true inclusivity.
The ADA Standards for Accessible Design outline requirements for newly constructed and altered buildings, as well as for existing facilities. These standards cover a wide range of elements, from parking spaces and ramps to restrooms and signage. However, compliance with the ADA is often a baseline; many organizations are choosing to exceed these minimum requirements.
Beyond the ADA, several other influential guidelines shape accessibility practices:
- ANSI A117.1: This is a consensus standard often referenced in ADA regulations and provides more detailed specifications for many design elements. It's frequently used in voluntary accessibility projects.
- WCAG (Web Content Accessibility Guidelines): Primarily focused on web accessibility, WCAG provides a framework for making online content accessible to people with disabilities. While not directly related to physical building accessibility, the principles of user-centered design and inclusivity resonate across both realms.
- State and Local Regulations: Many states and municipalities have their own accessibility codes and ordinances, which may be stricter than the ADA. Always research and comply with local requirements.
- Universal Design Principles: This broader philosophy encourages designing for the widest range of users possible, regardless of ability. It moves beyond mere compliance to creating genuinely usable and enjoyable spaces for everyone.
Staying informed about the latest updates and interpretations of these standards is an ongoing process. Consulting with accessibility professionals ensures your efforts are aligned with current best practices and evolving expectations.
Exterior Access & Circulation Assessment
The first impression matters, and that includes accessibility. Exterior access and circulation are crucial for ensuring individuals can safely and easily navigate your property. A thorough assessment here reveals potential barriers long before anyone even steps inside.
Begin by evaluating parking areas. Are there the required number of accessible parking spaces, clearly marked with appropriate signage? Verify the width of access aisles adjacent to the spaces - these are vital for wheelchair transfers.
Next, examine walkways and pathways. They need to be consistently wide enough for two wheelchairs to pass comfortably, with a firm, even surface free of cracks, loose gravel, or raised edges. Pay close attention to curb ramps - are they present at intersections and do they meet the required slope and dimensions?
Consider the landscaping. While aesthetics are important, ensure plants and landscaping elements don't obstruct walkways or create tripping hazards. Regularly trimming bushes and removing debris are essential for ongoing accessibility. Finally, assess the overall route from parking areas to the building entrance - is it clear, direct, and free from unnecessary obstacles?
Entrance and Doorway Inspection Checklist
A welcoming and accessible entrance is the first impression for visitors. This checklist focuses on common areas of concern to ensure your entrances meet accessibility standards.
1. Approach & Landings:
- Level Landings: Ensure a level landing exists both outside and inside the entrance. The landing should be at least 48 inches wide by 36 inches deep.
- Clearance: Verify sufficient clear floor space (at least 30 inches wide by 48 inches deep) is present beyond the landing.
- Curb Ramps: If a change in level exists, check for compliant curb ramps with appropriate slope, width, and detectable warnings.
- Obstructions: Confirm no vegetation, furniture, or other objects obstruct the approach to the entrance.
2. Door Dimensions & Hardware:
- Clear Opening Width: Measure the clear opening width when the door is open to 90 degrees. It should be at least 32 inches.
- Door Hardware Operation: Evaluate ease of operation. Lever handles are required; round doorknobs are not compliant.
- Door Hardware Height: Hardware should be mounted at a height between 30 and 48 inches from the floor.
- Threshold Height: The threshold should be beveled and no more than 1/2 inch high. A gap of at least 3/4 inch is recommended.
- Door Maneuvering Space: Adequate maneuvering space (60 inches x 36 inches) is needed in front of the door.
3. Automatic Door Operators (if applicable):
- Activation: Verify the door opens and closes smoothly.
- Controls: Check the location and accessibility of activation buttons or sensors.
- Timing: Assess the opening and closing speeds - they should be adjustable to accommodate users with limited mobility.
- Safety Features: Ensure the door has safety features (e.g., reversing sensors) to prevent injury.
4. Door Weight:
- Maximum Weight: The door should not exceed 20 pounds. Lighter doors are preferable.
Documentation: Record all measurements and observations. Photographs are highly recommended for future reference and remediation planning.
Ramp and Elevator Accessibility Evaluation
Ramps and elevators are crucial for vertical accessibility, but their effectiveness relies on strict adherence to ADA guidelines and thoughtful design. This evaluation goes beyond simply checking for the presence of these features; it's about ensuring they function safely and comfortably for all users.
Ramp Inspection Checklist:
- Slope: The most critical factor. Ramps should have a slope no steeper than 1: 12 (for every 1 inch of rise, there should be 12 inches of run).
- Width: Minimum clear width of 36 inches.
- Handrails: Required on ramps with a rise greater than 6 inches or a horizontal projection greater than 72 inches. Handrails should be between 34 and 38 inches high.
- Landings: Level areas should be provided at the top and bottom of ramps, and at intervals not exceeding 30 feet. Landings must be at least 5 feet by 5 feet.
- Surface: The ramp surface should be stable, firm, and slip-resistant.
- Edge Protection: Ramps should have edge protection, such as a curb or railing, to prevent wheelchairs from rolling off.
Elevator Inspection Checklist:
- Dimensions: Minimum interior dimensions of 68 inches wide and 51 inches deep.
- Controls: Accessible buttons with tactile and Braille markings. Buttons should be no higher than 48 inches above the landing.
- Door Opening: Doors should have a clear opening width of at least 32 inches.
- Audible/Visual Signals: Provide both audible and visual signals to indicate elevator movement.
- Emergency Communication: A working emergency communication system, including a phone or two-way communication device.
- Leveling: Elevators should level with the landing surface within ¼ inch.
- Door Timing: Door closing speed should be slow enough to allow passengers time to enter and exit safely.
Interior Wayfinding & Circulation Assessment
Effective interior wayfinding isn't just about getting from point A to point B; it's about creating a stress-free and intuitive experience for everyone, regardless of their abilities. A poorly designed interior can be disorienting and frustrating, particularly for individuals with visual impairments or cognitive disabilities. Here's a breakdown of key areas to assess:
Signage is Paramount:
- Clarity & Legibility: Signage should utilize clear, concise language, high contrast colors, and appropriate font sizes. Avoid jargon or overly complex wording. Consider using universally recognized symbols.
- Tactile & Braille Signage: Mandatory in many situations, tactile and Braille signage provides essential information for individuals with visual impairments. Ensure they're accurately placed and easily detectable.
- Consistency: Maintain consistent signage styles and placement throughout the building.
- Strategic Placement: Signage should be located at decision points - where users need guidance - and at regular intervals.
Corridor Widths & Obstructions:
- Minimum Widths: Corridors and passageways must meet minimum width requirements to allow for wheelchair maneuvering and the safe passage of multiple individuals.
- Clearance: Ensure corridors are free from obstructions such as furniture, storage containers, or protruding fixtures.
- Turning Space: Adequate turning spaces are crucial for wheelchair users to navigate corners and make turns.
Flooring Considerations:
- Surface Evenness: Uneven or cracked flooring poses tripping hazards. Repairs are essential.
- Slip Resistance: Flooring materials should provide sufficient traction, especially in areas prone to moisture.
- Color Contrasts: Subtle color variations can be difficult for some to perceive. Consider using contrasting colors to define pathways or highlight changes in level.
Lighting and Visual Cues:
- Adequate Illumination: Well-lit spaces reduce the risk of accidents and make it easier to navigate.
- Directional Lighting: Consider using directional lighting to guide users towards key areas.
- Visual Landmarks: Distinctive architectural features or artwork can serve as visual cues to aid orientation.
Beyond Compliance: Remember that accessibility isn't solely about meeting minimum code requirements. Thoughtful design that prioritizes user experience benefits everyone.
Restroom Accessibility: A Detailed Inspection
Restrooms are a critical element of accessibility, and often a source of non-compliance. A thorough inspection requires more than just checking for an accessible stall; it's about ensuring all aspects of the restroom are usable and safe.
Here's a detailed breakdown of what to look for:
1. Accessible Stall Requirements:
- Size: The accessible stall must meet minimum size requirements (typically 60 inches wide by 56 inches deep).
- Grab Bars: Properly located and secured grab bars are essential. Check for correct height (33-36 inches) and length (at least 36 inches for rear grab bars, 33 inches for side grab bars). Ensure they can support a significant amount of weight.
- Toilet Height: The toilet seat height should be between 17-19 inches.
- Water Closet Clearance: A clear space of at least 30 inches wide by 48 inches deep must be provided in front of the toilet.
- Door Clearance: The stall door must have a clear opening of at least 32 inches.
- Maneuvering Space: Sufficient maneuvering space (at least 60 inches diameter) should be available within the stall for turning.
2. Sink and Vanity Accessibility:
- Clear Knee Clearance: Provide 27 inches of clear knee clearance between the floor and the underside of the sink.
- Sink Height: The top of the sink rim should be no higher than 34 inches.
- Faucet Operation: Faucets should be lever-operated, push-button, or touch-activated for ease of use.
- Piping Clearance: Provide adequate clearance under the sink for knee and toe clearance.
3. Hygiene Fixtures:
- Hand Dryer/Towel Dispenser: Mount hand dryers and towel dispensers no higher than 48 inches from the floor. Ensure they are reachable from an accessible toilet stall.
- Soap Dispenser: Similar height requirements apply to soap dispensers.
4. Mirror Accessibility:
- The bottom edge of the mirror should be no higher than 40 inches from the floor.
5. Emergency Equipment:
- Ensure accessible signage and emergency pull cords are reachable and visible from within the accessible stall.
Beyond the Basics:
Consider the sensory aspects of accessibility. Are lighting levels adequate? Is the flooring slip-resistant? These details contribute to a truly inclusive restroom experience.
Emergency Egress & Safety Compliance
Ensuring safe evacuation during emergencies is paramount, and accessibility plays a critical role in protecting everyone. This section details key compliance points related to emergency egress and safety, focusing on provisions for individuals with disabilities.
Clear and Accessible Routes: Emergency evacuation routes must be clearly marked, free of obstructions, and wide enough to accommodate wheelchairs and other mobility devices. Regularly inspect these routes to ensure they remain unobstructed and well-maintained.
Accessible Exit Signage: Exit signs must be illuminated, legible, and placed at appropriate heights for visibility by individuals with visual impairments. Consider incorporating tactile signage and audible alarms to supplement visual cues. Emergency signage should contrast with the background color for optimal visibility.
Audible and Visual Fire Alarms: Providing both audible and visual fire alarms is essential. Individuals who are deaf or hard of hearing rely on visual alarms to be alerted to emergencies. Ensure these alarms are functioning correctly and adequately cover all areas.
Emergency Evacuation Plans: A comprehensive emergency evacuation plan must be in place, specifically addressing the needs of individuals with disabilities. This plan should include designated evacuation assistants, safe refuge areas, and procedures for communicating with emergency personnel. Regular drills, including those simulating assisting individuals with disabilities, are crucial for ensuring preparedness.
Refuge Areas: Designated refuge areas, often enclosed spaces with two-way communication systems, provide a temporary safe haven for individuals who cannot evacuate immediately. These areas must be clearly marked and easily accessible.
Two-Way Communication Systems: Refuge areas and other critical locations should be equipped with two-way communication systems to allow individuals to contact emergency responders during an evacuation. These systems must be regularly tested to ensure functionality.
Training and Awareness: Building staff should be trained on emergency procedures and how to assist individuals with disabilities during an evacuation. Post signage outlining emergency contact information and evacuation procedures.
Common Areas & Amenities Accessibility Checklist
Beyond basic building access, ensuring common areas and amenities are welcoming to all is crucial for creating a truly inclusive environment. This checklist focuses on spaces frequently used by occupants and visitors, promoting usability and enjoyment for everyone, regardless of ability.
Meeting & Conference Rooms:
- Table Height: Ensure at least 25% of tables have accessible heights (28-30 inches).
- Chair Availability: Provide a sufficient number of accessible chairs with armrests, properly arranged for maneuverability.
- Clear Floor Space: Maintain adequate clear floor space for wheelchair users to navigate and participate.
- Presentation Equipment: Position presentation screens and equipment within accessible reach ranges.
Fitness Centers & Recreation Areas:
- Accessible Equipment: Offer at least one piece of each type of exercise equipment designed for users with disabilities.
- Accessible Pathways: Ensure smooth, level pathways throughout the fitness area, free of obstructions.
- Accessible Lockers: Provide accessible lockers with appropriate maneuvering space.
- Accessible Showers: Include accessible showers with grab bars and adjustable showerheads.
Play Areas:
- Accessible Surfacing: Utilize impact-attenuating, firm, and stable surfacing that is accessible to users of wheelchairs and other mobility devices.
- Accessible Play Structures: Provide play structures with ramps or transfer systems allowing access to elevated platforms and activities.
- Clearances: Maintain adequate clearances around play structures for safe maneuvering.
Dining Areas & Break Rooms:
- Accessible Tables: Offer a selection of tables with accessible heights and knee clearances.
- Maneuvering Space: Ensure sufficient maneuvering space between tables and chairs.
- Accessible Vending Machines: Vending machines should have accessible controls and reach ranges.
Drinking Fountains:
- Dual Height Fountains: Provide fountains with both standard and lower height options.
- Elbow Clearance: Ensure adequate elbow clearance for users with limited reach.
Remember to regularly inspect and maintain these areas to ensure continued accessibility for all users.
Mechanical & Service Areas: Limited Access Considerations
These areas, like boiler rooms, electrical closets, and data centers, aren't intended for public use, but accessibility considerations remain important for the safety and efficiency of building maintenance and emergency response. While full ADA accessibility isn't always required, ensuring adequate maneuvering space for maintenance personnel, particularly those using wheelchairs or other mobility aids, is crucial. This includes providing sufficient clear floor space to navigate equipment and perform necessary repairs. Proper lighting is also paramount, reducing the risk of accidents and improving visibility for maintenance staff. Consider incorporating accessible routes to these areas for emergency responders in the event of a fire or other incident. Ultimately, prioritizing safe and efficient access for those responsible for building upkeep demonstrates a commitment to operational excellence and the well-being of your workforce.
Resources & Links
- ADA National Network : The official website of the ADA National Network, providing comprehensive information, technical assistance, and training on the Americans with Disabilities Act. A crucial resource for understanding legal requirements.
- U.S. Access Board : The federal agency responsible for developing and maintaining accessibility standards for buildings and transportation, including the ADA Standards for Accessible Design. Provides standards and guidelines.
- Web Content Accessibility Guidelines (WCAG) : While this post focuses on physical accessibility, understanding WCAG principles (especially Perceivable, Operable, Understandable, Robust) provides context for inclusive design thinking which benefits all users, including those with disabilities. Relevant for digital components of a building's access.
- U.S. Department of Housing and Urban Development (HUD) : HUD provides information and resources on accessibility requirements for federally assisted housing and other programs. Relevant for properties receiving HUD funding.
- Access Washington : A Washington State resource, but offers a lot of usable information and example checklists applicable to many jurisdictions. Includes examples of accessible routes and details.
- Seattle Faceless Access Alliance : A local organization that provides information about accessibility. Resources include guidance, training, and technical assistance.
- International Code Council (ICC) : The ICC develops the International Building Code (IBC) which includes accessibility provisions. Staying current with IBC updates is essential for compliance.
- Accessibility Inspections : This is an accessibility consulting business, their website has a blog with useful information and insights into accessibility compliance.
- Local Access : Offers training and consulting services related to accessibility. Their site contains helpful articles and resources.
- Disability Visibility : Offers numerous resources on disability rights and accessibility. Articles offer different perspectives on accessibility.
- ADA Compliance : A commercial website providing information and resources about ADA compliance. Offers a broad scope of information.
Frequently Asked Questions
What is an accessibility compliance inspection?
An accessibility compliance inspection is a systematic review of a digital product (website, application, document) to determine whether it adheres to established accessibility standards, primarily the Web Content Accessibility Guidelines (WCAG).
Why do I need an accessibility compliance inspection checklist?
A checklist provides a structured approach to ensure all relevant accessibility checkpoints are reviewed, reducing the risk of overlooking important aspects and potentially violating legal requirements. It helps maintain consistency across different reviews.
What standards does this checklist template cover?
This checklist template is primarily aligned with the Web Content Accessibility Guidelines (WCAG) 2.1 Level AA, which is a widely accepted standard for digital accessibility. It may also reference other relevant guidelines like Section 508.
Who should use this checklist?
This checklist is suitable for a wide range of users including web developers, designers, content creators, accessibility specialists, QA testers, and anyone responsible for ensuring digital accessibility.
Can I customize the checklist template?
Yes, absolutely! This template is designed to be a starting point. You can add, remove, or modify items to suit the specific needs of your organization and the digital product being assessed.
What does WCAG 2.1 Level AA mean?
WCAG 2.1 Level AA represents a balance between accessibility and usability. It is a generally accepted level of accessibility that provides a good user experience for most individuals with disabilities. Level AAA is a higher level of compliance, while Level A is the most basic.
What should I do if I find accessibility issues during the inspection?
Document the issues clearly and prioritize them based on their severity and impact. Work with the development team to remediate the issues and re-test the product to ensure they have been effectively resolved.
How often should I conduct accessibility compliance inspections?
Regular inspections are recommended. A good practice is to conduct them at least annually, and ideally more frequently (e.g., before a major release or redesign). Continuous accessibility testing should be integrated into the development lifecycle.
Does this checklist guarantee full compliance?
No, a checklist is a tool to aid in the assessment process. It's a guide to help identify potential issues, but it doesn't guarantee full compliance. A thorough accessibility audit by a qualified expert is often required for complete assurance.
Found this Article helpful?
Facility Management Solution Demo
Keep your facilities running smoothly! ChecklistGuro streamlines maintenance, inspections, and vendor management. Reduce downtime, optimize efficiency, & improve safety. Manage it all with our Work OS.
Related Articles
Industrial Floor Cleaning & Safety Checklist Template
Display Case Temperature Monitoring Checklist Template
The Ultimate Refrigeration Maintenance Checklist: Keeping Your Food Safe
Escalator & Moving Walkway Inspection Checklist Template
The Ultimate Guest Room Cleaning & Inspection Checklist Template

The Ultimate Security Camera Review Checklist Template
Forklift Inspection & Maintenance Checklist Template
Emergency Generator Load Testing Checklist Template
We can do it Together
Need help with
Facility Management?
Have a question? We're here to help. Please submit your inquiry, and we'll respond promptly.