Mastering Belt Maintenance: Your Tension & Alignment Checklist Template
Published: 08/31/2025 Updated: 12/13/2025
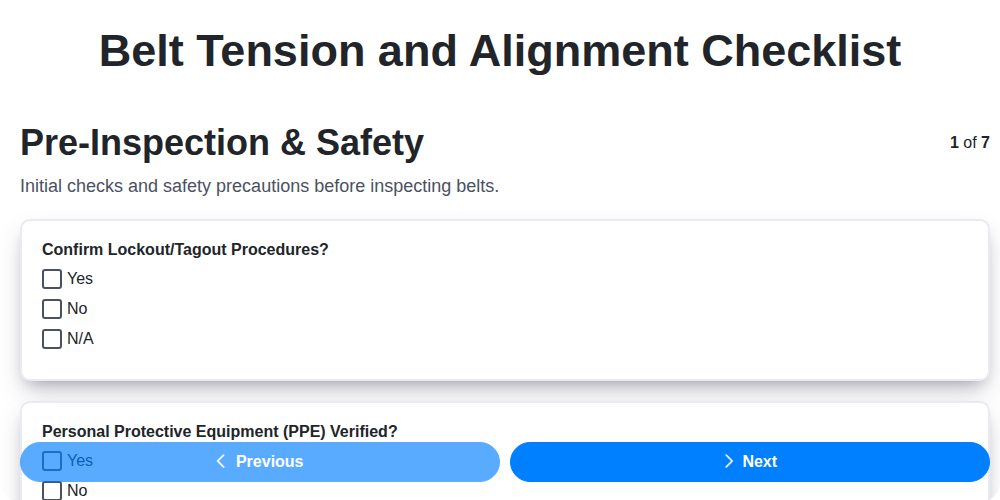
Table of Contents
- Introduction: Why Belt Maintenance Matters
- Understanding Belt Tension and Alignment
- Safety First: Your Pre-Inspection Checklist
- Visual Inspection: Spotting Potential Problems
- Measuring Belt Tension: Tools and Techniques
- Verifying Belt Alignment: Straight Edges and Lasers
- The Adjustment Process: Tension Correction
- Alignment Adjustments: Getting it Straight
- Post-Adjustment Verification: Ensuring Success
- Documentation and Record Keeping: Tracking Your Progress
- Common Belt Issues and Troubleshooting
- Creating Your Customized Checklist Template
- Resources and Further Learning
- Resources & Links
TLDR: Keep your conveyor belts running smoothly and prevent breakdowns with this free checklist template! It guides you through essential steps - from safety checks and visual inspections to tension measurement and alignment correction - ensuring optimal belt performance and extending its lifespan. Download the template and simplify your belt maintenance routine today!
Introduction: Why Belt Maintenance Matters
Belts are the silent workhorses of countless industrial processes, from manufacturing and logistics to food processing and mining. They tirelessly move materials, products, and components, often without a second thought. But what happens when these vital links in your operational chain start to falter? Neglecting belt maintenance can quickly snowball into a cascade of problems: reduced production efficiency, costly downtime, premature belt replacement, and even potential safety hazards.
A properly maintained belt operates smoothly, reliably, and efficiently, extending its lifespan and minimizing disruptions to your workflow. Conversely, a neglected belt can lead to increased energy consumption, damage to associated equipment, and a higher risk of accidents. This isn't just about keeping a single component running; it's about safeguarding your entire operation. Regular, proactive belt maintenance isn't an optional extra - it's a crucial investment in your long-term success.
Understanding Belt Tension and Alignment
Belt tension and alignment aren't just arbitrary numbers - they're critical factors that directly impact your system's efficiency, lifespan, and safety. Let's break down why each is important.
Why Belt Tension Matters
Incorrect belt tension leads to a cascade of problems. Too loose, and the belt will slip on the pulleys, wasting energy, generating heat, and rapidly wearing down the belt and pulleys. This slippage also creates a jerky, inefficient transfer of materials. Conversely, a belt that's too tight puts excessive stress on the belt, bearings, and motor, significantly reducing their lifespan and increasing the risk of breakage. The ideal tension provides the right balance - allowing for positive drive without overstressing components. The manufacturer's specifications will provide a recommended tension range; staying within that range is crucial.
The Importance of Proper Alignment
Misalignment isn't just visually unappealing; it causes uneven wear patterns. When pulleys aren't aligned, the belt rubs against the edges, creating friction, generating heat, and damaging both the belt and pulley grooves. This uneven wear shortens belt life and can even cause the belt to come off the pulleys, leading to costly downtime and potential safety hazards. Alignment issues also contribute to noise and vibration, indicating a problem that needs addressing. A properly aligned belt runs smoothly, quietly, and efficiently.
Safety First: Your Pre-Inspection Checklist
Before you even think about touching that belt, safety is paramount. Rushing into an inspection or adjustment without proper precautions can lead to serious injury. This pre-inspection checklist isn't optional - it's your first line of defense.
1. Lockout/Tagout (LOTO): This is non-negotiable. Implement your company's LOTO procedures to completely de-energize the conveyor system. Verify that all power sources are disconnected and locked out. Don't skip this step!
2. Personal Protective Equipment (PPE): Gear up! Safety glasses are essential to protect your eyes from debris. Gloves provide grip and prevent cuts. Hearing protection is recommended, especially in noisy environments. Consider additional PPE based on your specific work environment.
3. Area Assessment: Clear the immediate work area of obstructions and ensure no unauthorized personnel are present. A cluttered workspace increases the risk of accidents.
4. SDS Review: If you're using any cleaning agents or lubricants, review their Safety Data Sheets (SDS) to understand potential hazards and required precautions.
5. Initial Observation: Take a moment to observe the system before beginning the inspection. Listen for unusual noises, feel for vibrations, and note any existing issues. This baseline observation will help you identify changes later.
Remember: Safety isn't just a rule - it's a responsibility. If you're ever unsure about any step, stop and consult with a qualified supervisor or maintenance professional.
Visual Inspection: Spotting Potential Problems
A thorough visual inspection is your first line of defense against unexpected downtime and costly repairs. Don't rush this step - a keen eye can catch subtle signs of trouble before they escalate into major issues. Start by examining the entire length of the belt, paying close attention to areas where it contacts the pulleys.
Look for:
- Cracks: These can be hairline fractures or more substantial tears. Even small cracks weaken the belt's structure and can lead to breakage.
- Abrasions/Wear: Look for areas where the belt surface is noticeably thinner or damaged. This often occurs where the belt rubs against the pulleys or carries abrasive materials.
- Contamination: Oil, grease, or other foreign substances can degrade the belt's rubber compound and reduce its lifespan. Look for signs of leakage or spillage.
- Splice Issues (if applicable): Check splices for separation, fraying, or signs of previous repairs. Any weakness in the splice can lead to catastrophic failure.
- Edge Damage: Assess the condition of the belt edges, particularly if they're exposed to sharp materials. Look for fraying, cuts, or abrasion.
- Pulley Groove Condition: Examine the grooves in the pulleys for wear, debris buildup, or any signs of damage. Debris can cause misalignment and accelerated belt wear.
- Uneven Wear Patterns: Note any areas where the belt appears to be wearing more rapidly than others. This could indicate misalignment or uneven load distribution.
Measuring Belt Tension: Tools and Techniques
Determining the correct belt tension is critical, but it's not guesswork. Several tools and techniques exist to accurately measure and ensure optimal tension. Let's explore them:
1. The Rule of Thumb (Not Recommended as a Primary Method):
Historically, some operators relied on feeling the belt sag or tightness. This is highly subjective and unreliable. It's better as a quick check after using a proper tension gauge, but never solely depend on it.
2. Tensile Strength Gauge (Tensiometer):
These handheld devices are the most common and affordable option. They apply a force to the belt and display the tension reading. Different types exist:
- Mechanical Tensometers: Rely on spring mechanisms and scales. They're inexpensive but offer lower accuracy.
- Digital Tensometers: Provide more precise readings with digital displays. They often include features like peak hold and data logging.
3. Digital Tension Meters:
These devices offer the highest level of accuracy and often include advanced features:
- Dynamic Tension Measurement: Measures tension while the belt is in motion, which can be crucial for certain applications.
- Data Logging & Analysis: Records tension readings over time for trend analysis and predictive maintenance.
- Wireless Connectivity: Allows for remote monitoring and data transmission.
4. Beam Deflection Method (Indirect Measurement):
This method involves measuring the deflection of the belt under a known load. The amount of deflection is then correlated to the belt tension using a formula. While less common, it can be useful in situations where direct measurement is difficult.
Choosing the Right Tool:
The best tool depends on your budget, accuracy requirements, and the complexity of your application. Always refer to the belt manufacturer's recommendations for the appropriate tension range and measurement techniques. Don't hesitate to consult with a qualified maintenance professional for guidance.
Verifying Belt Alignment: Straight Edges and Lasers
A misaligned belt can lead to uneven wear, reduced efficiency, and potential breakdowns. Thankfully, verifying alignment is a straightforward process. The simplest method utilizes a straight edge - a ruler, level, or even a piece of sturdy cardboard - placed across the belt's width. Visually inspect the space between the belt and the pulley grooves. Consistent gaps suggest good alignment; varying gaps indicate a problem.
For increased precision, consider employing a laser alignment tool. These devices project a laser beam that precisely indicates any deviation from true alignment. While requiring an initial investment, laser alignment significantly reduces adjustment time and ensures highly accurate results, especially beneficial for critical applications or belts handling sensitive materials. Always consult your belt manufacturer's specifications for recommended alignment tolerances. Regular verification with either method is key to preventative maintenance.
The Adjustment Process: Tension Correction
Correcting belt tension isn't a one-size-fits-all scenario. The process depends heavily on the type of tensioning system your belt utilizes. Common systems include adjustable idlers, take-up towers, and spring-loaded tensioners.
Understanding Your System is Key: Before making any adjustments, identify the type of tensioning system you're dealing with. Refer to your equipment's manual for specifics on how to operate and maintain it. Incorrect adjustments can damage the belt or the tensioning mechanism itself.
Small Increments are Your Friend: Avoid large, abrupt adjustments. These can shock the belt and components, leading to premature wear or even failure. Instead, make small, incremental changes - a quarter-turn of a bolt, a few millimeters of take-up tower movement.
The Process:
- Loosen the Lock: If your system has a locking mechanism, release it to allow for movement.
- Adjust Gradually: Use the appropriate tool (wrench, lever, knob) to adjust the tension.
- Re-Measure: After each adjustment, immediately re-measure the belt tension with your tension gauge. This ensures you're heading in the right direction.
- Tighten the Lock: Once the desired tension is achieved, re-engage the locking mechanism to secure the adjustment.
- Visual Check: After locking the adjustment, visually inspect the belt and tensioning system to ensure everything appears properly aligned and secured.
Common Pitfalls to Avoid:
- Over-Tightening: Excessive tension creates unnecessary stress on the belt, pulleys, and bearings.
- Under-Tightening: Too little tension results in belt slippage, reduced efficiency, and increased wear.
- Uneven Tension: Ensure even tension distribution across the belt's length. Uneven tension can cause premature belt failure.
- Ignoring the System's Limits: Always respect the manufacturer's recommended tension range.
Alignment Adjustments: Getting it Straight
Misalignment is a common culprit behind premature belt wear, noisy operation, and decreased efficiency. Correcting it isn't always straightforward, but a systematic approach makes it manageable. Here's a breakdown of what to look for and how to address it:
Visual Clues and Initial Assessment:
Start with a thorough visual inspection. Look for signs of rubbing against the pulley faces - this indicates that the belt is too close to the pulley. Observe if the belt wanders to one side as it travels around the pulleys. Uneven wear patterns on the belt's edges are also a strong indicator of misalignment.
Common Adjustment Points:
- Motor Base Shimming: Often, the motor base needs to be adjusted. Placing shims between the motor base and the mounting surface can realign the motor and, consequently, the pulley. Experiment with different shim thicknesses - small adjustments can make a big difference.
- Pulley Mount Adjustments: Some pulley systems have adjustable mounts that allow for fine-tuning of the pulley's position. Utilize these adjustments to nudge the pulley into the correct alignment.
- Frame Adjustments: In larger systems, the conveyor frame itself may need to be adjusted to ensure proper alignment. This typically involves more extensive modifications and might require professional assistance.
- Idler Pulleys: Don't overlook idler pulleys! Their position plays a critical role in guiding the belt and maintaining proper tracking. Adjust idler pulleys as needed to correct wandering or drifting.
Tools & Techniques:
- Straight Edge: A simple straight edge can be used to visually check alignment. Place it across the belt and observe any deviations from a straight line.
- Laser Alignment Tools: These tools provide a more precise measurement of pulley alignment, enabling very fine adjustments. They are particularly useful for systems where even slight misalignment can cause problems.
- Alignment Compound: A thin layer of alignment compound applied to the pulley faces can help identify contact points and pinpoint areas of misalignment.
Post-Adjustment Verification: Ensuring Success
Confirming your adjustments are truly effective is just as vital as making them. Rushing this step can lead to recurring issues and premature belt failure. After adjusting tension and alignment, don't just assume everything is perfect. Instead, take these crucial steps to guarantee success.
First, re-measure the belt tension. Use the same tension gauge and method as before to verify you're now within the manufacturer's recommended range. A small deviation can often be corrected with a minor tweak.
Next, re-check the belt alignment. Repeat the straight-edge test or use your laser alignment tool to confirm the belt is running true. Look for any residual signs of rubbing or uneven wear.
Finally, and perhaps most importantly, conduct a short, supervised test run. Let the system operate under a light load for a brief period. Listen carefully for any unusual noises, vibrations, or signs of stress on the belt. Observe the belt's behavior to ensure it's running smoothly and efficiently. This also allows you to catch any subtle issues that might not be apparent during a static inspection. If anything seems amiss, don't hesitate to re-evaluate your adjustments.
Documentation and Record Keeping: Tracking Your Progress
Consistent documentation isn't just a "nice-to-have"; it's the backbone of a successful preventative maintenance program. A well-maintained record of belt tension and alignment inspections provides invaluable insights into system performance and helps predict future needs.
What exactly should you record? At a minimum, include:
- Date of Inspection: Essential for tracking inspection frequency and identifying trends over time.
- Belt Identification: Clearly label the belt being inspected (e.g., Conveyor Line 3, Belt A).
- Tension Readings: Document all tension measurements taken, noting the location along the belt's length.
- Alignment Observations: Describe any alignment issues observed, including the degree of misalignment.
- Adjustments Made: Precisely detail any adjustments made to tension or alignment, including the method used.
- Initials of Inspector: Assign responsibility and ensure accountability.
- Any Unusual Findings: Note any unexpected noises, vibrations, or signs of wear that warrant further investigation.
Beyond a simple log, consider utilizing a spreadsheet or maintenance management software to track belt usage (e.g., hours of operation, material throughput). This data, combined with inspection records, allows for more accurate predictions of remaining belt life and optimized replacement schedules. Regular review of these records can highlight recurring problems, allowing for proactive solutions to prevent future breakdowns and extend the overall lifespan of your belt system.
Common Belt Issues and Troubleshooting
Belts rarely present a single, straightforward problem. Often, a symptom is a result of an underlying issue. Here's a breakdown of frequent belt problems and how to approach troubleshooting them:
1. Premature Wear & Cracking:
- Possible Causes: Incorrect tension (too tight or too loose), abrasive materials being conveyed, chemical exposure, UV degradation, incompatibility between belt and pulleys.
- Troubleshooting: Verify belt tension is within the manufacturer's specifications. Inspect materials being conveyed for abrasiveness. Check for chemical spills or UV exposure. Ensure the belt material is appropriate for the application.
2. Misalignment & Edge Wear:
- Possible Causes: Pulley misalignment, frame distortion, uneven load distribution, belt stretching.
- Troubleshooting: Use a straight edge or laser alignment tool to check pulley alignment. Inspect the frame for distortions and correct them. Ensure the load is evenly distributed across the belt.
3. Spliced Belt Failures (if applicable):
- Possible Causes: Incorrect splice construction, splice material incompatibility, splice damage, excessive belt stress.
- Troubleshooting: Review splice construction procedures. Verify the splice material is compatible with the belt. Inspect splices for damage and repair or replace as needed.
4. Noise & Vibration:
- Possible Causes: Incorrect belt tension, pulley groove damage, misalignment, foreign objects lodged in the belt or pulley grooves.
- Troubleshooting: Adjust belt tension. Inspect pulley grooves for damage and debris. Check for foreign objects and remove them.
5. Belt Slippage:
- Possible Causes: Incorrect belt tension, pulley groove contamination, improper pulley size, excessive load.
- Troubleshooting: Increase belt tension. Clean pulley grooves. Ensure correct pulley size is used. Reduce the load on the belt.
Remember to always prioritize safety when troubleshooting and repairing belt systems. If you've exhausted troubleshooting steps and the issue persists, consult with a qualified maintenance professional.
Creating Your Customized Checklist Template
A generic checklist is a great starting point, but a truly effective maintenance program requires a customized template that reflects your specific equipment, environment, and operational needs. Here's how to create yours:
- Identify Your Belt Type & Specs: Note the manufacturer, model number, and any specific performance characteristics of your belts. These details are vital for referencing correct tension and alignment parameters.
- Review Manufacturer Guidelines: The belt manufacturer's documentation is your primary resource. Pay close attention to recommended tension ranges, alignment tolerances, and any specific inspection procedures.
- Consider Environmental Factors: Dust, moisture, temperature fluctuations, and the type of materials being conveyed can all impact belt performance. Add checklist items to address these specific challenges. For example, a checklist for a dusty environment might include more frequent cleaning and inspection for material buildup.
- Incorporate Operational Data: How often does the belt run? What is its load capacity? Use this data to determine inspection frequency. A belt running continuously will need more frequent checks than one used intermittently.
- Tailor Inspection Points: Add or remove items from the generic checklist to reflect unique aspects of your belt system. Does your system have a specialized tracking mechanism? Is there a particular area prone to wear?
- Use a Digital Format: Switching to a digital checklist (spreadsheet, mobile app) allows for easier data tracking, analysis, and sharing. Many maintenance management software solutions offer customizable checklist features.
- Regularly Review and Update: Your checklist isn't set in stone. Periodically review it (e.g., annually) to ensure it remains accurate and effective. Incorporate lessons learned from past inspections and equipment performance.
Resources and Further Learning
Want to dive deeper into belt maintenance and optimization? Here are some valuable resources to expand your knowledge:
- Belt Manufacturer Websites: Always the best starting point! Visit the websites of your belt manufacturer (e.g., Goodyear, Habasit, Carlisle) for detailed specifications, troubleshooting guides, and best practices tailored to your specific belt type.
- Conveyor Equipment Suppliers: Many suppliers offer technical documentation, training materials, and support for conveyor systems and their components.
- Maintenance Professional Organizations: Organizations like the Maintenance Professionals Society (MPS) offer resources, training, and networking opportunities for maintenance professionals.
- Online Forums & Communities: Join online forums and communities dedicated to conveyor systems and industrial maintenance to exchange knowledge and ask questions. (Search for terms like "conveyor maintenance forum").
- YouTube Channels: Several YouTube channels provide tutorials and demonstrations on conveyor belt maintenance and repair. (Search for terms like "conveyor belt maintenance tutorial").
- Industry Publications: Subscribe to industry publications and newsletters to stay up-to-date on the latest trends and technologies in conveyor systems.
Resources & Links
- Bosch Industrial: Bosch offers a wide range of industrial solutions, including belt drives and components. Their website contains technical information and product details that can be helpful for understanding belt mechanics.
- Gates: Gates is a major manufacturer of belts and related power transmission products. Their site features application guides, technical specifications, and resources on belt maintenance and troubleshooting. A valuable source for best practices.
- Optibelt: Optibelt specializes in synchronous belts and related power transmission solutions. Their website includes technical articles, product specifications, and information on belt installation and maintenance.
- National Tooling & Bearing (NTB): NTB is a distributor of industrial products, including belt tension gauges and alignment tools. Their website can help you find the right tools for belt maintenance.
- McMaster-Carr: McMaster-Carr is a comprehensive industrial supply company. You're likely to find tension gauges, lasers, and other tools mentioned in the article.
- Occupational Safety and Health Administration (OSHA): OSHA's website provides information on safety guidelines and regulations related to industrial machinery, including belt drives. Essential for ensuring a safe working environment.
- PTD (Power Transmission Design): PTD is a resource for power transmission design and engineering. Their articles and product directories contain relevant technical details.
- Machine Design: Machine Design magazine and website publishes articles on a wide range of industrial machinery topics, including power transmission and maintenance. Search their site for relevant articles.
- Engineering Toolbox: A broad-based engineering resource covering a multitude of topics, including belt drive calculations and selection guidelines. Useful for calculating required tension and speeds.
- Newton Scientific: This website provides useful information and calculators for determining belt tension and other parameters in power transmission systems.
- Conveyor Belt Direct: While focused on conveyor belts, this site offers general information and maintenance tips applicable to many types of belt systems.
Frequently Asked Questions
What is the purpose of belt maintenance?
Regular belt maintenance, focusing on tension and alignment, prevents premature wear and tear, reduces noise, improves efficiency, and extends the lifespan of your machinery. It also helps avoid unexpected breakdowns and costly repairs.
Why is belt tension so important?
Proper belt tension is crucial. Too loose, and the belt can slip, causing inefficiency and increased wear. Too tight, and it puts excessive stress on the bearings and motor, also shortening their lifespan.
What are the signs of a belt that is too loose?
Signs of a loose belt include slipping (especially under load), squealing or chirping noises, decreased performance, and visible belt wobble.
What are the signs of a belt that is too tight?
Signs of a tight belt include excessive heat, bearing wear, a high-pitched whine, and potential damage to the motor or pulleys.
What tools do I need for belt tension and alignment checks?
You'll typically need a belt tension gauge (or ruler for approximation), a straight edge or ruler, and potentially a level or protractor for alignment checks. Specific tools may vary depending on the belt type and machinery.
Can I estimate belt tension without a tension gauge?
Yes, you can use a 'rule of thumb' measurement. Most belts should deflect approximately 1/64th of an inch per inch of belt span. For example, for a 64-inch belt, deflection should be around 1 inch. However, a gauge is always more accurate.
How do I check belt alignment?
Use a straight edge to visually align the belt with the pulleys. Make sure the pulleys are parallel to each other. Misalignment can cause uneven wear and increased vibration.
What does the 'Belt Tension & Alignment Checklist Template' provide?
The template offers a structured approach to belt maintenance. It includes sections for recording measurements (tension, alignment), identifying issues, noting corrective actions, and tracking maintenance dates - ensuring consistent and thorough checks.
How often should I perform belt maintenance?
The frequency depends on the belt type, operating conditions, and manufacturer recommendations. A general guideline is to inspect belts monthly and perform detailed tension and alignment checks quarterly, or more frequently for high-demand applications.
What happens if I ignore belt maintenance?
Ignoring belt maintenance can lead to a cascade of problems, including reduced efficiency, increased noise, premature wear on the belt, damage to pulleys and bearings, and potential machine breakdowns - all of which can be costly to repair.
Found this Article helpful?
Agriculture Management Solution Demo
Running a farm or agricultural business is complex. ChecklistGuro's Work OS platform simplifies your operations, from crop planning and irrigation management to livestock tracking and harvest scheduling. Increase efficiency, reduce waste, and boost yields! See how ChecklistGuro can revolutionize your agriculture business.
Related Articles

10 Simple Steps to a Healthy Drainage System: Your Checklist Template

Mastering the Daily Crop Scouting Report: Your [Specific Crop] Checklist Template

Irrigation System Checklist: Farm Water Management & Crop Yield Optimization

Unlock Your Garden's Potential: A Soil pH Verification Checklist

PPE Usage Checklist Template: Your Guide to Safety

Water Discharge Permit Compliance Checklist Template

The Ultimate GPS & Precision Farming Calibration Checklist Template

Water Runoff Analysis Checklist Template
We can do it Together
Need help with
Agriculture?
Have a question? We're here to help. Please submit your inquiry, and we'll respond promptly.