The Ultimate 2026 Commercial Roofing Inspection & Leak Detection Checklist: A Comprehensive Guide for Facility Managers
Published: 10/30/2026 Updated: 10/31/2026
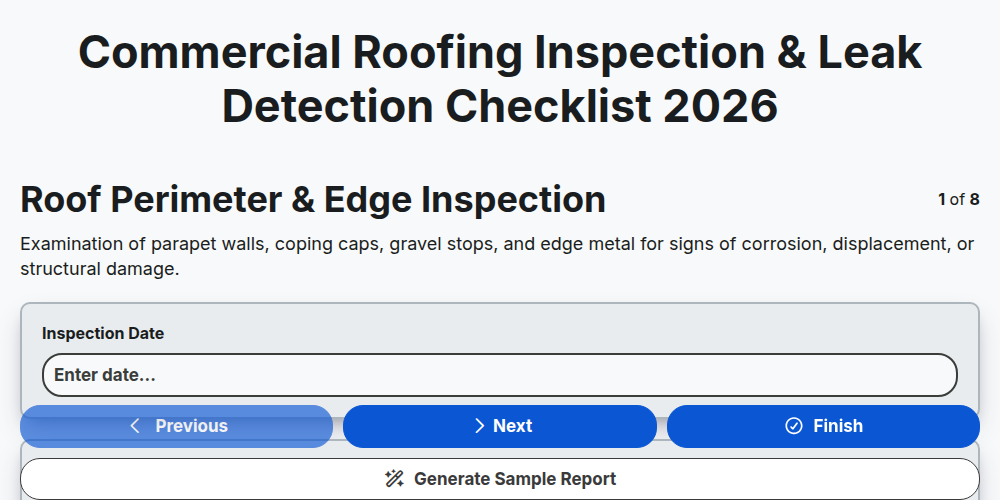
Table of Contents
- Introduction: Why Proactive Inspection is Vital in 2026
- Phase 1: Roof Perimeter & Edge Inspection
- Phase 2: Roof Membrane & Surface Integrity Assessment
- Phase 3: Inspecting Drainage & Water Runoff Systems
- Phase 4: Evaluating Flashing & Penetration Seals
- Phase 5: Checking Seam & Joint Continuity
- Phase 6: Structural & Support Inspection
- Phase 7: Identifying Debris & Environmental Hazards
- Phase 8: Advanced Leak Detection & Moisture Assessment
- Summary: Maintaining Your Long-Term Roofing Investment
- Resources & Links
TLDR: Stay ahead of costly repairs with our 2026 guide to commercial roofing maintenance. This comprehensive checklist provides facility managers with a step-by-step framework for inspecting roof perimeters, membrane integrity, drainage systems, and structural stability, alongside advanced leak detection techniques to ensure long-term building protection and minimized downtime.
Introduction: Why Proactive Inspection is Vital in 2026
Staying Ahead of the Curve in an Evolving Climate
As we navigate 2026, the challenges facing commercial property owners and facility managers have reached a new peak. With increasingly unpredictable weather patterns, more frequent extreme temperature fluctuations, and the rising cost of raw construction materials, the wait and see approach to roof maintenance is no longer a viable strategy. A single undetected leak is no longer just a localized nuisance; it is a potential catalyst for costly structural damage, mold proliferation, and expensive operational downtime.
The High Cost of Reactive Maintenance
In today's economic landscape, the cost of emergency repairs has surged. Transitioning from a reactive mindset to a proactive inspection routine is the most effective way to protect your bottom line. By identifying minor vulnerabilities-such as a hairline crack in a membrane or a slightly clogged drain-before they evolve into catastrophic failures, you can extend the service life of your roofing system by years and avoid the sudden capital expenditures associated with total roof replacement.
The 2026 Standard: Beyond the Visual Scan
Modern commercial roofing inspection in 2026 requires more than just a quick walk-through. It demands a systematic, data-driven approach. A comprehensive inspection serves two critical purposes:
- Risk Mitigation: Identifying structural and environmental hazards before they compromise the building's integrity.
- Asset Management: Utilizing systematic checks to create a predictable maintenance lifecycle, allowing for better budgeting and long-term facility planning.
The following checklist is designed to serve as your definitive guide, ensuring that every critical component of your roofing system is scrutinized, from the perimeter edges to the deepest structural supports. Following this protocol will help you ensure your facility remains watertight, compliant, and cost-efficient throughout the year.
Phase 1: Roof Perimeter & Edge Inspection
Securing the Boundaries: Perimeter & Edge Assessment
The first step in any high-level commercial roofing inspection is evaluating the roof's perimeter. The edges of your roof are the most vulnerable points for wind uplift, water intrusion, and structural fatigue. A failure at the edge often leads to much larger, more expensive failures in the central membrane.
Inspecting the Parapet Walls and Coping Caps
Your inspection should begin with a close examination of the coping caps-the protective metal coverings on top of your parapet walls.
- Fastener Integrity: Check for loose, rusted, or missing fasteners. If the coping cap is lifting, it creates a direct pathway for water to seep into the wall cavity.
- Sealant Condition: Inspect the sealant between the coping cap and the masonry. Look for cracks, shrinkage, or gaps caused by thermal expansion and contraction.
- Structural Cracks: Scan the parapet walls themselves for vertical or horizontal cracks that might indicate structural shifting or moisture saturation.
Evaluating Edge Metal and Drip Edges
The drip edge is your primary line of defense against water wicking back under the roofing membrane.
- Corrosion Check: Look for signs of oxidation or rust on metal flashing and drip edges.
- Deformation: Identify any bent or dented edges caused by debris impact or extreme weather events.
- Attachment Stability: Ensure the edge metal is securely fastened to the roof substrate. A loose edge is an invitation for wind-driven rain to enter the system.
Perimeter Insulation and Insulation Board Stability
In many modern commercial systems, the perimeter is where insulation can become compromised.
- Edge Erosion: Check for signs that the insulation boards are fraying or degrading at the edges.
- Compression Issues: Look for any signs that the perimeter insulation is compressing under the weight of the edge metal or due to moisture buildup.
Phase 2: Roof Membrane & Surface Integrity Assessment
After verifying the perimeter and edges, the focus must shift inward to the primary defense layer of your building: the roofing membrane itself. In 2026, with increasingly volatile weather patterns and higher-performance materials in use, a superficial glance is no longer sufficient. You must conduct a granular evaluation of the membrane's physical condition to identify degradation before it leads to systemic failure.
Inspecting for Material Degradation and Wear
The membrane is the skin of your building. As it ages, it is subject to UV radiation, thermal shock, and chemical degradation. During this phase, your inspection team should look for:
- UV Degradation and Cracking: Check for alligatoring or fine surface cracks. If the membrane appears brittle or shows signs of chalking, the material is losing its elasticity and is at high risk for puncture.
- Blistering and Bubbles: Inspect the surface for raised areas. While some minor blistering can be aesthetic, significant air or moisture pockets indicate that the membrane is separating from the substrate, which can lead to rapid deterioration under heavy foot traffic or snow loads.
- Punctures and Physical Damage: Scrutinize the surface for any mechanical damage caused by HVAC maintenance, foot traffic, or fallen debris. Even a tiny pinprick can allow moisture to migrate into the insulation layers.
Evaluating Substrate and Insulation Health
A surface-level inspection is only effective if it accounts for what lies beneath. If the membrane's integrity is compromised, the underlying components are likely at risk.
Checking for Ponding Water
While drainage is covered in a separate phase, the surface integrity check must include identifying areas where water dwells too long.
- Identify Depression Zones: Look for areas where the membrane appears submerged.
- Evaluate Stagnation: If water remains on the surface for more than 48 hours after a rain event, it indicates a failure in the membrane's ability to shed water, which accelerates the breakdown of single-ply systems (like TPO, EPDM, or PVC).
Assessing Chemical and Biological Growth
In the 2026 landscape, environmental stressors like algae, moss, and lichen are becoming more prevalent due to shifting humidity levels.
- Biological Fouling: Check for moss or heavy algae growth, which can trap moisture against the membrane and promote rot in the underlying substrate.
- Chemical Contaminants: Note any signs of chemical residue from nearby industrial activities that may be eating away at the membrane's protective coating.
Phase 3: Inspecting Drainage & Water Runoff Systems
Ensuring Efficient Water Management
A roofing system is only as good as its ability to move water away from the structure. Even the most high-quality membrane will fail if water is allowed to pool or stagnate on the surface. During your 2026 inspection, focus on the path of least resistance-the route water takes from the center of the roof to the downspouts.
Scuppers and Drain Grates
The primary point of failure in drainage is often simple blockage. Inspect all roof drains, scuppers, and overflow drains for:
- Debris Accumulation: Check for leaves, silt, and organic matter that can create dams.
- Debris Guards: Ensure that strainers or dome guards are securely in place and not overwhelmed by sediment.
- Flow Rate: During a heavy rain event or a controlled water test, verify that water is exiting the drains rapidly without creating immediate ponding.
Gutters and Downspouts
For buildings with perimeter gutter systems, the integrity of the vertical drainage path is critical to preventing foundation issues.
- Clog Detection: Inspect the entire length of the gutter run for trapped sludge or nesting materials.
- Downspout Integrity: Ensure downspouts are securely fastened to the building and are not leaking at the joints or elbows.
- Clearance at Ground Level: Verify that the discharge points (splash blocks or underground drains) are clear and effectively directing water away from the building's foundation.
Identifying Ponding Water Risks
Ponding water is the silent killer of commercial roofs. In your inspection, look for areas where water remains standing for more than 48 hours after a rain event.
- Check for Deflection: Persistent ponding often indicates structural sagging or inadequate slope.
- Membrane Degradation: Note any areas where stagnant water appears to be bubbling the membrane or causing discoloration, as this indicates the beginning of a long-term leak cycle.
Phase 4: Evaluating Flashing & Penetration Seals
Critical Inspection Points for Flashing and Penetration Seals
The integrity of your roof's flat or low-slope surface is only as strong as its weakest seal. While the membrane itself may be intact, the points where the roof is interrupted by pipes, vents, or skylights are the most common entry points for water. In 2026, as building materials face increasingly volatile weather patterns, a rigorous evaluation of these high-risk areas is non-negotiable.
Inspecting Pipe Boots and Vent Flashing
Pipe boots are often the first to fail due to thermal expansion and contraction. During your inspection, check for:
- Cracking or Dry Rot: Inspect the rubber or neoprene components for signs of brittleness or UV degradation.
- Seal Separation: Look for gaps between the base of the boot and the roof membrane.
- Loose Fasteners: Ensure that the clamping rings are secure and haven't been loosened by wind uplift.
Evaluating Skylight Perimeter Integrity
Skylights act as windows of opportunity for leaks. Focus your assessment on the following:
Frame Sealing: Check the sealant around the exterior metal frame for cracks, peeling, or alligatoring.
Gasket Compression: Verify that gaskets are still pliable and maintaining a tight compression against the glazing.
Debris Accumulation: Ensure that organic matter isn't trapping moisture against the skylight curb, which can lead to accelerated decay.
Assessing HVAC Unit Transitions and Curb Flashing
The interface between your rooftop HVAC units and the roofing membrane is a high-stress zone.
- Curb Integrity: Inspect the flashing extending up the side of the HVAC curb. Look for any signs of cupping or lifting.
- Sealant Continuity: Check the liquid-applied membranes or mastic used to bridge the gap between the metal curb and the field membrane.
- Rust and Corrosion: For metal flashing around mechanical units, check for oxidation that could compromise the waterproof barrier.
Checking Penetration Sealants and Mastic
Not all penetrations are large-scale fixtures; small vents and electrical conduits require equal attention.
- Consistency Check: Ensure that mastic or caulking is not shrinking or pulling away from the substrate.
- Adhesion Testing: Gently inspect the edges of sealant applications to ensure they are still bonded to both the penetration and the roof membrane.
Phase 5: Checking Seam & Joint Continuity
Ensuring Seamless Integrity: The Critical Role of Seams and Joints
While surface-level damage is often easy to spot, the most catastrophic leaks in a commercial roofing system rarely begin in the middle of a membrane. Instead, they originate at the weakest links: the seams and joints. In 2026, as building materials face more extreme thermal expansion and contraction cycles, verifying the continuity of these junctions is a non-negotiable step in your inspection protocol.
Identifying Common Vulnerabilities
The integrity of your roof's watertight seal depends entirely on how well the individual membrane sheets are bonded together. During this phase of the inspection, focus your attention on the following high-risk areas:
- Seam Delamination: Look for any signs of fish-mouthing, where the edges of two overlapping membranes begin to lift or separate. Even a microscopic gap can allow capillary action to pull water underneath the membrane.
- Adhesive Failure: For mechanically attached or ballasted systems, inspect for areas where the adhesive may have dried out or become brittle, leading to loss of bond.
- Thermal Stress Cracking: Examine longitudinal seams for fine cracks caused by the constant expansion and contraction of the roof during temperature fluctuations.
Advanced Inspection Techniques for 2026
To move beyond a basic visual check, implement these more rigorous assessment methods:
- The Probe Method: Use a specialized blunt-tipped tool to gently probe along the length of the seams. If the tool sinks easily into the joint, the seal is compromised.
- Surface Continuity Check: Ensure there are no voids or bubbles in the seam area, which often indicate trapped moisture or air that can lead to rapid degradation.
- Thermal Imaging Integration: Whenever possible, use infrared thermography to detect temperature differentials along the seams. A hot spot along a joint often indicates a breach where moisture is trapped beneath the surface.
What to Look For: The Red Flags
If you encounter any of the following, they should be prioritized for immediate repair:
- Visible gaps or separation between membrane layers.
- Discoloration or staining specifically localized along the seam lines.
- Evidence of pumping (where a seam moves noticeably under foot traffic or wind).
Pro-Tip for Facility Managers: Do not assume that a seam that looked good last year is still intact. Environmental stressors in 2026 are more aggressive than ever; a seam that is structurally sound today can fail within a single heavy storm season if the bond is even slightly compromised.
Phase 6: Structural & Support Inspection
Assessing the Backbone of Your Roofing System
While the surface of your roof may appear intact, the structural integrity of the underlying components determines the long-term viability of your entire roofing assembly. A leak often presents itself on the surface, but the true damage frequently occurs within the structural framework. During this phase of the inspection, we move beyond the membrane to evaluate the load-bearing elements and the stability of the roof deck.
Inspecting the Roof Deck and Substrate
The integrity of your roof membrane is entirely dependent on the condition of the substrate beneath it. We focus on identifying signs of:
- Substrate Sagging or Deflection: Identifying areas where the roof deck may be bowing due to excessive moisture retention or weakened structural supports.
- Moisture Trapped in the Deck: Checking for soft spots that indicate the insulation or wood/metal decking has reached a point of saturation.
- Corrosion and Decay: For metal decks, we look for advanced oxidation; for wood-based substrates, we inspect for fungal growth or rot.
Evaluating Support Systems and Load-Bearing Components
A commercial roof must support not only its own weight but also live loads such as snow, heavy HVAC units, and maintenance personnel. Our inspection includes:
- Truss and Rafter Stability: Checking for cracks, shifts, or signs of movement in the primary structural members.
- Load-Bearing Wall Interfaces: Ensuring that the junction where the roof meets the building's structural walls remains stable and hasn't experienced settling.
- Equipment Footing and Curb Integrity: Assessing the stability of the supports for heavy rooftop units (RTUs) to ensure they are not exerting uneven pressure on the roof membrane or causing structural stress.
Identifying Signs of Structural Fatigue
By 2026, many commercial structures will be facing increased environmental stressors. We look for red flag indicators such as:
- New Cracking in Concrete or Masonry: Often a precursor to significant structural movement.
- Evidence of Overloading: Assessing if recent additions to the roof (such as new solar arrays or upgraded HVAC systems) have compromised the original design's weight capacity.
Note: If any significant structural irregularities are found during this phase, it is critical to consult a structural engineer immediately to prevent catastrophic failure.
Phase 7: Identifying Debris & Environmental Hazards
Evaluating the Impact of External Factors on Roof Longevity
While structural integrity and membrane quality are critical, the invisible threats to your commercial roof often come from the surrounding environment. In 2026, as extreme weather patterns become more unpredictable, a proactive inspection must look beyond the roofing material itself to identify external debris and environmental hazards that can cause sudden, costly damage.
Identifying Debris Accumulation
Accumulated debris is more than just an aesthetic issue; it is a primary catalyst for localized roof failure. During your inspection, focus on the following:
- Organic Matter & Vegetation: Inspect for accumulated leaves, twigs, and dirt buildup. Organic matter retains moisture against the roof membrane, creating a breeding ground for mold, algae, and moss, which can eventually lead to membrane degradation.
- Wind-Blown Debris: Check for heavy objects like branches, construction scraps, or loose pieces of equipment that may have landed on the roof. These items can create physical punctures or point loads that stress the structural capacity of the roof.
- Sediment in Drainage Points: Ensure that drains and scuppers are not choked with silt or sand, which can lead to ponding water-one of the leading causes of long-term structural fatigue.
Assessing Environmental Hazards
Environmental hazards involve external elements that interact with your roofing system. A comprehensive 2026 audit should include:
- Tree Overhang & Encroachment: Evaluate the proximity of nearby trees. Overhanging branches not only drop debris but also act as impact hazards during high winds, potentially scraping or tearing the membrane.
- Air Quality & Particulate Matter: In industrial or high-traffic urban areas, check for excessive soot, dust, or chemical residue accumulation. These particulates can react with moisture to create acidic conditions that accelerate the aging of single-ply membranes.
- Bird and Pest Activity: Inspect for evidence of nesting or heavy bird droppings (guano). Large-scale nesting can obstruct drainage, while acidic droppings can chemically degrade certain roofing coatings and membranes over time.
Phase 8: Advanced Leak Detection & Moisture Assessment
Pinpointing the Hidden Threats: Precision Moisture Detection
The final and most critical stage of your 2026 inspection is moving beyond what is visible to the naked eye. Even if a roof appears structurally sound from the surface, subsurface moisture can act as a silent killer, compromising the integrity of your insulation and substrate long before a puddle forms in the ceiling below.
Utilizing Advanced Infrared Thermography
In 2026, manual visual inspection is no longer sufficient for a truly comprehensive audit. We recommend utilizing Infrared (IR) Thermography. By using thermal imaging cameras during a period of temperature transition (such as early morning), inspectors can identify thermal anomalies.
- How it works: Wet insulation retains heat differently than dry insulation.
- The Benefit: High-contrast thermal images reveal hot or cold spots that indicate trapped moisture trapped beneath the membrane, allowing you to target repairs precisely rather than replacing entire sections of the roof.
Electronic Leak Detection (ELD)
For single-ply membranes (TPO, PVC, or EPDM), Electronic Leak Detection is the gold standard for pinpointing microscopic punctures.
- The Process: By applying a low-voltage current to the roof surface, inspectors can detect where the circuit is broken by a leak.
- The Goal: This method eliminates the search and rescue approach, saving facility managers significant costs by identifying the exact location of a leak, even if it is hidden under layers of debris or insulation.
Core Sampling and Moisture Probes
When thermal imaging suggests an issue, the next step is verification through physical sampling.
- Moisture Meter Testing: Using handheld probes to measure the dielectric constant of the substrate.
- Core Samples: If a high-risk area is identified, a small core sample of the insulation should be extracted. This allows for a visual and tactile inspection of the moisture content within the board itself.
Documenting the Moisture Map
The culmination of this phase should be a detailed Moisture Map integrated into your digital building management system. This map should categorize areas by:
- Dry/Stable: No immediate action required.
- At-Risk: Minor moisture detected; monitor during the next quarterly check.
- Critical/Compromised: Active moisture intrusion detected; immediate remediation or section replacement required to prevent structural rot.
By completing this phase with scientific precision, you transition from reactive patchwork maintenance to a proactive, data-driven asset management strategy.
Summary: Maintaining Your Long-Term Roofing Investment
Protecting Your Bottom Line with Proactive Maintenance
In the modern industrial landscape, a commercial roof is far more than just a protective layer; it is a critical structural asset that safeguards your inventory, technology, and personnel. As we move into 2026, the complexity of building materials and the increasing frequency of extreme weather events mean that reactive maintenance is no longer a viable strategy. Waiting for a visible drip in the ceiling to trigger a repair is a costly mistake that can lead to structural rot, mold outbreaks, and expensive emergency downtime.
The Value of a Systematic Approach
A professional inspection is not merely a visual scan; it is a rigorous, technical evaluation of the roof's entire ecosystem. By utilizing a structured checklist-ranging from evaluating membrane integrity to analyzing drainage efficiency-facility managers can transition from a state of crisis management to a state of strategic oversight.
Why This Checklist Matters for 2026
Mitigating Financial Risk
Regular, documented inspections allow for micro-repairs. Addressing a minor seam failure or a degraded flashing seal today is exponentially cheaper than replacing an entire single-ply membrane or repairing compromised steel decking tomorrow. This proactive approach stabilizes your annual maintenance budget and prevents unexpected capital expenditures.
Extending Asset Lifespan
The lifecycle of a commercial roof is heavily dependent on the prevention of moisture ingress. By identifying vulnerabilities in the roof perimeter, drainage systems, and penetration seals before they fail, you effectively maximize the Return on Investment (ROI) of your roofing system, ensuring it reaches-or even exceeds-its projected service life.
Ensuring Operational Continuity
Leaks are more than a nuisance; they are a threat to business continuity. Water intrusion can damage sensitive electronic equipment, disrupt manufacturing processes, and create significant liability through slip-and-fall hazards or air quality issues. A rigorous inspection protocol ensures that your facility remains a safe, dry, and functional environment for your employees and customers alike.
Resources & Links
- ASTM International: Access industry-standard testing methods and technical specifications for roofing materials and membrane integrity.
- Natural Resources Canada: Resources on building envelope performance and energy efficiency through proper roof maintenance.
- National Roofing Contractors Association (NRCA): The authoritative source for roofing best as practices, technical manuals, and industry standards.
- FEMA: Guidance on protecting commercial structures from flood damage and managing post-storm roof assessments.
- American Society of Civil Engineers (ASCE): Technical insights into structural integrity, load-bearing capacities, and structural support inspections.
- National Fire Protection Association (NFPA): Essential standards regarding fire-rated roofing materials and safety protocols for facility managers.
- OSHA: Safety regulations and compliance guidelines for conducting inspections on commercial rooftops.
- U.S. Department of Energy: Information on how cool roofs and reflective membranes contribute to building energy savings.
- ISO (International Organization for Standardization): Global standards for quality management and environmental impact assessments in construction.
- IBM Watson IoT: Exploring the role of AI and IoT sensors in advanced, automated leak detection technologies.
- Autodesk: Tools for BIM (Building Information Modeling) to track roof lifecycles and structural changes.
- Esri: Geospatial data and mapping resources for analyzing environmental hazards and climate impact on infrastructure.
- buildingSMART International: Open standards for the exchange of information in the building lifecycle, useful for long-term asset management.
- IEEE: Research on the latest thermal imaging and infrared technology used in non-destructive moisture assessment.
- Sustainability Standards: Resources for evaluating the environmental footprint and longevity of roofing materials.
- Facility Management Software Resources: Platforms for digitalizing maintenance checklists and tracking inspection history for commercial assets.
Comments
There are no comments yet. Be the first to add one!
Facility Management Solution Demo
Keep your facilities running smoothly! ChecklistGuro streamlines maintenance, inspections, and vendor management. Reduce downtime, optimize efficiency, & improve safety. Manage it all with our Work OS.
Related Articles
Industrial Floor Cleaning & Safety Checklist Template
Display Case Temperature Monitoring Checklist Template
The Ultimate Refrigeration Maintenance Checklist: Keeping Your Food Safe
Escalator & Moving Walkway Inspection Checklist Template
The Ultimate Guest Room Cleaning & Inspection Checklist Template
The Ultimate Security Camera Review Checklist Template
Forklift Inspection & Maintenance Checklist Template
Emergency Generator Load Testing Checklist Template
Need help with
Facility Management?
Have a question? We're here to help. Please submit your inquiry, and we'll respond promptly.