Streamlining Support: The Construction Project Support Request Checklist You Need
Published: 10/23/2025 Updated: 12/13/2025
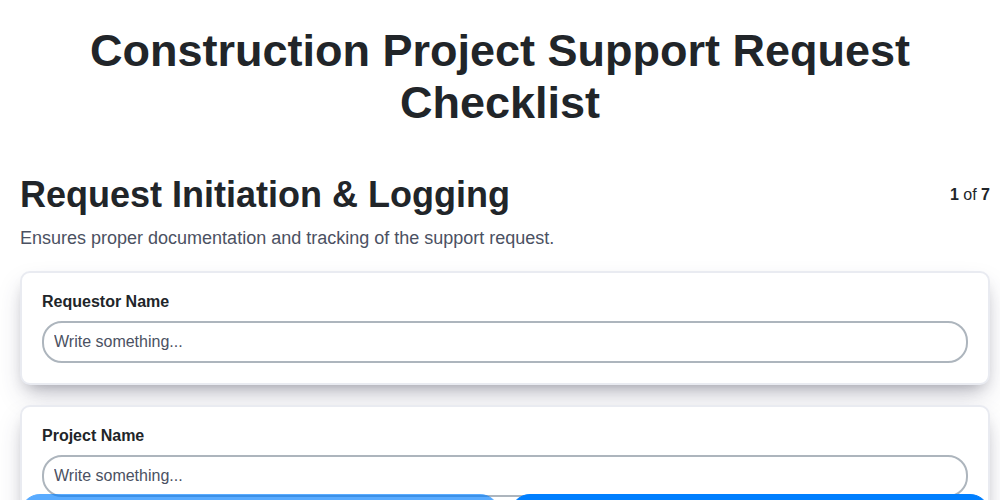
Table of Contents
- Introduction: Why a Support Request Checklist Matters in Construction
- 1. Request Initiation & Logging: The Foundation of Efficient Support
- 2. Initial Assessment & Prioritization: Gauging Urgency & Impact
- 3. Troubleshooting & Diagnosis: Pinpointing the Root Cause
- 4. Resolution Implementation: Putting the Fix into Action
- 5. Verification & Testing: Ensuring a Stable Solution
- 6. Documentation & Knowledge Base Update: Building a Resource for the Future
- 7. Request Closure & User Confirmation: Confirming Satisfaction
- 8. The Benefits of Standardized Support
- Potential Pitfalls to Avoid
- Tools & Technologies to Enhance Your Checklist
- Conclusion: Building Better Projects with Organized Support
- Resources & Links
TLDR: Construction project support requests can be chaotic! This checklist provides a structured process (Request Initiation to Closure) to efficiently log, prioritize, troubleshoot, resolve, and document issues. It ensures everyone's on the same page, reduces wasted time, and builds a knowledge base for future problems.
Introduction: Why a Support Request Checklist Matters in Construction
Construction projects are complex, juggling tight deadlines, intricate plans, and a multitude of stakeholders. When issues arise - and they inevitably will - efficient support requests are crucial for keeping things on track. A disorganized or haphazard support process can lead to delays, miscommunication, and frustration, ultimately impacting project outcomes.
This isn't just about fixing a broken piece of equipment or clarifying a design detail. It's about ensuring every request is handled consistently, thoroughly, and with a clear path to resolution. A well-defined support request checklist acts as a roadmap, guiding users through the process, ensuring no vital steps are missed, and fostering accountability. Ultimately, it minimizes downtime, improves communication, and boosts overall project efficiency. This blog post dives into a construction project support request checklist, breaking down each step to help you streamline your support workflow.
1. Request Initiation & Logging: The Foundation of Efficient Support
The entire support process hinges on a solid foundation - and that begins with proper request initiation and logging. Without it, requests can get lost, duplicated, or misunderstood, leading to frustration and delays. This first step isn't just about recording a problem; it's about setting the stage for effective resolution.
Here's what a robust request initiation and logging process should include:
- Centralized Request Portal: Provide a single, easily accessible point of entry for all support requests. This could be a dedicated online portal, a specific email address, or even a clearly defined process for submitting requests in person.
- Standardized Request Form: Utilize a standardized form that captures essential information. Fields should include:
- Project Name & Phase: Clearly identifying the affected project and its current phase is critical for context.
- Requestor Information: Name, contact details, and role are necessary for communication and accountability.
- Detailed Description of the Issue: Encourage requestors to be as specific as possible. Something isn't working isn't helpful. Prompt them to describe the problem, including error messages, steps to reproduce it, and the impact on the project.
- Priority/Severity: While initial assessments will refine this, a preliminary assessment from the requestor helps gauge immediate impact.
- Attachments: Allow for attaching screenshots, documents, or other relevant materials.
- Automated Logging & Ticketing: Automatically assign a unique ticket number upon request submission. This provides traceability and allows for easy reference throughout the resolution process.
- Acknowledgement & Initial Communication: Send an automated confirmation email to the requestor, acknowledging receipt and providing the ticket number.
By implementing these practices, you create a transparent and organized starting point, ensuring that every request receives the attention it deserves and contributes to a streamlined support workflow.
2. Initial Assessment & Prioritization: Gauging Urgency & Impact
Once a request is logged, the real work begins: understanding its scope and urgency. This phase focuses on a swift but thorough initial assessment and prioritization. We're not aiming for a complete solution here, but rather a clear picture of what's been requested and how critical it is to resolve.
This involves asking key clarifying questions, such as:
- What exactly is the issue? Encourage the requester to provide as much detail as possible. Screenshots, error messages, and step-by-step descriptions are invaluable.
- What is the impact of this issue? Is it preventing a critical function from operating? Is it affecting a single user or a whole team? Quantifying the impact helps gauge the level of disruption.
- What is the priority level? Utilizing a pre-defined priority matrix (e.g., Critical, High, Medium, Low) ensures consistency across all requests. This matrix should clearly define what constitutes each priority level based on impact and urgency.
- Who is affected? Knowing which teams or individuals are impacted helps determine the severity and potential escalation paths.
Based on this assessment, the request is assigned a priority and a tentative assignee. This ensures requests are addressed in the order that aligns with their importance and impact on the construction project. A clear rationale for the assigned priority should be communicated back to the requester to manage expectations.
3. Troubleshooting & Diagnosis: Pinpointing the Root Cause
Once a support request has been prioritized, the critical phase of troubleshooting and diagnosis begins. This isn't just about fixing the immediate symptom; it's about understanding why the problem occurred. A rushed, superficial fix can lead to recurring issues and wasted time.
Here's what this stage typically involves:
- Gather Detailed Information: Don't rely solely on the initial request description. Ask clarifying questions to the requester. What steps led to the issue? What error messages are displayed? When did the problem start? Screenshots and recordings are invaluable.
- Reproduce the Problem (If Possible): Attempting to replicate the issue in a controlled environment allows for a more objective analysis and prevents inadvertently impacting the user while troubleshooting.
- Systematic Investigation: Approach the investigation methodically. Start with the simplest potential causes and work towards more complex ones. This might involve checking logs, reviewing configurations, examining dependencies, or running diagnostic tools.
- Consult Existing Resources: Before diving into deep troubleshooting, leverage existing documentation, knowledge base articles, and past resolved issues. The solution might already be documented.
- Collaborate with Experts: Don't hesitate to involve specialists or other team members with relevant expertise. A fresh perspective can often unlock the solution.
- Document Findings: Meticulously record every step taken during the diagnosis, including potential causes considered and why they were dismissed. This creates a valuable audit trail and helps avoid repeating past mistakes.
The quality of this diagnosis phase directly impacts the efficiency and effectiveness of the entire support process.
4. Resolution Implementation: Putting the Fix into Action
Once the troubleshooting and diagnosis phase has pinpointed the root cause of the issue, the resolution implementation phase begins. This isn't just about blindly applying a fix; it's about carefully executing a planned action to rectify the problem.
Here's what's involved:
- Detailed Plan: The solution should be documented in a clear, step-by-step plan. This minimizes errors and ensures consistency if multiple team members are involved.
- Controlled Environment: Whenever possible, implement fixes in a test or staging environment before deploying to the live project. This allows for observation and mitigation of unforeseen consequences.
- Change Management: Adhere to established change management procedures. This includes approvals, communication to stakeholders, and potentially scheduled downtime if necessary.
- Version Control: If the fix involves code or configuration changes, maintain strict version control to allow for rollback if needed.
- Communication: Keep the requestor informed about the implementation progress, including expected downtime or potential impacts.
- Rollback Plan: Always have a detailed rollback plan in place. What steps need to be taken if the implementation fails or causes new issues?
Effectively implementing a resolution requires precision, planning, and clear communication - laying the groundwork for a successful outcome and minimizing disruption to the construction project.
5. Verification & Testing: Ensuring a Stable Solution
Resolution implementation is just the beginning. Rushing to close out a request without thorough verification and testing can lead to recurring issues and frustrated stakeholders. This phase is critical for validating that the implemented fix genuinely resolves the problem and hasn't introduced any unintended consequences.
Here's what should be included in this stage:
- Reproduce the Original Issue: The first step is to precisely replicate the initial problem reported. This confirms the fix has been correctly applied and is working as expected in the environment where the issue was experienced.
- Functional Testing: Go beyond the original issue. Execute related functionalities and workflows to ensure the fix hasn't negatively impacted anything else. This might involve user acceptance testing (UAT) or, for more complex scenarios, more formal testing protocols.
- Regression Testing: This is vital! Regression testing aims to identify any unexpected side effects of the change. Run a set of pre-defined tests covering key project areas to guarantee stability.
- Performance Monitoring: Observe system performance after the change. Ensure the fix hasn't introduced any performance bottlenecks or negatively impacted response times.
- Documentation Review: Cross-reference the implemented solution with any relevant documentation to ensure consistency and accuracy.
Only when all verification and testing steps are successfully completed should you proceed to request closure.
6. Documentation & Knowledge Base Update: Building a Resource for the Future
Resolving a construction project support request is only half the battle. The real win comes from preventing similar issues from arising again. That's where comprehensive documentation and a robust knowledge base become crucial.
After verifying the resolution and receiving user confirmation, the support team should meticulously document the entire process. This includes:
- Detailed Problem Description: A clear and concise explanation of the initial request.
- Root Cause Analysis: What was the underlying reason for the problem? Avoid superficial fixes - dig deep!
- Resolution Steps: A step-by-step guide on how the problem was resolved.
- Lessons Learned: Any insights or observations that could improve future support efforts or prevent recurrence.
- Relevant Files/Configurations: Attach any files, configuration changes, or screenshots that might be helpful.
This information isn't just for the immediate team. It should be incorporated into a centralized knowledge base accessible to all relevant stakeholders - project managers, field engineers, even potentially end-users. A searchable knowledge base empowers self-service, reduces the burden on the support team, and ensures consistency in problem-solving. Think of it as building a collective memory for your project! Regularly review and update the knowledge base to keep it accurate and relevant.
7. Request Closure & User Confirmation: Confirming Satisfaction
Closing the loop is just as vital as resolving the issue itself. Before officially marking a construction project support request as closed, it's crucial to actively seek user confirmation. This isn't just a formality; it ensures the solution was effective and the user is genuinely satisfied.
Here's what this final step involves:
- Proactive Contact: Don't wait for the user to reach out. A quick email, phone call, or even a short in-person check-in demonstrates commitment and shows you care.
- Clear Questioning: Frame your confirmation question clearly. Instead of a simple Is everything okay?, try something like, Does the implemented solution effectively address the original issue you reported? or Are you able to now perform [specific task] without the previous problem?.
- Active Listening: Truly listen to the user's response. There might be lingering concerns or additional clarifications needed. Acknowledge their feedback, even if it's positive.
- Address Remaining Concerns: If the user isn't fully satisfied, loop back to the troubleshooting and resolution stages. Don't dismiss their concerns - investigate further and work towards a complete resolution.
- Formal Closure: Once confirmed, formally close the request in your ticketing system, ensuring all notes are accurate and complete. This helps build a valuable history for future reference.
Ultimately, securing user confirmation isn't just about closing a ticket; it's about fostering trust and demonstrating a commitment to providing exceptional support for your construction projects.
8. The Benefits of Standardized Support
Standardized support, especially when driven by a checklist like the Construction Project Support Request Checklist we're outlining, brings tangible benefits. Beyond simply streamlining the process, it fosters a proactive and consistent approach to resolving issues. This leads to reduced downtime on projects, minimizing costly delays and keeping schedules on track. Team members gain a shared understanding of the support process, leading to better communication and collaboration. Furthermore, standardized support improves the quality of resolutions - a consistent methodology reduces errors and ensures problems are fully addressed. Finally, the data collected through the checklist provides valuable insights into recurring issues, allowing for preventative measures and continuous improvement of processes - ultimately reducing the volume of support requests over time.
Potential Pitfalls to Avoid
Even with a robust Construction Project Support Request Checklist, things can still go wrong. Here's what to watch out for:
- Skipping Initial Assessment: Rushing straight to fixing without properly understanding the request's scope and impact can lead to wasted time and misdirected effort. That initial assessment is critical.
- Lack of Clear Prioritization: Treating all requests as equally urgent creates bottlenecks and frustration. Without a clear prioritization system (considering factors like project phase, impact, and user criticality), the most important issues might get overlooked.
- Insufficient Troubleshooting Detail: Jumping to conclusions during troubleshooting is a common mistake. Thoroughly document the diagnostic steps taken - what was tried, what the results were - even if they seem insignificant at the time. This can be invaluable for future reference or escalation.
- Ignoring User Feedback After Resolution: Assuming a fix is perfect based solely on your internal testing is risky. Always confirm with the user that the issue is genuinely resolved and that their workflow isn't negatively impacted.
- Neglecting Knowledge Base Updates: Failing to update the knowledge base with solutions to common problems means those solutions will be forgotten, and the same issues will resurface repeatedly. Dedicate the time to document learnings.
- Lack of Communication Throughout the Process: Users appreciate transparency. Keep them informed about the progress of their request, estimated resolution times, and any roadblocks encountered. Silence breeds anxiety.
Tools & Technologies to Enhance Your Checklist
While a well-defined checklist like our Construction Project Support Request Checklist is a fantastic starting point, leveraging the right tools can significantly amplify its effectiveness and streamline the entire process. Here's a look at some technologies that can elevate your support workflows:
- Ticketing Systems (Jira, Zendesk, ServiceNow): These platforms aren't just for customer support. Integrating your checklist into a ticketing system allows for automated routing, assignment, and tracking of requests. Each step of the checklist can become a status update within the ticket, ensuring accountability and visibility.
- Project Management Software (Asana, Trello, Microsoft Project): Similar to ticketing systems, project management tools allow you to integrate the checklist as a task list or sub-task within a larger project. This context helps in understanding the urgency and impact of support requests.
- Knowledge Base Platforms (Confluence, Notion, SharePoint): Closely linked to Documentation & Knowledge Base Update on your checklist, a robust knowledge base is essential. Integrating your checklist with the KB allows for easy linking of relevant documentation and FAQs, empowering users to self-serve and reducing support requests in the first place.
- Collaboration Tools (Microsoft Teams, Slack): Real-time communication and collaboration are crucial during troubleshooting and resolution. Integrate your checklist with these platforms to facilitate quick discussions, problem-solving, and updates.
- Automation Platforms (Zapier, Microsoft Power Automate): Automate repetitive tasks like logging requests, assigning priorities, or sending notifications based on checklist progress. This frees up your team's time for more complex issues.
- Digital Forms & Workflow Builders (Google Forms, Microsoft Forms, Typeform): These can be used to create a more user-friendly way for users to initiate support requests, automatically populating the Request Initiation & Logging step of your checklist.
Conclusion: Building Better Projects with Organized Support
Ultimately, implementing a Construction Project Support Request Checklist like the one we've outlined isn't just about ticking boxes; it's about fostering a culture of proactive problem-solving and continuous improvement. By standardizing the support process, you'll see a marked decrease in duplicated efforts, faster resolution times, and a more satisfied project team. This checklist acts as a foundation - adapt it to your specific project needs and organizational processes. Remember, a well-managed support system translates directly to smoother project execution, reduced risk, and ultimately, a more successful construction endeavor. Embrace the power of organization and build better projects, one support request at a time.
Resources & Links
- PlanRoom : Provides document management and collaboration solutions often used in construction, relevant to organizing project documentation and request processes. Useful for visualizing how to structure a digital request system.
- Procore : Construction management software offering features for issue tracking, change orders, and communication. Provides insight into how a structured request system integrates with broader project workflows. Can inspire checklist design.
- Autodesk Construction Cloud : Suite of construction tools, including Build and BIM Collaborate, that facilitate communication and documentation. Consider how their workflows could inform a streamlined support request process.
- Smartsheet : A work management platform that's highly adaptable for creating checklists, workflows, and tracking project requests. Excellent for building and managing a support request checklist and tracking its progress.
- monday.com : Another versatile work operating system that's great for visual project management and could be used to implement a support request workflow. Its customizable boards would suit any specific industry needs.
- APJELman - Root Cause Analysis : Provides resources and training on root cause analysis techniques. Important for the troubleshooting and diagnosis phase, ensuring requests are fixed properly, and not merely addressed with a band-aid solution.
- The 5 Whys : A simple but effective root cause analysis technique, directly relating to the 'Troubleshooting & Diagnosis' header. It's a tool for digging deeper than surface-level issues.
- Atlassian (Jira, Confluence) : A suite of tools used for issue tracking (Jira) and knowledge base creation (Confluence). Illustrates how these tools facilitate the complete support request lifecycle.
- ServiceNow : Enterprise service management platform. Although perhaps overkill for a smaller construction project, ServiceNow demonstrates how sophisticated support request systems can be structured and automated.
- ISO/IEC 20000 : Provides the standard for IT Service Management. While a more complex framework, understanding its principles can inform the creation of a more robust and standardized support process for any project.
- NIST (National Institute of Standards and Technology) : Provides guidance on quality management and cybersecurity. Relevant to ensuring the stability and security of implemented solutions, particularly when dealing with technology in construction.
Frequently Asked Questions
What is a support request checklist and why is it important for construction projects?
A support request checklist is a structured document that ensures all necessary information is provided when requesting assistance (e.g., from a general contractor, subcontractors, or suppliers) during a construction project. It's important because it reduces misunderstandings, speeds up response times, minimizes errors, and ultimately helps keep projects on schedule and within budget.
Who should use this checklist?
This checklist is beneficial for anyone involved in requesting support on a construction project. This includes project managers, site supervisors, subcontractors, and even field personnel. Essentially, anyone needing assistance or clarification related to the project's progress.
What types of support requests are suitable for this checklist?
The checklist is suitable for a wide range of support requests, such as clarification on drawings, material substitutions, access issues, schedule adjustments, quality concerns, or any other deviation from the original plan that requires assistance or a decision.
Can I customize the checklist to fit my specific project needs?
Absolutely! The provided checklist is a template. We encourage you to customize it by adding, removing, or modifying sections to reflect the unique requirements and terminology used on your specific construction project. Adding company-specific contact information is also recommended.
What information should I include in a 'Detailed Description' of the issue?
The 'Detailed Description' section should include as much relevant information as possible. This includes the exact location of the issue, specific details of the problem, steps taken to resolve it (if any), and any relevant dates or times. Be clear and concise.
What is the purpose of the 'Supporting Documentation' section?
The 'Supporting Documentation' section allows you to attach photos, videos, drawings, or other relevant files that provide context and clarity for the support request. Visual aids can often prevent misinterpretations and expedite the resolution process.
How does using a checklist improve communication?
A checklist standardizes the information provided, ensuring everyone is on the same page. It reduces ambiguity and guesswork, leading to clearer communication and minimizing the back-and-forth that can often occur when requesting support.
What happens if I don't use a checklist?
Without a checklist, support requests might be incomplete, lack crucial details, or be sent to the wrong person. This can lead to delays in response times, increased miscommunication, rework, and potential cost overruns. Using a checklist helps avoid these pitfalls.
Found this Article helpful?
Support Management Solution Demo
Struggling to keep up with support requests? ChecklistGuro provides a centralized system for managing tickets, tracking progress, & ensuring customer satisfaction. Improve efficiency & reduce resolution times.
Related Articles
Legal Case Management Support Checklist: Your Guide to Seamless Implementation
Mastering Aircraft Maintenance: Your Aerospace Support Checklist Template
Ensuring Excellence: Your Zoo Animal Welfare Support Checklist Guide
Keeping Your Fish Farm Running Smoothly: The Aquaculture Support Checklist
Mastering Citizen Service: Your Government Helpdesk Checklist Template
Streamlining Support: The Financial Services Help Desk Escalation Checklist You Need

Navigating Shipping & Fulfillment Mishaps: Your Resolution Checklist
Mastering Guest Service Recovery: Your Hospitality Issue Checklist Template
We can do it Together
Need help with
Support Management?
Have a question? We're here to help. Please submit your inquiry, and we'll respond promptly.