Decoding Your Forage: A Checklist Template for Quality Analysis
Published: 09/02/2025 Updated: 12/13/2025
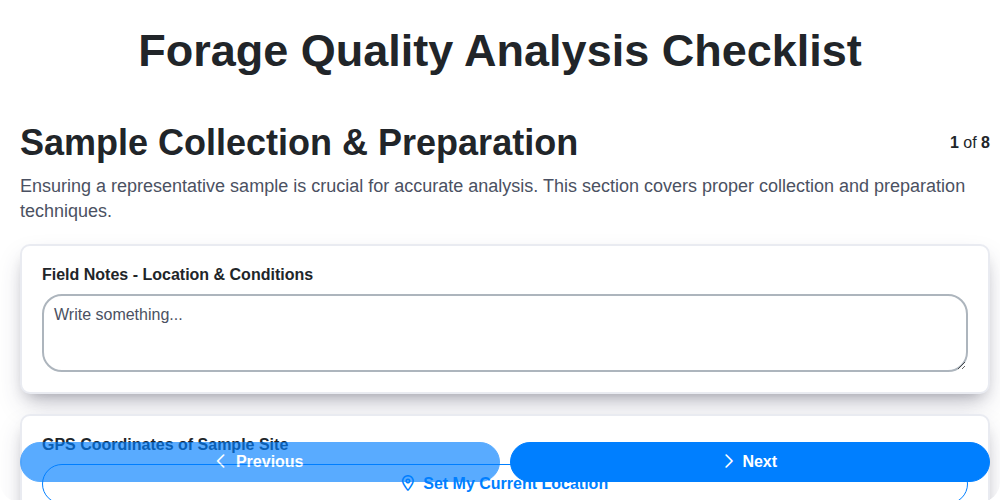
Table of Contents
- Understanding the Importance of Forage Quality
- Before You Start: Defining Your Goals
- Step 1: Sample Collection - The Foundation of Accuracy
- Step 2: Sample Preparation - Maintaining Integrity
- Step 2.1: Choosing the Right Laboratory
- Step 3: Nutrient Analysis - Dry Matter (DM)
- Step 4: Major Component Breakdown: Protein, Fiber, and Energy
- Step 5: Mineral and Vitamin Profiles: Filling the Gaps
- Step 6: Palatability & Digestibility: Beyond the Numbers (Optional)
- Step 7: Interpreting Your Results: Matching Nutrition to Needs
- Step 8: Creating Actionable Feeding Strategies
- Step 9: Quality Control and Assurance: Ensuring Reliable Data
- Step 10: Record Keeping and Future Benchmarking
- Resources & Links
TLDR: This checklist template helps you systematically analyze your forage (hay, silage, pasture) to ensure your animals get the nutrients they need. It covers everything from proper sampling to interpreting lab results, ultimately saving you money and boosting animal health - no more guesswork!
Understanding the Importance of Forage Quality
Forage isn't just "grass" or "hay"; it's the foundational building block of a livestock animal's diet and overall health. Its quality directly influences everything from growth rates and milk production to reproductive success and disease resistance. Think of it this way: a high-performance engine needs premium fuel to run efficiently, and similarly, livestock require high-quality forage to reach their full potential.
Poor forage quality often goes unnoticed until problems arise - reduced animal performance, increased veterinary bills, and ultimately, decreased profitability. These issues can stem from a variety of factors, including improper harvesting techniques, delayed cutting dates, nutrient deficiencies, and inadequate storage practices. By understanding the intricate relationship between forage quality and animal wellbeing, you can proactively address potential problems and optimize your feeding program. A consistent, proactive approach to forage quality analysis moves beyond guesswork and establishes a data-driven foundation for successful livestock management.
Before You Start: Defining Your Goals
Why are you getting your forage analyzed? The answer to this question shapes the entire process and helps you interpret the results effectively. Are you troubleshooting a sudden drop in milk production in your dairy herd? Trying to optimize growth rates in your beef cattle? Perhaps you're introducing a new forage variety and want to understand its nutritional profile?
Having clear objectives ensures you request the right tests and accurately understand the data. For instance, a dairy farmer primarily concerned with milk production will focus on protein and calcium levels, whereas a horse owner might prioritize vitamin E and digestible energy. Define your specific goals before collecting samples - it's the first step towards making informed feeding decisions and maximizing the value of your forage analysis.
Step 1: Sample Collection - The Foundation of Accuracy
Your forage analysis is only as good as your sample. A poorly collected sample can lead to inaccurate results and flawed feeding decisions, essentially defeating the entire purpose. Here's how to ensure you're representing your forage accurately:
1. Representativeness is Key: Don't just grab a handful from the top of a hay bale or the edge of a field. You need a composite sample that reflects the overall quality of the entire lot. For hay, this means taking samples from multiple bales within the lot, ensuring you reach into the center and grab material from different sides. For pasture, collect samples from different areas of the pasture, considering variations in soil type, sunlight exposure, and plant density. For silage, aim to sample from the face of the pile, taking material from different depths and positions.
2. Timing Matters: Collect samples at a representative time, preferably just after harvest or when the forage is being utilized. Avoid collecting samples that have been exposed to rain or prolonged sunlight, as these conditions can alter nutrient content.
3. Tools of the Trade: Use clean tools - a forage corer, knife, or shovel - to avoid contamination. A forage corer is ideal for hay and silage, as it allows you to collect a consistent sample from the center of the bale or pile.
4. Proper Storage and Labeling: Store your samples in airtight bags or containers to prevent moisture loss and nutrient degradation. Clearly label each sample with the date, field/lot identification, crop type, and any relevant information. This will help you track your results and make informed decisions later on.
5. Quantity is Crucial: The lab will specify how much sample they need, typically around 1-2 pounds for hay, 2-5 pounds for silage. Ensure you collect the required amount to avoid delays or re-sampling.
Step 2: Sample Preparation - Maintaining Integrity
The lab analysis is only as good as the sample it's based on. Improper sample preparation can lead to inaccurate results and wasted time and money. Here's how to ensure your sample maintains its integrity from field to lab:
1. Container Choice: Use clean, airtight containers provided by the lab. Avoid using containers that have previously held chemicals or fertilizers. Plastic bags are typically sufficient for hay, while silage samples may require specialized containers to prevent leakage.
2. Avoid Contamination: Be meticulous in preventing contamination. Use clean shovels, forks, or corers for collecting samples. Avoid contact with soil, manure, or other foreign materials. Wash sampling equipment thoroughly with potable water.
3. Rapid Transport & Storage: Time is of the essence. Transport samples to the lab as quickly as possible after collection. If immediate delivery isn't feasible, store samples in a cool, dry place, protected from sunlight and moisture. Refrigeration is ideal for silage samples to slow down fermentation.
4. Labeling is Key: Clearly label each sample container with the following information: * Your Name/Farm Name * Date and Time of Collection * Crop Type (e.g., Alfalfa Hay, Corn Silage) * Field/Lot Identification (e.g., Field #3, Lot A) * Any relevant notes (e.g., First cutting hay)
5. Chain of Custody: If your lab requires it, establish a chain of custody record detailing the handling of the sample from collection to delivery. This ensures traceability and accountability.
Step 2.1: Choosing the Right Laboratory
Not all forage labs are created equal. Selecting a reputable and certified laboratory is crucial for obtaining reliable and accurate results. Here's what to look for:
- Certification: Prioritize labs certified by recognized organizations like the AOAC (Association of Official Analytical Chemists) or state-specific certification programs. This indicates adherence to standardized testing methods and quality control procedures.
- Accreditation: Look for accreditation from bodies like ISO 17025. This demonstrates technical competence and a commitment to quality management.
- Method Expertise: Ensure the lab offers the specific analyses you need. Some labs specialize in certain types of forage or analyses (e.g., mycotoxin testing in silage).
- Turnaround Time: Consider the lab's turnaround time for results, especially if you need to make timely adjustments to your feeding program.
- Cost: While cost is a factor, don't sacrifice quality for the cheapest option. Compare prices from several labs and inquire about package deals or discounts.
- Customer Service: A responsive and helpful customer service team can be invaluable when interpreting results and troubleshooting issues.
- References: Ask for references from other forage producers or consultants who have used the lab's services.
Step 3: Nutrient Analysis - Dry Matter (DM)
Dry matter (DM) represents the percentage of forage that isn't water - essentially, the portion that actually contributes to nutrient intake. It's a foundational measurement because all other nutrient values are reported on a dry matter basis. Think of it like this: a hay bale that's 20% moisture contains less actual forage than a bale that's 10% moisture.
Why is this so important? Because knowing the DM allows you to accurately calculate how much of each nutrient your animals are actually consuming. A high-moisture forage will have a lower concentration of nutrients per pound compared to a drier forage. Labs typically determine DM through a standardized oven-drying process, where a sample is dried at a specific temperature until its weight stabilizes. The difference in weight before and after drying directly indicates the moisture content. Understanding your forage's DM percentage is the critical first step in interpreting the rest of your nutrient analysis results - so pay close attention to this value!
Step 4: Major Component Breakdown: Protein, Fiber, and Energy
Understanding the big three - Crude Protein (CP), Fiber (represented by ADF and NDF), and Energy (TDN) - is crucial for interpreting your forage analysis. Let's break them down:
Crude Protein (CP): The Building Block
CP isn't pure protein; it's a measure that includes non-protein nitrogen compounds. However, it's a good indicator of protein availability for your animals. Adequate protein supports growth, reproduction, and overall health. Lower CP values might necessitate supplementation with protein sources like soybean meal or cottonseed meal. Conversely, excessively high CP can lead to nitrogen losses and environmental concerns. Optimal levels depend on the animal's age, species, and production stage.
Fiber: Digestibility and Palatability
Fiber content, primarily assessed through ADF and NDF, dictates how readily forage can be digested and how appealing it is to animals.
- NDF (Neutral Detergent Fiber): This measures the total fiber content and provides insight into forage maturity. Higher NDF generally means lower digestibility. Think of it as a rough indicator of how "mature" the forage is - later stage plants have higher NDF.
- ADF (Acid Detergent Fiber): ADF represents the more resistant portion of the fiber, influencing the time it takes for digestion. Higher ADF values correlate with lower digestibility. The difference between NDF and ADF (NDF - ADF) provides an estimate of hemicellulose, another important carbohydrate component.
A high ADF/NDF ratio suggests a more mature, less digestible forage.
Total Digestible Nutrients (TDN): Fueling Performance
TDN is an estimate of the total energy available to the animal from the forage. It's calculated from the CP, ADF, and fat content. A higher TDN value indicates a more energy-rich forage. This value directly impacts how much feed is needed to meet an animals energy requirements. TDN is a practical number for ration balancing and is often used to determine the animal's maintenance or production needs.
Step 5: Mineral and Vitamin Profiles: Filling the Gaps
Beyond the major components like protein and fiber, a comprehensive forage analysis dives deep into the crucial, often overlooked, mineral and vitamin content. These micronutrients are the unsung heroes of animal health, impacting everything from bone development and reproductive success to immune function and overall vitality. A deficiency in even one mineral or vitamin can trigger a cascade of health problems, leading to decreased performance and increased veterinary costs.
Why are Minerals So Important?
Minerals like Calcium (Ca), Phosphorus (P), Potassium (K), Magnesium (Mg), Sodium (Na), and Zinc (Zn) each play distinct roles. Calcium and Phosphorus, for instance, are vital for strong bones and teeth, particularly important for growing animals and those in lactation. Potassium is key for muscle function and nerve transmission. A mineral imbalance can disrupt these processes, leading to conditions like rickets (calcium deficiency), milk fever (magnesium deficiency), or reduced growth rates.
Vitamins: More Than Just Supplements
While supplements can help, relying solely on them masks underlying forage deficiencies. Vitamin A (essential for vision and immune health), Vitamin E (an antioxidant protecting cells from damage), and Carotene (a precursor to Vitamin A) are often present in forage, albeit in variable amounts. Factors like sunlight exposure during growth, harvest timing, and storage conditions significantly impact vitamin content. For example, hay that is cut and stored improperly can lose substantial amounts of Vitamin A.
Decoding the Results & Correcting Deficiencies
Your forage analysis report will provide quantitative data for each mineral and vitamin tested. Compare these values to the established requirements for your specific livestock species and production stage. If deficiencies are identified, there are several avenues for correction:
- Adjusting Feeding Rations: Incorporating mineral/vitamin premixes or alternative feedstuffs.
- Fertilizer Application: Strategic fertilization to increase mineral uptake in future harvests (consult with an agronomist).
- Improving Storage Practices: Minimizing nutrient losses during haymaking and storage.
Understanding your forage's mineral and vitamin profile empowers you to optimize animal health and performance, minimizing reliance on supplements and maximizing the nutritional value of your feedstuffs.
Step 6: Palatability & Digestibility: Beyond the Numbers (Optional)
While laboratory analyses provide a wealth of information about a forage's nutritional composition, they don't always tell the whole story about how animals will actually consume and digest it. Palatability, or how appealing the forage is to animals, and true digestibility (how effectively the animal extracts nutrients) can vary considerably. This is where optional assessments come into play.
Several factors influence palatability, including aroma, leaf-to-stem ratio, maturity stage, and even the presence of molds or toxins. A forage that looks nutritious on paper might be refused by livestock if it's unpalatable. Similarly, maturity level significantly impacts digestibility; a very mature forage, even with seemingly adequate nutrient levels, can be difficult for animals to digest.
There are several ways to gauge palatability and digestibility beyond the standard lab report. Observational methods, where you simply monitor animal intake, are often the most practical. Sudden decreases in consumption or signs of digestive upset (like loose manure) can signal a problem. More sophisticated approaches involve in vitro digestion techniques, which simulate the digestive process in a laboratory setting, offering a more precise estimate of nutrient extraction. While these advanced methods are less common, they can be incredibly valuable when dealing with novel forages, unusually mature harvests, or when troubleshooting persistent feeding problems. Ultimately, a combined approach-lab results plus careful observation-provides the most complete picture of forage quality.
Step 7: Interpreting Your Results: Matching Nutrition to Needs
Receiving your forage analysis report is just the beginning. The real value lies in understanding what those numbers mean and how they relate to your animals' nutritional needs. It's not enough to know you have a forage report; you need to translate that data into a feeding strategy.
1. Understanding Key Values:
- Compare to Requirements: The core of interpretation is comparing your forage's nutrient profile to the established nutritional requirements of your livestock. These requirements vary based on age, breed, physiological state (e.g., pregnant, lactating), and activity level. Your local extension office or a livestock nutritionist can provide tables or software to help you determine these needs.
- Dry Matter (DM) Matters: Remember that all nutrient values are typically reported on a dry matter basis. This is crucial for accurate comparisons because it accounts for variations in moisture content.
- Protein - The Foundation: Crude Protein (CP) is often the first nutrient to assess. Insufficient protein can hinder growth, milk production, and overall health. Consider supplementing with protein sources if levels are low.
- Energy Balance: Total Digestible Nutrients (TDN) gives you an estimate of energy availability. A deficit in energy can lead to poor performance and weight loss.
- Fiber and Digestibility: ADF and NDF provide insights into forage maturity and digestibility. High ADF levels indicate lower digestibility, meaning animals will extract less energy and nutrients.
- Mineral & Vitamin Deficiencies: Pay close attention to mineral and vitamin levels. Deficiencies can lead to specific health problems (e.g., calcium deficiency causing milk fever).
2. Identifying Potential Imbalances:
- Protein-Fiber Ratio: A high fiber content coupled with low protein can create a digestive challenge for animals.
- Calcium-Phosphorus Ratio: A proper ratio is critical for bone health. An imbalance can lead to metabolic disorders.
- Energy-Protein Ratio: A mismatch can affect overall performance and nutrient utilization.
3. Developing a Feeding Strategy:
- Supplementation: If your forage analysis reveals deficiencies, supplementation is often necessary. This can involve adding protein, minerals, vitamins, or energy sources to the diet.
- Forage Blending: Combining different forages can help balance nutrient levels.
- Adjusting Feeding Rates: Increasing or decreasing the amount of forage offered can help meet nutritional requirements.
- Consulting an Expert: A qualified livestock nutritionist can provide personalized recommendations based on your specific needs and resources.
Remember, interpreting forage analysis results is an ongoing process. Regularly test your forages and adjust your feeding strategies to optimize animal health and productivity.
Step 8: Creating Actionable Feeding Strategies
So, you're armed with a comprehensive forage analysis report. Fantastic! But the real power lies in transforming that data into a feeding strategy that maximizes animal performance and minimizes waste. Here's how to move beyond the numbers and create a plan:
1. Matching Forage to Animal Needs:
- Nutrient Requirements: Refer to established nutrient requirements tables for your specific livestock species, age, and production stage (e.g., pregnant vs. lactating cows, growing vs. finishing pigs). These tables outline the minimum amounts of protein, energy, minerals, and vitamins needed.
- Balancing Act: Compare your forage analysis results to these requirements. Is your forage deficient in any key nutrients? Are you supplying more than needed? Excessive nutrient levels can be just as problematic as deficiencies.
- Consider Maturity: Forage maturity significantly impacts nutrient content. Earlier-cut forages are typically higher in protein and lower in fiber.
2. Supplementation Strategies:
- Protein Supplements: If protein is deficient, consider adding protein sources like soybean meal, cottonseed meal, or legumes.
- Energy Supplements: If energy is low, corn, barley, or other grains can be incorporated.
- Mineral and Vitamin Supplements: Use a balanced mineral supplement to address any mineral deficiencies identified in your forage analysis. Vitamin supplements may be necessary if vitamin levels are inadequate.
- Gradual Changes: Introduce any supplements gradually to avoid digestive upset.
3. Ration Formulation:
- Dry Matter Basis: Always calculate rations on a dry matter basis to ensure accurate nutrient intake.
- Software Tools: Utilize ration balancing software to simplify the process and ensure accurate calculations.
- Professional Consultation: Don't hesitate to consult with a nutritionist or livestock specialist for assistance in formulating balanced rations.
4. Ongoing Monitoring:
- Animal Performance: Regularly monitor animal performance (growth rates, milk production, reproductive success) to assess the effectiveness of your feeding strategy.
- Forage Variability: Recognize that forage nutrient content can vary considerably within a field and from year to year. Periodic re-analysis is recommended.
- Adjustments: Be prepared to adjust your feeding strategy based on animal performance and forage variability.
Step 9: Quality Control and Assurance: Ensuring Reliable Data
The most meticulously collected and analyzed forage sample is useless if the data isn't reliable. Quality control and assurance aren't just checkboxes; they're the bedrock of informed decision-making. Here's how to ensure the data you receive accurately reflects your forage's nutritional profile:
1. Choosing a Reputable Lab: Not all labs are created equal. Look for a forage testing laboratory certified by a recognized body (e.g., AOCS, ISO). Certification indicates adherence to standardized methodologies and quality protocols. Check online reviews and seek recommendations from fellow producers or agricultural professionals.
2. Standardized Methods are Key: Insist that the lab uses nationally recognized and standardized testing methods (AOAC, NRC). These methods ensure consistency and comparability across different analyses. Understand the methods used - the lab should be able to clearly explain them.
3. Sample Chain of Custody: Maintain a clear record of who handled the sample from collection to receipt at the lab. This "chain of custody" helps identify any potential contamination or mishandling during transit.
4. Blank Samples & Proficiency Testing: A good lab regularly performs blank samples (samples with no forage) to detect any lab contamination and participates in proficiency testing programs to validate their results against known standards. Don't hesitate to ask about these practices.
5. Periodic Verification: Consider submitting "check" samples - samples with known nutrient levels - to the lab periodically. This allows you to verify that their results are consistent over time.
6. Don't Be Afraid to Question: If you notice significant discrepancies between different analyses or if you have concerns about the lab's procedures, don't hesitate to ask questions and seek clarification. A reputable lab will be transparent and willing to address your concerns.
Ultimately, investing in quality control and assurance strengthens your confidence in the data, empowering you to make smart, data-driven decisions that optimize livestock health and performance.
Step 10: Record Keeping and Future Benchmarking
The data you're collecting through forage quality analysis isn't just for this year's feeding plan; it's a valuable foundation for long-term improvements. Establishing a robust record-keeping system is paramount. Create a spreadsheet or use specialized farm management software to log:
- Sample Date & Location: Precise location within the field/lot from which the sample was taken.
- Crop Type & Variety: Identifies the specific forage being analyzed.
- Lab Report Details: Name of the lab, report date, and a link to the full report (if possible).
- Key Nutrient Values: Record CP, TDN, ADF, NDF, and mineral levels.
- Animal Feeding Strategy: Document how the results influenced ration adjustments.
- Animal Performance Data: Track relevant animal performance metrics (e.g., weight gain, milk production).
Over time, this data allows you to establish benchmarks for your forage quality. You'll be able to identify trends-such as changes in nutrient levels due to management practices or seasonal variations. This historical data provides context, enabling you to make more informed decisions about future forage management, seed selection, and fertilizer applications. Furthermore, these records become incredibly valuable if you ever decide to sell your farm or lease land. They demonstrate a commitment to responsible land management and provide potential buyers or lessees with transparency regarding forage quality.
Resources & Links
- Oregon State University Forage Research : A comprehensive resource with research, extension publications, and information on all aspects of forage production and quality. Includes detailed information on forage testing and interpretation. Excellent for understanding the science behind forage analysis.
- West Virginia University Extension - Forage Testing & Interpretation : Provides practical guides and information specifically geared towards interpreting forage analysis results for livestock producers. Includes detailed explanations of key nutrients and their importance.
- Noble Research Institute : Noble Research Institute offers a wealth of resources, including articles and publications on forage management, grazing systems, and nutrient analysis. Their expertise spans a broad range of livestock operations.
- University of Kentucky Forage & Grassland Extension : Offers information and resources related to forage production, grazing management, and forage testing. Includes guides and fact sheets geared toward Kentucky producers, but principles are widely applicable.
- Purdue University Animal Sciences : Purdue's Animal Sciences department provides research-based information on livestock nutrition and forage quality. Useful for understanding nutritional requirements of various livestock species.
- Iowa DNR Forage Testing Guide : A practical guide by the Iowa Department of Natural Resources, outlining the process and importance of forage testing, especially for wildlife and livestock. Includes sample submission procedures.
- Cornell University Forage Information : A collection of resources from Cornell University, focusing on forage production and quality. Includes information on different forage types and their nutritional value.
- Dairy One - Feed Analysis Services : A prominent forage testing laboratory. Their website provides information about their testing services, methods, and interpretation guides (though geared towards dairy). Useful for understanding the lab process.
- Waypoint Analytical : Another reputable forage testing laboratory. Offers a range of testing packages and provides information about their methodologies. Comparison shopping for labs can be helpful.
- Agri-Tech Consulting : While primarily a consultancy, Agri-Tech's website has many free resources regarding forage testing and interpretation, specifically for pasture and grazing management, relevant to all livestock types.
- University of Minnesota Extension : Provides information relating to nutrient and forage testing. Offers practical advice for producers.
Frequently Asked Questions
What is forage and why is analyzing it important?
Forage refers to plants eaten by livestock, like grasses, legumes, and other plants. Analyzing it is crucial to ensure your animals are receiving adequate nutrition, which impacts their health, growth, milk production, and overall performance. Improper forage can lead to deficiencies, health problems, and wasted resources.
What does 'quality analysis' of forage involve?
Quality analysis involves laboratory testing to determine the nutritional content of your forage. This includes measurements of dry matter, crude protein, fiber (NDF, ADF), minerals (calcium, phosphorus, magnesium, potassium), and sometimes vitamins. The checklist template provided helps guide you through the process of knowing what to request.
Why use a checklist template for forage analysis?
The checklist template ensures you're consistently requesting the essential tests each time you analyze your forage. This allows for accurate comparisons between different batches or cuts, and simplifies the process by providing a standardized request form for the lab.
Where can I find the checklist template mentioned in the article?
The checklist template is available as a downloadable resource linked directly within the article. Look for the button or link labeled 'Download Checklist' or similar wording near the introduction of the article.
What does 'dry matter' refer to in forage analysis?
Dry matter (DM) represents the weight of the forage after all moisture has been removed. It's a critical measurement because all other nutrient values are expressed as a percentage of dry matter, allowing for accurate comparisons regardless of moisture content.
What are NDF and ADF, and why are they important?
NDF (Neutral Detergent Fiber) and ADF (Acid Detergent Fiber) are measures of the structural carbohydrates in forage. They indicate digestibility - higher NDF and ADF values generally mean lower digestibility. They help determine the forage's suitability for different livestock classes (e.g., growing animals vs. lactating cows).
How often should I analyze my forage?
The frequency of analysis depends on several factors, including the type of forage, storage method, and the livestock being fed. Generally, analyzing each new cutting or batch is recommended, especially for critical periods like lactation or growth. At a minimum, annual testing is a good practice.
Can I interpret the lab results myself, or do I need a nutritionist?
While the checklist provides some basic explanations, interpreting forage analysis results accurately requires expertise. Consulting with a qualified livestock nutritionist is highly recommended to fully understand the results and tailor feeding strategies appropriately.
What is the difference between a 'wet' and 'dry' forage sample?
A 'wet' sample refers to the forage as it is harvested, containing its natural moisture content. A 'dry' sample is the forage after it has been dried to a consistent moisture level (usually around 85-90% dry matter) for laboratory analysis. Both are important for different calculations and comparisons.
How do I collect a representative forage sample for analysis?
Proper sample collection is vital for accurate results. Collect multiple small samples from different locations within the harvested area or storage pile, then combine them thoroughly. Avoid taking samples from the edges or bottom, as these may not be representative of the entire lot. The article includes details on proper sampling techniques.
Found this Article helpful?
Agriculture Management Solution Demo
Running a farm or agricultural business is complex. ChecklistGuro's Work OS platform simplifies your operations, from crop planning and irrigation management to livestock tracking and harvest scheduling. Increase efficiency, reduce waste, and boost yields! See how ChecklistGuro can revolutionize your agriculture business.
Related Articles

10 Simple Steps to a Healthy Drainage System: Your Checklist Template

Mastering the Daily Crop Scouting Report: Your [Specific Crop] Checklist Template

Irrigation System Checklist: Farm Water Management & Crop Yield Optimization

Unlock Your Garden's Potential: A Soil pH Verification Checklist

PPE Usage Checklist Template: Your Guide to Safety

Water Discharge Permit Compliance Checklist Template

The Ultimate GPS & Precision Farming Calibration Checklist Template

Water Runoff Analysis Checklist Template
We can do it Together
Need help with
Agriculture?
Have a question? We're here to help. Please submit your inquiry, and we'll respond promptly.