The Ultimate Irrigation Pump Maintenance Checklist Template
Published: 09/02/2025 Updated: 04/23/2026
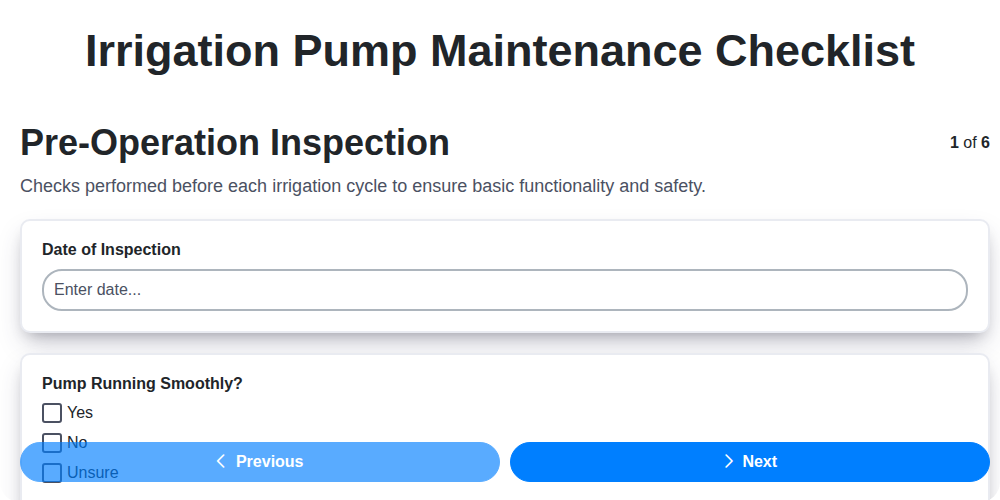
Table of Contents
- Introduction: Why Irrigation Pump Maintenance Matters
- Pre-Operation Inspection: A Quick Check Before You Start
- Weekly Maintenance: Staying on Top of Things
- Monthly Maintenance: Deeper Dive
- Seasonal Maintenance (Pre-Season): Preparing for Peak Performance
- Seasonal Maintenance (Post-Season): Winterizing for Protection
- Engine/Motor Maintenance: Keeping the Powerhouse Running
- Impeller and Casing Inspection: Ensuring Efficient Pumping
- Safety First: Protecting Yourself and Your System
- Record Keeping: Tracking Your Maintenance Efforts
- Resources & Links
TLDR: This checklist template simplifies irrigation pump maintenance! It guides you through essential inspections, routine upkeep, seasonal prep, and safety checks to keep your pump running smoothly and avoid costly repairs. Download the template and customize it for your specific pump - saving you time and ensuring reliable irrigation.
Introduction: Why Irrigation Pump Maintenance Matters
Your irrigation pump is the unsung hero of a thriving garden, farm, or landscape. It tirelessly delivers the water your plants need to flourish, often operating without a second thought. But just like any crucial piece of machinery, consistent maintenance is vital to ensure its longevity, efficiency, and - most importantly - its reliable performance.
Neglecting irrigation pump upkeep can lead to a cascade of problems. From reduced water pressure and uneven irrigation to costly breakdowns and premature system failure, the consequences can significantly impact your yield, budget, and overall peace of mind. A few proactive steps taken regularly can prevent these issues, saving you time, money, and frustration. This article provides a practical checklist designed to help you keep your irrigation pump operating at its best, year after year.
Pre-Operation Inspection: A Quick Check Before You Start
Before you even think about turning on your irrigation pump, taking a few minutes for a pre-operation inspection can save you headaches (and costly repairs) down the line. This isn't about a deep dive; it's a quick visual and functional check to ensure everything looks and feels right.
Start with a thorough visual scan of the pump and surrounding area. Look for any signs of damage - cracks, leaks, loose connections, or corrosion. Even a small drip can indicate a developing problem.
Next, check your fluid levels. Many engine-driven pumps require regular oil and coolant checks. Refer to your pump's manual for the correct levels. Electric motor pumps typically don't require this.
Ensure a stable power supply by verifying the voltage if applicable. Clean the intake screen or filter - this is essential to prevent debris from entering and damaging the pump. A clogged intake screen dramatically reduces efficiency and can overheat the motor or engine.
Finally, give the pump a listen. If you hear any unusual noises - grinding, squealing, or knocking - investigate before proceeding. Trust your instincts; if something doesn't sound right, it probably isn't.
Weekly Maintenance: Staying on Top of Things
Staying on top of weekly maintenance tasks takes just a few minutes but can prevent major headaches down the road. Think of it as a quick health check for your irrigation pump.
Here's your weekly routine:
- Leak Patrol: Take a quick visual sweep around the pump and all connected piping. Even a small drip can indicate a developing issue that needs attention.
- Pressure Check: Observe the water pressure at a discharge point (like a sprinkler head). A sudden drop in pressure is a red flag. Note the normal pressure, and any deviations are worth investigating.
- Listen Closely: As you're checking, really listen to the pump. Any unusual noises-grinding, squealing, banging-could signal a problem. Don't ignore them! Document anything out of the ordinary.
- Quick Filter Check: If you have an inline filter or screen, give it a quick visual check for obvious debris. A clogged filter drastically reduces flow and puts extra strain on the pump. A more thorough cleaning is part of the monthly maintenance.
Monthly Maintenance: Deeper Dive
Beyond the weekly quick checks, dedicating a bit more time each month goes a long way in preventing costly breakdowns and ensuring peak pump performance. Here's what you should be focusing on:
1. Air Filter Inspection & Cleaning (Engine-Driven Pumps): A clogged air filter restricts airflow to the engine, causing it to work harder, burn more fuel, and ultimately reduce its lifespan. Remove the air filter and inspect it for dirt, debris, and oil. If it's lightly soiled, you can typically clean it by gently tapping it or using compressed air (blow from the inside out). Heavily soiled filters should be replaced. Always refer to your engine's manual for specific air filter cleaning or replacement intervals.
2. Belt Inspection & Tension Adjustment (Belt-Driven Pumps): Belts transfer power from the engine to the pump impeller. Over time, they can stretch, crack, or fray, leading to slippage and reduced efficiency. Visually inspect the belt for any signs of wear. Check the tension - it should be firm but not overly tight. Most pumps have a simple tensioning system; consult your manual for proper adjustment procedures. A belt tension gauge can be a valuable tool for accurate adjustments.
3. Lubrication Points - A Targeted Approach: While weekly checks might involve a quick squirt of lubricant, a monthly check allows for a more thorough inspection. Consult your pump's manual to identify all lubrication points, including bearings, fittings, and gears. Apply the appropriate type of lubricant (grease, oil) as recommended by the manufacturer. Pay close attention to any areas that appear dry or show signs of wear.
4. Discharge Pipe & Strainer Assessment: Debris can accumulate in the discharge pipe and strainer, restricting water flow and putting extra strain on the pump. Shut off the pump and carefully inspect the strainer for any blockage. If you notice reduced flow or increased noise, it's likely that debris is the culprit. Clean the strainer and check the discharge pipe for any visible obstructions.
5. Listening for Anomalies: Take a few minutes to listen carefully to the pump's operation. Unusual noises like grinding, squealing, or knocking could indicate a developing problem. Note the specific noises and their location and consult a qualified technician if you're unsure of the cause. Early detection can often prevent more serious damage.
Seasonal Maintenance (Pre-Season): Preparing for Peak Performance
As the growing season approaches, ensuring your irrigation pump is ready for peak performance is vital for a thriving landscape or crop yield. Pre-season maintenance isn't just about preventing breakdowns; it's about maximizing efficiency and water delivery. Here's what you need to do:
1. Thorough Visual Inspection: Start with a comprehensive check. Look for any cracks, leaks, corrosion, or damage that might have occurred during storage or over the winter. Pay close attention to wiring connections and any exposed metal surfaces.
2. Voltage & Electrical System Check: Verify the voltage supply matches the pump's requirements. Inspect wiring for any signs of damage or wear. Tighten any loose connections. A multimeter is helpful for this step.
3. Intake Screen/Filter Cleaning: This is paramount! A clogged intake significantly reduces pump efficiency and can even cause damage. Remove any debris, algae, or sediment that has accumulated. Consider replacing the filter if it's old or damaged.
4. Belt Inspection & Adjustment (if applicable): For pumps with belts, examine them for cracks, fraying, or excessive wear. Ensure proper tension according to the manufacturer's specifications. A loose belt can cause slippage and reduced performance.
5. Lubrication Check (if applicable): Consult your pump's manual for lubrication points and recommended lubricants. Top off or replace lubricants as needed. Proper lubrication minimizes friction and extends pump life.
6. Pressure Relief Valve Test: Test the pressure relief valve to ensure it's functioning correctly. This safety feature prevents over-pressurization and potential damage to the system.
7. Priming (for some pump types): Certain pump types, particularly suction-lift pumps, require priming before operation. Follow the manufacturer's instructions for proper priming procedures.
8. Run a Short Test Cycle: After completing the visual inspection and maintenance tasks, run the pump for a short period to ensure everything is functioning smoothly. Monitor for any unusual noises, vibrations, or leaks.
Important Note: If you are uncomfortable performing any of these tasks, or if you suspect a more serious issue, consult a qualified irrigation specialist.
Seasonal Maintenance (Post-Season): Winterizing for Protection
As the growing season winds down, protecting your irrigation pump from freezing temperatures is absolutely essential, especially if you live in a region experiencing cold winters. Failure to properly winterize can lead to cracked pump housings, burst pipes, and expensive repairs. Here's a step-by-step guide to winterizing your irrigation pump:
1. Shut Down & Drain: First, completely shut off the power to the pump. Then, open all valves that allow water to drain from the pump housing, pipes, and any connected irrigation lines. Use a wet/dry vacuum to remove any remaining water trapped in low-lying areas.
2. Blow Out the Lines: Using compressed air, blow out any remaining water from the pipes. Start at the highest point in the system and work your way down. This is a crucial step to eliminate standing water that could freeze and expand. Always wear appropriate safety gear, including eye protection and earplugs, when using compressed air.
3. Add Antifreeze (Optional but Recommended): For extra protection, especially in areas with prolonged freezing temperatures, add an RV-specific antifreeze designed for plumbing systems to the pump and lines after blowing them out. Follow the manufacturer's instructions for proper dilution and usage. Do not use automotive antifreeze, as it is toxic.
4. Lubricate (If Applicable): Apply a thin coat of lubricant to any exposed moving parts on the pump.
5. Storage: Store the pump in a dry, sheltered location, protected from the elements. Consider covering it with a tarp or storing it indoors if possible.
Important Note: Always consult your pump's manufacturer's manual for specific winterization recommendations tailored to your model. Improper winterization can void warranties and lead to significant damage.
Engine/Motor Maintenance: Keeping the Powerhouse Running
Whether your irrigation pump is driven by a gasoline engine or an electric motor, regular maintenance is essential for reliable operation and extended lifespan. The specific tasks will vary depending on the type of power source, but here's a breakdown of what to look for.
For Engine-Driven Pumps:
These pumps rely on internal combustion engines, often gasoline-powered. Following the engine manufacturer's recommended maintenance schedule is absolutely crucial. Here's a checklist of key items:
- Oil Changes: Replace the engine oil at the intervals specified in the manufacturer's manual. Using the correct type of oil is critical for lubrication and engine health.
- Spark Plug Replacement: Old or fouled spark plugs can lead to reduced engine performance and starting difficulties. Replace them according to the schedule.
- Air Filter: A clean air filter ensures proper combustion. Replace it regularly, especially in dusty environments.
- Fuel Filter: Keep the fuel filter clean to prevent contaminants from reaching the engine.
- Valve Adjustment: Periodic valve adjustments are necessary to maintain optimal engine performance (refer to the engine manual). This often requires specialized tools and knowledge - consider professional assistance.
- Exhaust System: Inspect the exhaust system for leaks, which can be a safety hazard and reduce efficiency.
- Cooling System: Check coolant levels and condition (if applicable) and flush the system periodically.
For Electric Motor-Driven Pumps:
Electric motors are generally lower maintenance than engines, but still require some attention.
- Motor Ventilation: Ensure the motor's ventilation openings are clear of debris to prevent overheating.
- Bearing Lubrication: Some motors have sealed bearings that require no maintenance. Others have bearings that need periodic lubrication - consult the motor's manual for instructions.
- Electrical Connections: Inspect electrical connections for tightness and corrosion. Loose or corroded connections can cause performance issues and safety hazards.
- Overload Protection: Verify the overload protection device (e.g., thermal overload relay) is functioning correctly.
- Wiring: Inspect the wiring for any signs of damage or wear. Replace damaged wiring immediately.
Important Note: Working with electrical components can be dangerous. If you're not comfortable performing electrical work, consult a qualified electrician.
Impeller and Casing Inspection: Ensuring Efficient Pumping
The impeller and casing work together as the core of your pump, responsible for moving water efficiently. Over time, both components can suffer from wear and tear, corrosion, or debris buildup, significantly impacting performance.
While a thorough inspection of these parts is best left to qualified professionals, understanding what to look for can help you recognize potential problems early on.
What to Look For (and Why You Might Need a Pro):
- Impeller Damage: Look for signs of corrosion, erosion, cracks, or broken blades. Erosion is common in pumps handling abrasive materials or water with high sediment content. Damaged blades reduce pumping efficiency and can cause noise.
- Casing Corrosion & Cracks: Examine the casing's exterior and interior for signs of corrosion, pitting, or cracks. Corrosion weakens the casing and can lead to leaks. Cracks can compromise the pump's structural integrity.
- Debris Buildup: Accumulation of sediment, algae, or other debris can obstruct the impeller's rotation and reduce water flow.
- Cavitation: This is a serious issue. It appears as pitting on the impeller and casing, caused by the formation and collapse of vapor bubbles. It is a sign of underlying problems (like low suction pressure) that must be addressed.
Important Note: Disassembling the pump to inspect the impeller and casing requires specialized tools and expertise. Incorrect handling can damage these components and void warranties. Unless you are a trained professional, it's strongly recommended to leave this task to a qualified technician. They have the tools, knowledge, and experience to diagnose the problem accurately and perform the necessary repairs or replacements safely. Attempting this work yourself can lead to further damage and potentially create hazardous conditions.
Safety First: Protecting Yourself and Your System
Working on irrigation pumps involves potential hazards. Electricity, moving parts, and pressurized water can all pose risks if safety isn't prioritized. Here's how to minimize those dangers:
- Lockout/Tagout: Before performing any maintenance, disconnect the power supply to the pump. Use lockout/tagout procedures to ensure the power remains off. This is absolutely critical for electric motors.
- Personal Protective Equipment (PPE): Always wear appropriate PPE, including safety glasses or goggles, work gloves, and appropriate footwear. Hearing protection may also be necessary when working near running equipment.
- Pressure Release: Before disconnecting any lines or fittings, relieve pressure in the system. Slowly open a nearby valve to release the pressure gradually.
- Moving Parts: Keep hands and loose clothing away from rotating or moving parts. Be particularly cautious with belts, impellers, and couplings.
- Electrical Hazards: If working with electrical components, ensure you're qualified and comfortable with electrical safety procedures. If not, seek professional assistance.
- Confined Spaces: If the pump is located in a confined space, ensure adequate ventilation and follow confined space entry procedures.
- Water Hazards: Be aware of the potential for slipping or falling on wet surfaces. Keep the work area clean and dry.
- Chemical Exposure: If using any cleaning chemicals or lubricants, follow the manufacturer's instructions and wear appropriate protective gear. Consult the Safety Data Sheet (SDS) for detailed safety information.
Record Keeping: Tracking Your Maintenance Efforts
Maintaining meticulous records of your irrigation pump's maintenance is just as vital as the work itself. These records provide a historical snapshot of your pump's performance, allowing you to identify trends, predict potential issues, and justify warranty claims if necessary.
What should you record? At a minimum, document the date, a brief description of the work performed (e.g., Oil change, Impeller inspection), any parts replaced, and the name or initials of the person who completed the task. For engine-driven pumps, meticulously track engine-specific maintenance like spark plug changes and filter replacements. Photographic evidence - a quick snapshot before and after a task - can also be incredibly useful.
Consider using a simple spreadsheet, a dedicated maintenance logbook, or even a cloud-based platform to store this information. Regularly reviewing these records can help optimize your maintenance schedule, anticipate potential repairs, and ultimately extend the lifespan of your valuable irrigation pump. It's also invaluable when discussing issues with technicians or making warranty claims.
Resources & Links
- Occupational Safety and Health Administration (OSHA) : Provides comprehensive safety guidelines and regulations related to machinery operation and maintenance, crucial for ensuring worker safety during irrigation pump maintenance. Includes information on lockout/tagout procedures and personal protective equipment (PPE).
- United States Environmental Protection Agency (EPA) : Provides information on water conservation and potential environmental impacts related to irrigation systems. Relevant for understanding best practices in water usage and potential contamination prevention.
- Irrigation Tutorials : A website containing articles and guides on irrigation system topics, including pump troubleshooting and maintenance tips. Offers practical advice for various irrigation setups.
- Irrigation Association : A professional organization for irrigation professionals. Offers resources, training, and industry best practices related to irrigation system maintenance, including pump operations. Offers certification programs and technical resources.
- Franklin Wholesale : A supplier of irrigation equipment and parts. Their website often contains informational articles and guides about irrigation pump maintenance and troubleshooting.
- Grainger : A large industrial supply company. Offers a vast selection of pumps, parts, and maintenance tools. Their site often has helpful articles and guides related to mechanical maintenance.
- Thermo Fisher Scientific : While primarily known for lab equipment, Thermo Fisher often provides insights into fluid dynamics and material science relevant to impeller and casing inspection and material degradation - crucial for ensuring long-term pump performance.
- Red Wing Shoes : Focuses on appropriate personal protective equipment (PPE) - particularly work boots. Irrelevant though, still important for safety!
- Snap-on Tools : A provider of professional tools for maintenance and repair. Can provide recommendations on appropriate tools for various maintenance tasks.
- Centers for Disease Control and Prevention (CDC) : Useful for understanding potential hazards associated with waterborne illnesses and safe handling practices when dealing with irrigation water. Relevant, especially in areas with specific water quality concerns.
Frequently Asked Questions
What is an irrigation pump maintenance checklist and why is it important?
An irrigation pump maintenance checklist is a detailed guide outlining the routine checks, inspections, and maintenance tasks necessary to keep your irrigation pump operating efficiently and reliably. It's important because regular maintenance prevents costly repairs, extends the pump's lifespan, improves irrigation efficiency, and ensures consistent water delivery to your plants or landscape.
Who should use this checklist template?
This checklist template is designed for anyone responsible for maintaining irrigation pumps, including homeowners, landscapers, irrigation professionals, farmers, and agricultural workers. It's adaptable for various pump types and irrigation systems.
What types of irrigation pumps does this checklist cover?
The checklist is designed to be generally applicable to most common irrigation pump types, including centrifugal pumps, submersible pumps, and jet pumps. However, always consult your pump's manufacturer's manual for specific recommendations and potential customizations.
How often should I perform the tasks listed in this checklist?
The frequency of maintenance tasks varies based on factors like pump usage, water quality, and environmental conditions. The checklist provides suggested intervals (e.g., weekly, monthly, annually), but you may need to adjust them based on your specific situation. Heavy use or poor water quality necessitate more frequent checks.
What do I need to gather before starting maintenance?
Before you begin, gather essential tools like wrenches, screwdrivers, pliers, a multimeter (if checking electrical components), safety glasses, gloves, rags, and potentially a pump oil (if applicable). Have your pump's manual readily available for reference.
What does 'impeller' refer to in the checklist?
The impeller is the rotating component inside the pump that moves water. Checking it involves looking for signs of wear, damage, or debris accumulation.
What does 'backflush' mean in relation to irrigation pumps?
Backflushing a pump (often referring to the intake screen/filter) involves reversing the water flow to remove accumulated debris and sediment. This keeps the pump drawing clean water and prevents damage.
Where can I find the pump's manufacturer's manual?
The manufacturer's manual is typically included with the pump when it was purchased. If you've lost it, try searching the manufacturer's website or contacting them directly. The model number of your pump is usually required for this search.
What should I do if I notice a problem during maintenance?
If you identify a problem, such as a leak, unusual noise, or reduced pressure, stop the pump and investigate further. Consult the pump's manual or contact a qualified irrigation professional for assistance. Don't attempt repairs you're not comfortable with.
Can I customize this checklist template?
Absolutely! This checklist is designed to be a starting point. Add or remove tasks as needed to match your specific pump model, irrigation system, and local conditions. Include details relevant to your unique setup.
Found this Article helpful?
Agriculture Management Solution Demo
Running a farm or agricultural business is complex. ChecklistGuro's Work OS platform simplifies your operations, from crop planning and irrigation management to livestock tracking and harvest scheduling. Increase efficiency, reduce waste, and boost yields! See how ChecklistGuro can revolutionize your agriculture business.
Related Articles

10 Simple Steps to a Healthy Drainage System: Your Checklist Template

Mastering the Daily Crop Scouting Report: Your [Specific Crop] Checklist Template

Irrigation System Checklist: Farm Water Management & Crop Yield Optimization

Unlock Your Garden's Potential: A Soil pH Verification Checklist

PPE Usage Checklist Template: Your Guide to Safety

Water Discharge Permit Compliance Checklist Template

The Ultimate GPS & Precision Farming Calibration Checklist Template

Water Runoff Analysis Checklist Template
We can do it Together
Need help with
Agriculture?
Have a question? We're here to help. Please submit your inquiry, and we'll respond promptly.