Isolation Room Cleaning Checklist Template: Your Guide to Safe Decontamination
Published: 09/02/2025 Updated: 05/11/2026
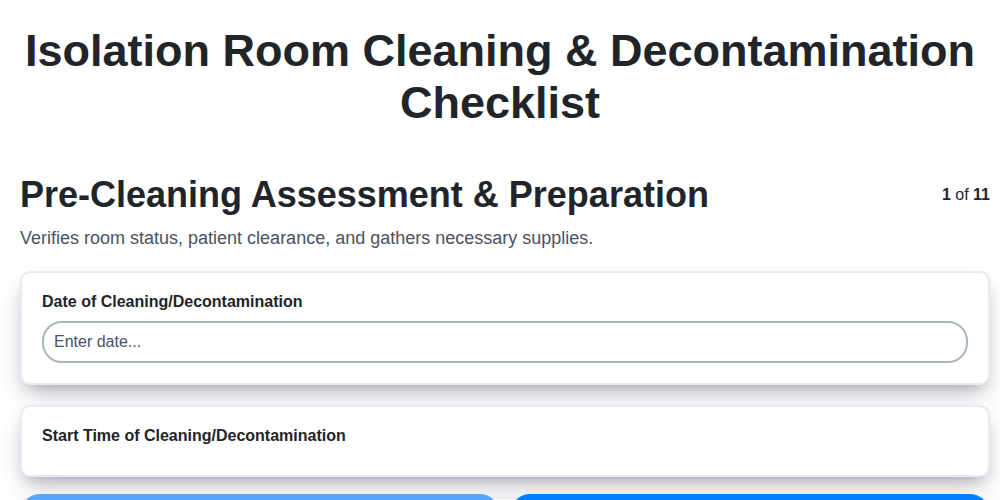
Table of Contents
- Introduction: Why Isolation Room Cleaning Matters
- Understanding Isolation Room Risks and Precautions
- Essential PPE: Protecting Yourself and Patients
- Step-by-Step Cleaning Checklist: A Detailed Guide
- Pre-Cleaning Assessment: Identifying Contamination Zones
- Surface Cleaning: Low-Touch vs. High-Touch Areas
- Disinfection Protocols: Choosing the Right Agents
- Equipment Decontamination: Medical Devices and Furniture
- Waste Management: Safe Disposal Procedures
- Documentation & Sign-Off: Maintaining Compliance
- Post-Cleaning Verification: Ensuring a Safe Environment
- Resources & Links
TLDR: This checklist template helps healthcare facilities ensure safe and thorough isolation room cleaning after patient discharge. It breaks down the process step-by-step, from PPE to waste disposal, helping prevent infection spread and protect staff and patients. Download the template and use it to standardize your cleaning procedures!
Introduction: Why Isolation Room Cleaning Matters
Beyond simply maintaining a tidy appearance, meticulous isolation room cleaning is a cornerstone of patient and staff safety within healthcare settings. These rooms are specifically designed to contain infectious diseases, preventing their spread to other patients, healthcare workers, and visitors. However, the effectiveness of this containment hinges entirely on the thoroughness and consistency of post-patient cleaning and decontamination procedures. A compromised cleaning protocol can lead to healthcare-associated infections (HAIs), increased morbidity, prolonged hospital stays, and ultimately, a compromise in the overall quality of care. Properly executed isolation room cleaning isn't just a task; it's a critical safeguard ensuring a secure and healing environment for everyone.
Understanding Isolation Room Risks and Precautions
Understanding the potential risks associated with isolation room cleaning and decontamination is paramount for protecting both healthcare workers and patients. The primary risk stems from potential exposure to airborne or surface contaminants capable of spreading infectious diseases. This isn't solely limited to highly visible pathogens; even seemingly minor exposures can lead to complications, especially in immunocompromised individuals.
Several factors contribute to these risks. Improper use of Personal Protective Equipment (PPE) is a significant concern, leading to cross-contamination and potential infection. Insufficient contact time with disinfectants diminishes their efficacy, leaving surfaces inadequately sanitized. A lack of consistent adherence to established protocols, often due to inadequate training or rushed procedures, also increases risk. Furthermore, the complexity of some pathogens - some requiring specific cleaning agents or specialized equipment - can inadvertently elevate the risk if not properly addressed.
To mitigate these risks, a proactive and meticulous approach is essential. This includes rigorous training programs for cleaning staff, adherence to strict protocols including proper PPE usage and contact times, regular auditing of cleaning processes, and ongoing education on emerging infectious diseases and best practices. Recognizing these potential risks and implementing robust precautions is not merely a procedural step-it's a cornerstone of a safe and effective healthcare environment.
Essential PPE: Protecting Yourself and Patients
Personal Protective Equipment (PPE) forms the first line of defense against potential exposure to infectious agents. Selecting and correctly utilizing PPE is paramount for safeguarding both healthcare workers and patients. This section details the essential PPE items and best practices for their use in isolation room cleaning and decontamination.
Minimum Required PPE:
- Gloves: Nitrile gloves are preferred due to their durability and resistance to chemicals. Always inspect gloves for tears or punctures before use. Change gloves between patients and when they become visibly soiled.
- Gown: A fluid-resistant or impermeable gown protects skin and clothing from contamination. Ensure the gown fully covers the torso and arms.
- Mask: The type of mask required depends on the airborne risk. An N95 respirator is typically required for airborne pathogens; a surgical mask may be sufficient for droplet precautions. Ensure a tight seal around the nose and mouth.
- Eye Protection: Goggles or a face shield are essential to protect the eyes from splashes or sprays of bodily fluids.
Donning and Doffing Sequence (Critical for Preventing Contamination):
Proper sequence is vital. Here's a general guideline; always refer to your facility's specific protocols:
- Gown
- Mask/Respirator (Perform seal check)
- Eye Protection (Goggles or Face Shield)
- Gloves
Remember: Practice donning and doffing in a supervised setting to ensure competency and minimize the risk of self-contamination. Improper removal is a significant source of transmission!
Step-by-Step Cleaning Checklist: A Detailed Guide
Let's break down the isolation room cleaning process into actionable steps. This checklist is designed to be comprehensive, but remember to always consult your facility's specific protocols and adapt accordingly. Print this out and use it as a guide during the cleaning process!
Phase 1: Preparation & Assessment (5-10 minutes)
- Review Patient History: Briefly review the patient's isolation precautions (e.g., Airborne, Contact, Droplet) to guide agent selection.
- Gather Supplies: Ensure you have:
- Appropriate PPE (gloves, gown, mask, eye protection)
- Cleaning agents (detergent, disinfectant - verify efficacy against expected pathogens)
- Cleaning cloths (color-coded is ideal)
- Waste disposal bags (biohazard if necessary)
- Spray bottles
- Mops & buckets
- Ventilation: Maximize room ventilation by opening windows (if appropriate and permitted) and ensuring proper HVAC function.
Phase 2: Room Cleaning - The Core Steps (20-30 minutes)
- PPE Donning: Don full PPE following established protocols. Double-check fit and integrity.
- Initial Waste Removal: Remove all disposable items (linens, dressings, trash) and place in appropriate waste containers.
- Low-Touch Surface Cleaning:
- Dust and vacuum all low-touch surfaces (walls, ceilings, tops of furniture).
- Wipe down low-touch surfaces with a detergent solution.
- High-Touch Surface Cleaning (Priority!):
- Bed Rails: Thoroughly clean and disinfect all bed rails (top and sides).
- Call Buttons/Handrails: Wipe down all call buttons, handrails, and assistive devices.
- Overbed Table: Clean and disinfect the entire surface of the overbed table.
- Furniture Surfaces: Wipe down all other furniture surfaces (chairs, bedside tables).
- Floors: Mop the entire floor, paying attention to high-traffic areas.
- Bathroom Surfaces: Clean and disinfect all bathroom surfaces (toilet, sink, shower/tub).
- Disinfection: Apply disinfectant to all high-touch surfaces, ensuring adequate contact time as per the product instructions.
- Rinsing (if necessary): Rinse disinfected surfaces with clean water to remove disinfectant residue, as per product instructions.
Phase 3: Completion & Documentation (5 minutes)
- Waste Disposal: Properly bag and label all contaminated waste and dispose of it according to facility protocols.
- PPE Removal & Hand Hygiene: Carefully remove PPE, avoiding self-contamination, and perform thorough hand hygiene.
- Documentation: Record the cleaning process, including date, time, staff involved, and any unusual findings, in the designated log. Secure a sign-off to verify completion.
Pre-Cleaning Assessment: Identifying Contamination Zones
Before you even reach for a cleaning supply, a thorough assessment is critical. This isn't just about visually inspecting the room; it's about actively identifying potential contamination zones and tailoring your cleaning approach accordingly.
Start by reviewing the patient's medical record. Knowing the type of infection they had - whether airborne, droplet, or contact - dictates the level of precaution needed and the appropriate disinfectants to use.
Next, perform a detailed visual inspection. Look beyond the obvious. Are there any spills or residue on surfaces? Are linens soiled or contaminated? Note any areas that may have been frequently touched by the patient or healthcare personnel. Consider:
- Patient Contact Surfaces: Bed rails, bedside tables, overbed tables, commode, and any equipment directly used by the patient are high-risk areas.
- Healthcare Worker Touchpoints: Door knobs, light switches, call buttons, IV poles, and any equipment handled by staff require careful attention.
- Environmental Surfaces: Walls, floors, and ceilings can also harbor contamination, particularly in cases of airborne pathogens. Pay special attention to areas directly above the patient's bed.
- Equipment: Any reusable equipment used during the patient's stay, such as suction canisters, pulse oximeters, or thermometers, must be identified and included in the cleaning and disinfection process.
Document your observations. A simple checklist or notes can help ensure that no potential contamination zones are overlooked. This proactive assessment lays the groundwork for a targeted and effective cleaning process.
Surface Cleaning: Low-Touch vs. High-Touch Areas
Understanding the distinction between low-touch and high-touch surfaces is key to efficient and effective isolation room cleaning. Not all surfaces pose the same level of risk for pathogen transmission. A targeted approach, prioritizing high-touch areas, conserves resources and maximizes infection control efforts.
Low-Touch Surfaces: These areas typically experience minimal contact and represent a lower risk of transmission. Examples include walls above waist height, ceilings, undersides of furniture, and the upper surfaces of bedside tables. Cleaning these areas usually involves dusting and vacuuming to remove settled dust and debris. While disinfection isn't always necessary, it's beneficial as part of a comprehensive cleaning program.
High-Touch Surfaces: The Priority Zone. This category includes items frequently contacted by patients, healthcare providers, and visitors. These surfaces are the most likely to harbor pathogens and require meticulous cleaning and disinfection. Key examples include:
- Bed rails (all sides)
- Doorknobs and handles
- Light switches
- Call buttons
- Bedside tables (tops and handles)
- Faucet handles
- Toilet handles and seats
- IV poles
- Monitoring equipment housings
The cleaning process for high-touch surfaces should always involve a two-step approach: first, a thorough cleaning with a suitable detergent to remove visible soil, followed by disinfection with an EPA-registered disinfectant effective against the anticipated pathogens. Remember, adherence to the disinfectant's contact time is crucial for its efficacy. Utilizing color-coded cleaning supplies for these areas can prevent cross-contamination and reinforce the importance of this prioritized cleaning.
Disinfection Protocols: Choosing the Right Agents
Choosing the right disinfection agents is paramount for effective isolation room cleaning. Not all disinfectants are created equal; their efficacy varies depending on the pathogen in question. A broad-spectrum disinfectant is generally preferred, capable of tackling a range of potential contaminants. However, understanding specific pathogens (e.g., C. difficile, Norovirus, MRSA) might necessitate using targeted agents.
Here's a breakdown of common disinfectant types and considerations:
- Sodium Hypochlorite (Bleach): A widely used and cost-effective option, effective against many bacteria and viruses. However, it can be corrosive and requires careful dilution to avoid damaging surfaces. Always follow manufacturer's instructions for correct dilution and contact time.
- Quaternary Ammonium Compounds (Quats): Offer good cleaning and disinfection properties. However, their efficacy can be reduced by organic matter, requiring thorough pre-cleaning.
- Hydrogen Peroxide: Available in various concentrations, including stabilized formulations that offer broad-spectrum activity and rapid action.
- Peracetic Acid: A powerful disinfectant used for high-level disinfection of medical devices and surfaces. Requires careful handling due to its corrosiveness.
- Alcohol-Based Disinfectants: Effective against many bacteria and viruses, but less effective against non-enveloped viruses and spores.
Crucial Considerations:
- Contact Time: Always adhere to the manufacturer's recommended contact time - this is the minimum amount of time the disinfectant needs to remain wet on the surface to be effective.
- Surface Compatibility: Verify that the disinfectant is compatible with the surfaces being cleaned to avoid damage or discoloration.
- Organic Matter: Thorough pre-cleaning to remove organic matter (blood, pus, dirt) is essential for optimal disinfectant efficacy.
- Rotation of Disinfectants: Consider rotating disinfectant types to prevent the development of resistant microorganisms. Always consult with your infection control team for guidance on appropriate agent selection and rotation schedules.
Equipment Decontamination: Medical Devices and Furniture
Medical devices and furniture within an isolation room pose a unique challenge for decontamination. These items, often shared or reused, can readily harbor pathogens and contribute to cross-contamination if not properly handled. A systematic approach is crucial to ensure their safety.
Prioritization is Key: Medical devices directly interacting with the patient (e.g., IV pumps, vital signs monitors, suction catheters) receive the highest priority for decontamination. Furniture, while requiring thorough cleaning, may be prioritized slightly lower but still necessitate meticulous attention.
Device-Specific Instructions are Paramount: Always refer to the manufacturer's instructions for cleaning and disinfecting medical equipment. These instructions often specify approved cleaning agents and procedures. Deviation from these guidelines can damage equipment and compromise its effectiveness. Many devices have designated cleaning ports or surfaces. Utilize these as directed. For equipment that cannot be directly cleaned, consider single-use disposable covers where available.
Furniture Cleaning - A Step-by-Step Guide:
- Surface Identification: Determine the furniture's material (vinyl, fabric, metal, wood) to select appropriate cleaning agents.
- Initial Cleaning: Remove visible soil and debris with a mild detergent and water.
- Disinfection: Apply a hospital-grade disinfectant according to the manufacturer's instructions, paying close attention to crevices and seams.
- Drying: Ensure all surfaces are thoroughly dry before reintroducing the furniture into the patient's room.
- Upholstered Furniture: Upholstered furniture may require specialized cleaning methods, such as steam cleaning or fabric protectors, following manufacturer recommendations.
Special Considerations:
- Reusable Equipment: Clearly label reusable equipment with the date and time of last cleaning and disinfection.
- Single-Use vs. Reusable: Prioritize single-use disposable items whenever feasible to minimize the risk of contamination.
- Documentation: Record all equipment cleaning and disinfection activities, including the agent used, date, time, and staff member performing the task.
- Regular Inspections: Conduct routine inspections of equipment to identify any signs of damage or wear that could compromise its cleanliness.
Waste Management: Safe Disposal Procedures
Proper waste management is a cornerstone of effective isolation room decontamination, preventing the spread of infection beyond the immediate area. Contaminated waste poses a significant risk if not handled correctly, and adhering to strict protocols is essential.
Categorizing Waste: First, understand the different waste categories:
- Biohazardous Waste: This includes items contaminated with blood, body fluids, cultures, or potentially infectious materials. Examples include soiled linens, dressings, sharps, and lab waste. Always double-bag biohazardous waste.
- Regulated Medical Waste (RMW): Often synonymous with biohazardous waste, specific state and local regulations dictate how RMW is managed.
- Pharmaceutical Waste: Expired or unused medications (both hazardous and non-hazardous) require separate disposal. Follow your facility's pharmaceutical waste management plan.
- General Waste: Non-contaminated trash can be disposed of in regular waste containers.
Specific Disposal Procedures:
- Sharps: Never dispose of sharps (needles, syringes, scalpel blades) in regular trash. Use designated, puncture-resistant sharps containers. Ensure containers are not overfilled and are properly sealed before disposal.
- Soiled Linens & Dressings: Place these items in designated biohazard bags, ensuring bags are properly sealed to prevent leaks. Avoid overfilling bags; multiple smaller bags are preferable to one overstuffed bag.
- IV Fluids & Bags: Empty IV fluid bags and containers (if not contaminated with medications) can be disposed of as regulated medical waste.
- Laboratory Waste: All laboratory waste, including cultures, stocks, and contaminated materials, must be handled as biohazardous waste.
- Labeling is Key: All waste containers must be clearly labeled with the appropriate biohazard symbol and a description of the contents.
- Segregation: Never mix different types of waste. Maintain strict segregation to ensure proper treatment and disposal.
- Training & Protocol: Cleaning staff must be thoroughly trained on waste identification, segregation, and disposal procedures. Review and reinforce these protocols regularly.
Remember: Always consult your facility's waste management plan for specific guidance and regulations.
Documentation & Sign-Off: Maintaining Compliance
Maintaining meticulous documentation is the cornerstone of a robust infection prevention program. It's not just about ticking a box; it's about demonstrating compliance with regulations, tracking performance, and identifying areas for improvement.
Here's what your documentation process should include:
- Date and Time of Cleaning: A clear record of when the room was cleaned.
- Staff Identification: Names or employee IDs of the individuals responsible for the cleaning and disinfection process. This ensures accountability and allows for targeted training if needed.
- Isolation Type: Record the type of isolation precautions the room was under (e.g., airborne, droplet, contact). This helps contextualize the cleaning procedures.
- Cleaning Agent Details: Note the specific cleaning agents and disinfectants used, including lot numbers and expiration dates.
- Any Deviations or Challenges: Document any difficulties encountered during the cleaning process, such as equipment malfunctions, supply shortages, or unusual contamination. This information can inform process adjustments.
- Sign-Off: A designated individual (typically a supervisor or experienced cleaning staff member) should sign off on the completed cleaning process, verifying that all steps were followed correctly. Digital sign-off systems are increasingly common and offer enhanced tracking capabilities.
- Retention: Establish a clear retention policy for cleaning records, ensuring compliance with legal and regulatory requirements.
Regular review of these records can reveal trends, identify training needs, and ultimately strengthen your overall infection control program. Don's underestimate the power of well-maintained documentation - it's your best defense against potential liabilities and a testament to your commitment to patient and staff safety.
Post-Cleaning Verification: Ensuring a Safe Environment
The final steps in the isolation room cleaning process aren't just about tidying up; they's about confirming that your efforts have created a truly safe environment. Thorough post-cleaning verification is paramount to prevent potential contamination and protect patients and staff.
A Keen Eye for Detail:
Begin with a meticulous visual inspection of every surface within the room. Look for any signs of missed areas, residue from cleaning agents, or lingering moisture. Pay particular attention to corners, crevices, and areas that may have been difficult to reach. A bright light source can be invaluable for spotting subtle signs of contamination.
Removing Residual Disinfectant: A Crucial Step:
Many disinfectants, while effective at killing pathogens, can be irritating to the skin and mucous membranes. Therefore, a final rinse with clean water is strongly recommended. This step removes any residual disinfectant from surfaces, minimizing the risk of adverse reactions for future occupants. Ensure all surfaces are thoroughly rinsed and that no streaks or film remain.
Beyond the Visual: Considerations for Advanced Verification (Optional):
While visual inspection is the primary method, some facilities may utilize additional verification techniques:
- ATP Testing: Adenosine Triphosphate (ATP) testing provides a quantitative measure of surface cleanliness.
- Surface Swabbing: Samples can be collected and sent to the lab to verify effectiveness.
Remember, the ultimate goal is to create a consistently clean and safe isolation room-a place where patients can recover with peace of mind.
Resources & Links
- Centers for Disease Control and Prevention (CDC) : The CDC provides comprehensive guidelines and recommendations for infection control in healthcare settings, including isolation precautions and cleaning/disinfection protocols. A primary resource for understanding current best practices.
- Environmental Protection Agency (EPA) : The EPA provides information on disinfectants and sanitizers registered for use against specific pathogens. Their website contains lists of approved products and guidance on their use. Crucial for 'Disinfection Protocols' section.
- Occupational Safety and Health Administration (OSHA) : OSHA provides regulations and guidelines related to worker safety, including handling hazardous materials and using personal protective equipment (PPE). Relates to the 'Essential PPE' and 'Waste Management' sections.
- World Health Organization (WHO) : The WHO offers global guidelines and resources on infection prevention and control, including isolation precautions. Provides a broader international perspective on the topic.
- Association for Professionals in Infection Control and Epidemiology (APIC) : APIC is a professional organization providing education, resources, and networking opportunities for infection preventionists. Contains articles, guidelines, and educational materials.
- American Society of Anesthesiologists (ASA) : While focused on anesthesia, ASA provides some guidance and resources pertaining to infection prevention and cleaning protocols within healthcare facilities, including considerations for operating rooms which share similar isolation principles.
- Association of periOperative Registered Nurses (AORN) : AORN provides standards, resources, and continuing education for perioperative nurses. Their guidelines can be helpful for understanding best practices in cleaning and disinfection procedures, especially in operating rooms that frequently require isolation protocols.
- Indian Health Service (IHS) : The IHS provides specific guidance regarding isolation precautions and cleaning procedures, often with a focus on resource limitations often found in rural facilities. Can provide useful insights for adapting protocols.
- Steri-Tek : Steri-Tek is a manufacturer of specialized cleaning products and equipment for healthcare settings. Provides information about disinfection techniques and available products (consider for product overview section).
- 3M : 3M is a supplier of cleaning supplies and PPE. Provides information on a variety of products that might be used in isolation room cleaning procedures.
Frequently Asked Questions
What is an isolation room and why is proper cleaning so important?
An isolation room is a designated space used to separate individuals with contagious diseases to prevent the spread of infection. Proper cleaning and disinfection, following a checklist like ours, are crucial to ensure the environment is safe for patients, healthcare workers, and visitors, minimizing the risk of transmission.
Who should use this isolation room cleaning checklist template?
This checklist is designed for environmental services staff, cleaning personnel, infection control specialists, and anyone responsible for cleaning and decontaminating isolation rooms in healthcare facilities, hospitals, clinics, and similar settings.
What's the difference between cleaning and disinfecting?
Cleaning removes dirt, debris, and some germs from surfaces. Disinfecting kills germs on surfaces. In isolation rooms, both cleaning *and* disinfecting are essential, typically in that order. The checklist outlines both steps.
What personal protective equipment (PPE) is required when cleaning an isolation room?
The checklist specifies recommended PPE including, but not limited to, gloves, gowns, masks (N95 or equivalent), and eye protection. Specific PPE requirements may vary depending on the infectious agent and facility protocols. Always consult your facility's infection control guidelines.
What types of disinfectants are appropriate for isolation room cleaning?
Appropriate disinfectants include those registered with the EPA and effective against the suspected or known infectious agent. Common choices include bleach solutions, quaternary ammonium compounds, and hydrogen peroxide-based products. Always refer to the manufacturer's instructions for proper use and contact time.
What is 'contact time' and why is it important?
Contact time refers to the duration a disinfectant needs to remain wet on a surface to effectively kill germs. The checklist will emphasize adherence to the disinfectant manufacturer's recommended contact time. Insufficient contact time renders the disinfectant ineffective.
What areas of the isolation room are included in the cleaning checklist?
The checklist covers a comprehensive range of surfaces, including but not limited to: floors, walls, furniture, bed frames, medical equipment, door handles, light fixtures, and bathroom fixtures. Specific areas will be tailored based on the patient's condition and potential contamination zones.
How often should isolation rooms be cleaned and decontaminated?
Cleaning should occur after a patient leaves the room. Decontamination frequency depends on the infectious agent and facility protocols. Some organisms may require more rigorous cleaning and disinfection procedures. Refer to your facility's guidelines.
Can I customize the cleaning checklist template?
Yes, the checklist is designed to be a template. Feel free to modify it to reflect your facility's specific protocols, equipment, and infectious agents. However, ensure any modifications align with infection control best practices and regulatory requirements.
Where can I find more information about isolation room cleaning and disinfection?
Refer to guidelines from organizations like the Centers for Disease Control and Prevention (CDC), the Environmental Protection Agency (EPA), and your facility's infection control department. Regularly review updated protocols and best practices.
Found this Article helpful?
Facility Management Solution Demo
Keep your facilities running smoothly! ChecklistGuro streamlines maintenance, inspections, and vendor management. Reduce downtime, optimize efficiency, & improve safety. Manage it all with our Work OS.
Related Articles
Industrial Floor Cleaning & Safety Checklist Template
Display Case Temperature Monitoring Checklist Template
The Ultimate Refrigeration Maintenance Checklist: Keeping Your Food Safe
Escalator & Moving Walkway Inspection Checklist Template
The Ultimate Guest Room Cleaning & Inspection Checklist Template

The Ultimate Security Camera Review Checklist Template
Forklift Inspection & Maintenance Checklist Template
Emergency Generator Load Testing Checklist Template
We can do it Together
Need help with
Facility Management?
Have a question? We're here to help. Please submit your inquiry, and we'll respond promptly.