Lab Ventilation Checklist Template: Your Guide to Safety
Published: 09/02/2025 Updated: 12/13/2025
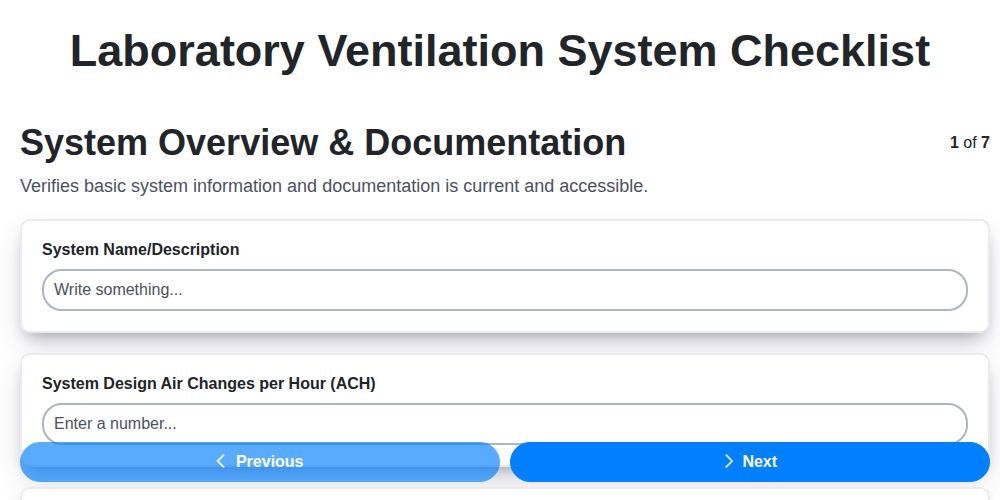
Table of Contents
- Introduction: Why Lab Ventilation Matters
- Understanding Your Lab Ventilation System
- Section 1: System Overview and Documentation
- Section 2: Supply Air System Inspection
- Section 3: Exhaust Air System Assessment
- Section 4: Fume Hoods and Local Exhaust Ventilation (LEV) Checks
- Section 5: Air Filtration and Quality Control
- Section 6: Monitoring and Control System Review
- Section 7: Maintenance Records and History
- Section 8: Troubleshooting Common Ventilation Issues
- Section 9: Regulatory Compliance and Best Practices
- Section 10: Creating Your Custom Lab Ventilation Checklist
- Section 11: Lab Personnel Training and Awareness
- Section 12: Emergency Procedures and Response
- Conclusion: Ensuring a Safe and Compliant Lab Environment
- Resources & Links
TLDR: Ensure your lab's safety and compliance with a ready-to-use ventilation checklist! This template guides you through essential checks - from airflow rates and fume hood performance to filter maintenance - helping you proactively identify and address potential hazards and keep your lab running smoothly.
Introduction: Why Lab Ventilation Matters
Labs aren't just spaces for groundbreaking research; they're also environments where potential hazards exist. From volatile solvents and reactive chemicals to biological agents and radioactive materials, the risks are real. Without a properly functioning ventilation system, these hazards can pose serious threats to the health and safety of personnel, damage sensitive equipment, and even compromise the integrity of experimental results.
Think of your lab's ventilation system as the first line of defense. It's the invisible shield protecting researchers from exposure to harmful airborne contaminants. Beyond personal safety, effective ventilation safeguards your valuable instruments and ensures the reliability of your data. A single compromised experiment due to inadequate ventilation can lead to wasted time, resources, and potentially years of research undone. Investing in a robust and regularly maintained ventilation system isn't just about compliance-it's about prioritizing the well-being of your team and the quality of your science.
Understanding Your Lab Ventilation System
A lab ventilation system isn't just one component; it's an interconnected network designed to protect personnel and experiments. Think of it as having three primary functions: supplying fresh air, exhausting contaminated air, and controlling airflow within specific workspaces like fume hoods.
The Supply Air System brings in clean, conditioned air to replace the air being exhausted. This system often includes fans, ductwork, air filters (pre-filters and HEPA filters in many labs), and controls to regulate airflow. The quality and quantity of supply air are vital for maintaining a comfortable and safe working environment.
The Exhaust Air System is responsible for removing hazardous fumes, vapors, and particulates from the lab. This typically involves exhaust fans, ductwork, and strategically placed exhaust hoods. Proper exhaust system design ensures contaminants are effectively removed and prevented from recirculating within the lab.
Local Exhaust Ventilation (LEV), such as fume hoods and snorkel exhausts, are critical components focused on capturing contaminants at their source. They provide localized control, preventing exposure and protecting sensitive experiments. Understanding how these three systems work together-and how they're all linked to building-wide HVAC-is the first step toward effective maintenance and safety.
Section 1: System Overview and Documentation
Before you even touch a fan or check an airflow reading, it's critical to understand the system you're maintaining. This begins with thorough documentation. Many labs have complex ventilation systems built over years, and the original design intent can be easily lost without proper records.
What Documentation Should You Have?
- System Drawings and Schematics: These are your roadmap. Locate up-to-date drawings that detail the layout of ducts, fans, fume hoods, and other components. Verify these match the actual physical setup. Discrepancies should be investigated and documented.
- Equipment Inventory List: A comprehensive list of all ventilation system components, including model numbers, serial numbers, and maintenance schedules.
- Safety Data Sheets (SDS): Essential for understanding the hazards associated with chemicals used in the lab and ensuring the ventilation system is adequate for their safe handling. Regularly review and update SDS as chemicals are added or removed.
- Standard Operating Procedures (SOPs): Clear, written instructions for operating and maintaining the ventilation system, ensuring consistency and minimizing errors.
- Emergency Procedures: Clearly posted and understood procedures for responding to ventilation system failures, including evacuation plans and contact information.
Why is Documentation So Important?
- Troubleshooting: Accurate documentation helps quickly diagnose and resolve ventilation issues.
- Compliance: Regulatory inspections often require comprehensive documentation.
- Modifications & Upgrades: Proper records are vital for planning and executing modifications or upgrades to the ventilation system.
- Training: New lab personnel can be effectively trained with clear documentation.
Without this foundational knowledge, you're operating blind. Invest the time upfront to gather and organize your documentation - it will pay dividends in the long run.
Section 2: Supply Air System Inspection
The supply air system delivers clean air to the lab, forming the foundation of a safe working environment. A thorough inspection here can prevent larger issues down the line. Start by visually inspecting the air intake location. Ensure it's free from obstructions like debris, vegetation, or exhaust vents from other processes. These obstructions can significantly reduce airflow and compromise the system's effectiveness.
Next, examine the ductwork. Look for any signs of leaks, cracks, or corrosion, particularly at joints and seams. Even small leaks can introduce contaminants into the lab. While a visual inspection is a good starting point, consider using a smoke stick or an ultrasonic leak detector for a more precise assessment - these tools can pinpoint even minor breaches.
Accurate airflow is paramount. Use an anemometer to measure airflow rates at key points within the system and compare these readings to the design specifications outlined in the system's documentation. Any significant deviations require further investigation and corrective action. Finally, inspect the supply fans themselves, listening for unusual noises (humming, rattling) and feeling for excessive vibration - these can indicate motor or bearing problems.
Section 3: Exhaust Air System Assessment
The exhaust air system is the workhorse of your lab's safety protocols, actively removing hazardous fumes and contaminants from the workspace. A compromised system can quickly escalate risks. This assessment goes beyond a cursory glance; it demands thorough inspection and verification.
Begin by visually inspecting all exhaust ductwork. Look for signs of corrosion, particularly around joints and seams. Even small cracks can significantly reduce efficiency and allow contaminants to recirculate. Use a bright light and, if possible, a mirror to examine difficult-to-reach areas. Document any findings with photographs.
Next, focus on the exhaust fans themselves. Listen for unusual noises - grinding, squealing, or rattling - which could indicate bearing failure or other mechanical issues. Check for excessive vibration; a vibrating fan can damage surrounding components and contribute to noise pollution. Verify that the fan motor is operating smoothly and that there are no signs of overheating.
Critically, assess the connections between the exhaust system and fume hoods, snorkels, and other local exhaust points. Ensure these connections are secure and airtight. Any leaks at these junctions can significantly reduce the effectiveness of the local exhaust ventilation. A simple smoke stick test can be invaluable in identifying subtle leaks.
Finally, examine any backdraft dampers installed within the exhaust system. These dampers are designed to prevent backflow of air when the exhaust fans are not operating. Verify that the dampers open and close freely and that they seal properly when closed. A stuck or damaged damper can compromise system performance and potentially allow contaminants to enter the lab. Consistent monitoring and proactive maintenance are essential for a reliable and safe exhaust air system.
Section 4: Fume Hoods and Local Exhaust Ventilation (LEV) Checks
Fume hoods and other Local Exhaust Ventilation (LEV) systems are the frontline defense against airborne contaminants in the lab. Regular, thorough checks are paramount to ensure their effectiveness. Here's what you need to inspect:
1. Fume Hood Performance Testing - The Critical Step:
This isn't just a suggestion; it's often a regulatory requirement. Annual (or more frequent, depending on usage and risk assessment) performance testing verifies that the hood is providing adequate face velocity and containment. Testing should include:
- Face Velocity Measurement: Using an anemometer, measure the average face velocity at various points within the hood opening. Compare results to established standards (typically 80-120 linear feet per minute). Document readings carefully.
- Containment Verification: Employ methods like smoke tube visualization or tracer gas testing to assess the hood's ability to contain vapors and prevent them from escaping into the lab.
- Sash Position: Verify that the sash is functioning correctly and is typically kept at the designated operating height.
2. Visual Inspection & Physical Checks:
Beyond the performance testing, a routine visual inspection is vital:
- Baffles and Airfoils: Ensure these crucial components are present, undamaged, and correctly positioned to optimize airflow.
- Airflow Obstructions: Regularly check for items placed too far into the hood, which disrupt airflow patterns. Remind lab personnel of proper hood usage practices.
- Light Shields & Service Wings: Inspect for damage or obstructions that could compromise hood performance.
3. LEV System Functionality:
Don't forget other LEV systems! Verify the operation of snorkel exhausts, slot exhausts, and other localized ventilation points. Listen for unusual noises or changes in airflow that could indicate a problem. Document any findings and promptly address any issues.
Section 5: Air Filtration and Quality Control
Maintaining optimal air quality within a laboratory is paramount, and it begins with robust filtration systems. These aren't simply about removing dust; they're essential for safeguarding personnel, protecting sensitive equipment, and ensuring data integrity. A tiered filtration approach is generally employed, with pre-filters tackling larger particles and HEPA (High-Efficiency Particulate Air) filters capturing microscopic contaminants.
Pre-Filters: The First Line of Defense
Pre-filters, typically made of materials like fiberglass or polyester, capture larger particles such as dust, pollen, and debris. These filters significantly extend the lifespan of more expensive downstream filters, like HEPA filters. Regular inspection and replacement - typically every 1-3 months, depending on the lab's environment - are crucial. Visually inspect pre-filters for dirt accumulation; a dark grey or black color indicates they need replacement.
HEPA Filters: Capturing the Invisible
HEPA filters are the workhorses of lab air purification. Designed to capture at least 99.97% of particles 0.3 microns in diameter, they remove bacteria, viruses, and other airborne contaminants. Manufacturer guidelines are critical for HEPA filter replacement - ignoring them can compromise filtration efficiency and damage the system. Pressure drop monitoring is vital. Increasing pressure drop across a HEPA filter indicates clogging and the need for replacement. Many systems incorporate pressure gauges to alert operators to rising pressure. Proper disposal of used HEPA filters is also important, particularly in labs handling infectious agents.
Beyond HEPA: Activated Carbon Filters (Optional)
Some labs utilize activated carbon filters in conjunction with HEPA filters. These filters are designed to remove gaseous contaminants and odors. Their effectiveness depends on the type of contaminants present and the filter's saturation level. Replacement frequency varies significantly, often dictated by the specific chemicals being used.
Documentation is Key
Meticulous records of filter inspections, replacements, and pressure drop readings are essential for tracking performance and identifying potential problems. These records should be readily accessible and reviewed regularly as part of the overall ventilation system maintenance program.
Section 6: Monitoring and Control System Review
The monitoring and control system is the brain of your lab's ventilation. It's responsible for maintaining set points, responding to alarms, and providing data for analysis. A thorough review of this system is critical for ensuring consistent performance and identifying potential issues before they escalate.
Key Areas to Assess:
- Building Management System (BMS) Integration: Verify seamless communication between the ventilation system and the BMS. Are data points accurately reported? Can adjustments be made remotely?
- Trending and Data Logging: Review historical data for temperature, pressure, airflow rates, and filter pressure drop. Look for unusual patterns or deviations from established baselines. Consistent monitoring allows for predictive maintenance and identifies gradual degradation.
- Alarm Functionality: Test all alarm set points (high/low pressure, airflow deviations, filter saturation). Ensure alarms trigger appropriately and notifications are delivered to the designated personnel. Document testing procedures and results.
- Sensor Calibration: Consult manufacturer's recommendations for calibrating pressure sensors, airflow sensors, and other critical components. Out-of-calibration sensors can lead to inaccurate readings and improper system operation.
- Control Loop Performance: Assess the responsiveness of the control loops. Are adjustments made quickly and effectively to maintain desired set points? Slow or erratic control loop behavior can indicate equipment malfunction or inadequate tuning.
- Emergency Shutdown Procedures: Regularly test the emergency shutdown system to ensure it functions correctly in the event of a critical failure. Verify that designated personnel are familiar with the shutdown procedure.
- Cybersecurity: For systems connected to networks, review cybersecurity protocols to prevent unauthorized access and potential disruption of ventilation operations.
Section 7: Maintenance Records and History
Maintenance records aren't just paperwork; they's the history of your ventilation system's health. A well-maintained record provides invaluable insight into performance trends, identifies recurring issues, and demonstrates due diligence in safety compliance. Beyond simply noting when filters were changed or a fan was serviced, a robust system captures why work was performed and what the results were.
Here's what a comprehensive maintenance record should include:
- Date of Service: When the maintenance was performed.
- Description of Work: A clear explanation of the task completed (e.g., "Replaced pre-filter on supply air unit #2," "Inspected and calibrated airflow sensor in fume hood A").
- Technician/Personnel: Who performed the work and their qualifications (important for liability and training records).
- Measurements & Results: Crucial data such as airflow readings, pressure drops, vibration levels, and any observed anomalies. Include before and after values whenever possible.
- Parts Used: List the specific parts replaced, including manufacturer and part number.
- Recommendations: Document any recommendations for future maintenance or repairs, even if they weren't immediately implemented.
- Photographic Evidence (Highly Recommended): A picture is worth a thousand words! Photos can document the condition of components before and after service, providing a visual history.
Beyond Compliance: Leveraging Historical Data
Analyzing maintenance records over time can reveal patterns that help optimize system performance and prevent costly breakdowns. For example, consistently high-pressure drops across a filter could indicate premature filter degradation, prompting a review of filter selection or maintenance schedule. Similarly, recurring issues with a specific fan might point to a design flaw or inadequate lubrication. By treating maintenance records as a valuable asset, you can move from reactive repairs to proactive maintenance, enhancing safety, extending equipment life, and minimizing operational costs.
Section 8: Troubleshooting Common Ventilation Issues
Even with diligent preventative maintenance, ventilation systems can encounter problems. Knowing how to diagnose and address common issues quickly can minimize disruption and ensure continued safety. Here's a breakdown of frequent problems and potential solutions:
1. Reduced Airflow: This is perhaps the most common complaint.
- Possible Causes: Clogged filters, blocked ductwork, failing fan motor, incorrect fan speed, damper malfunction.
- Troubleshooting Steps: Check filter condition and replace if necessary. Visually inspect ductwork for obstructions. Verify fan motor functionality and voltage. Check damper positioning and actuator operation. Use an anemometer to pinpoint airflow reduction areas.
- Severity: Moderate to High - Reduced airflow compromises safety.
2. Unusual Noises (Humming, Whining, Rattling): These sounds often indicate mechanical issues.
- Possible Causes: Fan blade imbalance, bearing failure, ductwork vibration, loose components.
- Troubleshooting Steps: Visually inspect fan blades for damage or debris. Listen carefully to pinpoint the noise's origin. Check fan bearings for lubrication. Tighten loose components. Consider professional inspection for complex issues.
- Severity: Moderate - Can indicate impending equipment failure.
3. Temperature Fluctuations: Unexpected temperature changes within the lab can affect experiments.
- Possible Causes: Air intake issues (proximity to heat sources), damper malfunction, HVAC system imbalance, infiltration.
- Troubleshooting Steps: Inspect air intake location. Verify damper operation. Check for air leaks. Evaluate the overall HVAC system balance.
- Severity: Moderate - Can impact experimental accuracy.
4. Fume Hood Face Velocity Drop: A sudden decrease in face velocity compromises containment.
- Possible Causes: Obstructions in the fume hood, incorrect sash position, malfunctioning exhaust fan, ductwork blockage.
- Troubleshooting Steps: Remove obstructions within the hood. Verify sash position is at the recommended height. Check exhaust fan operation. Inspect ductwork for blockage. Perform a full fume hood performance test.
- Severity: High - Immediate safety concern; requires immediate corrective action.
5. Alarm System Malfunctions: Non-functional or false alarms can mask critical issues.
- Possible Causes: Sensor failure, wiring problems, programming errors.
- Troubleshooting Steps: Verify sensor calibration. Check wiring connections. Review alarm programming. Contact a qualified technician for advanced diagnostics.
- Severity: High - Reduces confidence in safety systems; requires prompt investigation and repair.
Important Note: These are general troubleshooting guidelines. Complex ventilation issues may require the expertise of a qualified HVAC technician or safety professional. Always prioritize safety and consult with qualified personnel before attempting any repairs.
Section 9: Regulatory Compliance and Best Practices
Laboratory ventilation systems aren't just about safety; they're also subject to a complex web of regulations and evolving best practices. Staying compliant isn't just about avoiding penalties; it's about demonstrating a commitment to a safe and healthy environment for all lab personnel.
Key Regulatory Bodies & Standards:
- OSHA (Occupational Safety and Health Administration): OSHA's regulations cover a broad range of lab safety issues, including ventilation requirements for specific processes and the use of hazardous chemicals. Pay close attention to standards related to chemical exposure limits and personal protective equipment (PPE).
- EPA (Environmental Protection Agency): EPA regulations address environmental concerns, particularly regarding the release of volatile organic compounds (VOCs) and other pollutants from lab exhaust. Review relevant rules pertaining to air emissions and waste disposal.
- ANSI (American National Standards Institute): ANSI develops voluntary consensus standards that often serve as benchmarks for best practices in laboratory design and operation, including ventilation system performance. ANSI/AIHA Z9.5 is a particularly relevant standard for laboratory safety.
- State and Local Regulations: Don't forget that state and local authorities may have additional requirements beyond federal regulations. Always consult local codes and ordinances.
Best Practices to Elevate Your Ventilation Program:
- Regular Performance Testing: Annual or bi-annual performance testing of fume hoods and other LEV systems is crucial. Document these tests meticulously.
- Hazard Assessment Integration: Ventilation design and maintenance should be directly tied to a thorough hazard assessment. Ensure that ventilation controls are appropriate for the specific chemicals and processes used.
- Employee Training: Provide comprehensive training to all lab personnel on the proper use of ventilation systems and the importance of reporting any concerns.
- Continuous Improvement: Ventilation systems aren't static. Regularly review and update your ventilation program based on changes in processes, chemicals, and regulations. Implement a system for tracking and addressing employee feedback.
- Documentation is Key: Maintain meticulous records of all inspections, maintenance, testing, and training. This documentation provides a valuable audit trail and demonstrates your commitment to compliance.
Section 10: Creating Your Custom Lab Ventilation Checklist
The checklist provided is a solid foundation, but no two labs are exactly alike. To truly maximize its effectiveness, you need to customize it to reflect your unique environment, equipment, and hazards. Here's how to build your bespoke checklist:
1. Hazard Assessment is Paramount: Begin by thoroughly assessing the specific chemical, biological, or radiological hazards present in your lab. What volatile compounds are used? What are the potential exposure routes? These hazards will dictate the frequency and type of inspections needed.
2. Equipment Inventory & Specifications: Document every component of your ventilation system. Include manufacturer details, model numbers, and original design specifications. This information is essential for troubleshooting and sourcing replacement parts. Knowing the original airflow rates, filter types, and fan capacities is crucial for accurate assessment.
3. Tailor Checkpoints to Equipment: If you have specialized equipment, like glove boxes or biosafety cabinets, add dedicated checkpoints to verify their proper function. For example, regularly check the HEPA filter integrity in a biosafety cabinet.
4. Frequency & Responsibility: Assign clear responsibilities for each checklist item. Who is responsible for performing the inspection? How often should it be done (daily, weekly, monthly, annually)? Adjust frequencies based on hazard severity and equipment criticality. High-risk areas or frequently used equipment require more frequent checks.
5. Documentation & Review: Establish a robust system for documenting inspection results. This could be a paper logbook, a spreadsheet, or a dedicated software platform. Regularly review inspection logs to identify trends, recurring issues, and areas for improvement. Update the checklist accordingly.
6. Incorporate Feedback: Encourage lab personnel to provide feedback on the checklist's effectiveness. Their observations and insights are invaluable for identifying gaps and refining the process.
Ultimately, your custom checklist should be a living document that evolves with your lab's needs and priorities.
Section 11: Lab Personnel Training and Awareness
A flawlessly maintained ventilation system is useless if lab personnel don't understand how it works or how to use it properly. Comprehensive training and ongoing awareness programs are vital to ensuring safety and maximizing the system's effectiveness. This section outlines key areas to cover in your lab's personnel training.
Initial Training for New Employees:
- System Overview: Provide an introductory explanation of the lab's ventilation system, including its purpose, components, and operating principles.
- Fume Hood Usage: Thoroughly train all personnel on proper fume hood technique, including sash height requirements, placement of equipment, and avoiding obstructions. Demonstrate common mistakes and how to correct them.
- Local Exhaust Ventilation (LEV) Procedures: Explain the specific procedures for utilizing snorkel exhausts, slot exhausts, and other LEV systems.
- Emergency Procedures: Clearly outline the steps to take in the event of ventilation system failure or emergency situations. Conduct drills to reinforce these procedures.
- Hazard Communication: Ensure personnel understand the hazards associated with chemicals used in the lab and how the ventilation system helps mitigate those risks.
Ongoing Awareness and Refresher Training:
- Annual Safety Refresher: Incorporate ventilation system safety into annual safety training programs.
- Poster and Signage: Display informative posters and signage near ventilation system components, reminding personnel of key safety practices.
- Regular Safety Meetings: Dedicate time in regular lab safety meetings to discuss ventilation system performance and address any concerns.
- Communication of Changes: Promptly communicate any changes to ventilation system procedures or equipment to all relevant personnel.
- Feedback Mechanisms: Establish channels for personnel to provide feedback on ventilation system performance and identify potential safety concerns.
Effective training empowers lab personnel to be active participants in maintaining a safe and healthy laboratory environment.
Section 12: Emergency Procedures and Response
A robust ventilation system is only as effective as your ability to respond when things go wrong. While preventative maintenance minimizes failures, unexpected events will occur. Having clear, practiced emergency procedures is paramount for protecting personnel and minimizing damage.
1. Ventilation System Failure - Immediate Actions:
- Alert Personnel: Immediately notify all personnel in the lab of the ventilation system failure. Use audible alarms, clear signage, and verbal communication.
- Contain Hazardous Materials: Prioritize securing any ongoing experiments or processes that involve hazardous materials. Close containers, minimize further release, and isolate the affected area.
- Evacuation Considerations: Based on the nature of the failure and the potential hazards released, determine if a full or partial evacuation is necessary. Follow established evacuation plans.
- Manual Override (If Applicable): If the system has a manual override capability, trained personnel should activate it to attempt to maintain some level of ventilation. Only trained personnel should attempt this.
2. Post-Failure Investigation & Repair:
- Do Not Restart Immediately: Do not attempt to restart the ventilation system until the cause of the failure has been determined and corrected.
- Root Cause Analysis: Conduct a thorough investigation to identify the root cause of the failure. Document findings meticulously.
- Professional Repair: Engage qualified HVAC technicians to diagnose and repair the system. Do not attempt complex repairs without proper training and authorization.
- System Validation: After repairs, rigorously test the system to validate functionality and ensure it meets performance specifications. Documentation of this validation is critical.
3. Communication & Documentation:
- Incident Reporting: File a detailed incident report outlining the failure, actions taken, and corrective measures implemented.
- Training Updates: Use the incident as a learning opportunity. Update training materials and reinforce proper emergency response procedures.
- System Modifications: If the failure revealed a design or maintenance deficiency, consider modifications to the ventilation system or procedures to prevent recurrence.
Important Note: Regularly review and practice emergency procedures to ensure preparedness. Incorporate drills into the lab's safety training program.
Conclusion: Ensuring a Safe and Compliant Lab Environment
Maintaining a robust and reliable laboratory ventilation system isn't just about ticking boxes on a checklist; it's a fundamental commitment to the well-being of your personnel, the integrity of your research, and adherence to regulatory standards. A proactive approach - prioritizing preventative maintenance, thorough inspections, and prompt repairs - minimizes risks, extends the lifespan of your equipment, and prevents costly downtime. Remember that ventilation systems are complex; when in doubt, consult with qualified HVAC professionals for assessments, repairs, or modifications. By embracing a culture of safety and continuous improvement, you're not just ensuring a compliant lab environment; you're fostering a thriving and trustworthy space for innovation and discovery.
Resources & Links
- United States Environmental Protection Agency (EPA) : EPA provides regulations, guidelines, and information on indoor air quality, ventilation, and hazardous substances. Crucial for understanding regulatory requirements related to lab ventilation.
- Occupational Safety and Health Administration (OSHA) : OSHA sets and enforces standards for workplace safety, including ventilation requirements in laboratories. Provides resources on permissible exposure limits and safety regulations.
- American Industrial Hygiene Association (AIHA) : AIHA is a professional organization offering resources, publications, and training on industrial hygiene, including ventilation system assessment and control. Useful for understanding best practices and standards.
- American Society of Heating, Refrigerating and Air-Conditioning Engineers (ASHRAE) : ASHRAE develops standards and guidelines for HVAC systems, which directly impact lab ventilation. Their publications cover design, operation, and maintenance.
- Centers for Disease Control and Prevention (CDC) : CDC provides information on infectious diseases, chemical safety, and other health hazards relevant to lab environments. Useful for understanding risks and appropriate ventilation controls.
- National Institute of Standards and Technology (NIST) : NIST provides research and standards related to measurement science, including air quality monitoring and ventilation performance. May be relevant for advanced ventilation system assessment.
- Lab Manager : A website dedicated to laboratory management. Includes articles, webinars, and resources related to ventilation, safety, and compliance.
- Science and Chemicals : Provides information, guidance, and safety data sheets (SDS) for various chemicals commonly used in laboratories. Helps in assessing hazards and determining appropriate ventilation requirements.
- Ductwork.com : Focuses on ductwork design, installation, and maintenance. Useful for understanding and assessing the physical aspects of the ventilation system, especially for older labs.
- Home Depot (for general ventilation components) : While primarily for retail, can be used to visualize and understand components like filters, fans, and dampers, aiding in troubleshooting and general knowledge. *Use cautiously and for informational purposes only - lab-grade equipment should be sourced from specialized suppliers.*
- Thermo Fisher Scientific : Provides lab equipment and services, including ventilation systems. Good resource for understanding current technology and potential upgrades.
- Cole-Parmer : Supplier of scientific equipment, including ventilation systems and air monitoring devices. Provides technical information and product specifications.
- Simco Ion : Specializes in electrostatic discharge (ESD) control and ventilation systems. May be relevant for labs handling sensitive materials.
- Vent-Tech : Provides commercial and industrial ventilation solutions, which can offer insights into design principles and components for larger lab ventilation systems.
- Building Science : Focuses on building performance and energy efficiency, which includes insights into air leakage, ventilation rates, and indoor air quality. Can inform best practices for lab design and operation.
Frequently Asked Questions
What is a lab ventilation checklist and why is it important?
A lab ventilation checklist is a document used to systematically inspect and verify the proper functioning of ventilation systems in a laboratory. It's crucial for maintaining a safe working environment by ensuring harmful fumes, vapors, and particles are effectively removed, protecting researchers and preventing potential hazards.
Who should use this checklist?
This checklist is designed for laboratory personnel, safety officers, facility managers, and anyone responsible for ensuring the proper operation of lab ventilation systems. It's beneficial for both experienced and less experienced individuals.
How often should I use this checklist?
The frequency of checklist usage depends on the lab's specific hazards, regulatory requirements, and institutional policies. Generally, monthly checks are recommended, but quarterly or annual checks may be sufficient in some cases. High-risk labs or those with frequent changes to processes may require more frequent inspections.
What kind of ventilation systems are covered by this checklist?
The checklist covers common lab ventilation systems including fume hoods, biosafety cabinets (BSCs), local exhaust ventilation (LEV), and general room ventilation. It can be adapted to include other specialized systems present in your lab.
What do I do if I find a problem during the checklist inspection?
Document the issue thoroughly in the checklist's designated area. Immediately report the problem to the appropriate personnel (e.g., lab supervisor, safety officer, facilities manager). Do not continue working in the area until the issue is resolved and the ventilation system is functioning correctly.
Can I modify the checklist template?
Yes, the checklist is designed to be adaptable. Modify it to include elements specific to your lab's equipment, processes, and safety protocols. Add or remove items as needed to ensure it accurately reflects your lab's ventilation system.
What terms like 'face velocity' and 'airflow' mean in the checklist?
'Face velocity' refers to the speed of air moving across the opening of a fume hood or BSC. 'Airflow' broadly describes the movement of air within the ventilation system. Proper airflow is critical for effective fume removal and containment. Specific measurements for these are often taken using calibrated instruments.
Are there any legal or regulatory requirements related to lab ventilation?
Yes, various regulations (e.g., OSHA, NIOSH, EPA) mandate proper lab ventilation to protect workers and the environment. Your institution should have specific policies and procedures in place to ensure compliance. Consult your safety officer or relevant regulatory agencies for detailed requirements.
Found this Article helpful?
Facility Management Solution Demo
Keep your facilities running smoothly! ChecklistGuro streamlines maintenance, inspections, and vendor management. Reduce downtime, optimize efficiency, & improve safety. Manage it all with our Work OS.
Related Articles
Industrial Floor Cleaning & Safety Checklist Template
Display Case Temperature Monitoring Checklist Template
The Ultimate Refrigeration Maintenance Checklist: Keeping Your Food Safe
Escalator & Moving Walkway Inspection Checklist Template
The Ultimate Guest Room Cleaning & Inspection Checklist Template

The Ultimate Security Camera Review Checklist Template
Forklift Inspection & Maintenance Checklist Template
Emergency Generator Load Testing Checklist Template
We can do it Together
Need help with
Facility Management?
Have a question? We're here to help. Please submit your inquiry, and we'll respond promptly.