Mastering Manure Composting: Your Process Monitoring Checklist Template
Published: 09/01/2025 Updated: 12/13/2025
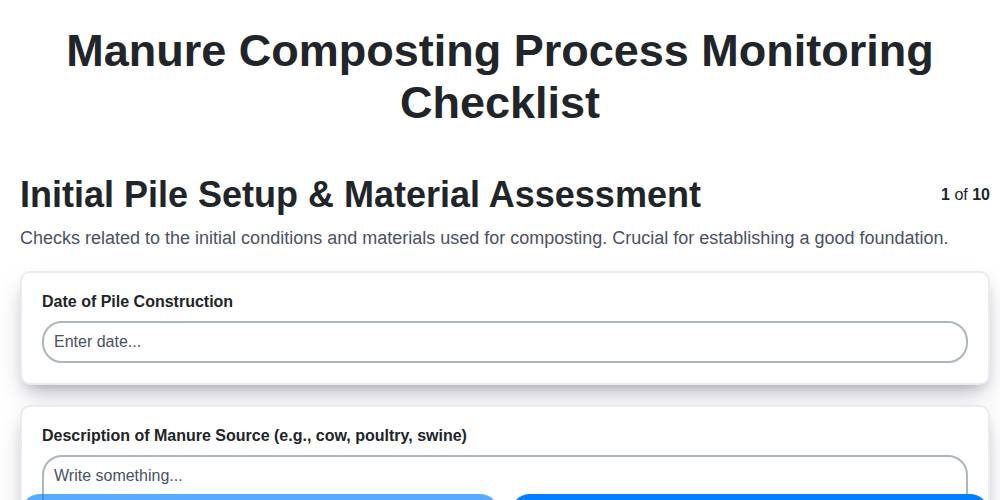
Table of Contents
- Introduction: Why Monitor Your Manure Composting?
- Understanding the Benefits of Process Monitoring
- Your Comprehensive Manure Compost Composting Checklist Template
- Initial Pile Setup & Material Assessment
- Temperature Tracking: The Heart of Composting
- Moisture Management: Finding the Sweet Spot
- Aeration & Oxygen: Breathing Life into Your Pile
- Pile Dimensions & Volume: Keeping Track of Progress
- Odor Control: Preventing Neighborly Complaints
- Visual Inspection: Observing Material Breakdown
- Pest & Vector Management: Keeping Unwanted Guests Away
- Record Keeping: Your Logbook for Success
- Finished Compost Assessment: The Final Checkpoint
- Troubleshooting Common Composting Challenges
- Resources & Further Learning
- Resources & Links
TLDR: Feeling overwhelmed by manure composting? This checklist template simplifies the process! It guides you through critical steps - from initial setup & temperature monitoring to odor assessment & finished compost evaluation - so you can create high-quality compost, avoid problems like foul odors, and confidently turn waste into a valuable resource. Download the template and start mastering your composting today!
Introduction: Why Monitor Your Manure Composting?
Manure composting is a fantastic way to transform a potential waste product into a valuable resource - a nutrient-rich soil amendment that can benefit your gardens, farms, or landscaping projects. But simply piling manure and hoping for the best won't guarantee success. Improper composting can lead to unpleasant odors, attract pests, fail to kill harmful pathogens, and ultimately result in a product that's less effective than it could be.
Consistent monitoring is the key to unlocking the full potential of your manure composting efforts. It's about more than just knowing that something is happening; it's about understanding what's happening, identifying potential problems before they escalate, and ensuring you're creating a high-quality compost that's both safe and beneficial. This blog post will walk you through a detailed checklist to help you do just that, giving you the tools to troubleshoot issues and produce truly exceptional compost.
Understanding the Benefits of Process Monitoring
Consistent monitoring isn't just about ticking boxes; it's about maximizing the value you get from your composting efforts. Think of it as investing a little time upfront to reap significant rewards down the line. Properly monitored composting leads to a higher-quality end product, minimizing waste and maximizing resource utilization.
Here's a deeper look at the advantages:
- Reduced Odor Complaints: Proactive monitoring allows you to identify and correct anaerobic conditions before they escalate into neighborhood-level concerns. A well-managed pile is a silent, beneficial process.
- Pathogen Destruction Assurance: Achieving and maintaining the right temperatures ensures that harmful pathogens are effectively eliminated, making your compost safe for application to crops and gardens.
- Enhanced Nutrient Availability: Monitoring allows you to fine-tune the carbon-to-nitrogen ratio, guaranteeing a compost rich in essential nutrients that benefit soil health and plant growth.
- Minimized Resource Waste: By understanding the decomposition process, you avoid adding unnecessary materials or water, optimizing resource efficiency.
- Improved Compost Quality: The end result is a uniform, stable compost with a desirable texture and earthy aroma - a testament to your careful process.
- Data-Driven Adjustments: Record keeping provides invaluable data to learn from your process, allowing for continuous improvement and optimized results season after season.
Your Comprehensive Manure Compost Composting Checklist Template
Ready to put this knowledge into action? Below is a downloadable template to guide your manure composting process. We're providing this in a simple table format that you can easily print or adapt for digital use. Remember to customize it to your specific setup and composting method. The Notes column is crucial for documenting observations and adjustments - those insights are invaluable for fine-tuning your composting process over time.
Downloadable Checklist Template:
| Date/Time | Temperature (°F/°C) | Moisture (Squeeze Test/Meter) | Aeration (Smell/Visuals) | Pile Dimensions (LxWxH) | Odor Assessment | Material Breakdown | Pest/Vector Concerns | Notes/Adjustments |
|---|---|---|---|---|---|---|---|---|
Understanding the Columns:
- Date/Time: Essential for tracking changes over time.
- Temperature: Monitor core temperature to ensure proper decomposition and pathogen kill.
- Moisture: Adjust as needed based on the "sponge test" or moisture meter readings.
- Aeration: Observe for signs of anaerobic conditions (ammonia smell).
- Pile Dimensions: Tracks volume reduction as composting progresses.
- Odor Assessment: Identifies potential issues requiring intervention.
- Material Breakdown: Visual assessment of decomposition stage.
- Pest/Vector Concerns: Addresses potential nuisance or health issues.
- Notes/Adjustments: Your personal record of observations and modifications made to the composting process.
Pro-Tip: Print multiple copies of this template and keep them in a waterproof binder near your composting area. Regular and consistent record-keeping is key to successful composting!
Initial Pile Setup & Material Assessment
The foundation of successful composting lies in a thoughtful initial setup. This isn't just about throwing manure into a pile; it's about creating the ideal environment for those hardworking microbes to thrive. Here's what to assess and how to set the stage for efficient decomposition.
The Carbon: Nitrogen (C: N) Ratio - Your Recipe for Success
The most crucial element is the balance of carbon-rich ("brown") and nitrogen-rich ("green") materials. Ideally, you're aiming for a C: N ratio between 25: 1 and 30: 1. Think of it like baking - too much of one ingredient throws off the whole process.
- Nitrogen-Rich "Greens" (approximate values): Manure (varies by animal type - chicken manure is higher in nitrogen than cow manure), grass clippings, food scraps, green plant material.
- Carbon-Rich "Browns": Straw, wood shavings, shredded paper, leaves, sawdust.
Too much nitrogen (greens) will lead to excessive ammonia production - that pungent, unpleasant odor. Too much carbon (browns) will slow down the decomposition process significantly, essentially putting your composting on hold.
Particle Size Matters
Large, chunky materials decompose much slower than smaller ones. Microbial action is surface-dependent, so more surface area means faster breakdown. Consider:
- Shredding or Chipping: Wood chips and straw break down slowly. Shredding them or using finer materials accelerates decomposition.
- Manure Bedding: Straw or wood shavings mixed with manure provide both carbon and aeration.
Spotting Potential Problems: Contaminants
Before you even start, carefully inspect your materials. Non-compostable items are a major headache:
- Plastic: Bags, wrappers, and other plastic debris won't break down and can contaminate your finished compost.
- Metal: Wire, nails, and other metal items are obviously undesirable.
- Glass: Sharp and dangerous to handle.
- Diseased Plants: Can spread diseases to your finished compost.
Initial Moisture Content: A Quick Check
While a detailed moisture analysis isn't necessary at this stage, take a quick look. The materials should be damp, like a wrung-out sponge. If they're bone dry, add water. If they're soaking wet, add more "browns" to absorb excess moisture.
Temperature Tracking: The Heart of Composting
Temperature isn't just a reading; it's the vital sign of your composting process. During the hot phase, when beneficial microbes are actively breaking down organic matter, your compost pile should consistently reach temperatures between 131°F (55°C) and 170°F (77°C). This heat is crucial for several reasons: it destroys harmful pathogens like E. coli and Salmonella, reduces weed seeds, and accelerates the decomposition process.
Think of it like this: a consistently low temperature suggests the microbial community isn't thriving. It could mean your carbon-to-nitrogen ratio is off, the pile is too dry or too wet, or it needs more oxygen. On the flip side, extremely high temperatures (above 170°F) can kill off beneficial microbes, slowing down the process and potentially creating unpleasant odors.
How to Track It Effectively:
- Multiple Thermocouples: Don't rely on a single reading. Place thermocouples in the core and the surface of the pile to get a comprehensive picture.
- Daily Monitoring: Check temperatures daily during the hot phase.
- Record Keeping: Meticulously log your temperature readings - this helps identify trends and troubleshoot problems.
- Understanding Temperature Fluctuations: Be prepared for temperature spikes and dips. A temperature drop signals a need for adjustments - add water for dryness or add 'browns' for aeration.
Moisture Management: Finding the Sweet Spot
Maintaining the right moisture level is arguably the most critical factor in successful manure composting. Too little moisture, and the microbial community simply can't thrive; they dry up and decomposition slows to a crawl. Too much moisture, and you risk creating an anaerobic environment, resulting in foul odors and potentially harmful gases.
So, how do you find that "sweet spot"? The ideal moisture range is generally considered to be 40-60%, feeling like a wrung-out sponge.
The Squeeze Test: Your Best Friend
The easiest and most accessible method is the squeeze test. Grab a handful of compost material and squeeze it firmly.
- Too Dry: If the material crumbles and falls apart without leaving any moisture on your hand, it's too dry.
- Just Right: If you can squeeze a few drops of moisture onto your hand, it's likely in the ideal range.
- Too Wet: If water drips freely from your hand, it's too wet.
Adjusting Moisture Levels:
- Dry Compost: Add water gradually, mixing it in thoroughly. You can use a sprinkler, hose, or even buckets.
- Wet Compost: Incorporate dry materials like straw, wood shavings, or shredded leaves (browns) to absorb excess moisture. Turn the pile frequently to promote even drying.
Regularly assessing moisture levels and making adjustments as needed is a simple but powerful way to ensure a healthy and productive composting process.
Aeration & Oxygen: Breathing Life into Your Pile
Composting relies on the tireless work of microbes - tiny organisms that break down organic matter. Just like us, these microbes need oxygen to thrive. Without it, the process slows dramatically, and unpleasant odors (think ammonia and sulfur) become a problem. This anaerobic (oxygen-lacking) environment also produces greenhouse gases.
So, how do you ensure your compost pile is "breathing"?
Signs of Good Aeration: A healthy compost pile should have a slightly earthy, almost sweet smell - reminiscent of a forest floor. This indicates that aerobic microbes are doing their job efficiently.
What Happens When Things Go Wrong? A strong ammonia smell (like household cleaner) is a major red flag. It's a telltale sign of anaerobic conditions. You might also notice a rotten egg smell (hydrogen sulfide) - another indicator of oxygen deprivation. The pile may also heat up less effectively.
Getting Air into Your Pile:
- Regular Turning: This is the most common and often most effective method. How frequently you turn depends on your pile size and composting method. Smaller piles need more frequent turning (every few days), while larger windrows can be turned less often (weekly).
- Pile Design: Build your pile with bulky materials like wood chips or straw to create air pockets.
- Aeration Tubes: These perforated tubes are inserted into the pile and connected to a blower, forcing air through the compost. A more advanced (and more expensive) option.
- Proper Pile Shape: A conical or sloped pile allows for better air circulation.
Don't underestimate the importance of aeration! It's a vital component of successful and odor-free composting.
Pile Dimensions & Volume: Keeping Track of Progress
Knowing the dimensions and volume of your compost pile isn't just about aesthetics - it's a valuable tool for understanding how your composting process is progressing and identifying potential issues. As your pile decomposes, it shrinks in volume, releasing water and gases. Tracking these changes provides a tangible representation of the microbial activity at work.
Why Measure?
- Estimate Decomposition Rate: A rapidly shrinking pile suggests vigorous decomposition. A slow decrease might indicate a problem with moisture, aeration, or C: N balance.
- Material Balance: Helps you estimate how much material has been converted to compost and how much is remaining.
- Planning for Future Batches: Knowing how much volume you lose helps in planning future composting cycles.
- Record Keeping: Consistent measurements provide data to analyze trends over time.
How to Measure:
- Initial Measurements: When setting up your pile, record the length, width, and height. This provides a baseline for comparison.
- Regular Monitoring: Measure the dimensions every few weeks (or more frequently if you're troubleshooting).
- Volume Calculation: For a simple rectangular pile, calculate volume as: Length x Width x Height. For more complex shapes, estimate or use more advanced techniques.
- Record Keeping: Note the dates and dimensions in your compost log.
- Visual Markers (Optional): Use stakes or markers to visually track the pile's height. This can be particularly helpful for larger piles.
Don't worry about being perfectly precise - a rough estimate is better than nothing. The key is to maintain consistency in your measurements.
Odor Control: Preventing Neighborly Complaints
Unpleasant odors are the quickest way to turn a valuable composting operation into a neighborhood nuisance. Preventing them requires proactive management. The primary culprit for manure compost odors is anaerobic decomposition - that is, decomposition happening without sufficient oxygen. Here's how to keep those smells at bay:
1. Aeration is Your Best Friend: Frequent turning is the most common and effective method. The frequency depends on your pile size and turning method, but generally, turning at least once a week is a good starting point. Smaller piles benefit from more frequent turning.
2. Carbon-Nitrogen Balance: Too much nitrogen (greens - manure, grass clippings) without enough carbon (browns - straw, leaves) leads to ammonia odors. Balance the mix. If you notice ammonia smells, add more carbon-rich materials.
3. Moisture Management: Excessive moisture hinders aeration. Aim for a "wrung-out sponge" consistency. Adjust moisture by adding dry materials (browns) or allowing the pile to dry out a bit.
4. Covering the Pile: While not a replacement for good aeration, a tarp or other covering can help contain odors, particularly during windy conditions or rain. Just remember to lift it regularly to allow for airflow.
5. Pile Location: Consider the prevailing wind direction when siting your compost pile. Keeping it downwind of your neighbors can significantly reduce the impact of any stray odors.
6. Immediate Action: If you do notice an odor, don't ignore it! Increase aeration, adjust the carbon: nitrogen ratio, and address any moisture issues immediately. Prompt action prevents the problem from escalating.
Visual Inspection: Observing Material Breakdown
Beyond temperature and moisture readings, your eyes are your most valuable tool. Regularly observing the physical changes in your compost pile provides a wealth of information about its progress. Initially, you're likely to see distinct layers of manure, bedding, and any added materials. As decomposition progresses, these layers will start to blend.
Look for these key indicators:
- Color Change: The pile will gradually darken from light brown to a rich, dark brown or even black.
- Size Reduction: Materials will visibly shrink as they break down. Larger pieces of straw or wood shavings will become smaller and more fragmented.
- Texture Transformation: The texture will change from chunky and coarse to a crumbly, soil-like consistency.
- Uniformity: A well-decomposed pile will appear more uniform throughout, with fewer distinct pieces of original material visible.
- Presence of True Compost: You should begin to see the emergence of humus - dark, earthy-smelling, stable organic matter that's the hallmark of finished compost.
Take photos periodically to document the visual changes over time - it's a great way to track your composting success and identify any potential issues early on.
Pest & Vector Management: Keeping Unwanted Guests Away
Manure composting, while beneficial, can unfortunately attract unwanted guests. Flies, rodents, and other pests are drawn to the warmth, moisture, and organic material. Proactive management is key to minimizing these issues and maintaining a clean, odor-free composting operation.
Fly Control: Flies are a common complaint associated with composting. To deter them:
- Cover the Pile: A tarp or layer of straw/wood shavings can significantly reduce fly breeding sites.
- Burial: Burying fresh manure and food scraps under several inches of bedding material can interrupt the fly lifecycle.
- Fly Traps: Strategically placed fly traps can help control existing populations.
Rodent Prevention: Rodents seek food and shelter. To keep them at bay:
- Secure the Site: Ensure the composting area is fenced or otherwise secured to prevent access.
- Eliminate Food Sources: Remove any spilled feed or other potential rodent attractants.
- Regular Cleaning: Sweep and clean the surrounding area to remove any potential nesting materials.
Mosquito Management: Mosquitoes breed in standing water.
- Proper Drainage: Ensure the composting area has good drainage to prevent water accumulation.
- Cover Wet Materials: Covering particularly wet materials helps minimize mosquito breeding sites.
Larger Animals: Depending on your location, larger animals like deer or raccoons may also be attracted. A sturdy fence or other barriers may be necessary.
Regularly inspect your compost pile for signs of pests and address any issues promptly. Early intervention is the best way to keep your composting operation pest-free and your neighbors happy.
Record Keeping: Your Logbook for Success
Your compost pile isn't just a pile of manure; it's a dynamic ecosystem. And like any ecosystem, it needs careful observation and documentation to thrive. A detailed record-keeping system transforms your composting from guesswork to a science.
What should you record? Everything! Start with the basics:
- Date & Time: Crucial for tracking trends and identifying patterns over time.
- Temperature Readings: Core and surface temperatures - note any significant fluctuations.
- Moisture Content Assessment: Describe your observation (e.g., felt dry, wringed out like a sponge).
- Aeration Activities: When you turned the pile, how much you turned it, and any noticeable changes in odor after aeration.
- Material Additions: What you added (manure, bedding, browns), quantities, and the C: N ratio (if known).
- Weather Conditions: Precipitation, temperature, and sunlight - these significantly impact decomposition.
- Observations: Any unusual sights, smells, or insect activity.
Don't feel pressured to be overly scientific. A simple notebook and pen work just fine. Consider also taking photos to visually document the pile's progress - a picture truly is worth a thousand words when it comes to composting! Your logbook isn't just for you; it's a valuable resource for learning from your successes and troubleshooting any challenges that arise.
Finished Compost Assessment: The Final Checkpoint
The real magic happens here - it's time to decide if your efforts have paid off! Finished compost isn't just decomposed manure; it's a valuable resource ready to nourish your garden or crops. Here's what to look for:
Visual Inspection: Ideally, your finished compost should be a dark brown to black color, with a uniform, crumbly texture. You shouldn't see recognizable chunks of the original manure or bedding materials - everything should be well integrated.
The Sniff Test (Again!): A pleasant, earthy, almost sweet smell is what you're aiming for. Any lingering ammonia or foul odors indicate incomplete decomposition or anaerobic conditions - it's best to compost it a bit longer.
Screening: Passing your compost through a screen (typically ½ inch or ¼ inch) is an excellent way to remove any large, undecomposed pieces and create a more consistent product. This is especially important if you're using the compost for seed starting or potting mixes.
The "Feel" Test: Squeeze a handful of finished compost. It should hold together slightly, but easily crumble when touched.
Optional Lab Testing: For those who want to know exactly what's in their compost, a lab test can analyze nutrient content (nitrogen, phosphorus, potassium) and other characteristics. While not always necessary, it can be a useful tool for optimizing your compost's benefits.
Troubleshooting Common Composting Challenges
Composting, while generally straightforward, can occasionally throw curveballs. Don't panic! Most issues are easily remedied with a little detective work and adjustment. Here's a rundown of frequent problems and how to tackle them:
1. Pile Smells Like Ammonia: This usually indicates too much nitrogen (greens) and not enough carbon (browns), or insufficient aeration. Solution: Add more brown materials like straw, shredded leaves, or wood chips. Turn the pile frequently to increase oxygen flow.
2. Pile is Too Wet & Waterlogged: Excess moisture hinders decomposition. Solution: Add dry materials to absorb water. Turn the pile to improve aeration, which helps evaporate moisture. Consider covering the pile during rain.
3. Pile is Too Dry & Nothing is Happening: Microbes need moisture to thrive. Solution: Water the pile thoroughly, ensuring it's evenly moistened. Monitor moisture levels and water as needed.
4. Pile Isn't Heating Up: Lack of heat signifies a lack of microbial activity. This could be due to imbalance in C: N ratio, lack of moisture, or a lack of oxygen. Solution: Check and adjust the C: N ratio. Water the pile if dry. Turn the pile to aerate. Ensure the pile is large enough to retain heat (generally a minimum of 1 cubic yard).
5. Flies are a Problem: Flies are attracted to fresh manure and food scraps. Solution: Bury fresh materials deep within the pile. Cover the pile with a layer of brown materials. Consider using fly-repellent netting.
6. Pile is Taking Too Long to Decompose: Several factors can slow down the process. Solution: Ensure the C: N ratio is correct. Check moisture levels. Turn the pile regularly. Reduce the particle size of materials. A larger pile volume often composts faster due to retained heat.
7. You See Rodents: A rodent infestation is a sign of uncovered food scraps or other attractive materials. Solution: Bury all food scraps completely within the pile. Secure the pile with wire mesh or fencing. Consider using rodent-resistant containers for food waste.
If you're still struggling, consult your local agricultural extension office for personalized advice.
Resources & Further Learning
Want to dive deeper into the world of composting? Here's a curated list of resources to help you expand your knowledge and troubleshoot any challenges you might encounter.
- Your Local Extension Office: A fantastic starting point! Extension offices offer tailored advice based on your region's climate and soil conditions. Search online for [your state/county] Extension Office to find contact information and upcoming workshops.
- The Environmental Protection Agency (EPA): The EPA provides comprehensive composting resources, including guides for different scales of operation and information on regulatory requirements. https://www.epa.gov/composting
- Cornell Waste Management Institute: Offers a wealth of information and training programs on composting and other waste management practices. https://cwmi.cornell.edu/
- The Compost Research & Education Foundation (CREF): A non-profit organization dedicated to advancing the science and practice of composting. https://www.compostfoundation.org/
- Books:
- The Complete Compost Gardening Guide by Barbara Pleasant and Deborah L. Martin
- Let It Rot! The Complete Guide to Composting by Stu Campbell and Mary Appelhof
- Online Forums and Communities: Join online forums or Facebook groups dedicated to composting. These are great places to ask questions, share experiences, and learn from others. Search for composting forums or composting groups on your preferred platform.
Resources & Links
- Agency for Toxic Substances and Disease Registry (ATSDR) : Provides information on soil contamination, which can be relevant if manure source or land application areas have concerns. Understanding potential contaminants helps guide composting best practices.
- United States Environmental Protection Agency (EPA) : The EPA offers a wealth of information on composting, including regulations, best management practices, and resources for various scales of composting operations. Search specifically for 'composting' and 'manure management'.
- Natural Resources Conservation Service (NRCS) : NRCS provides technical assistance and resources on soil health and nutrient management, including manure composting. Look for publications on nutrient management planning and cover cropping which relates to land application of compost.
- Oregon State University Extension : OSU Extension has excellent publications on composting, with regionally specific advice. Search their site for 'compost' and 'manure'.
- BioResource Center : Offers comprehensive resources and training programs on composting, including hands-on workshops and online courses covering all aspects of composting, from basic principles to troubleshooting.
- Composting Council of Canada : Provides resources and information specifically relevant to composting in Canada. Offers guidance on process monitoring and troubleshooting common issues.
- Sustainable Agriculture Research & Education (SARE) : SARE offers a searchable database of farmer-written grants, guides, and videos related to sustainable agriculture practices, including manure composting and soil health.
- acresusa.com : Website focused on ecological farming and soil health. Often features articles and resources on composting and organic matter management, with a holistic perspective.
- acresonline.com : The online version of Acres USA. Provides articles, resources and directories related to sustainable and organic farming. Includes guides and practical advice on composting.
- University of Minnesota Extension : Provides regionally specific resources on composting, including guides and fact sheets tailored to Minnesota's climate and agricultural practices. Use the search function for specific topics related to manure composting.
- Clemson Cooperative Extension : Clemson Extension offers resources and expertise for farmers and gardeners in South Carolina, including information on composting, nutrient management, and soil health. Search for 'manure composting'.
- Purdue University Agriculture : Purdue's College of Agriculture provides research-based information and educational resources on a wide range of agricultural topics, including composting and manure management. Search their publications for relevant content.
Frequently Asked Questions
What is manure composting and why should I do it?
Manure composting is the natural process of decomposing organic matter (like manure) into a nutrient-rich soil amendment. It reduces waste, minimizes odors, creates a valuable resource for your garden or farm, and can improve soil health and plant growth.
What is the 'Process Monitoring Checklist' and why is it important?
The Process Monitoring Checklist is a tool to help you regularly check the vital signs of your compost pile. It ensures optimal conditions for decomposition, preventing issues like slow breakdown, bad odors, or pest problems, and ensures a high-quality finished compost.
What types of manure can I compost?
Most animal manures can be composted, including cow, horse, chicken, sheep, and pig manure. However, be aware that some manures (like those from animals treated with herbicides) can affect plant growth. Always research the specific manure type before composting.
What are the key factors I need to monitor in my compost pile?
The checklist focuses on: Temperature (hot composting vs. cold composting), Moisture (too wet or too dry), Aeration (oxygen levels), Particle Size (chunkiness), and Odor (unpleasant smells indicate problems).
What does 'hot composting' mean, and is it necessary?
Hot composting refers to maintaining a high-temperature pile (typically 130-160°F or 54-71°C). This kills pathogens and weed seeds. While not always necessary, it generally produces higher quality compost faster. Cold composting is slower and doesn't guarantee pathogen destruction.
How often should I use the monitoring checklist?
We recommend checking your compost pile using the checklist at least once a week, or more frequently if you're experiencing problems or the weather is extreme (very hot, wet, or dry).
What does it mean if my compost pile smells bad?
Unpleasant odors usually indicate anaerobic conditions (lack of oxygen). This can be caused by too much moisture, compaction, or the wrong carbon-to-nitrogen ratio. Adjust aeration and moisture levels to correct the issue.
What's the ideal carbon-to-nitrogen (C:N) ratio for manure composting?
A good C:N ratio is typically around 25:1 to 30:1. Manure is generally nitrogen-rich, so you'll need to add carbon-rich materials like straw, wood shavings, or shredded leaves to balance it.
How do I measure the temperature of my compost pile?
You can use a long-stemmed thermometer designed for soil or compost. Insert the thermometer into the center of the pile to get an accurate reading.
Can I compost manure with other organic materials?
Yes! Composting manure alongside other organic materials like leaves, grass clippings, and vegetable scraps is encouraged. This creates a more balanced and nutrient-rich compost.
Found this Article helpful?
Agriculture Management Solution Demo
Running a farm or agricultural business is complex. ChecklistGuro's Work OS platform simplifies your operations, from crop planning and irrigation management to livestock tracking and harvest scheduling. Increase efficiency, reduce waste, and boost yields! See how ChecklistGuro can revolutionize your agriculture business.
Related Articles

10 Simple Steps to a Healthy Drainage System: Your Checklist Template

Mastering the Daily Crop Scouting Report: Your [Specific Crop] Checklist Template

Irrigation System Checklist: Farm Water Management & Crop Yield Optimization

Unlock Your Garden's Potential: A Soil pH Verification Checklist

PPE Usage Checklist Template: Your Guide to Safety

Water Discharge Permit Compliance Checklist Template

The Ultimate GPS & Precision Farming Calibration Checklist Template

Water Runoff Analysis Checklist Template
We can do it Together
Need help with
Agriculture?
Have a question? We're here to help. Please submit your inquiry, and we'll respond promptly.