Your Radiology Equipment Maintenance Checklist Template
Published: 08/31/2025 Updated: 04/03/2026
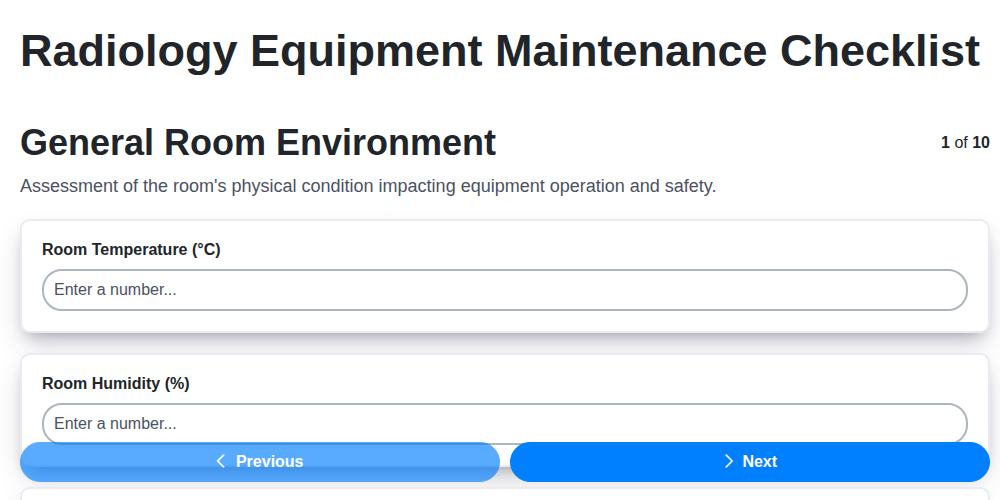
Table of Contents
- Why a Radiology Equipment Maintenance Checklist is Essential
- Understanding Your Equipment: A Breakdown
- Template Overview: What's Included
- General Room Environment Checks
- X-Ray Generator & Tube Inspection
- Image Receptor (Detector) Assessment
- High Voltage System Safety Checks
- Collimation and Light Field Verification
- Patient Support & Table Functionality
- Dose Calibration & Quality Assurance Procedures
- Safety Interlocks & Shielding Validation
- Electrical and Mechanical Systems Review
- Resources & Links
TLDR: Get a free, easy-to-use checklist template to keep your radiology equipment running safely and efficiently! It covers key areas like X-ray generator, detectors, safety interlocks, and more, helping you stay compliant and avoid costly breakdowns. Download now and simplify your maintenance program!
Why a Radiology Equipment Maintenance Checklist is Essential
A breakdown can cripple your radiology department, leading to appointment cancellations, frustrated patients, and costly repairs. But the financial implications are only part of the picture. Improperly maintained equipment can compromise image quality, potentially leading to misdiagnosis and impacting patient care. More importantly, neglected safety features pose serious risks to both staff and patients.
Think of a checklist not as a tedious task, but as a critical safeguard. It's a proactive measure that minimizes downtime, extends equipment lifespan, and ensures consistent performance. A well-maintained system delivers reliable diagnostic images, reduces patient dose through accurate calibration, and promotes a safer working environment. Compliance with regulatory standards and accreditation requirements is significantly easier to demonstrate with documented maintenance records. Ultimately, a robust checklist demonstrates a commitment to quality and patient well-being - a vital aspect of any successful radiology practice.
Understanding Your Equipment: A Breakdown
Each piece of equipment within a radiology suite serves a critical function, and understanding its role is the first step toward effective maintenance. Let's break down some of the key components and their typical maintenance considerations.
X-Ray Tube & Generator: Think of the tube as the heart of the process, generating the X-ray beam. The generator controls the voltage and current supplied to the tube, dictating the energy and intensity of the radiation. Maintenance here involves inspecting for physical damage, verifying output settings, and monitoring filament integrity. Uneven wear or overheating can indicate underlying issues.
Image Receptor (Detector): This is what captures the X-ray beam and converts it into a digital image. Modern detectors (like CR, DR, and advanced CT detectors) are sophisticated. Maintenance focuses on verifying pixel mapping, assessing signal-to-noise ratios, and looking for physical imperfections that could compromise image quality. Detector degradation can manifest as increased noise or loss of sensitivity.
Collimation & Light Field: Precise beam restriction (collimation) and accurate alignment with the light field are essential for image quality and patient dose reduction. Mismatches can result in poorly defined anatomy and increased scatter radiation. Periodic checks are vital to ensure beam accuracy and sufficient illumination for safe patient positioning.
High Voltage System: This intricate system generates the extremely high voltages needed to accelerate electrons within the X-ray tube. Any fault here can be hazardous. While detailed inspection and repair are best left to qualified service personnel, visual checks for cable damage and appropriate cooling are good practice.
Patient Support & Table: While seemingly simple, patient tables and supports are vital for positioning patients accurately and safely. Regular inspection for smooth operation, weight capacity compliance, and secure patient restraints is essential to prevent accidents and ensure proper image acquisition.
Understanding these individual components and their interdependencies will allow for a more targeted and effective maintenance approach.
Template Overview: What's Included
Our downloadable template provides a structured framework to streamline your radiology equipment maintenance. Here's a breakdown of what you're getting:
- Categorized Checklist Sections: The template is divided into the ten core areas detailed in the main article (General Room Environment, X-Ray Generator, etc.), providing a clear and organized approach.
- Detailed Task Lists: Each section includes a comprehensive list of tasks, outlining specific items to inspect and verify.
- Frequency Recommendations: We've included suggested maintenance frequencies (Daily, Weekly, Monthly, Quarterly, Annually) as a starting point; adjust these based on your equipment's usage and manufacturer guidelines.
- Record-Keeping Columns: Dedicated columns for date, technician initials, and notes allow for thorough documentation of all maintenance activities. This is essential for tracking trends and demonstrating compliance.
- Customization Options: The template is designed to be easily customizable. You can add or remove tasks, modify frequencies, and incorporate any equipment-specific requirements. A space for equipment model numbers and serial numbers is also provided for clear identification.
- PDF & Editable Format: You've got options! The template is provided in both a PDF for easy printing and a fully editable format (like .docx or Google Docs) for full customization.
General Room Environment Checks
Maintaining a clean, safe, and well-maintained room environment is foundational to reliable radiology equipment performance and patient safety. It's often overlooked, but crucial. Here's a breakdown of the essential checks:
Cleanliness and Dust Control: Dust accumulation can interfere with detector sensitivity, scatter radiation, and contribute to equipment overheating. Regularly dust all surfaces, including consoles, monitors, and equipment housings. Implement a cleaning schedule - daily spot cleaning and weekly thorough cleaning are good starting points. Pay particular attention to areas near detectors and collimators.
Ventilation and Air Quality: Adequate ventilation is vital for removing heat generated by the X-ray equipment and minimizing airborne contaminants. Ensure ventilation systems are functioning correctly and filters are clean. Monitor temperature and humidity levels; extreme fluctuations can impact equipment stability and image quality.
Lighting: Sufficient and appropriately positioned lighting is essential for both the radiographer's safety and accurate patient positioning. Verify light fixtures are functioning and provide adequate illumination without glare. Regularly clean light fixtures to maximize brightness. Consider LED lighting for energy efficiency and reduced heat generation.
Spatial Organization & Safety: Clear pathways and a well-organized room minimize the risk of accidents. Keep equipment access panels unobstructed. Ensure emergency exits are clear and easily accessible. Implement a system for managing cables and wires to prevent tripping hazards.
Radiation Shielding Integrity: Regularly inspect walls, doors, and other shielding components for any signs of damage or deterioration. Report any concerns to qualified personnel for assessment and repair.
X-Ray Generator & Tube Inspection
The heart of your radiology suite lies within the X-ray generator and tube - ensuring their optimal function is paramount for both image quality and patient safety. Inspection of these components demands a meticulous approach, extending beyond visual checks.
Generator Examination: Begin with a thorough visual assessment. Look for any signs of corrosion, leaks (particularly around seals and connections), or damaged wiring. Verify the accuracy of voltage and current settings, comparing them against established calibration records. Coolant performance, if applicable, requires monitoring - check fluid levels and temperatures for any deviations from the manufacturer's specifications. Unusual noises emanating from the generator during operation should be investigated immediately. Record any irregularities and their corrective actions.
Tube Evaluation: The X-ray tube's integrity is critical. While complete assessment typically requires specialized equipment, a visual inspection can reveal clues. Note any discoloration or unusual deposits on the tube housing, which might indicate oil leaks or target damage. Filament condition should be visually assessed where possible (refer to manufacturer guidelines - this may involve specialized techniques). Changes in the tube's operational characteristics, such as increased mAs required for a given exposure, can also be indicative of degradation. Remember that target deterioration is a gradual process requiring periodic and comprehensive testing by qualified personnel to determine the tube's remaining lifespan. Maintaining detailed records of all inspections and test results is essential for proactive maintenance and early detection of potential issues.
Image Receptor (Detector) Assessment
Image receptors, whether computed radiography (CR) screens, digital radiography (DR) panels, or advanced detector technologies, are the heart of digital imaging. Their performance directly impacts image quality and diagnostic confidence. A cursory visual inspection is simply not enough to guarantee optimal function. A thorough assessment involves several key checks, ranging from straightforward tasks to more complex measurements requiring specialized equipment.
Visual Inspection & Physical Integrity:
Begin with a careful visual check for any signs of physical damage: scratches, cracks, delamination, or distortion. Even minor damage can compromise detector performance and potentially introduce artifacts into the image. Note any areas of discoloration or unevenness.
Pixel Mapping Verification:
Pixel mapping ensures the spatial relationship between the detector pixels and the image is accurate. A misalignment can result in distorted images. This is typically performed using a standardized test pattern and specialized software, confirming that each pixel corresponds correctly to its intended location. Incorrect mapping requires recalibration or potentially detector replacement.
Light Attenuation Measurement:
Light attenuation, also known as "dark exposure," measures the amount of light the detector absorbs. This parameter directly impacts image contrast and signal-to-noise ratio. Deviations from established tolerances indicate potential aging or damage. Automated systems often perform this measurement, generating reports comparing the current value to baseline readings.
Signal-to-Noise Ratio (SNR):
SNR is a critical indicator of image quality. A higher SNR translates to clearer, more diagnostic images. Evaluate SNR using standard test objects and image analysis software. Declining SNR suggests increasing noise levels or reduced detector efficiency. This assessment should be performed periodically as part of quality assurance.
Flatness Evaluation:
Detector flatness assesses the uniformity of signal output across the detector surface. Non-uniformity can create artifacts that obscure anatomical details. Specialized phantom and software tools are used to evaluate flatness.
Operating Environment Considerations:
Remember that temperature and humidity can also impact detector performance. Maintaining the recommended operating environment is essential for maximizing detector lifespan and consistent image quality. Regularly monitor and control these factors.
High Voltage System Safety Checks
The high voltage (HV) system is arguably the most critical - and potentially hazardous - component of a radiology suite. Safety is paramount during any inspection or maintenance of this system. Never attempt to work on the HV system without proper training, certification, and the use of appropriate personal protective equipment (PPE), including insulated gloves and face shields.
Here's a breakdown of essential safety checks:
- Visual Inspection: Carefully examine HV cables, connectors, and the step-up transformer for signs of damage, cracking, melting, or discoloration. Look for any evidence of leaks or arcing.
- Leakage Current Measurement: Using a calibrated leakage current meter, measure the current leakage from HV components. Excessive leakage indicates insulation breakdown and requires immediate investigation and repair. Refer to manufacturer's specifications for acceptable limits.
- Insulation Resistance Testing: An insulation resistance test, performed with a megohmmeter, assesses the overall integrity of the HV insulation. Low resistance readings signal potential failure.
- Grounding Verification: Ensure proper grounding of all HV components. A faulty ground can create a serious shock hazard.
- Safety Interlock Testing: Confirm that all safety interlocks designed to prevent accidental exposure to high voltage are functioning correctly. A failed interlock is a critical safety risk.
- Controlled Discharge Procedures: Always follow documented and approved procedures for discharging capacitors and other HV components before commencing any work. Residual voltage can be lethal.
- Two-Person Rule: Ideally, HV system maintenance should be performed with two qualified personnel - one working and one acting as a safety observer.
Collimation and Light Field Verification
Ensuring accurate collimation and a properly aligned light field is absolutely critical for producing high-quality diagnostic images while minimizing patient dose. Misalignment can lead to unwanted anatomy being included in the image, obscuring relevant structures, and increasing exposure unnecessarily.
Collimation Verification:
The collimator's primary function is to restrict the X-ray beam to the area of interest. Verification involves several key checks:
- Physical Alignment: Visually inspect the collimator leaves for damage or deformation.
- Leaf Positioning: Accurately measure the aperture size at various collimation settings to ensure it matches the manufacturer's specifications. Use a calibrated aperture measuring device.
- Symmetry: Verify that the collimated field is symmetrical. Asymmetry can indicate collimator leaf misalignment.
- Light Field Correlation: (See below)
Light Field Verification:
The light field serves as a guide for positioning the patient and aligning the X-ray beam. Its accuracy is paramount for reproducible imaging. Checks include:
- Centering: The center of the light field should align precisely with the center of the X-ray beam. A slight offset can result in patient repositioning errors. This alignment is typically verified using a laser alignment device or by observing the light field as a test X-ray image is taken (low dose).
- Magnification: Confirm the magnification of the light field is consistent with the magnification factor stated by the manufacturer. Incorrect magnification can lead to inaccurate patient positioning.
- Brightness and Uniformity: Assess the brightness and uniformity of the light field. A dim or uneven light field makes accurate positioning difficult.
- Laser Alignment (if applicable): If the system incorporates a laser alignment system, verify the accuracy and stability of the laser beam.
Patient Support & Table Functionality
The patient support table is more than just a platform; it's a critical component impacting patient comfort, positioning accuracy, and ultimately, image quality. Regular maintenance ensures smooth operation and minimizes potential risks. Here's what to check:
- Table Movement: Test all table movements - longitudinal (lengthwise), lateral (sideways), and vertical (height adjustment). Pay close attention to any jerky motions, unusual noises, or resistance.
- Locking Mechanisms: Verify that all locking mechanisms (e.g., for longitudinal and lateral positioning) function correctly and securely hold the table in the desired position.
- Weight Capacity: Be aware of the table's maximum weight limit and ensure it's clearly posted. Overloading can damage the motor and compromise safety.
- Patient Positioning Aids: If your table has specialized aids like armboards, leg supports, or headrests, check their secure attachment and functionality. Replace any worn or damaged components.
- Foot Pedal/Control Panel: Test all controls, including the foot pedal (if applicable) and any control panel functions. Ensure responsiveness and proper labeling.
- Emergency Stop: Confirm that the emergency stop button is easily accessible and functional. It's a vital safety feature.
- Cleanliness: Regularly clean the table surface to prevent the spread of infection and maintain patient comfort. Use appropriate cleaning agents as recommended by the manufacturer.
Dose Calibration & Quality Assurance Procedures
Dose calibration and quality assurance (QA) are not just periodic checks; they's the bedrock of safe and effective radiology practice. These procedures directly impact patient dose, image quality, and the reliability of diagnostic information. A robust QA program involves a combination of initial commissioning, routine monitoring, and periodic evaluations.
Initial Commissioning: When new equipment is installed, thorough commissioning is essential. This includes verifying all system parameters, testing safety features, and establishing baseline performance data. Documentation of this process is critical.
Routine Monitoring - The Daily and Weekly Essentials:
- Exposure Index Verification: Regularly check the exposure indices (kVp, mA, time, distance) displayed on the console. Discrepancies can indicate errors in programming or equipment malfunctions.
- Automatic Exposure Control (AEC) Accuracy: For systems utilizing AEC, periodically assess its accuracy and responsiveness to phantom variations.
- Logarithmic Wedges & TMO Verification: Verify the accuracy of logarithmic wedges and transmission molybdenum (TMO) for mammography systems.
- Digital Image Quality Metrics: Employ digital image quality metrics (e.g., SNR, contrast, spatial resolution) to objectively assess image quality. Consider using standardized phantoms for consistency.
Periodic Evaluations - The Quarterly and Annual Deep Dive:
- Output Measurement: Use calibrated ionization chambers or photodiode arrays to measure the actual X-ray output of the system. Compare these measurements to design specifications and previous readings.
- Spatial Resolution Testing: Utilize line pair measurements (Lovibond or similar) on a standardized phantom to quantify spatial resolution. This assesses the system's ability to resolve fine details.
- Contrast Resolution Testing: Evaluate the system's ability to differentiate between subtle shades of gray using standardized contrast targets.
- Geometric Accuracy: Verify the geometric accuracy of the system, including the focal spot size and the accuracy of the imaging field.
- Image Receptor (IR) Evaluation: Assess the linearity, sensitivity, and detective quantum efficiency (DQE) of digital image receptors.
- QA Image Review: Include a review of routine clinical images by a qualified radiologist or physicist to identify any potential issues.
Documentation is Key: All QA activities, findings, and corrective actions must be meticulously documented. This documentation serves as a record of the system's performance and assists in identifying trends and potential problems.
Safety Interlocks & Shielding Validation
Safety interlocks and shielding are the last lines of defense against unnecessary radiation exposure. Regular and rigorous validation of these systems is not just a best practice-it's a legal and ethical responsibility. Here's what a comprehensive validation process should include:
Interlock Functionality Testing:
- Simulated Exposure Attempts: Actively attempt exposures with doors open, interlocks bypassed (under controlled conditions and by qualified personnel only), and other scenarios designed to trigger interlock activation. Document each test and the system's response.
- Manual Override Checks: If manual override switches exist (for maintenance or specific procedures), verify that they function as intended-allowing temporary overrides only when necessary and requiring multiple actions to prevent accidental activation. Immediately return to default safety settings after the procedure.
- Bypass Verification: Confirm that any bypass features are secure and require authorized access only. Regular audits of bypass usage are essential.
- Warning Signal Checks: Test audible and visual warning signals associated with interlock activation to ensure they are clear, noticeable, and functional.
Shielding Integrity Assessment:
- Visual Inspection: Thoroughly examine shielding materials (walls, doors, protective barriers) for any signs of damage, cracks, or corrosion.
- Survey Meter Readings: Perform radiation surveys using calibrated survey meters to measure radiation levels outside the shielded area during an exposure. Compare readings to established thresholds and investigate any exceedances. This requires trained personnel and appropriate survey techniques.
- Shielding Factor Verification: Periodically verify the shielding factor of the room by comparing the dose rate inside and outside the shielded environment during an exposure. Document the results.
- Personnel Monitoring: Ensure adequate personnel monitoring is in place, and review dosimeter records to confirm exposure levels remain within acceptable limits.
Documentation is Key: Maintain detailed records of all interlock and shielding validations, including dates, personnel involved, test procedures, results, and corrective actions taken. Regular review of these records is crucial for continuous improvement and ensuring ongoing safety.
Electrical and Mechanical Systems Review
Ensuring the reliable operation of your radiology equipment hinges on a thorough review of its electrical and mechanical systems. These often-overlooked components underpin every scan and contribute significantly to overall uptime and safety.
Begin with a visual inspection of all wiring, connectors, and conduit. Look for signs of fraying, corrosion, or loose connections. A simple tug on each connector (with power off, of course!) can reveal surprisingly weak bonds. Document any findings, no matter how minor they seem.
Next, assess the motors and gearboxes that drive table movement, collimation, and other automated functions. Listen for unusual noises - grinding, squealing, or knocking - which could indicate worn bearings or other mechanical issues. Lubrication is critical; follow manufacturer recommendations for frequency and type of lubricant. Don't forget to check for oil leaks and address them promptly.
The emergency stop buttons are a crucial safety feature. Test every one, ensuring they immediately interrupt power to the X-ray tube and any other energized components. A faulty emergency stop button represents a serious safety hazard.
Finally, verify the functionality of any power distribution units (PDUs) and uninterruptible power supplies (UPS) associated with the equipment. These systems are vital for maintaining power during outages and preventing data loss. Regular testing and battery replacement are essential.
Resources & Links
- FDA Quality System Regulations (QSR) : Provides the framework for quality management systems in medical device manufacturing and service, highly relevant to radiology equipment maintenance. This is fundamental for ensuring compliance and safety.
- American Society for Nondestructive Testing (ASNT) : ASNT provides resources, standards, and certification programs for non-destructive testing (NDT) techniques. NDT methods like visual inspection, ultrasonic testing, and radiography are often vital for equipment maintenance.
- International Atomic Energy Agency (IAEA) : The IAEA provides guidelines and standards related to radiation safety and equipment, particularly relevant for X-ray systems. Provides information on dose management and quality assurance.
- American Association of Medical Dosimetrists (AAMD) : While focused on radiation therapy, AAMD offers resources and best practices related to dose calibration and quality assurance which applies to general radiology equipment as well.
- Spenx - Radiology Equipment Services : Spenx is a service provider for radiology equipment and could provide insights and some resources related to maintenance best practices although not a direct resource link, it represents a common maintenance provider.
- Radiology Services : A company providing radiology equipment services and maintenance; their website contains information about common radiology equipment issues and maintenance best practices (similar to Spenx).
- National Institute of Standards and Technology (NIST) : NIST develops standards and provides calibration services that are essential for ensuring accurate measurements in radiology, which directly impacts dose calibration and quality assurance.
- American Institute of Ultrasound in Medicine (AIUM) : Relevant for ultrasound equipment maintenance. Provides guidelines and recommendations for ultrasound quality assurance and safety.
- Radiological Society of North America (RSNA) : RSNA is a leading professional organization for radiologists and related healthcare professionals. Offers educational resources, publications, and conferences, often including content on equipment maintenance and safety.
- Healthcare Safety Association (HSA) : Provides resources and guidance on a wide range of healthcare safety topics, including equipment safety and maintenance, which are relevant to radiology departments.
Frequently Asked Questions
What is a radiology equipment maintenance checklist and why do I need one?
A radiology equipment maintenance checklist is a detailed document outlining the regular checks, inspections, and repairs necessary to keep your radiology equipment operating safely and effectively. You need one to ensure equipment longevity, image quality, patient safety, regulatory compliance, and minimize downtime - ultimately protecting your investment and providing optimal patient care.
What types of radiology equipment should be included in the checklist?
The checklist should include all equipment used in your radiology department, such as X-ray machines (digital radiography, fluoroscopy), CT scanners, MRI machines, ultrasound machines, mammography units, and any associated accessories like generators and image processing workstations. It's important to tailor the checklist to your specific equipment models and manufacturer recommendations.
How often should I perform maintenance tasks?
Maintenance frequency depends on the equipment's complexity, usage intensity, and manufacturer guidelines. Tasks are generally categorized into daily, weekly, monthly, quarterly, annual, and sometimes bi-annual or 5-year preventive maintenance. The checklist template provides guidelines, but always refer to your equipment manuals.
Who should perform the maintenance tasks?
Some tasks (like daily visual inspections) can be performed by trained radiology technologists. More complex tasks and repairs often require qualified biomedical engineers, service technicians, or authorized personnel specifically trained on the equipment. The checklist clearly outlines recommended personnel for each task.
What if I don't follow the maintenance schedule?
Failure to follow the maintenance schedule can lead to equipment malfunctions, inaccurate imaging, potential harm to patients, increased repair costs, and potential regulatory penalties. Consistent adherence to the schedule is critical.
How can I customize the checklist template?
The template is designed to be flexible. You can add or remove tasks, adjust frequencies, assign personnel, and add notes specific to your equipment and environment. Be sure to document any changes made to the original template.
What does 'Preventative Maintenance' (PM) mean in this context?
Preventative Maintenance refers to scheduled inspections, cleaning, testing, and minor repairs performed to prevent breakdowns and maintain optimal performance. It's a proactive approach to equipment care and a key component of the checklist.
Where can I find the manufacturer's maintenance recommendations?
The manufacturer's maintenance recommendations are found in the equipment's operation manual, service manual, and often on the manufacturer's website. These are the primary sources for determining specific maintenance procedures and intervals.
What documentation should I keep regarding equipment maintenance?
Maintain detailed records of all maintenance performed, including dates, tasks completed, technician's name/credentials, findings, and any corrective actions taken. These records are essential for regulatory compliance and troubleshooting future issues.
How does this checklist help with regulatory compliance?
This checklist provides a framework for demonstrating due diligence in maintaining your equipment, which is often required by regulatory bodies like the FDA. Thorough documentation helps prove your commitment to safety and compliance.
Found this Article helpful?
Facility Management Solution Demo
Keep your facilities running smoothly! ChecklistGuro streamlines maintenance, inspections, and vendor management. Reduce downtime, optimize efficiency, & improve safety. Manage it all with our Work OS.
Related Articles
Industrial Floor Cleaning & Safety Checklist Template
Display Case Temperature Monitoring Checklist Template
The Ultimate Refrigeration Maintenance Checklist: Keeping Your Food Safe
Escalator & Moving Walkway Inspection Checklist Template
The Ultimate Guest Room Cleaning & Inspection Checklist Template

The Ultimate Security Camera Review Checklist Template
Forklift Inspection & Maintenance Checklist Template
Emergency Generator Load Testing Checklist Template
We can do it Together
Need help with
Facility Management?
Have a question? We're here to help. Please submit your inquiry, and we'll respond promptly.