Your Ultimate Security Camera Functionality Checklist Template
Published: 09/01/2025 Updated: 12/13/2025
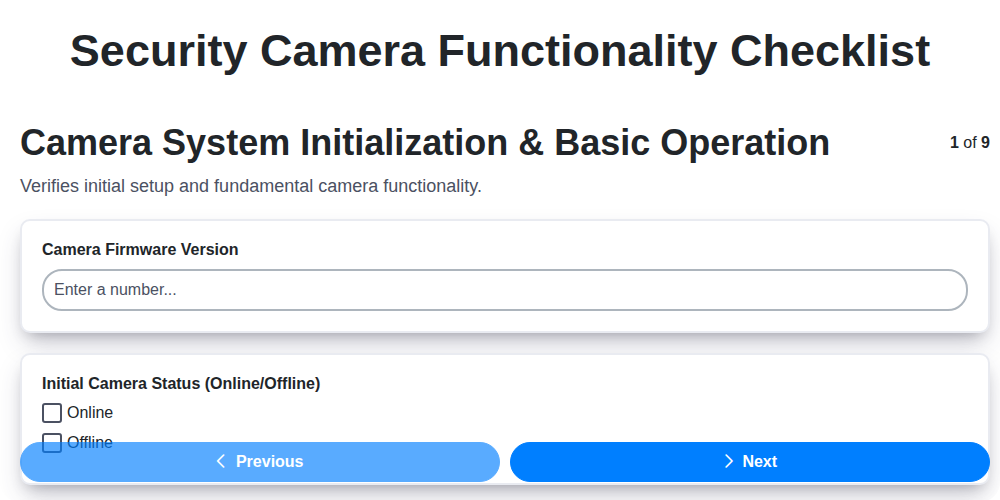
Table of Contents
- Why a Security Camera Functionality Checklist Matters
- Before You Begin: Gathering Your Tools
- Camera System Initialization & Basic Operation
- Assessing Image Quality and Clarity
- Testing Pan-Tilt-Zoom (PTZ) Functionality (If Applicable)
- Verifying Recording & Storage Capabilities
- Network Connectivity & Remote Access: A Critical Check
- Alerts & Notifications: Ensuring Timely Responses
- Power & Backup Systems: Reliability in Emergencies
- System Integration: Connecting Your Security Ecosystem
- Software & Firmware Updates: Staying Protected
- Resources & Links
TLDR: This free checklist template helps you ensure your security camera system is working *exactly* as it should, covering everything from image clarity and recording quality to network access and alerts. Download it, run through the steps, and eliminate potential problems *before* they become security breaches - it's your quick guide to a fully functional and reliable security system!
Why a Security Camera Functionality Checklist Matters
Beyond the initial satisfaction of a newly installed security system, a functionality checklist serves a crucial role in ensuring your investment truly protects your property and loved ones. It's not enough to simply have cameras; they need to be functioning correctly and consistently. Think of it this way: a faulty camera, a blurry image, or a notification failure can render your entire system ineffective, potentially leaving you vulnerable during a critical situation.
This checklist isn't about being overly technical; it's about proactive prevention. Identifying and addressing minor issues early - whether it's a loose connection, a software glitch, or an incorrect setting - can prevent major headaches (and potential security breaches) down the line. It's a simple process that can transform your security system from a piece of equipment into a reliable safeguard, providing genuine peace of mind knowing your system is ready when you need it most. Ultimately, a small investment of time with a checklist can save you significant worry and potential expense later on.
Before You Begin: Gathering Your Tools
Before diving into the functionality checklist, it's important to be prepared. Rushing the process can lead to missed details and frustration. Here's a quick rundown of the tools you'll likely need:
- Your Security Camera System's Documentation: Keep the manuals, quick start guides, and any online resources handy. They often contain valuable information about specific features and troubleshooting tips.
- A Stable Internet Connection: Many tests involve remote access, so ensure you have a reliable internet connection during the checklist process.
- Mobile Device & Laptop/Computer: You'll need both for testing mobile app access and web interface functionality.
- A Second Person (Optional): Having someone else to assist with observation and confirmation can be incredibly helpful, especially when testing motion detection or remote access.
- A Notepad & Pen (or Digital Note-Taking App): Document your findings. Noting any issues you encounter will be invaluable for future troubleshooting or when seeking support from the manufacturer.
- Basic Tools (Potentially): Depending on your camera setup, you might need a screwdriver or other simple tools for minor adjustments or inspections.
Camera System Initialization & Basic Operation
Before you even think about recording footage, it's vital to ensure your cameras are properly initialized and functioning at a basic level. This is your foundation - if it's shaky, everything else will be too.
First, power up each camera. Observe if they illuminate correctly - a solid light often indicates proper power, while a flashing light might suggest an issue. Then, access your recording system (DVR, NVR, or cloud platform). Confirm each camera is recognized and appears in the live view. This is usually indicated by a clear, visible feed on the system's interface.
Next, assign descriptive names to each camera. Instead of generic names like Camera 1, use names like Front Door, Back Patio, or Driveway. This simple step will save you countless headaches later when reviewing footage or responding to alerts.
Finally, synchronize the date and time across all cameras. This is critical for accurate timestamps on recorded footage, which can be invaluable for investigations or simply for reviewing events in chronological order. Most systems allow for centralized time synchronization; utilize this feature if available. Double-check the date and time on each camera to confirm accuracy.
Assessing Image Quality and Clarity
Sharp, clear images are the foundation of an effective security camera system. A grainy or poorly lit image won't help you identify a person or vehicle, rendering your investment essentially useless. Here's a breakdown of what to look for and how to test your cameras:
1. Resolution is Key: Most modern cameras offer resolutions ranging from 720p (HD) to 4K. Ensure your cameras are operating at the resolution you expect. Check the camera's settings within the recording system or app. Higher resolution provides more detail, crucial for zooming in and identifying fine details.
2. Lighting Conditions: The Real Test: Image quality varies dramatically depending on the lighting. Test your cameras in these scenarios:
- Bright Sunlight: Observe the camera's ability to handle bright light without being overly exposed. Look for details in shadowed areas.
- Low Light/Night Vision: Most security cameras have infrared (IR) LEDs for nighttime visibility. Evaluate the range and clarity of the IR illumination. Are faces discernible? Are colors accurate (some cameras use color night vision)?
- Backlit Scenes: Situations where a light source is behind the subject can be challenging. Look for signs of overexposure or loss of detail. If your camera supports Wide Dynamic Range (WDR), test its effectiveness in these scenarios.
3. Focus and Sharpness: A blurry image defeats the purpose. Ensure the cameras are properly focused. Many cameras have auto-focus, but it's worth manually checking focus, especially for fixed-lens cameras. Try zooming in on a recorded image - can you still make out fine details?
4. Wide Dynamic Range (WDR): WDR is a valuable feature for cameras facing scenes with high contrast (e.g., a doorway with bright sunlight outside and a dark interior). It balances the exposure to prevent overexposed highlights and underexposed shadows. Test its effectiveness by filming a scene with significant lighting differences. A good WDR will show details in both the bright and dark areas.
5. Color Accuracy: While infrared night vision typically results in black and white images, some cameras offer color night vision. Assess the accuracy and clarity of colors in low-light conditions.
Ultimately, the best way to assess image quality is to actually use the camera. Film a few short clips during different times of the day and under various lighting conditions. This hands-on experience will reveal any limitations and allow you to fine-tune camera settings for optimal performance.
Testing Pan-Tilt-Zoom (PTZ) Functionality (If Applicable)
PTZ cameras offer incredible flexibility in monitoring a wider area, but that power only works if it's functioning correctly. Here's how to test your PTZ capabilities:
- Full Range of Motion: Slowly move the camera through its entire pan and tilt range. Look for any limitations or unexpected stops. Does it reach the intended maximum angles?
- Zoom Test: Cycle through the zoom levels (wide, medium, telephoto). Check for image quality degradation at higher zoom levels - excessive pixelation can make details unusable.
- Speed Control: Verify the speed settings are responsive and allow for precise camera positioning. Fast speeds are great for quick scans, but slower speeds are essential for careful observation.
- Preset Verification: If you've programmed preset positions (e.g., Front Yard, Back Porch), thoroughly test each one. Ensure the camera moves accurately to each preset location and returns smoothly.
- Remote Operation: Check the responsiveness and reliability of PTZ controls via the mobile app and/or web interface. Lag or unresponsiveness can be frustrating and hinder real-time monitoring.
- Boundary Checks (if applicable): Some PTZ cameras allow you to set boundaries to prevent them from rotating beyond certain angles. Confirm these boundaries are in place and functioning as intended.
Verifying Recording & Storage Capabilities
Recording and storage are the bedrock of any security camera system. What good is a clear image if it's not being captured and preserved? Let's dive into verifying that your system is reliably recording and storing footage.
Confirming Recording Modes: Most systems offer several recording modes: continuous, scheduled, and motion-activated. Ensure your system is operating in the mode that best suits your needs. Continuous recording captures everything 24/7, providing maximum coverage but requiring significant storage space. Scheduled recording allows you to specify specific timeframes for recording, ideal for predictable activity patterns. Motion-activated recording conserves storage by only recording when movement is detected.
Assessing Recording Quality & Resolution: Higher resolution footage (1080p, 4K) provides significantly better clarity, especially crucial for identifying details. Check that the recorded footage matches the intended resolution settings. Experiment with different quality settings to find a balance between storage space and image detail.
Storage Capacity & Management: Calculate how much storage space you need based on your recording schedule, resolution, and desired retention period. Most systems offer options for local storage (SD card, hard drive) and cloud storage. If using local storage, ensure the hard drive is functioning correctly and has sufficient capacity. Regularly check storage utilization and consider upgrading if necessary. For cloud storage, review your subscription plan and ensure adequate storage limits.
Playback and Retrieval Testing: Regularly test the playback and retrieval of recorded footage. Verify that you can easily access and review footage from different cameras and time periods. Ensure the file format is compatible with your playback devices. A few minutes of test playback can reveal issues with recording quality, file corruption, or access problems.
Retention Policies: Understand and configure your system's retention policies - how long footage is stored before being automatically deleted. Consider legal requirements or your own preferences when setting retention periods.
Network Connectivity & Remote Access: A Critical Check
Your security camera system is only truly valuable if you can access it remotely. A spotty internet connection or a misconfigured network can render your cameras useless during a critical moment. This section focuses on rigorously testing your system's ability to connect and allow you to view live footage and recordings from anywhere.
1. Initial Network Verification:
- IP Address Confirmation: Double-check that each camera has a unique and valid IP address within your network. Conflicts can cause intermittent connection issues.
- Wireless Signal Strength: For wireless cameras, assess the Wi-Fi signal strength at each camera's location. Weak signals lead to dropped connections and lag. Consider using Wi-Fi extenders if needed.
- Wired Connection Stability: If cameras are wired, visually inspect the cables and connectors for damage or loose connections.
2. Remote Access Testing:
- Mobile App Accessibility: Test access to the system's mobile app from various locations - ideally, outside your home or business. This simulates a real-world scenario.
- Web Interface Verification: Similarly, access the system's web interface from a different network (e.g., using your mobile data).
- Port Forwarding (If Applicable): If your system requires port forwarding for remote access, ensure the ports are correctly configured in your router. This is often a source of connection problems.
- DDNS (Dynamic DNS) Configuration: If you use a DDNS service, verify it's functioning correctly and accurately reflects your public IP address. This is essential if your IP address changes frequently.
- VPN Connectivity: If using a VPN for added security, ensure the VPN connection is stable and doesn't interfere with camera access.
Troubleshooting Common Issues:
- Firewall Conflicts: Temporarily disable your firewall to see if it's blocking access. If so, create exceptions for the camera system's IP addresses and ports.
- Router Reboot: A simple router reboot can often resolve temporary connectivity problems.
- Contact Your ISP: If you suspect an internet service issue, contact your internet service provider for assistance.
Alerts & Notifications: Ensuring Timely Responses
Alerts and notifications are the vital link between your security cameras and a timely response to potential threats. A beautifully installed system is useless if you're not promptly informed of unusual activity. Let's dive into ensuring your alerts are accurate, reliable, and effective.
Fine-Tuning Motion Detection Sensitivity: This is often the biggest culprit for false alarms. Start with a lower sensitivity setting and gradually increase it until you're capturing the activity you need, while minimizing triggers from things like swaying branches or passing cars. Many systems allow you to adjust sensitivity independently for each camera, which is highly recommended.
Defining Alert Zones - Precision is Key: Instead of monitoring an entire yard, create specific alert zones around doorways, driveways, or vulnerable areas. This targeted approach dramatically reduces false positives and ensures you're only notified of events that truly matter. Most modern systems allow you to draw custom zones directly on the camera's live feed.
Notification Delivery Methods - Redundancy is Your Friend: Don't rely solely on push notifications! Configure multiple delivery methods, such as email and SMS (text message). If one method fails (e.g., due to Wi-Fi issues), you'll still receive the alert. Consider the urgency of the notification when choosing delivery methods - SMS for critical alerts, email for less urgent ones.
Customization is Crucial: Take advantage of customization options. Specify which cameras trigger alerts, set time windows for monitoring, and tailor notification content (e.g., include snapshots or short video clips). This personalized approach maximizes relevance and minimizes alert fatigue.
Testing and Validation: Regularly test your notification setup. Simulate potential threats (safely, of course!) and verify that you receive alerts promptly and accurately. Pay attention to the time delay - a delayed alert can be almost as bad as no alert at all.
Power & Backup Systems: Reliability in Emergencies
A power outage can render your security camera system useless at the exact moment you need it most. It's not enough to simply have cameras; they need to be reliable during emergencies. Here's how to ensure your system stays online when the lights go out.
Understanding Your Options:
- Uninterruptible Power Supply (UPS): A UPS provides temporary battery power to your cameras and recording system, allowing them to continue operating during a short power outage (typically 15-30 minutes, depending on the UPS capacity and system power draw). It's a relatively inexpensive way to maintain basic functionality. Look for a UPS with surge protection as well.
- Battery Backup (for Wireless Cameras): Many wireless security cameras have built-in battery backups. While this provides a degree of temporary power, it's typically only enough for a few hours.
- Generator Power: For extended outages, a whole-house or security-focused generator provides a more robust power solution. Ensure your cameras and DVR/NVR are connected to the generator's circuit.
- PoE (Power over Ethernet) with UPS: If your cameras utilize PoE, a UPS connected to your network switch provides power and backup power simultaneously, simplifying the setup and ensuring cameras remain operational.
Testing Your Backup:
Regularly test your backup power system. This involves simulating a power outage to confirm the UPS or generator engages correctly and provides sufficient power to keep your cameras recording. Note the length of time the system can operate on backup power and adjust accordingly. This proactive measure is essential for ensuring your security system remains vigilant, even when the power grid falters.
System Integration: Connecting Your Security Ecosystem
Your security camera system doesn't have to be a standalone entity. Integrating it with your broader smart home or security ecosystem can dramatically enhance its effectiveness and convenience. This section explores common integration points and essential checks.
Smart Home Platforms (Alexa, Google Assistant, Apple HomeKit):
The ability to control your cameras with voice commands is a huge convenience. Test basic commands like Show me the front door camera or Record a clip from the back patio. Ensure any custom routines or automations (e.g., triggering camera recording when motion is detected by a smart sensor) function as expected. Be aware of privacy settings and ensure you're comfortable with how voice commands access and utilize camera data.
Alarm Systems:
Integrating your cameras with your existing alarm system can create a powerful deterrent. Verify that camera footage can be triggered and recorded upon alarm activation, providing valuable visual evidence for investigations. Some systems allow you to arm/disarm your cameras remotely through the alarm panel. Ensure this functionality is working smoothly and that notifications are configured correctly.
Smart Lighting & Sensors:
Consider integrating your cameras with smart lighting (e.g., illuminating a dark area when motion is detected) or other smart sensors (e.g., door/window sensors). This can proactively address potential security risks and improve overall situational awareness. Thoroughly test any automation rules and ensure they don't generate excessive false positives.
Third-Party Security Systems:
If you use a dedicated third-party security service, check how your cameras integrate with their monitoring platform. Confirm that they receive live feeds and can access recorded footage as needed. Understand their response protocols and any limitations of the integration.
Important Integration Considerations:
- Compatibility: Always check compatibility between your camera system and the other devices you want to integrate.
- Security: Understand the security implications of integrating your cameras with other devices. Use strong passwords and enable two-factor authentication whenever possible.
- Network Load: Integrating multiple devices can increase network load. Ensure your network can handle the bandwidth requirements.
- Privacy: Be mindful of privacy implications and understand how data is shared between different devices.
Software & Firmware Updates: Staying Protected
Just like your smartphone or computer, security camera systems rely on software and firmware to function correctly and securely. These underlying programs are constantly being refined to improve performance, add new features, and - crucially - patch security vulnerabilities. Ignoring these updates is like leaving your front door unlocked.
Why are Updates Important?
- Security Patches: Hackers are constantly probing for weaknesses in software. Manufacturers release updates to fix these vulnerabilities, preventing unauthorized access to your system and protecting your privacy.
- Bug Fixes: Updates often address bugs that can cause system instability, recording errors, or other issues.
- New Features: Manufacturers frequently introduce new features and functionalities through software updates, enhancing the system's capabilities.
- Compatibility: Updates ensure compatibility with evolving network standards and other connected devices.
How to Stay Up-to-Date:
- Automatic Updates (If Available): Many modern systems offer automatic update functionality. Enable this feature whenever possible for hassle-free protection.
- Check for Updates Regularly: If automatic updates aren't available, proactively check the manufacturer's website or the system's interface for available updates. Set a recurring reminder.
- Read Release Notes: Before installing an update, review the release notes to understand what changes are included and any potential impact on your system.
- Backup Configuration (Optional but Recommended): Before any major update, consider backing up your system's configuration. This allows you to restore to a previous state if something goes wrong.
Remember, keeping your software and firmware current is one of the most important steps you can take to maintain a secure and reliable security camera system.
Resources & Links
- How-To Geek : A general tech resource covering a wide range of topics including security and smart home devices. Useful for understanding basic concepts and troubleshooting common issues.
- Security.org : Provides in-depth reviews and comparisons of security cameras and systems. Great for researching different brands and features mentioned in the checklist.
- CNET : Offers reviews and buying guides for electronics and tech, including security cameras. Can help you understand what features are worthwhile and how they perform.
- Consumer Reports : Provides unbiased product reviews and ratings, including security cameras. Requires a subscription for full access, but offers valuable insight into reliability and performance.
- B&H Photo Video : A reputable retailer for security cameras and equipment. Their website has informative product descriptions and specifications to compare different camera models. Useful for understanding technical details.
- Lifewire : Provides clear and concise explanations of technology topics, including security cameras and home automation. Can assist in understanding terminology and setup processes.
- WiFi Camera : A comprehensive website focused on wireless security cameras. Provides reviews, setup guides, and troubleshooting tips for a variety of camera brands.
- AV Forums : A forum dedicated to audio-visual equipment, including security systems. Allows for discussion with other users, sharing experiences, and getting advice on specific camera models and configurations. Especially useful for the 'System Integration' section.
- Google Nest Support : If the checklist includes Google Nest cameras, this is the official support website for troubleshooting, FAQs, and documentation.
- Ring Support : If the checklist includes Ring cameras, this is the official support website for troubleshooting, FAQs, and documentation.
- Lockheed Martin : While a large corporation, Lockheed Martin's cybersecurity division provides insights into broader security principles relevant to securing a home security camera system, especially relating to software/firmware updates and overall protection.
Frequently Asked Questions
What is this checklist template for?
This checklist template is designed to help you evaluate and select security cameras and related systems based on essential functionality and features, ensuring you choose a solution that effectively meets your security needs.
Who is this checklist template for?
This template is for homeowners, business owners, property managers, and anyone looking to purchase or upgrade their security camera system. It's useful for both beginners and those with some existing knowledge of security camera technology.
What does 'Required,' 'Desired,' and 'Not Needed' mean in the checklist?
'Required' means the feature is essential for your security system to function adequately. 'Desired' means the feature would be beneficial and enhances your system but isn't absolutely critical. 'Not Needed' means the feature isn't relevant to your needs and you don't want to pay for it.
Can I customize the checklist template?
Yes! The template is designed to be flexible. You can add, remove, or modify items to reflect your specific needs and priorities. Feel free to add features or categories that are relevant to your situation.
What is the difference between resolution (e.g., 1080p, 4K) and what is important to consider?
Resolution refers to the image clarity of the camera. Higher resolution (like 4K) provides more detail, which can be crucial for identifying individuals or objects. However, higher resolution requires more storage space and bandwidth. Consider the viewing distance and what you need to see clearly when deciding on resolution.
What is the difference between wired and wireless security cameras?
Wired cameras use cables for power and data transmission, providing a more reliable connection. Wireless cameras use Wi-Fi, offering more flexibility in placement but potentially being susceptible to interference or hacking. Consider factors like placement, network strength, and security concerns.
What does 'cloud storage' vs 'local storage' mean, and what are the pros and cons?
Cloud storage saves recordings to a remote server, accessible from anywhere with internet. Pros: accessibility, backup. Cons: recurring fees, dependence on internet. Local storage (e.g., SD card, NVR) saves recordings to a device on-site. Pros: no recurring fees, more control. Cons: risk of physical theft or damage.
What are some key security considerations when choosing a wireless camera system?
Ensure strong Wi-Fi password, enable two-factor authentication, keep camera firmware updated, and be aware of potential interference sources. Consider using a dedicated Wi-Fi network for your security cameras for enhanced security.
Found this Article helpful?
Retail Management Solution Demo
Boost retail efficiency! ChecklistGuro simplifies store operations, inventory management, and employee training. Improve customer experience and maximize profitability. Manage it all with our Work OS.
Related Articles
Industrial Floor Cleaning & Safety Checklist Template
Display Case Temperature Monitoring Checklist Template
The Ultimate Refrigeration Maintenance Checklist: Keeping Your Food Safe
Escalator & Moving Walkway Inspection Checklist Template
The Ultimate Guest Room Cleaning & Inspection Checklist Template

The Ultimate Security Camera Review Checklist Template
Forklift Inspection & Maintenance Checklist Template
Emergency Generator Load Testing Checklist Template
We can do it Together
Need help with
Retail?
Have a question? We're here to help. Please submit your inquiry, and we'll respond promptly.