Your Location-Specific Soil Moisture Monitoring Checklist: A Step-by-Step Guide
Published: 08/24/2025 Updated: 12/13/2025
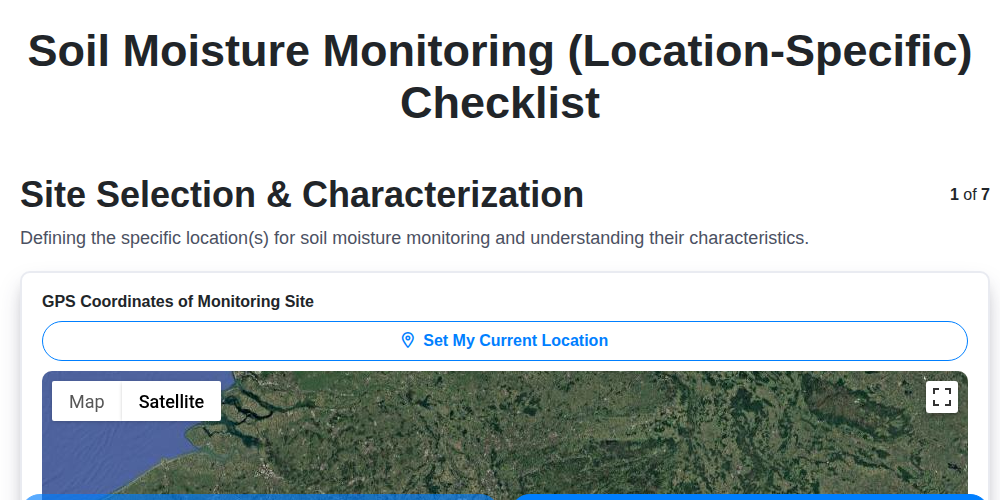
Table of Contents
- 1. Why Location-Specific Soil Moisture Monitoring Matters
- 2. Assessing Your Site: Initial Characterization
- 3. Soil Mapping & Understanding Drainage Patterns
- 4. Selecting the Right Soil Moisture Sensors
- 5. Sensor Calibration: Ensuring Accuracy
- 6. Installation & Placement: Getting it in the Ground
- 7. Data Transmission Options: Wired vs. Wireless
- 8. Establishing a Baseline: Data Collection
- 9. Data Analysis & Interpretation
- 10. Routine Maintenance & Troubleshooting
- 11. Reporting & Actionable Insights
- 12. Optimizing Irrigation Schedules
- 13. Long-Term Soil Health Considerations
- Resources & Links
TLDR: Want to ditch guesswork and optimize your irrigation? This checklist guides you through setting up soil moisture monitoring, from picking the right sensors and where to put them, to understanding the data and making smarter decisions. It's your roadmap for location-specific insights, saving water, and boosting plant health - no matter your experience level.
1. Why Location-Specific Soil Moisture Monitoring Matters
Why settle for a general understanding of your soil when you can know exactly what's happening beneath the surface in every area of your land? Many assume a single soil moisture reading represents the whole picture, but that's like judging the health of a forest by looking at a single tree. It simply doesn't work.
Think about it: your property isn't uniform. You likely have variations in soil type (sandy loam versus heavy clay), slope (leading to runoff and uneven water distribution), and vegetation (different plants have vastly different water needs). A single soil moisture sensor placed randomly won't capture this complexity.
Ignoring these variations can lead to several costly consequences:
- Overwatering: Wasting precious water and increasing your bills in areas that are already adequately hydrated.
- Underwatering: Stressful conditions for plants in drier areas, potentially reducing yields or impacting plant health.
- Inefficient Fertilizer Use: Soil moisture affects nutrient uptake. Incorrect moisture levels can render fertilizers ineffective or even harmful.
- Increased Risk of Disease: Improper moisture can create environments favorable to plant diseases.
Location-specific monitoring is about getting a complete picture-an informed understanding-that allows you to make smarter, more targeted decisions that maximize resource efficiency and optimize plant health.
2. Assessing Your Site: Initial Characterization
Before deploying any sensors, a thorough assessment of your site is paramount. This initial characterization lays the groundwork for accurate data interpretation and effective decision-making. Start with a visual inspection - walk the entire area, noting variations in topography, vegetation, and apparent soil conditions. Create a basic sketch or map, even a hand-drawn one, to document these observations.
Next, perform simple soil texture tests. The "squeeze and roll" method (squeezing a moist soil sample and observing how it forms a ribbon) provides a quick indication of soil type - sandy, silty, or clayey. While not a precise scientific analysis, it's a valuable starting point. Observe drainage patterns after rainfall. Where does water pool? Where does it run off quickly? This information highlights areas prone to waterlogging or drought.
Consider the impact of existing infrastructure. Are there buried pipes or cables that could interfere with sensor installation? Are there areas prone to animal disturbance or vandalism? Document any potential challenges to ensure a successful deployment. This initial assessment doesn't need to be exhaustive, but it should provide a solid understanding of your site's unique characteristics and inform your sensor placement strategy.
3. Soil Mapping & Understanding Drainage Patterns
Understanding your site's soil composition and drainage is foundational to effective soil moisture monitoring. It's about more than just knowing where to put your sensors; it's about anticipating how water will move across your land.
Why Bother with Soil Mapping?
Different soil types hold water differently. Sandy soils drain rapidly and have low water-holding capacity, while clay soils retain water but can become waterlogged. Loamy soils, a mix of sand, silt, and clay, generally offer the best balance. A basic soil map, even a hand-drawn one, allows you to predict how quickly moisture will be lost from different areas and where water might pool.
Simple Soil Identification:
You don't need to be a soil scientist! Here's a quick guide:
- Sandy Soil: Gritty texture, loose, drains very quickly.
- Clay Soil: Smooth, sticky when wet, forms a hard clod when dry.
- Loamy Soil: A balanced mix, feels slightly gritty but also holds its shape.
- Organic Soil: Dark, spongy, rich in organic matter (like peat or compost).
Mapping Drainage Patterns:
Observe how water flows after rainfall or irrigation. Look for:
- Natural Swales: Depressions in the land that collect water.
- Slope: Water naturally flows downhill. Identify the direction of flow.
- Runoff Points: Areas where water quickly flows off the land.
- Ponding Areas: Locations where water tends to accumulate.
Combining Soil Type and Drainage:
Overlay your soil map with your drainage observations. For example, a sandy area at the bottom of a slope will drain very quickly, while a clay-rich swale will likely hold water for longer. This combined understanding helps you strategically place your sensors to capture a representative picture of moisture levels across your site. Consider creating contour lines on your map to better visualize elevation changes and water flow.
4. Selecting the Right Soil Moisture Sensors
Choosing the right soil moisture sensor can feel overwhelming, given the variety on the market. It's not simply about picking the cheapest option; it's about aligning the sensor's capabilities with your specific needs and budget. Here's a breakdown of common sensor types and their pros and cons:
1. Capacitance Sensors: These are among the most popular choices, particularly for general monitoring. They measure the dielectric permittivity of the soil, which correlates with water content.
- Pros: Relatively inexpensive, easy to install, good for broad-scale monitoring, less sensitive to soil salinity.
- Cons: Can be less accurate than other types, may require calibration for highly variable soil conditions, readings can be influenced by air gaps.
2. Time Domain Reflectometry (TDR) Sensors: Considered the gold standard for accuracy, TDR sensors measure the time it takes for an electromagnetic pulse to travel down a probe. This provides a precise measurement of volumetric water content.
- Pros: Highly accurate, minimally affected by soil salinity or temperature, provides direct measurement of volumetric water content.
- Cons: Significantly more expensive than other options, more complex installation, potentially less durable.
3. Frequency Domain Reflectometry (FDR) Sensors: Similar to TDR, FDR sensors utilize electromagnetic pulses but operate within a frequency domain. They offer a balance between accuracy and cost.
- Pros: Good accuracy, more affordable than TDR, easier to install than TDR.
- Cons: Accuracy can be affected by soil temperature and salinity, slightly less precise than TDR.
4. Neutron Moisture Gauges: These gauges emit neutrons into the soil and measure the number that are scattered back. They are commonly used for large-scale, infrequent measurements.
- Pros: Can measure moisture over a large area quickly.
- Cons: Require specialized training and licensing due to radiation concerns, not suitable for continuous monitoring.
Key Considerations Before You Choose:
- Accuracy Requirements: How precise do your measurements need to be?
- Soil Type: Different sensors perform differently in sandy, loamy, or clay-rich soils.
- Budget: Prices vary dramatically between sensor types.
- Power Requirements: Consider if you need battery-powered or wired sensors.
- Data Logging & Connectivity: Do you need sensors that can transmit data wirelessly?
5. Sensor Calibration: Ensuring Accuracy
Calibration isn't always required, but it's a crucial step to maximizing the value of your soil moisture data. While many modern sensors are factory-calibrated and offer acceptable baseline accuracy, environmental factors and soil variability can influence their readings over time. Think of it like this: a brand-new thermometer might read 70°F, but if you don't account for humidity or altitude, it's not a perfectly accurate reflection of the true temperature.
Why Calibrate?
- Soil-Specific Variability: Different soil types (clay, sand, loam) interact with sensors differently. Calibration allows you to account for these variations.
- Temperature Effects: Temperature can impact sensor readings. Calibration can minimize this influence.
- Long-Term Drift: Sensors can experience drift over time, meaning their accuracy degrades. Calibration helps correct this.
Calibration Methods:
- Gravimetric Method (The Gold Standard): This involves physically measuring the water content of a soil sample in a lab. You weigh a sample of dry soil, then add water and weigh it again. The difference in weight directly correlates to the water content. Compare sensor readings to these gravimetric measurements and adjust sensor settings accordingly. This is labor-intensive but provides the most accurate calibration.
- Air-Oven Drying: A simpler alternative to the gravimetric method. Dry a soil sample in an oven and weigh it before and after. Similar principle as gravimetric method.
- Comparison with Known Conditions: If you can establish conditions where you know the soil moisture content (e.g., a saturated field), compare the sensor readings to this known value and adjust accordingly.
- Manufacturer's Calibration Procedures: Consult the sensor's documentation for specific calibration instructions provided by the manufacturer. Some sensors have built-in calibration routines.
Frequency of Calibration:
The frequency of calibration depends on the sensor type, environmental conditions, and the level of accuracy required. As a general guideline:
- High-Accuracy Applications (research, precision irrigation): Calibrate every 3-6 months.
- General Agricultural Use: Calibrate annually or every other year.
- Troubleshooting: Recalibrate if you notice significant discrepancies between sensor readings and your expectations.
Important Note: Always document your calibration procedures and results. This will help you track sensor performance and ensure consistent data quality.
6. Installation & Placement: Getting it in the Ground
Proper installation isn's just about shoving a sensor in the dirt; it's about ensuring accurate, reliable data for years to come. Here's a breakdown of best practices:
1. Read the Manual - Seriously! Each sensor model has unique requirements. The manufacturer's instructions are your first and most important guide. Don't skip this step.
2. Depth Matters: Most sensors are designed to measure moisture at a specific depth, often corresponding to the active root zone of the plants you're monitoring. Typically, this falls between 6 and 18 inches (15-45cm). Deeper placement may skew readings due to differences in moisture profiles.
3. Site Preparation: Clear away any rocks, roots, or large debris at the installation site. These can physically obstruct the sensor and interfere with accurate readings. A small hole, slightly larger than the sensor casing, will make the process easier.
4. Minimize Soil Compaction: Avoid over-compacting the soil during installation. Compacted soil hinders water infiltration and can alter the measurement. Loosen the soil gently around the sensor.
5. Avoid Obstructions: Be mindful of nearby tree roots or large rocks. These can create localized moisture variations that distort the overall reading. Choose a site with minimal surrounding interference.
6. Secure the Sensor: Depending on the sensor type and soil conditions, you might need to secure the sensor to prevent it from shifting or being dislodged by animals or weather events. This could involve using a stake, a small enclosure, or even burying a portion of the sensor casing.
7. Wiring Considerations (for Wired Sensors): If you're using a wired sensor, protect the cable from physical damage and exposure to sunlight. Proper cable management is crucial for long-term reliability. Consider burying the cable or using UV-resistant conduit.
8. Test Immediately: After installation, take a few readings to verify that the sensor is functioning correctly and providing reasonable values. Compare the readings to your expectations based on surface moisture conditions. This simple check can catch installation errors early on.
7. Data Transmission Options: Wired vs. Wireless
Choosing how your soil moisture data gets from the sensor to you is a critical decision, influencing cost, flexibility, and reliability. You essentially have two main pathways: wired and wireless. Each approach has distinct advantages and disadvantages, and the best choice will depend on your specific site conditions and budget.
Wired Systems: The Reliable Workhorse
Wired systems involve physically connecting each sensor to a central data logger or computer. This method offers unparalleled reliability - power and data transmission are guaranteed as long as the wires remain intact. They are typically less prone to interference and security breaches. However, wired systems are significantly less flexible. Running wires can be difficult and costly, particularly across large or uneven terrain. Installation is more labor-intensive, and relocating sensors later is a major undertaking. They's also vulnerable to physical damage from animals, weather, or accidental digging.
Wireless Systems: Flexibility at a Price
Wireless systems utilize radio waves to transmit data, offering significantly more freedom in sensor placement. Options include:
- LoRaWAN: Long-range, low-power communication ideal for large farms and remote locations. Requires a LoRaWAN gateway.
- WiFi: Simple to set up if WiFi coverage is already available, but range is limited and power consumption can be higher.
- Cellular (LTE/NB-IoT): Offers the widest coverage area, suitable for locations without existing wireless infrastructure, but incurs ongoing data plan costs.
- Bluetooth: Short-range communication, best suited for small areas and direct data logging to a mobile device.
Wireless systems offer easier installation and greater mobility, but they are susceptible to interference from other devices, weather conditions, and potential security vulnerabilities. Battery life (for battery-powered sensors) is a constant consideration. Careful planning and signal testing are essential for successful wireless deployment.
8. Establishing a Baseline: Data Collection
Understanding your soil's natural water patterns is the cornerstone of effective monitoring. Before you can accurately interpret data and optimize irrigation or other interventions, you need to establish a baseline - a record of typical moisture levels under various conditions. This isn't a one-time event; it's an ongoing process that evolves with changing weather patterns and plant growth stages.
Here's how to build a solid baseline:
- Initial Data Collection Period: Aim for at least one complete growing season (or a full year for perennial crops) to capture seasonal variations. Longer is better.
- Frequency of Readings: Initially, take readings frequently - ideally every few hours, or at least daily. This density allows you to understand how moisture fluctuates rapidly in response to rainfall, temperature changes, and plant uptake.
- Record Environmental Conditions: Critically, record corresponding environmental data alongside your soil moisture readings. This includes rainfall amounts, air temperature, humidity, solar radiation, and wind speed. This context is what turns raw data into meaningful insights.
- Manual Verification (Spot Checks): Periodically perform manual soil moisture checks using a handheld meter or by feel (the squeeze test - though this is subjective). This helps validate your sensor readings and identify potential calibration issues.
- Document Plant Stage: Note the growth stage of your plants (e.g., seedling, vegetative, flowering, fruiting). Water needs vary significantly at different stages.
- Historical Data (if available): If you have any historical soil moisture data from the site (even if limited), incorporate it to provide broader context.
- Dynamic Adjustment: After the initial baseline period, you can often reduce the frequency of readings, but continue to monitor regularly and be prepared to re-evaluate your baseline if significant changes occur (e.g., drought, new irrigation system, change in crop type).
9. Data Analysis & Interpretation
Raw data is just that - raw. It's the analysis and interpretation that transforms it into actionable insights. Understanding your soil moisture data goes beyond simply seeing a number; it's about recognizing patterns, trends, and anomalies that can inform critical decisions about irrigation, fertilization, and drought management.
Establishing a Baseline: Your Moisture Roadmap
Before you can identify deviations, you need to know what's normal. Collect data continuously for at least one full growing season, ideally across multiple years. This baseline period establishes typical moisture levels under various weather conditions. Note the ranges for each sensor location, documenting average readings, peak values during rainfall, and troughs during dry spells.
Identifying Trends and Anomalies
Once you have a baseline, start looking for trends. Are moisture levels consistently higher or lower in a particular zone? Are there seasonal fluctuations that align with expected rainfall patterns? Pay close attention to anomalies - sudden spikes or drops in moisture that don't fit the usual pattern. These could signal leaks, issues with sensor placement, or localized stress.
Visualizing the Data - A Picture is Worth a Thousand Numbers
Graphs and charts are your best friends. Create line graphs showing moisture levels over time for each sensor. Heatmaps can visually represent moisture distribution across your site. Interactive dashboards allow you to explore data in real-time and easily compare readings across different locations and time periods.
Understanding Relationships - Moisture, Growth, and Yield
Correlate your soil moisture data with other relevant factors, such as crop growth stage, yield data, and weather forecasts. Are low moisture levels associated with stunted growth or reduced yields? Using this information, you can refine your irrigation strategies to maximize resource efficiency and optimize crop performance.
Alerts & Thresholds: Proactive Monitoring
Set up alerts based on pre-defined thresholds. For example, trigger an alert if moisture levels drop below a critical point that could stress crops. This proactive monitoring allows you to intervene before problems escalate.
Interpreting Specific Scenarios:
- Rapid Decline in Moisture: Potential leaks, unusually high evapotranspiration rates, or pump failure.
- Sustained High Moisture: Poor drainage, over-irrigation, or waterlogging.
- Uneven Moisture Distribution: Inconsistent irrigation coverage or variations in soil type.
10. Routine Maintenance & Troubleshooting
Soil moisture monitoring systems, like any piece of technology, require regular attention to ensure reliable data and long-term functionality. Neglecting routine maintenance can lead to inaccurate readings, system failures, and unnecessary costs. Here's a breakdown of essential maintenance tasks and common troubleshooting steps:
Routine Maintenance (Every 3-6 Months):
- Visual Inspection: Carefully examine each sensor and its housing for any signs of physical damage (cracks, breaks, corrosion), debris accumulation (leaves, dirt, insect nests), or animal interference.
- Connection Checks: Verify that all wiring and connections are secure and free from corrosion. This is particularly important for wired systems.
- Battery Status: If using battery-powered sensors, monitor battery levels and replace as needed. Solar panels should also be checked for cleanliness and proper function.
- Data Transmission Verification: Confirm that data is consistently being transmitted to your data platform. Check signal strength and connectivity.
- Cleaning: Gently clean sensor probes with a soft brush or cloth to remove any buildup. Do not use harsh chemicals.
Troubleshooting Common Issues:
- No Data/Intermittent Data:
- Check Power: Verify power supply to the sensor.
- Check Connectivity: Confirm network connectivity (Wi-Fi, Cellular, LoRaWAN).
- Check Sensor Placement: Ensure the sensor is properly positioned and not obstructed.
- Check Data Logging Frequency: Confirm the logging frequency is appropriately set.
- Inaccurate Readings:
- Recalibrate Sensor: Some sensors have calibration settings; refer to the manufacturer's instructions.
- Check for Air Gaps: Ensure the sensor is in full contact with the soil. Air gaps can lead to inaccurate readings.
- Consider Soil Type Variability: Different soil types retain water differently. Factor this into your interpretations.
- Check for Nearby Water Sources: Proximity to irrigation lines or other water sources can influence readings.
- System Errors: Consult the sensor's manual for specific error codes and troubleshooting steps. Contact the manufacturer's technical support if needed.
Preventative Measures:
- Protect Sensors from Extreme Weather: Consider using protective housings for sensors in areas prone to harsh weather conditions.
- Regularly Monitor System Performance: Keep an eye on data trends and identify any anomalies early on.
- Document Maintenance Activities: Keep a log of maintenance tasks performed, including dates and observations.
Remember: Refer to your specific sensor's manual for detailed maintenance and troubleshooting instructions.
11. Reporting & Actionable Insights
Having a wealth of soil moisture data is fantastic, but its true value lies in how you use it. This isn't just about collecting numbers; it's about transforming those readings into actionable insights that drive positive outcomes.
Regular Reporting is Key: Establish a reporting cadence - weekly, bi-weekly, or monthly - to track trends and identify potential issues. A simple spreadsheet can work initially, but consider transitioning to a more sophisticated dashboard if your data volume and complexity grow. Your reports should include:
- Baseline Comparison: How do current readings compare to established baselines for this time of year?
- Location-Specific Analysis: Highlight areas exhibiting unusual moisture patterns-either consistently dry or waterlogged.
- Trend Identification: Are moisture levels generally increasing, decreasing, or remaining stable?
- Alerts & Flags: Implement a system to flag readings that fall outside of predetermined thresholds, indicating potential problems.
Turning Insights into Action:
- Irrigation Optimization: The most direct application is refining your irrigation schedule. Reduce watering in areas that are consistently moist and increase it where moisture is low. This conserves water, reduces costs, and minimizes the risk of overwatering.
- Fertilizer Management: Soil moisture significantly impacts nutrient uptake. Adjust fertilizer applications based on moisture levels; less fertilizer is typically needed in wet conditions.
- Drought Contingency Planning: Proactive soil moisture monitoring allows you to anticipate and mitigate the impacts of drought. Identify areas vulnerable to drought stress and implement strategies like supplemental irrigation or drought-tolerant planting.
- Crop Health Assessment: Correlate soil moisture data with crop health indicators (e.g., leaf color, yield). This can help you diagnose underlying issues and optimize growing practices.
- Long-Term Planning: Track soil moisture trends over several seasons to identify long-term patterns and inform land management decisions, such as selecting appropriate crop varieties or implementing soil conservation practices.
Remember, the most valuable insights come from combining soil moisture data with your expert knowledge of the land and the crops you're growing.
12. Optimizing Irrigation Schedules
Soil moisture monitoring isn't just about knowing how much water is in the soil; it's about using that knowledge to make smarter irrigation decisions. Historically, irrigation schedules have been based on guesswork, calendar dates, or broad regional guidelines - often leading to overwatering and wasted resources. With a robust soil moisture monitoring system, you can shift to a data-driven approach, dramatically improving efficiency and plant health.
Here's how to translate your soil moisture data into an optimized irrigation schedule:
- Understand Plant Water Needs: Different plants have varying water requirements. Factor in plant type, growth stage, and local climate conditions. Your soil moisture data should be interpreted in the context of these needs.
- Define Thresholds: Establish clear trigger points for irrigation. For example, you might define a VWC threshold of 30% as the point where irrigation is required. This threshold will vary based on plant type and soil.
- Irrigation Depth: Don't just irrigate when the soil is dry; irrigate to the correct depth. Aim to re-wet the root zone effectively. Monitoring sensor placement at different depths can help determine how deeply water penetrates.
- Variable Rate Irrigation (VRI): If you have the technology, integrate your soil moisture data with a VRI system. This allows you to apply water precisely where and when it's needed, optimizing efficiency and reducing water waste.
- Consider Evapotranspiration (ET): Combine your soil moisture data with ET information (which accounts for water loss through evaporation and plant transpiration) for a comprehensive picture of water needs.
- Account for Rainfall: Adjust irrigation schedules based on recent rainfall. Overwatering can be as detrimental as underwatering.
- Monitor and Adjust: Irrigation scheduling isn't a "set it and forget it" process. Continuously monitor soil moisture levels and fine-tune irrigation schedules as needed based on changing conditions. Keep detailed records of irrigation events and their impact on soil moisture and plant health.
13. Long-Term Soil Health Considerations
Maintaining accurate soil moisture data is only one piece of a larger puzzle - the health and vitality of your soil ecosystem. While consistent monitoring helps optimize irrigation and resource management, neglecting long-term soil health can undermine these efforts. Soil moisture data is most impactful when integrated with a holistic approach to soil stewardship.
Here's why long-term soil health considerations are vital for accurate and meaningful soil moisture readings:
- Organic Matter is Key: Healthy soil boasts high organic matter content. This acts like a sponge, increasing the soil's water-holding capacity and making moisture readings more consistent and reliable. Depleted organic matter leads to erratic readings and diminished benefits from your monitoring system.
- Soil Structure: Well-structured soil (think aggregates of soil particles) allows for better aeration and drainage. Poor structure can lead to waterlogging or rapid drainage, impacting both moisture levels and plant health.
- Microbial Activity: A thriving soil microbiome is crucial for nutrient cycling and overall soil health. Depleted microbial life can negatively impact water availability and nutrient uptake.
- Compaction: Compacted soil restricts root growth, reduces aeration, and inhibits water infiltration. This leads to uneven moisture distribution and inaccurate readings.
- Erosion: Erosion carries away topsoil, reducing water-holding capacity and disrupting the soil profile.
Practical Steps for Long-Term Soil Health:
- Cover Cropping: Planting cover crops helps build organic matter, improve soil structure, and prevent erosion.
- Reduced Tillage: Minimizing tillage helps preserve soil structure and microbial life.
- Compost Application: Adding compost increases organic matter and improves soil fertility.
- Crop Rotation: Rotating crops helps break pest and disease cycles and improves soil health.
- No-Till Farming: A comprehensive approach to minimizing soil disturbance, enhancing water infiltration, and preserving organic matter.
Integrating these soil health practices not only safeguards the long-term productivity of your land but also enhances the value and accuracy of your soil moisture data, creating a virtuous cycle of sustainability.
Resources & Links
- USDA Web Soil Survey : The USDA Web Soil Survey is the authoritative source for soil maps and data. Crucial for understanding your soil types and characteristics for initial site assessment (Section 2 & 3).
- U.S. Geological Survey (USGS) Water Resources : The USGS provides valuable data and resources on water resources, including groundwater levels, precipitation, and streamflow, all relevant to understanding drainage patterns and water availability (Section 2 & 3).
- Natural Resources Conservation Service (NRCS) : The NRCS provides resources on soil health, conservation practices, and water management, informing long-term soil health considerations and best practices for irrigation (Section 2, 3 & 13).
- Environmental Protection Agency (EPA) : EPA provides information on water quality and environmental regulations, indirectly relevant for sustainable irrigation and soil management practices (Section 13).
- Decagon Devices (now METOS) : A leading manufacturer of soil moisture sensors and data loggers. Provides technical specifications, resources, and guidance on sensor selection and calibration (Section 2, 4, & 5).
- Teros Sensors : Offers advanced soil moisture sensing technology with a focus on precision agriculture. Provides detailed product information and application examples. (Section 2, 4, & 5)
- Irrometer : Manufacturers of tensiometers and other soil moisture monitoring equipment, offering a more traditional approach. Useful for understanding water potential (Section 2, 4, & 5).
- Libel Water Monitoring Solutions : Provides rugged, long-life data loggers and sensors for various applications, including soil moisture monitoring. Relevant for data transmission and long-term deployments (Section 7).
- Motech Systems : Offers wireless sensor networks and data acquisition systems suitable for larger-scale soil moisture monitoring deployments (Section 7).
- Seeed Studio : Provides affordable microcontroller development boards (like Arduino) that can be used for DIY soil moisture monitoring systems, suitable for experimentation (Section 4, 6 & 7).
- Arduino : A popular open-source electronics platform for building custom soil moisture monitoring devices. Helpful for those wanting to build their own sensors (Section 4, 6 & 7).
- University of Minnesota Extension : Offers regional information on irrigation management and soil health. Useful for understanding local climate and soil conditions (Section 8, 10 & 12).
- National Weather Service : Provides local weather forecasts and climate data, crucial for correlating soil moisture data with precipitation and evapotranspiration (Section 8 & 12).
- Ohio State University CropWatch : Provides detailed information and research on crop water requirements and irrigation scheduling, offering examples of data analysis and interpretation (Section 2, 12 & 11).
Frequently Asked Questions
What is soil moisture monitoring and why is it important?
Soil moisture monitoring involves measuring the amount of water present in the soil. It's vital for optimizing irrigation, improving crop yields, conserving water resources, and preventing plant stress and disease. It allows for data-driven decisions, moving away from guesswork.
Who is this checklist for?
This checklist is designed for farmers, gardeners, agricultural consultants, and anyone responsible for managing soil and plant health who wants to implement a location-specific soil moisture monitoring program.
What does 'location-specific' mean in this context?
'Location-specific' means tailoring your soil moisture monitoring approach to your unique environment. This includes considering factors like soil type, climate, topography, and the specific plants you're growing. The checklist helps you identify and account for these factors.
What types of soil moisture sensors are mentioned in the guide?
The guide discusses various types including Tensiometers, Granular Matrix Sensors (GMS), Capacitance Sensors, and Time Domain Reflectometry (TDR) sensors. It explains their pros, cons, and suitability for different situations.
How do I determine the correct depth for my soil moisture sensors?
The appropriate depth depends on the root zone of the plants you're monitoring. Generally, sensors should be placed at a depth where most of the plant's active root growth occurs. The checklist provides specific depth recommendations based on common crops and plant types.
What is the difference between volumetric water content (VWC) and soil water potential?
Volumetric water content (VWC) measures the percentage of soil volume occupied by water. Soil water potential indicates how tightly water is held by the soil; a lower value means water is easier for plants to access. The guide explains how to interpret both and their relevance to plant health.
How often should I be checking my soil moisture data?
The frequency of monitoring depends on factors like climate, crop type, and irrigation practices. The checklist provides general guidelines, but you should adjust based on your specific needs and observations. More frequent checks are often needed during critical growth stages or in periods of drought.
What if my soil type is mixed or uneven across my land?
If your soil type is mixed, take multiple readings in different areas representing the dominant soil types. Averaging the data can provide a more representative picture of soil moisture conditions. The checklist suggests strategies for dealing with variable soil conditions.
How can I integrate my soil moisture data with other farm management practices?
Soil moisture data can be integrated with irrigation scheduling, fertilizer application, and crop selection. Use the data to make informed decisions and optimize your overall farm management strategy. The checklist encourages a holistic approach.
Where can I find more information about specific sensor technologies or soil types?
The checklist provides links to reputable resources and organizations for further reading. These resources can provide detailed information about sensor technologies, soil properties, and best practices for soil moisture management.
Found this Article helpful?
Agriculture Management Solution Demo
Running a farm or agricultural business is complex. ChecklistGuro's Work OS platform simplifies your operations, from crop planning and irrigation management to livestock tracking and harvest scheduling. Increase efficiency, reduce waste, and boost yields! See how ChecklistGuro can revolutionize your agriculture business.
Related Articles

10 Simple Steps to a Healthy Drainage System: Your Checklist Template

Mastering the Daily Crop Scouting Report: Your [Specific Crop] Checklist Template

Irrigation System Checklist: Farm Water Management & Crop Yield Optimization

Unlock Your Garden's Potential: A Soil pH Verification Checklist

PPE Usage Checklist Template: Your Guide to Safety

Water Discharge Permit Compliance Checklist Template

The Ultimate GPS & Precision Farming Calibration Checklist Template

Water Runoff Analysis Checklist Template
We can do it Together
Need help with
Agriculture?
Have a question? We're here to help. Please submit your inquiry, and we'll respond promptly.