Your Soil Testing & Amendment Checklist: A Step-by-Step Guide
Published: 09/02/2025 Updated: 05/28/2026
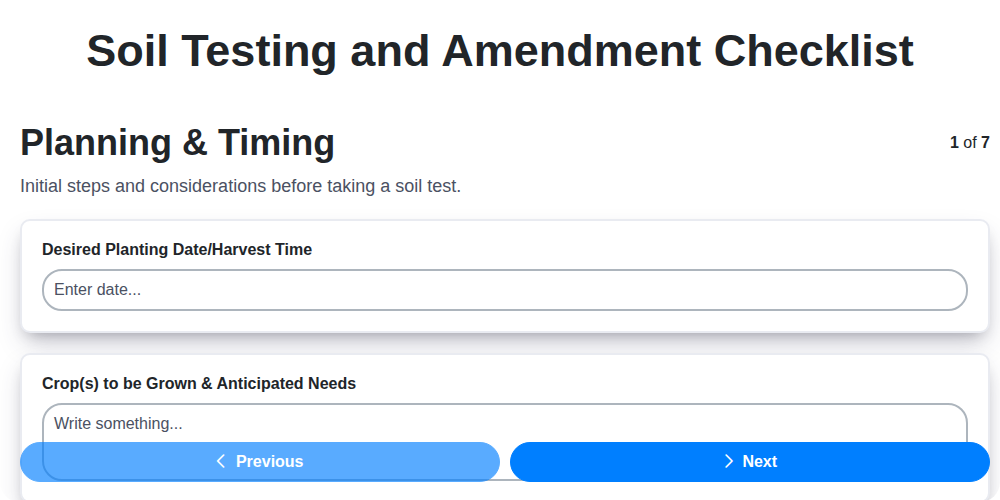
Table of Contents
- Why Soil Testing Matters
- 1. Planning & Timing: When and Why to Test
- 2. Gathering Your Supplies
- 3. Soil Sampling: Getting Representative Samples
- 4. Submitting Your Sample to a Lab
- 5. Understanding Your Soil Test Results
- 6. Decoding Soil pH
- 7. Selecting the Right Amendments
- 8. Organic vs. Synthetic Amendments: What's the Difference?
- 9. Application Techniques: Getting Amendments into the Soil
- 10. Post-Amendment Monitoring
- 11. Troubleshooting Common Soil Issues
- 12. Maintaining Long-Term Soil Health
- 13. Resources & Further Learning
- Resources & Links
TLDR: Not sure where to start with soil testing and improving your garden's health? This checklist breaks down the process into 8 easy steps: planning, sampling, lab submission, interpreting results, amendment selection, application, monitoring, and repeat. It's your complete guide to unlocking your garden's potential!
Why Soil Testing Matters
Beyond simply knowing if your plants look healthy, soil testing provides a level of precision that can significantly boost your garden's productivity and your own gardening success. Think of it like a doctor running diagnostics - you wouldn't treat a patient without knowing what's going on internally! Similarly, guessing at your soil's needs leads to wasted money on unnecessary amendments, potential imbalances that can harm your plants, and ultimately, disappointing results.
A soil test reveals a wealth of information beyond just pH. It quantifies the levels of essential nutrients like phosphorus, potassium, and calcium, telling you exactly what's abundant, deficient, or out of balance. This targeted approach means you're only applying what your soil actually needs, reducing fertilizer runoff and protecting the environment. It also helps you avoid the pitfalls of nutrient toxicities, which can be just as detrimental as deficiencies. Ultimately, investing a little time and money in soil testing is an investment in a thriving, sustainable garden.
1. Planning & Timing: When and Why to Test
Knowing when to test your soil is just as important as knowing how to test it. Timing your soil test strategically can maximize its benefits and prevent unnecessary spending. Here's a breakdown to guide your planning:
New Gardens & Planting Beds: Always test your soil before establishing a new garden or planting bed. This gives you ample time to amend the soil based on the results and ensure optimal conditions for your plants from the start. Ignoring this step can lead to disappointing results and wasted effort.
Troubleshooting Plant Problems: If your plants are exhibiting signs of nutrient deficiencies (yellowing leaves, stunted growth, poor flowering), a soil test can pinpoint the underlying cause. Don't guess - test!
Regular Maintenance: Even if your garden seems to be thriving, periodic soil testing (every 2-3 years) is a good practice. Soil conditions can change over time due to factors like rainfall, erosion, and the decomposition of organic matter.
Before Major Amendments: If you're planning a large-scale amendment project (like adding a significant amount of compost or manure), a soil test will help you determine the appropriate amount to apply and avoid over- or under-fertilizing.
Spring is Prime Time: While testing can be done year-round, spring is generally the best time. This allows enough lead time to implement amendments before the active growing season begins. However, if you're experiencing immediate plant issues, don't delay - test now!
2. Gathering Your Supplies
Before you start digging, it's important to have the right tools on hand. This will make the process much easier and more accurate. Here's a list of what you'll need:
- Clean Shovel or Trowel: For digging and collecting soil samples. A long-handled shovel or trowel is ideal for reaching deeper into the soil.
- Soil Probe (Optional): A soil probe simplifies the digging process and helps ensure consistent sample depth.
- Clean Plastic Bucket: To hold the soil samples you collect from different areas. Make sure it's clean to avoid contaminating the samples.
- Sample Bags or Containers: Most soil testing labs provide these with their kits. If not, use clean plastic bags or sturdy containers with lids. Label them clearly with the area they represent.
- Permanent Marker: For labeling your sample bags or containers.
- Gloves (Optional): To keep your hands clean.
- Measuring Cup or Spoon: For accurately measuring the amount of soil required for the lab submission (usually about 1 cup).
- Soil Testing Kit (or Submission Form): If you purchased a kit, familiarize yourself with its contents. If not, obtain the required submission form from your chosen lab.
3. Soil Sampling: Getting Representative Samples
Getting accurate results from your soil test hinges on taking a good sample. One scoop of heavily compacted clay won't tell you what's happening across your entire garden bed. Here's how to gather a representative sample:
Divide and Conquer: Your garden likely isn't uniform. Different areas might have different soil types or receive different amounts of sunlight. For the most reliable results, divide your garden or farm into logical zones - perhaps based on planting areas, sun exposure, or noticeable differences in plant growth.
The V Pattern: Within each zone, collect 10-20 random samples. Think of it as drawing a V shape across the area. Dig to a depth of 6-8 inches (15-20 cm) each time. This depth accounts for the root zone of most plants.
Mix it Up! Place all the soil samples from a single zone into a clean plastic bucket. Thoroughly mix the soil to create a "composite sample." This ensures that the portion you send to the lab accurately reflects the entire zone.
The Composite Sample: From this thoroughly mixed soil, take approximately 1 cup (240ml) to send to the soil testing laboratory. Label this sample clearly with the zone it represents. Accurate labeling is essential for interpreting the results correctly.
4. Submitting Your Sample to a Lab
Okay, you've diligently collected your composite soil sample - now it's time to get it analyzed! This step is crucial for getting accurate results and a personalized amendment plan. Here's what you need to know:
1. Choosing a Lab: Start by researching soil testing labs in your area. Your local agricultural extension service will often have a list of approved labs. Consider factors like turnaround time, price, and the range of tests offered.
2. Following Instructions Precisely: Each lab has specific instructions for sample submission. This isn't the place to improvise! These instructions are designed to ensure the sample remains uncontaminated and arrives in the condition needed for accurate testing. You'll typically find these instructions on the lab's website, in a packet accompanying your soil test kit, or upon request. Look for details about:
- Packaging: What type of container to use (usually a sturdy plastic bag or box).
- Labeling: How to clearly label the sample with your contact information, zone identification (if applicable), and any special requests.
- Payment: Most labs require prepayment or credit card payment upon submission.
- Shipping: Whether the lab prefers you to drop off the sample or ship it via a specific carrier (USPS, FedEx, UPS). Make sure to package the sample securely to prevent leakage during transit.
3. Completing the Submission Form: Most labs require you to complete a submission form along with your sample. Be thorough and accurate when filling it out. Indicate the types of tests you want performed (basic nutrient levels, pH, organic matter, etc.). Some labs offer specialized tests for specific crops or problems.
4. Maintaining Chain of Custody (Optional): For more formal testing or legal purposes, you may need to maintain a chain of custody record. This document tracks the sample's movement from collection to the lab, ensuring its integrity and preventing tampering. Check with the lab for their specific requirements.
Good luck with your soil testing!
5. Understanding Your Soil Test Results
Your soil test report might look intimidating, but it's a roadmap to a healthier garden! Let's break down the key sections. pH is usually at the top - it measures the soil's acidity or alkalinity. Most plants thrive in a slightly acidic range (6.0 to 7.0). If your pH is too high or low, it can affect the availability of essential nutrients, even if those nutrients are present in the soil.
Next, you'll likely see results for Macronutrients: Nitrogen (N), Phosphorus (P), and Potassium (K). These are needed in large quantities for plant growth. The report will show the current levels and often provide a range of ideal values for the crops you're planning to grow (this is why accurate crop selection on the submission form is so important!). Deficiencies often show up as stunted growth or discoloration in leaves.
Then there are Secondary Nutrients: Calcium (Ca), Magnesium (Mg), and Sulfur (S). These are needed in smaller amounts than macronutrients but are still vital for plant health.
Finally, you may see results for Micronutrients: Iron (Fe), Manganese (Mn), Zinc (Zn), Copper (Cu), and Boron (B). These are needed in trace amounts, but deficiencies can still cause problems. A lab may only test for these if you specifically request it. Don't panic if micronutrient levels are slightly outside the ideal range; these are often less critical than macronutrient and pH issues.
Most reports include a recommendation section. Read this carefully - it will provide specific suggestions for amendment based on your results and crop selection. If anything is unclear, don't hesitate to contact your local Extension office or the testing lab for clarification.
6. Decoding Soil pH
Understanding your soil's pH is arguably the most critical piece of the soil testing puzzle. pH measures the acidity or alkalinity of your soil on a scale of 0 to 14. A pH of 7 is neutral. Values below 7 indicate acidity, while values above 7 indicate alkalinity.
But why does pH matter so much? Because it directly impacts a plant's ability to absorb essential nutrients. Even if your soil is brimming with phosphorus, potassium, and other vital elements, if the pH is off, your plants might not be able to access them! Think of it like having a locked door between the nutrients and the plant roots.
Most plants thrive in a slightly acidic to neutral soil pH range, typically between 6.0 and 7.0. However, some plants have specific pH preferences. For instance, blueberries and azaleas love acidic soil (pH 4.5-5.5), while lavender prefers slightly alkaline conditions (pH 6.5-8.0).
Your soil test report will provide a pH value. If your pH is outside the ideal range for your desired crops, you'll need to take steps to adjust it. Raising pH (making it more alkaline) is usually done with lime. Lowering pH (making it more acidic) is typically achieved with elemental sulfur or sphagnum peat moss. Remember to adjust pH gradually and retest periodically to avoid drastic changes.
7. Selecting the Right Amendments
Choosing the right amendments is where the rubber meets the road - it's how you translate those soil test results into a thriving garden. You have two primary paths: organic and synthetic. Organic amendments, like compost, well-rotted manure, and cover crops, are fantastic for improving overall soil health. They boost beneficial microbes, enhance water retention, and release nutrients slowly over time. However, they might not provide a quick fix for severe nutrient deficiencies.
Synthetic fertilizers offer a more immediate nutrient boost, with precise formulations tailored to specific crops. They're often more concentrated, meaning you need less to achieve the desired effect. However, overuse can lead to nutrient imbalances, salt build-up, and doesn't contribute to the long-term health of your soil structure.
Here've got a quick reference guide to common deficiencies and amendment options:
- Low Phosphorus (P): Bone meal, rock phosphate, poultry manure.
- Low Potassium (K): Wood ash (use sparingly due to potential for high pH), potassium sulfate, greensand.
- Low Nitrogen (N): Blood meal, feather meal, composted manure. Note: Nitrogen is often mobile in soil and may require multiple applications throughout the growing season.
- Low Organic Matter: Compost, well-rotted manure, leaf mold. This is a foundational amendment - always important!
- Low Calcium (Ca): Gypsum, lime (if pH is also low).
- Low Magnesium (Mg): Epsom salts (magnesium sulfate), dolomitic lime (if pH is also low).
Always read and follow product label instructions carefully. Consider a balanced approach - incorporating organic amendments for long-term soil health alongside targeted synthetic applications when necessary. Soil pH is a critical factor; some amendments affect pH, so be mindful of the impact on nutrient availability.
8. Organic vs. Synthetic Amendments: What's the Difference?
Choosing between organic and synthetic amendments is a foundational decision for any gardener or farmer. Both approaches aim to improve soil health and provide nutrients to plants, but they do so in very different ways, impacting the soil ecosystem and plant health differently over time.
Organic Amendments: Working with Nature
Organic amendments are derived from natural sources, like plants, animals, or minerals. They break down slowly over time, releasing nutrients gradually and enriching the soil as they do. Think compost, well-rotted manure, cover crops, bone meal, and seaweed extract.
- Benefits:
- Soil Structure: Organic matter improves soil structure, increasing water retention in sandy soils and drainage in clay soils.
- Microbial Life: They feed beneficial soil microbes, which are essential for nutrient cycling and disease suppression.
- Slow-Release Nutrients: Provides a steady supply of nutrients, reducing the risk of nutrient burn.
- Environmentally Friendly: Sustainable and renewable resources.
- Drawbacks:
- Slower Results: Takes longer to see the effects.
- Nutrient Variability: Nutrient content can vary depending on the source.
- Can Be Bulky: May require more space for storage and application.
Synthetic Amendments: A Quick Boost
Synthetic (or chemical) amendments are manufactured and offer a concentrated dose of specific nutrients. They are readily available to plants and provide a quick fix for nutrient deficiencies. Examples include ammonium nitrate, superphosphate, and potassium chloride.
- Benefits:
- Rapid Results: Provides a quick response to nutrient deficiencies.
- Precise Nutrient Control: Allows for precise control over nutrient levels.
- Concentrated Nutrients: Requires less material for application.
- Drawbacks:
- Potential for Burn: Over-application can lead to nutrient burn.
- Soil Disruption: Can negatively impact soil microbial life if used excessively.
- Environmental Concerns: Potential for runoff and water pollution.
Ultimately, the best choice depends on your specific goals, budget, and commitment to sustainable practices. Many gardeners choose to combine both organic and synthetic amendments to achieve optimal results - using organic amendments to build long-term soil health and supplementing with synthetic fertilizers when a quick nutrient boost is needed.
9. Application Techniques: Getting Amendments into the Soil
Simply having the right amendments isn't enough - you need to get them into the soil effectively. The best application technique depends on the type of amendment, the size of your garden, and your resources. Here's a breakdown of common methods:
1. Broadcasting: This is ideal for granular fertilizers and lime. Spread the amendment evenly over the soil surface using a spreader (for larger areas) or by hand. Follow the manufacturer's recommended application rate.
2. Incorporating (Tilling/Digging): After broadcasting, work the amendment into the top 6-8 inches of soil. This can be done with a rototiller (for larger areas), a garden fork, or a shovel. Incorporating ensures the amendment is evenly distributed and readily available to roots. Be mindful of soil disturbance; excessive tilling can damage soil structure.
3. Banding: For fertilizers, banding involves placing a narrow band of amendment along the planting row. This concentrates nutrients near the roots and can be particularly beneficial for young plants. Use a soil injector or carefully apply with a shovel.
4. Topdressing: This technique works well for compost and well-rotted manure. Spread a thin layer (1-2 inches) over the soil surface. Topdressing gradually releases nutrients and improves soil structure. It's particularly effective around established plants.
5. Side-dressing: This is a method for applying fertilizer to plants that are already growing. Place the amendment in a ring around the plant, a few inches away from the stem, and gently incorporate it into the soil. Water thoroughly.
6. Foliar Feeding: While not a primary amendment technique, foliar feeding can provide a quick boost of nutrients directly to plant leaves. Mix a diluted solution of fertilizer and apply it with a sprayer. This is best used to correct deficiencies, not as a replacement for soil amendments.
Important Considerations:
- Moisture: Soil moisture aids in the breakdown and distribution of amendments. Water thoroughly after application.
- Weather: Avoid applying amendments before heavy rain, as they may be washed away.
- Safety: Always wear appropriate safety gear, such as gloves and a dust mask, when handling amendments.
10. Post-Amendment Monitoring
Observing your plants after amendment is just as important as the amendment itself! It's your chance to see if your efforts paid off and make adjustments for future seasons. Look for signs of improved growth: are leaves a richer green, stems stronger, and overall plant vigor increased? Note any continued issues - yellowing leaves, stunted growth, or blossom end rot - as these could indicate that further adjustments are needed. Keep a simple journal documenting your observations alongside the date and any amendments applied. This record will become invaluable for fine-tuning your soil management strategy over time and ensuring consistently healthy plants. Don't hesitate to re-test your soil every 2-3 years to track changes and ensure your soil remains balanced.
11. Troubleshooting Common Soil Issues
Sometimes, a soil test isn't enough - you might be seeing problems before the lab results come back. Here's a breakdown of common soil issues and how to address them:
1. Yellowing Leaves (Chlorosis): Often a sign of nutrient deficiencies (especially nitrogen or iron). Test your soil and amend accordingly. Consider chelated iron if iron deficiency is suspected, as it's more readily absorbed.
2. Stunted Growth: Could be a lack of phosphorus, but also a sign of compacted soil or poor drainage. Aerate the soil and improve drainage with organic matter.
3. Wilting, Even with Adequate Water: Points towards root problems. Could be due to soil compaction, nematodes, or disease. Check for visible pests and improve soil structure.
4. Excessively Acidic Soil (Low pH): Can lock out essential nutrients. Apply lime to raise the pH. Monitor pH regularly.
5. Excessively Alkaline Soil (High pH): Can also hinder nutrient uptake. Apply sulfur or acidic organic matter to lower pH.
6. Compacted Soil: Roots struggle to penetrate, and water drains poorly. Aerate the soil and add plenty of organic matter to improve structure.
7. Poor Drainage: Standing water leads to root rot. Amend the soil with compost and perlite to enhance drainage. Consider raised beds if drainage remains a persistent issue.
8. Visible Pests (Nematodes, Grubs): These can damage roots and hinder nutrient absorption. Use appropriate pest control methods (beneficial nematodes, insecticidal soap).
9. Algae Growth on the Soil Surface: Indicates overwatering and lack of sunlight. Reduce watering frequency and ensure plants receive adequate sunlight.
10. Crust Formation: A hard layer on the soil surface prevents water and air from reaching the roots. Break up the crust with a rake or hoe.
11. Presence of Rocks or Debris: These can impede root growth and nutrient uptake. Remove rocks and debris as you encounter them.
12. Maintaining Long-Term Soil Health
Maintaining long-term soil health isn't a one-and-done task; it's a continuous process of nurturing and replenishing. Think of it as building a bank account - you need to regularly deposit (add nutrients and organic matter) to keep it healthy. Here's how to keep your soil thriving for years to come:
- Embrace Cover Cropping: These green manures protect your soil from erosion, suppress weeds, and add organic matter when they decompose. Choose cover crops suitable for your climate and soil type.
- No-Till or Reduced-Till Practices: Minimizing soil disturbance preserves soil structure, protects beneficial microbes, and reduces erosion.
- Regular Organic Matter Additions: Compost, well-rotted manure, leaf mold, and other organic materials are the bedrock of healthy soil. Apply them annually or bi-annually.
- Crop Rotation: Rotating crops prevents nutrient depletion and helps break pest and disease cycles. Plan your rotations carefully, considering nutrient needs and potential problems.
- Mulching: A layer of mulch (wood chips, straw, shredded leaves) conserves moisture, regulates soil temperature, suppresses weeds, and adds organic matter as it decomposes.
- Minimize Chemical Use: Excessive use of synthetic fertilizers and pesticides can harm beneficial soil microbes and disrupt the natural balance. Opt for organic alternatives whenever possible.
- Observe and Adapt: Regularly monitor your soil and plants for signs of imbalance. Be prepared to adjust your practices based on your observations. Soil health isn't static; it requires ongoing attention and refinement.
13. Resources & Further Learning
Ready to dive deeper into the world of soil health? Here's a curated list of resources to expand your knowledge and connect with helpful communities:
- USDA Natural Resources Conservation Service (NRCS): https://www.nrcs.usda.gov/ - A wealth of information on soil conservation and management practices.
- Your Local Agricultural Extension Service: - Your local experts! They offer workshops, soil testing services, and tailored advice.
- The Soil Food Web Institute: https://www.soilfoodweb.com/ - Explore the fascinating world of soil microbes and their vital role in soil health.
- Cornell Soil Health and Sustainability Program: https://soilhealth.cals.cornell.edu/ - Research, resources, and tools for improving soil health.
- Mother Earth News - Soil Testing & Amendment Articles: https://www.motherearthnews.com/organic-gardening/soil-testing-zm001 - Practical advice and insightful articles.
- Online Forums & Communities: Search for gardening or farming forums specific to your region - these are great places to ask questions and learn from others' experiences.
- Books:
- Teaming with Microbes by Jeff Lowenfels and Wayne Lewis
- The Complete Compost Gardening Guide by Barbara Pleasant and Deborah L. Martin
Resources & Links
- Auburn University Soil Testing Laboratory: A comprehensive resource with detailed information about soil testing, including what to expect, sample submission guidelines, and result interpretation. Excellent for understanding the technical aspects.
- Ohio State University Soil Testing: Provides Ohio-specific soil testing information, sample submission instructions, and result interpretation guidance, but generally applicable principles are widely useful. Includes information about nutrient recommendations.
- University of Minnesota Extension - Soil Testing: A good overview of soil testing, covering when to test, how to take samples, and understanding results. Includes links to lab services and fact sheets.
- NC State University - Soil Testing Services: Details about North Carolina's soil testing program, with information on required testing parameters and how to interpret the results. Offers a good foundation for understanding regional differences in soil needs.
- Alabama Cooperative Extension System - Soil Testing: A resource providing Alabama-specific guidelines and information regarding soil testing and soil management practices, useful for understanding regional differences in soil needs.
- Gardening Know How - Soil pH and Amendments: Explains pH and different types of soil amendments, with a focus on the practicalities of garden soil improvement.
- Planet Natural - Organic Soil Amendments: Focuses specifically on organic soil amendments, explaining their benefits and different options. A good starting point for those interested in organic gardening.
- Miracle-Gro Soil Testing Guide: Provides basic information about soil testing and common amendments from a commercial gardening products perspective. Can be helpful for understanding readily available options, but keep commercial biases in mind.
- Gardener's Supply - Soil Amendments: A broad overview of soil amendments, including both organic and synthetic options, with explanations of their functions and how they impact soil health.
- The Old Farmer's Almanac - Soil Testing: A general introduction to soil testing, covering the reasons to test, how to take samples, and interpreting results. Good for beginners.
- Oregon State University Extension - Soil Testing: Provides information about soil testing, when to test, how to collect samples, and interpret results. Covers specific regional considerations.
- Build a Soil: Focuses on soil health and the importance of building soil biology. Provides resources on composting and other practices to enhance soil life, complementing chemical soil test results.
- The Spruce - Soil Amendments: A comprehensive guide to soil amendments, covering various types, including organic and synthetic options. Offers practical advice and considerations for different soil types.
Frequently Asked Questions
Why should I test my soil?
Soil testing provides crucial information about your soil's pH, nutrient levels (like nitrogen, phosphorus, and potassium), and organic matter content. This allows you to amend your soil effectively, promoting healthier plant growth, avoiding nutrient deficiencies or toxicities, and reducing unnecessary fertilizer use.
What's the difference between a basic soil test and a comprehensive test?
A basic soil test typically checks pH and macronutrients (nitrogen, phosphorus, potassium). A comprehensive test includes micronutrients (iron, manganese, zinc, copper, boron, molybdenum) and sometimes organic matter or cation exchange capacity. Choose based on your needs and plant types - more specialized plants often benefit from comprehensive tests.
How often should I test my soil?
Generally, test your soil every 1-3 years, or more frequently if you suspect a problem (like poor plant growth, unusual leaf discoloration, or consistent nutrient deficiencies).
What kind of soil sample should I collect?
Collect a representative sample by taking multiple (10-20) small scoops of soil from different areas of your garden or planting bed, about 4-6 inches deep. Mix them together and remove any rocks or debris. Follow the specific instructions of the test kit or lab regarding sample size and how to package it.
What does soil pH mean, and why is it important?
Soil pH measures the acidity or alkalinity of your soil on a scale of 0 to 14. Most plants prefer a slightly acidic pH (around 6.0 to 7.0). pH affects nutrient availability - if it's too high or too low, plants can't absorb nutrients properly.
What are common soil amendments, and what do they do?
Common amendments include lime (to raise pH), sulfur (to lower pH), compost (to improve soil structure and add nutrients), and fertilizers (to provide specific nutrients).
How do I apply soil amendments?
Follow the instructions provided on the amendment product label. Generally, amendments are mixed into the soil before planting or topdressed around existing plants. Be careful not to over-apply, as this can harm plants.
If my soil test results show a deficiency, how do I correct it?
The soil test report will usually recommend specific amendments and quantities to correct the deficiency. Consider slow-release options or organic alternatives for more sustainable results.
Found this Article helpful?
Agriculture Management Solution Demo
Running a farm or agricultural business is complex. ChecklistGuro's Work OS platform simplifies your operations, from crop planning and irrigation management to livestock tracking and harvest scheduling. Increase efficiency, reduce waste, and boost yields! See how ChecklistGuro can revolutionize your agriculture business.
Related Articles

10 Simple Steps to a Healthy Drainage System: Your Checklist Template

Mastering the Daily Crop Scouting Report: Your [Specific Crop] Checklist Template

Irrigation System Checklist: Farm Water Management & Crop Yield Optimization

Unlock Your Garden's Potential: A Soil pH Verification Checklist

PPE Usage Checklist Template: Your Guide to Safety

Water Discharge Permit Compliance Checklist Template

The Ultimate GPS & Precision Farming Calibration Checklist Template

Water Runoff Analysis Checklist Template
We can do it Together
Need help with
Agriculture?
Have a question? We're here to help. Please submit your inquiry, and we'll respond promptly.