Decoding Your Soil Test: A Review Checklist
Published: 09/02/2025 Updated: 12/13/2025
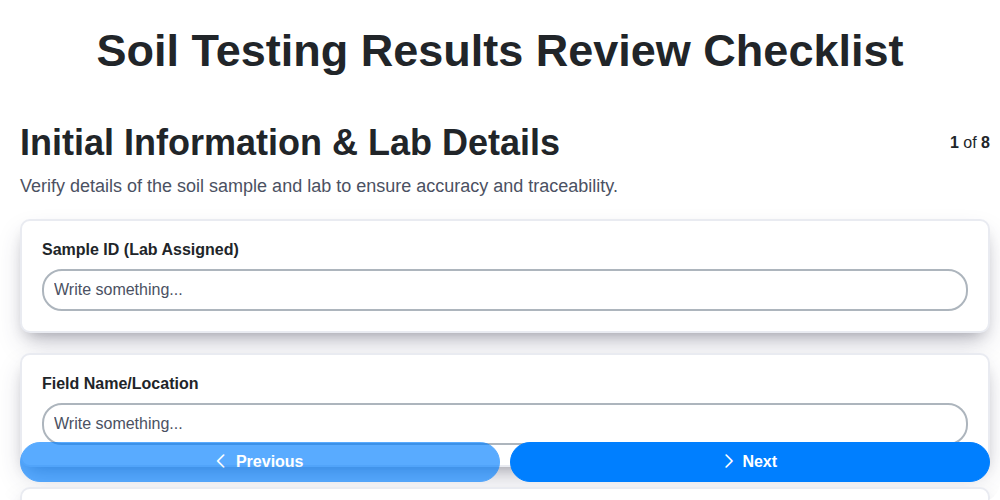
Table of Contents
- Understanding the Importance of Soil Testing
- Preparing for Your Soil Test: Sampling Techniques
- Initial Review: Lab Details and Sample Identification
- Macronutrient Analysis: N, P, and K Levels
- pH and Salinity: Assessing Soil Acidity and Salt Content
- Micronutrient Breakdown: Fe, Mn, Zn, Cu, B, and Mo
- Organic Matter and Soil Health Indicators
- Heavy Metals and Contaminant Screening
- Interpreting the Results: A Guide to Deficiency and Excess
- Developing a Soil Improvement Plan
- Record Keeping and Future Testing
- Resources & Links
TLDR: Got a soil test? Don't panic! This checklist breaks down those confusing numbers - covering nutrients, pH, potential contaminants, and more. It guides you through understanding your soil's needs and creating a simple plan to boost your garden or farm's health.
Understanding the Importance of Soil Testing
Soil testing isn't just a good idea; it's a foundational practice for any successful garden, farm, or landscape. Think of it like a checkup for your soil - just as you're proactive about your own health, you should be about the health of the ground supporting your plants. Without knowing what's happening beneath the surface, you're essentially guessing about your plants' nutritional needs. This can lead to wasted money on unnecessary fertilizers, stunted growth, nutrient deficiencies, and even increased susceptibility to pests and diseases. More than that, it's an environmentally responsible approach; targeted fertilization based on actual needs minimizes runoff and pollution, protecting our waterways and ecosystems. Investing in a soil test is an investment in healthy plants, a thriving environment, and a sustainable future.
Preparing for Your Soil Test: Sampling Techniques
Taking a representative soil sample is just as crucial as the analysis itself. A biased sample can lead to inaccurate results and misguided decisions. Here's how to do it right:
1. Timing is Key: Ideally, sample before applying fertilizers or amendments. If that's not possible, note the date and type of application.
2. Define Your Areas: Divide your garden or farm into distinct areas based on plant type, slope, previous land use, or any visible differences. Sample each area separately.
3. Gather Your Tools: You'll need a clean soil probe or shovel, a clean bucket, and sample bags (provided by the lab).
4. The V or Zig-Zag Pattern: Don't just scoop from the surface! Use your probe or shovel to take samples from a depth of 6-8 inches. Follow a V or zig-zag pattern across the area, taking 10-20 subsamples at random locations.
5. Mix Thoroughly: Combine all the subsamples in your clean bucket and mix them well to create a composite sample.
6. Fill the Sample Bag: Fill the provided sample bag about halfway full. Label the bag clearly with the sample ID.
7. Dry and Ship: Allow the sample to air dry before shipping to the lab, following their specific instructions. Avoid shipping wet soil.
Initial Review: Lab Details and Sample Identification
Before you dive into the numbers, let's confirm the foundation is solid. The credibility of your entire review hinges on ensuring the lab is reputable and that the results accurately represent the areas you intended to sample.
First, check the lab's credentials. Is it a certified laboratory, following established testing methodologies? Knowing this provides assurance of reliable data. Next, meticulously compare the sample IDs listed on your report with your original sampling plan. Did you label each sample clearly and accurately? Front Veggie Garden, East Orchard, or similar designations should match precisely. A mismatch here means you're potentially misinterpreting results - a high phosphorus reading for your orchard might actually belong to a drastically different area of your land! Finally, note the date of the analysis. Soil chemistry isn't static; a test from several years ago may not reflect your current soil conditions. This initial verification is a simple but crucial step in ensuring the rest of your review is based on accurate information.
Macronutrient Analysis: N, P, and K Levels
Nitrogen (N), Phosphorus (P), and Potassium (K) - often referred to as NPK - are the macronutrients plants require in the largest quantities. Understanding their levels is critical for healthy growth.
Nitrogen (N): Nitrogen is vital for leafy green growth and chlorophyll production. Deficiency presents as stunted growth and a general yellowing (chlorosis) of leaves, especially older ones. Excess nitrogen, however, can lead to lush foliage but reduced flowering and fruiting, and potentially weaker stems. Your lab report will often express nitrogen as potential mineral nitrogen (Npotential), which takes into account the contribution from organic matter breakdown.
Phosphorus (P): Phosphorus plays a key role in root development, flowering, and fruiting. A phosphorus deficiency often manifests as purple or reddish hues on leaves, particularly in younger growth. It can also lead to stunted roots and poor flowering.
Potassium (K): Potassium supports overall plant health, disease resistance, and fruit quality. A potassium deficiency often results in scorched or yellowed leaf edges, and can weaken plant stems.
Your lab report will typically categorize nutrient levels as "Low," "Medium," or "High," based on established sufficiency ranges. Carefully compare your results to these ranges to determine if amendments are necessary. Remember that the best approach is always a balanced diet for your plants - address deficiencies, but avoid over-application of any single nutrient.
pH and Salinity: Assessing Soil Acidity and Salt Content
Soil pH is a critical factor influencing nutrient availability. Most plants thrive in a slightly acidic to neutral range, ideally between 6.0 and 7.0. When the pH is too low (acidic), certain nutrients like phosphorus, calcium, and magnesium become less accessible to plant roots, even if they are present in the soil. Conversely, excessively alkaline soils (high pH) can lock up micronutrients like iron and manganese, leading to deficiencies.
Your soil test report will provide a pH value. If it falls outside the 6.0-7.0 range, it's important to understand why and how to adjust it. Acidic soils can be corrected by incorporating lime (calcium carbonate), which raises the pH. Alkaline soils can be made more acidic by adding elemental sulfur or organic matter like peat moss.
Salinity, often reported as Electrical Conductivity (EC), indicates the salt content in your soil. High salinity hinders water absorption by plants, leading to wilting and stunted growth, even when water is available. It's particularly problematic in arid and semi-arid regions, and can also be exacerbated by irrigation with saline water. An EC value above a certain threshold (often around 4 dS/m, but check your lab's guidelines) warrants attention. Strategies to reduce salinity include leaching the soil with excessive water (if drainage is adequate) and improving soil structure to enhance drainage. Planting salt-tolerant species can also be a viable option.
Micronutrient Breakdown: Fe, Mn, Zn, Cu, B, and Mo
Micronutrients, often overlooked, are essential for robust plant growth and vibrant health. While needed in smaller quantities than macronutrients (N, P, K), their deficiency can manifest as distinct and often perplexing symptoms. Let's break down each of these vital players:
Iron (Fe): Primarily responsible for chlorophyll production, iron deficiency (chlorosis) appears as yellowing between leaf veins while the veins remain green. This is especially common in alkaline soils where iron availability is reduced. Chelated iron applications are often recommended.
Manganese (Mn): Involved in photosynthesis, enzyme activation, and nitrogen metabolism. Manganese deficiency leads to interveinal chlorosis, often starting on older leaves. Like iron, manganese availability can be limited in alkaline or high-organic matter soils.
Zinc (Zn): Crucial for hormone regulation, protein synthesis, and enzyme function. Zinc deficiency causes stunted growth, small leaves, and mottled chlorosis. High soil pH and excessive phosphorus can interfere with zinc uptake.
Copper (Cu): Plays a role in photosynthesis, respiration, and enzyme activity. Copper deficiency causes wilting, distorted new growth, and bluish-green discoloration of leaves. Organic matter can bind copper, reducing its availability.
Boron (B): Essential for cell wall development, flowering, and seed production. Boron deficiency results in stunted growth, brittle stems, and deformed flower parts. Low organic matter and sandy soils often indicate boron deficiency.
Molybdenum (Mo): Critical for nitrogen fixation and nitrate reduction. Molybdenum deficiency manifests as yellowing of older leaves, similar to nitrogen deficiency, but with a distinct interveinal pattern. Acidic soils tend to limit molybdenum availability.
Understanding the specific roles and deficiency symptoms of each micronutrient allows for targeted soil amendments and corrective measures to ensure optimal plant health. Soil testing remains the best way to accurately determine micronutrient levels and guide appropriate actions.
Organic Matter and Soil Health Indicators
Organic matter is the lifeblood of healthy soil. It's composed of decaying plant and animal material, plus the byproducts of microbial activity. A higher percentage of organic matter (ideally 2-5% or higher) translates to a soil that's more resilient, productive, and environmentally friendly.
Here's why organic matter is so important:
- Improved Water Retention: Organic matter acts like a sponge, holding onto water and making it available to plants.
- Enhanced Nutrient Availability: It slowly releases essential nutrients as it decomposes, providing a sustained food source for plants.
- Better Soil Structure: It binds soil particles together, creating aggregates that improve drainage and aeration.
- Increased Microbial Activity: Organic matter provides food for beneficial soil microbes, which play a crucial role in nutrient cycling and disease suppression.
Beyond just the percentage of organic matter, other indicators paint a fuller picture of soil health. Cation Exchange Capacity (CEC) is a particularly useful measure. CEC reflects the soil's ability to hold onto positively charged nutrients (cations) like calcium, magnesium, and potassium. Soils with higher CEC have a greater capacity to retain these nutrients and prevent them from leaching away. Clay and organic matter both contribute to CEC - so soils rich in both will typically have a high CEC value. Think of it as the soil's 'nutrient holding tank' - the bigger the tank, the more nutrients it can store for plants to use. While a high organic matter percentage is desirable, a strong CEC is critical for optimal plant nutrition.
Heavy Metals and Contaminant Screening
Soil contaminant screening isn't about alarmism; it's about proactive risk assessment. Many activities throughout history - from leaded gasoline to industrial processes - have left traces of potentially harmful substances in the soil. Common contaminants screened for include lead (Pb), arsenic (As), cadmium (Cd), and mercury (Hg). The presence of these elements doesn't automatically mean your soil is unsafe, but it does warrant further investigation and potentially remediation.
Lab results will usually report concentrations in parts per million (ppm) or milligrams per kilogram (mg/kg) - both essentially the same thing. Alongside the results, the lab will often provide guidelines, usually referencing Action Levels or Screening Values established by regulatory bodies (like the EPA in the US, or equivalent agencies in other countries). These values represent concentrations considered likely to pose a risk to human health (primarily through ingestion of soil or consumption of homegrown produce) or environmental health.
Understanding the Results:
- Below Screening Values: The risk is generally considered low, but ongoing monitoring might be recommended, especially if the soil is near a known source of contamination.
- Near or Slightly Above Screening Values: Increased caution is advised. Thorough washing of homegrown produce is essential. Consider restricting children's contact with the soil and implementing soil covering (mulch, ground cover plants) to reduce exposure.
- Significantly Above Screening Values: This indicates a potential health hazard. Soil testing isn't enough; you're going to need to consult with a qualified environmental professional or soil scientist to develop a remediation plan. Options range from soil removal and replacement to phytoremediation (using plants to absorb contaminants) and capping (covering the contaminated soil).
Important Note: Regulatory values vary significantly between regions. Always refer to the guidelines specific to your location. Do not attempt to interpret or remediate contaminated soil without expert assistance.
Interpreting the Results: A Guide to Deficiency and Excess
Understanding what your soil test results mean is the crucial step. Let's break down how to recognize signs of nutrient deficiencies and excesses, and what they might look like in your plants.
Macronutrient Imbalances (N, P, K)
- Nitrogen Deficiency: Plants exhibit stunted growth, pale green or yellowing leaves (chlorosis), especially on older leaves. Flowering and fruiting may be reduced.
- Phosphorus Deficiency: Leaves may turn purplish or reddish, particularly on newer leaves. Stunted growth, poor root development, and delayed maturity are common.
- Potassium Deficiency: Leaf edges may appear scorched or yellowed, with a general decline in overall plant vigor. Older leaves are typically affected first.
- Excess Nitrogen: Leads to lush, dark green foliage, but can reduce flowering and fruiting. Plants may be more susceptible to pests and diseases.
- Excess Phosphorus: Can interfere with the uptake of other micronutrients, particularly zinc and iron.
- Excess Potassium: Can lead to imbalances and potential nutrient lock-out, hindering the absorption of other essential elements.
Micronutrient Considerations
Micronutrient deficiencies often show as interveinal chlorosis (yellowing between leaf veins) or distorted leaf growth. Here's a quick rundown:
- Iron (Fe): Yellowing between veins on new leaves.
- Manganese (Mn): Similar to iron deficiency, but may also include small, dark spots.
- Zinc (Zn): Small, mottled leaves and shortened internodes ("rosetting").
- Copper (Cu): Wilting, distorted new growth.
- Boron (B): Thickened, brittle leaves; stunted floral development.
- Molybdenum (Mo): Yellowing of older leaves, often with upward curling.
Recognizing Excesses
While deficiencies are commonly addressed, excesses can be equally problematic. Nutrient excesses can cause toxicity, impacting nutrient uptake and overall plant health. Symptoms can include leaf burn, stunted growth, and reduced yields. Always prioritize addressing known deficiencies before applying amendments for potential excesses.
Important Note: Symptom appearance can be influenced by various factors (soil pH, plant variety, environmental conditions). Confirm deficiencies or excesses through soil testing and expert consultation. This guide is for preliminary assessment only.
Developing a Soil Improvement Plan
Once you're armed with your soil test results and a solid understanding of what they mean, it's time to translate that knowledge into action. A soil improvement plan isn't about instant gratification; it's a long-term strategy for building a healthier, more resilient soil. Here's a phased approach to developing yours:
1. Prioritize Issues: Not every deficiency needs immediate attention. Rank issues based on their impact on your desired plants and the feasibility of correction. Severe heavy metal contamination will take precedence over a minor micronutrient deficiency.
2. Organic Matter First: This is the foundation of good soil health. Increasing organic matter improves water retention, nutrient availability, and soil structure. Incorporate compost, well-rotted manure, cover crops, or other organic materials. Aim for a gradual increase over time - adding too much at once can create imbalances.
3. pH Adjustment - A Balanced Approach: If your pH is significantly outside the ideal range (6.0-7.0), adjustments are necessary. However, understand that correcting pH often impacts nutrient availability. Use lime to raise pH and sulfur to lower it, but do so gradually and retest periodically.
4. Targeted Amendments: Once organic matter and pH are addressed, focus on correcting specific nutrient deficiencies identified in your soil test. Use fertilizers sparingly and choose formulations appropriate for your plants' needs. Consider slow-release options to minimize nutrient leaching.
5. Consider Cover Cropping: Integrating cover crops into your rotation can significantly improve soil health. They add organic matter, fix nitrogen, suppress weeds, and prevent erosion. Select cover crop species that address specific soil needs.
6. Regular Monitoring and Adjustment: Soil health isn't a "set it and forget it" situation. Continue to monitor your soil's condition through periodic testing and visual observation. Adjust your plan as needed based on the results. Document your actions and their effects to refine your approach over time.
Record Keeping and Future Testing
Keeping meticulous records isn't just about organization; it's about understanding your soil's story and how your actions impact it. Create a dedicated notebook (physical or digital) to document your soil test results, including the lab name, date of analysis, and a copy of the report itself. Alongside the results, note any amendments you apply - the type, quantity, and date of application. Be equally diligent in recording observations about your plants: noting any signs of nutrient deficiencies or improvements in growth after applying amendments.
These records become invaluable when it's time for your next soil test (typically every 2-3 years, or more often if you're making significant changes to your soil management practices). By comparing successive test results, you can track the effectiveness of your amendments and make informed decisions about future adjustments. Trends in your soil's health over time will reveal a more complete picture than a single snapshot ever could. Don't underestimate the power of these records - they are your soil's biography!
Resources & Links
- Alabama Extension : Offers comprehensive soil testing information, guides, and publications, particularly helpful for Southern US conditions. Includes specifics on sampling techniques and interpreting results, relevant to multiple states beyond Alabama.
- Michigan State University Soil Testing Services : Provides a wealth of information about soil testing, including guides on soil sampling and interpreting results. Offers detailed explanations of nutrient levels and deficiencies.
- Cornell Garden-Based Learning : Cornell University's gardening resource provides reliable information about soil health, soil testing, and understanding soil test results, geared towards gardeners but applicable to broader soil health understanding.
- Purdue Extension : Similar to Cornell and MSU, Purdue Extension offers educational resources on soil testing, including practical guides for homeowners and farmers. Covers nutrient deficiencies and amendment strategies.
- USDA Natural Resources Conservation Service (NRCS) : Provides information on soil health principles, soil conservation practices, and links to local conservation districts offering soil testing and technical assistance. A solid base for understanding soil health context.
- Auburn University Soil Testing Laboratory : Offers insights into soil testing procedures, relevant especially for Southeastern US considerations. Can provide helpful context for specific regional variations.
- Cornell AgriTech : An excellent resource for interpreting soil test results; specifically addresses NPK and pH levels. Provides clear guidance on correcting deficiencies.
- Waypoint Analytics (Soil Testing) : A commercial soil testing lab offering detailed reports and interpretations. While they offer services, their website contains information on the different tests and factors considered in soil analysis.
- The Soil Health Institute : Provides resources for improving soil health, focusing on the bigger picture beyond just nutrient levels. Provides context to understand the importance of organic matter and microbial activity.
- Planet Natural : While primarily a retailer, Planet Natural provides educational content about organic soil health practices and amendment strategies that can be informed by soil test results.
- acresUSA : Focuses on ecological agriculture and regenerative farming practices. Offers articles and resources on soil testing and soil health, emphasizing biological approaches.
- The Soil Food Web : Focuses entirely on soil biology, offering insights into how soil microorganisms influence nutrient cycling and soil health. Helps understand soil test results in a broader ecological context.
Frequently Asked Questions
What is a soil test and why should I get one?
A soil test analyzes the nutrients and other properties of your soil. It helps you understand its pH, nutrient levels (like nitrogen, phosphorus, potassium), and organic matter content. This information allows you to make informed decisions about fertilization, amendments, and overall soil health, leading to healthier plants and a more efficient garden or farm.
I just received my soil test results. What does 'Decoding' them mean?
'Decoding' your soil test means understanding what the numbers and descriptions on the report actually tell you about your soil's condition and what actions, if any, you need to take. It's not always straightforward and often requires interpreting the results in the context of the plants you're growing.
What is pH and why is it important?
pH measures the acidity or alkalinity of your soil. Most plants prefer a slightly acidic pH (around 6.0-7.0). pH affects nutrient availability; if the pH is too high or too low, plants may not be able to absorb essential nutrients, even if they are present in the soil.
What do the different nutrient levels (N, P, K) represent?
N stands for Nitrogen, crucial for leaf and stem growth. P stands for Phosphorus, vital for root development, flowering, and fruiting. K stands for Potassium, important for overall plant health, disease resistance, and water regulation. The report will show levels as 'low', 'medium', or 'high', or with specific number ranges based on your region's standards.
What are 'ideal' ranges for N, P, and K levels?
Ideal ranges vary depending on the type of plants you're growing and your local soil conditions. The soil test report itself usually provides recommended ranges for your region and the plants you selected. Generally, a 'medium' range is often desirable, but consult the report's guidelines.
What does 'cation exchange capacity' (CEC) measure and why is it important?
CEC refers to the soil's ability to hold onto positively charged nutrients (cations) like calcium, magnesium, and potassium. A higher CEC generally means the soil is more fertile and can hold onto nutrients for longer, reducing leaching.
My soil test report mentions 'organic matter.' Why is this important?
Organic matter improves soil structure, water retention, aeration, and provides a slow-release source of nutrients. Higher organic matter levels generally indicate a healthier soil.
I see recommendations for specific fertilizers. How do I choose the right one?
The soil test report will usually suggest fertilizers based on the nutrient deficiencies identified. Pay attention to the N-P-K ratio (e.g., 10-10-10) and choose a fertilizer that addresses the specific needs outlined in the report. Consider slow-release options to minimize nutrient runoff.
Can I adjust my soil pH naturally?
Yes, you can. To raise pH (make it less acidic), you can add lime. To lower pH (make it more acidic), you can add sulfur or organic matter like peat moss. However, changes take time, and it's best to test again after a few months to see the effect.
How often should I get my soil tested?
Generally, a soil test should be done every 1-3 years, especially if you're growing crops, have concerns about soil health, or notice problems with plant growth. More frequent testing may be needed in areas with sandy soils or heavy fertilization.
Found this Article helpful?
Agriculture Management Solution Demo
Running a farm or agricultural business is complex. ChecklistGuro's Work OS platform simplifies your operations, from crop planning and irrigation management to livestock tracking and harvest scheduling. Increase efficiency, reduce waste, and boost yields! See how ChecklistGuro can revolutionize your agriculture business.
Related Articles

10 Simple Steps to a Healthy Drainage System: Your Checklist Template

Mastering the Daily Crop Scouting Report: Your [Specific Crop] Checklist Template

Irrigation System Checklist: Farm Water Management & Crop Yield Optimization

Unlock Your Garden's Potential: A Soil pH Verification Checklist

PPE Usage Checklist Template: Your Guide to Safety

Water Discharge Permit Compliance Checklist Template

The Ultimate GPS & Precision Farming Calibration Checklist Template

Water Runoff Analysis Checklist Template
We can do it Together
Need help with
Agriculture?
Have a question? We're here to help. Please submit your inquiry, and we'll respond promptly.