Your Ultimate Solar Panel Maintenance Checklist Template
Published: 10/03/2025 Updated: 05/11/2026
Table of Contents
- Why Regular Solar Panel Maintenance Matters
- Understanding Your Solar Panel System
- Safety First: Precautions Before You Begin
- 1. Visual Inspection: A Monthly Check
- 2. Panel Cleaning: Removing Dirt and Debris
- 3. Wiring and Connection Inspection: Ensuring Electrical Integrity
- 4. Inverter Performance Monitoring: Tracking System Output
- 5. Mounting Structure Assessment: Checking for Stability
- 6. DC Disconnect Switch Testing: A Critical Safety Step
- 7. Grounding System Verification: Protecting Against Electrical Hazards
- 8. Vegetation Management: Preventing Shading and Damage
- 9. Performance Monitoring: Identifying Potential Issues
- 10. Documentation: Keeping a Record of Your Maintenance
- When to Call a Professional: Knowing Your Limits
- Solar Panel Maintenance Frequency Guide
- Resources & Links
TLDR: Keep your solar investment running smoothly with this free, printable checklist! It guides you through essential tasks - from cleaning and visual inspections to checking wiring and performance - to maximize energy output, prevent costly repairs, and ensure your system's longevity. Download it now and stay on top of your solar maintenance!
Why Regular Solar Panel Maintenance Matters
Ignoring routine upkeep on your solar panel system isn't just about aesthetics; it directly impacts its long-term performance and your return on investment. Let's break down the consequences of neglecting maintenance:
Reduced Energy Production & Higher Bills: A layer of dirt, pollen, or debris can significantly reduce a panel's ability to absorb sunlight. Studies show that dirty panels can lose up to 25% of their potential output. That's real money lost each month, driving up your electricity bills and diminishing the savings you expected from solar.
Accelerated Equipment Degradation: Weather and environmental factors constantly take a toll. Without regular checks, minor issues like loose wiring or corroded connections can worsen over time, potentially leading to premature equipment failure and costly repairs.
Increased Risk of Safety Hazards: Neglected electrical components, especially grounding systems, pose a serious fire risk. A faulty system can also present a shock hazard. Ensuring everything is functioning correctly is paramount for the safety of your home and family.
Warranty Implications: Most solar panel warranties require proof of regular maintenance. Failing to adhere to these requirements could void your warranty, leaving you responsible for expensive repairs or replacements.
Diminished Home Value: A poorly maintained solar panel system detracts from your home's overall value. Potential buyers are less likely to invest in a system with a questionable history of care.
Understanding Your Solar Panel System
Solar panel systems, while seemingly simple in concept, are comprised of several interconnected components working in harmony. Let's break down the key players to ensure you understand how your system generates and distributes power.
Solar Panels (Photovoltaic - PV) Modules: These are the most visible part of your system. They convert sunlight directly into direct current (DC) electricity through the photovoltaic effect. The number of panels you have directly impacts your system's potential output.
Inverter: This crucial device transforms the DC electricity generated by the solar panels into alternating current (AC) electricity, which is the type used in your home and by the utility grid. There are different types of inverters:
- String Inverters: These are common and cost-effective, but less adaptable to shading issues.
- Microinverters: Attached to each individual panel, they optimize performance and offer panel-level monitoring.
- Power Optimizers: Work with a central inverter to maximize power output from each panel.
Mounting System: This framework securely attaches the solar panels to your roof or ground. Proper installation and structural integrity are vital for safety and longevity.
DC Disconnect Switch: A safety device that allows you to manually shut off the DC power flowing from the panels.
AC Disconnect Switch: Similar to the DC disconnect, this allows you to shut off the AC power flowing to your home or the grid.
Monitoring System: Many systems include monitoring capabilities that allow you to track performance, identify potential issues, and optimize energy production. This can be as simple as a display on the inverter or a sophisticated online portal.
Net Meter: If you've connected your system to the grid, a net meter measures the difference between the electricity you consume and the electricity you send back to the utility company.
Safety First: Precautions Before You Begin
Working on your solar panel system involves potential hazards, and prioritizing safety is paramount. Before you even think about cleaning or inspecting your panels, carefully consider these precautions:
- Working at Heights: Solar panels are typically installed on roofs, which presents a significant fall risk. Never attempt maintenance if you're uncomfortable working at heights. Use appropriate safety equipment like harnesses and fall protection gear, and ensure a secure ladder setup. If you're not experienced with rooftop work, hire a professional.
- Electrical Hazards: Solar panels generate electricity, even when the system is seemingly off. Incorrect handling of electrical components can lead to serious injury or electrocution. Always disconnect the system at the DC disconnect switch before performing any maintenance involving wiring or connections. If you've never worked with electrical systems, do not attempt any electrical work.
- Weather Conditions: Avoid working on your panels during inclement weather, such as rain, snow, or high winds. Wet conditions increase the risk of slips and falls, and high winds can make working on the roof dangerous.
- Personal Protective Equipment (PPE): Wear appropriate PPE, including safety glasses, gloves, and closed-toe shoes.
- System Lockout/Tagout: Implement a proper lockout/tagout procedure to ensure the system remains de-energized during maintenance. Consult your system documentation or a qualified professional for guidance.
- If in Doubt, Hire a Pro: Seriously. Your safety is more valuable than saving a few dollars.
1. Visual Inspection: A Monthly Check
A quick visual inspection is the easiest and most crucial part of your solar panel maintenance routine. It's something you can (and should) do monthly, even if you're not doing a full system check. Grab a ladder (safely!) or use binoculars from the ground to scan your panels. Look for any obvious signs of damage or abnormalities.
Here's what to keep an eye out for:
- Cracks: Even hairline cracks can compromise a panel's efficiency.
- Discoloration: Changes in panel color can indicate underlying issues.
- Delamination: This is when the layers of the panel start to separate - a sign of aging or damage from moisture.
- Hail Damage: Look for small, circular indentations or shattered glass.
- Animal Activity: Bird droppings, nests, or signs of rodent damage can impact performance.
- Debris Accumulation: Large piles of leaves, branches, or other debris can cause shading.
Don't worry if you see something you're unsure about. Simply note it down and schedule a more thorough inspection or consult with a qualified solar professional. Remember, early detection is key to preventing more serious problems down the road.
2. Panel Cleaning: Removing Dirt and Debris
Maintaining clean solar panels is one of the simplest, yet most impactful, maintenance tasks you can perform. A layer of dirt, pollen, bird droppings, leaves, or even dust accumulation can significantly reduce your system's efficiency - potentially decreasing energy production by up to 25% in heavily soiled areas. While rainfall can naturally clean your panels to some extent, it's often not enough to restore them to peak performance.
The Right Approach is Key
Avoid the temptation to use high-pressure washers or harsh chemicals. These can damage the delicate surface of your solar panels, voiding warranties, and creating more problems than they solve. Instead, a gentle and methodical cleaning process is essential.
What You'll Need:
- Soft-Bristled Brush: A car wash brush or a similar soft-bristled brush is ideal.
- Mild Soap: Use a mild, non-abrasive soap specifically designed for car washing or a gentle dish soap diluted in water.
- Water Source: A garden hose with a spray nozzle works well.
- Safety Gear: Eye protection (goggles) and gloves are recommended.
The Cleaning Process:
- Timing is Important: Choose a cloudy day or early morning/late afternoon when the panels are cooler to avoid thermal shock.
- Rinse First: Thoroughly rinse the panels with water to remove loose debris.
- Apply Soap Solution: Gently scrub the panels with the soft-bristled brush and soapy water, working in overlapping strokes.
- Rinse Again: Rinse the panels completely with clean water, ensuring no soap residue remains.
- Let Dry: Allow the panels to air dry.
Remember: Frequency depends on your location and environmental conditions. Areas with high pollen counts, industrial pollution, or frequent bird activity will require more frequent cleaning.
3. Wiring and Connection Inspection: Ensuring Electrical Integrity
Wiring and connections are the arteries of your solar system, delivering the hard-earned energy from your panels to your home. A compromised connection can lead to reduced output, system inefficiencies, and, in the worst-case scenario, safety hazards. This inspection isn't just about spotting obvious damage; it's about proactively safeguarding your investment.
What to Look For:
- Loose Connections: These are common, especially in areas exposed to significant temperature fluctuations. Gently tug on wires (with the system de-energized, of course - see safety note below) to check for secure connections. Look for any wires that move unexpectedly.
- Corrosion: Moisture and environmental factors can lead to corrosion on terminals and connectors. Corrosion diminishes conductivity and creates resistance. Signs include a white or greenish residue.
- Frayed or Damaged Wiring: Inspect the entire length of the wiring for any signs of fraying, cracking, or rodent damage. Even seemingly minor damage can compromise the integrity of the circuit.
- Wire Insulation: Look for cracks or damage to the wire insulation. This exposes the conductive wire, increasing the risk of short circuits and electrical hazards.
- Secure Mounting: Ensure all wiring and connectors are securely mounted and protected from the elements. Loose wiring can be a tripping hazard and is vulnerable to damage.
Tools You Might Need (and When to Hire a Pro):
While a visual inspection is a good start, a multimeter can provide a more detailed assessment of voltage and continuity. *However, using a multimeter requires electrical knowledge and safety precautions. If you are not comfortable using electrical equipment, DO NOT ATTEMPT THIS YOURSELF. Hire a qualified electrician.
SAFETY NOTE: Always disconnect the DC disconnect switch before inspecting wiring. If you are unsure about any part of this process, please consult a qualified solar professional. Electrical work is dangerous and should only be performed by those with the proper training and experience.
4. Inverter Performance Monitoring: Tracking System Output
The inverter is the heart of your solar energy system, converting the DC electricity generated by your panels into AC electricity that powers your home. Monitoring its performance is crucial for identifying potential issues early on. Regularly checking the inverter's display and data allows you to ensure it's operating efficiently and troubleshoot any problems before they escalate.
Here's what to look for:
- Error Codes: Many inverters display error codes that indicate specific malfunctions. Consult your inverter's manual to understand these codes and what corrective actions to take. Ignoring error codes can lead to reduced output or even system failure.
- Output Wattage: Track the inverter's output wattage over time. Compare this to the expected output based on weather conditions and panel performance. A significant and unexplained drop in output warrants further investigation.
- Efficiency Rating: Many modern inverters provide a real-time efficiency rating. Monitor this rating to ensure it remains within the expected range. A declining efficiency could indicate a problem with the inverter's internal components.
- Monitoring Apps/Web Portals: Many inverter manufacturers offer free monitoring apps or web portals that provide detailed performance data, including daily and monthly production figures, voltage and current readings, and historical trends. Utilize these tools to gain a deeper understanding of your system's operation.
- Audible Noises: While some noise is normal, pay attention to any unusual buzzing, clicking, or humming sounds emanating from the inverter. These could signal an internal fault.
If you notice any unusual behavior or performance drops, don't hesitate to contact a qualified solar technician.
5. Mounting Structure Assessment: Checking for Stability
The mounting structure - the framework that secures your solar panels to your roof or ground - is critical for system stability and longevity. Regular assessment is essential to ensure it's functioning correctly and hasn't been compromised by weather or structural shifts. Here's what to look for:
Visual Inspection for Obvious Issues: Begin with a thorough visual inspection. Look for any signs of corrosion, rust, or bending of the racking components. Pay close attention to welds, bolts, and connection points. Any visible damage indicates a potential weakness and warrants further investigation.
Checking for Looseness: Over time, vibration from wind and weather can cause bolts and fasteners to loosen. Periodically check all connections, tightening them as needed. Use a torque wrench to ensure proper tension - over-tightening can damage components, while under-tightening compromises stability.
Assessing for Displacement: Look for any signs that the racking has shifted or moved from its original position. This is particularly important after severe weather events like high winds or heavy snow. Even slight displacement can affect panel alignment and efficiency.
Foundation Integrity (Ground-Mounted Systems): For ground-mounted systems, inspect the concrete footings or anchors that secure the racking to the ground. Look for cracking, settling, or any signs of instability.
Professional Verification: We strongly recommend having a qualified solar professional conduct a more in-depth assessment of the mounting structure, especially for complex systems or after major weather events. They have the expertise and equipment to identify subtle issues that might be missed by a homeowner.
6. DC Disconnect Switch Testing: A Critical Safety Step
The DC disconnect switch is your system's emergency shut-off - a critical safety device that allows you to quickly and safely de-energize the solar panel array in case of an emergency, maintenance, or repairs. Think of it as the main power switch for your solar system.
Why is testing this switch so important? Years of exposure to the elements can cause corrosion or mechanical failure, preventing the switch from properly disconnecting power. A faulty disconnect switch creates a significant safety hazard, potentially exposing yourself or others to dangerous electrical voltage.
Here's how to perform a simple test (always consult your system's manual for specific instructions):
- Locate the Switch: It's usually mounted near the inverter or the point where the DC wiring enters your home.
- Visually Inspect: Look for signs of corrosion, damage, or unusual buildup.
- Operate the Switch: Move the switch from the ON to the OFF position, and back again. It should move freely and smoothly.
- Verify Disconnection: Using a multimeter (if you're comfortable and have the appropriate training), confirm that the voltage drops to zero when the switch is in the OFF position. If you're not comfortable using a multimeter, skip this step and consider hiring a qualified electrician to verify the disconnection.
Important Note: This is a basic test. A qualified electrician should periodically (e.g., every 5 years) perform a more thorough inspection of the disconnect switch and its associated wiring. Don't neglect this crucial safety component!
7. Grounding System Verification: Protecting Against Electrical Hazards
A robust grounding system is the unsung hero of your solar panel setup, silently working to protect your home and family from electrical hazards. It provides a safe path for stray electrical currents to flow to the earth, preventing dangerous voltage buildup that could lead to shocks, fires, or damage to your equipment.
During your annual inspection, carefully examine all grounding wires and connections. Look for signs of corrosion, looseness, or physical damage. Corrosion often appears as a white or greenish buildup on the metal surfaces. Loose connections can be identified by wiggling the wires - they should be firmly attached. Any signs of damage, like frayed wires or broken connections, must be addressed immediately.
It's highly recommended to have a qualified electrician perform a thorough grounding system verification at least every few years. They possess the specialized equipment and expertise to test the system's integrity and ensure it meets safety standards. Don't underestimate the importance of this often-overlooked component - a faulty grounding system can pose a serious risk. Remember, safety always comes first.
8. Vegetation Management: Preventing Shading and Damage
Overhanging branches, climbing vines, and even tall grasses can significantly impact your solar panel system's efficiency. Shade cast upon even a portion of your panels can dramatically reduce their power output - remember, panels are often wired in series, so shading one panel can affect the performance of the entire string. Beyond efficiency, vegetation can also cause physical damage. Falling leaves and debris can scratch the panel surfaces, and unchecked growth can put stress on the mounting structure, potentially loosening connections or causing damage.
Regularly inspect the area around your panels, trimming back any vegetation that encroaches on their space. A general rule of thumb is to maintain a clear zone of at least 6-10 feet around the panels. Consider the mature size of plants when making landscaping decisions - what might seem small now could become a significant shading problem in a few years. Don't forget to clear any fallen leaves and debris that accumulate around the base of the panels, as this can trap moisture and promote corrosion. A little preventative care goes a long way in protecting your investment and maximizing energy production.
9. Performance Monitoring: Identifying Potential Issues
Performance monitoring is arguably the most proactive step in maintaining your solar panel system. It's not enough to just check things occasionally; you need to actively watch your system's output and compare it to expectations. Here's how to identify potential problems:
Regular Review is Key: Set aside a few minutes each month to review your system's production data. Many modern solar inverters come equipped with built-in monitoring apps or web portals that display real-time and historical performance. These apps often provide graphs and charts that make it easy to spot anomalies.
What to Look For:
- Sudden Drops in Production: A significant decrease in energy generation - even a few percentage points - can be a sign of trouble. This could be caused by shading, panel degradation, inverter issues, or wiring problems.
- Unexpected Fluctuations: While solar production naturally varies with weather conditions, unusually erratic output suggests something might be amiss.
- Lower Than Expected Output: Compare your current production to your historical data and to the predicted output based on your system's size and location. Websites and apps often provide tools to estimate production.
- Inverter Error Codes: Pay close attention to any error messages displayed on your inverter's screen or within its monitoring app. Consult the inverter's manual for troubleshooting guidance.
- Unusual Weather Impacts: Consider whether observed production changes are consistent with actual weather conditions. If your system's output is significantly lower than expected on a sunny day, investigate further.
Record Keeping: Document any performance deviations you notice, along with the date, weather conditions, and any actions taken. This record can be invaluable when troubleshooting issues or communicating with a solar professional. Early detection often means simpler and less expensive repairs, maximizing your solar investment's long-term value.
10. Documentation: Keeping a Record of Your Maintenance
Keeping thorough records of your solar panel maintenance is arguably as important as the maintenance itself. Think of it as a health journal for your energy system. Why? Several reasons!
First, it creates a valuable history of your system's upkeep. This is incredibly helpful if you ever need to file a warranty claim. Manufacturers often require proof of regular maintenance to honor their guarantees. Having a detailed log showing what you've done, when, and any issues found, strengthens your claim considerably.
Second, documentation helps you identify trends. By tracking performance data alongside maintenance actions, you can spot patterns. Perhaps you notice a consistent drop in production after panel cleaning - this could indicate a need for a deeper investigation.
Third, it simplifies future maintenance. No need to rack your brain trying to remember when you last cleaned the panels or inspected the wiring. A well-organized record provides a clear timeline.
What should you document? Include:
- Date of inspection/maintenance: Obvious, but essential!
- Description of work performed: Be specific - Cleaned panels with mild soap and water, not just Cleaned panels.
- Findings: Note any issues observed, even if seemingly minor.
- Actions taken: Record any repairs or adjustments made.
- Performance data: Log inverter output, production numbers, and any unusual readings.
- Contact information: Keep a list of your installer, electrician, and other relevant contacts.
A simple spreadsheet, a dedicated notebook, or even a cloud-based document - the format doesn't matter as much as the consistency. Make it a habit, and your solar investment will thank you.
When to Call a Professional: Knowing Your Limits
While many homeowners are comfortable performing basic visual inspections and panel cleaning, certain maintenance tasks demand the expertise of a qualified solar professional. Attempting these yourself could lead to damage, injury, or voided warranties. Here's a breakdown of when it's best to call in the pros:
1. Any Electrical Work: This includes inspecting wiring, connections, the DC disconnect switch, and inverter components. Electrical systems are inherently dangerous, and improper handling can result in shocks, fires, or system damage. Leave all electrical work to licensed and experienced professionals.
2. Significant Damage or Concerns: If you notice cracks in panels, signs of delamination (layers separating), a sagging mounting structure, or any other significant physical damage, don't attempt to repair it yourself. These issues often indicate deeper problems requiring specialized tools and knowledge.
3. Inverter Troubleshooting & Repair: Inverters are complex pieces of equipment. If you're seeing persistent error codes, unusual readings, or suspect a faulty inverter, a professional diagnosis and repair is essential. Incorrect repairs can lead to inverter failure and potentially damage your entire solar system.
4. Roof Work & Safety: Accessing and working on your roof can be hazardous. If you're uncomfortable with heights or lack the necessary safety equipment, hire a professional for any roof-related maintenance, including panel cleaning or inspections.
5. Grounding System Verification: A faulty grounding system poses a significant fire risk. Have a qualified electrician periodically verify the integrity of your grounding system.
6. Performance Issues You Can't Explain: If your system's energy production is significantly lower than expected and you're unable to identify the cause through basic troubleshooting, a professional assessment is needed to pinpoint the issue and implement a solution.
Remember, your solar investment represents a significant commitment. Protecting that investment and ensuring your safety is paramount. When in doubt, always err on the side of caution and consult a qualified solar professional.
Solar Panel Maintenance Frequency Guide
Knowing when to perform maintenance is just as important as knowing what to do. Here's a breakdown of recommended frequencies for each task, keeping in mind that these can vary based on your location's climate, environment, and the specifics of your solar system.
Daily/Weekly (Visual Checks - Quick & Easy)
- Visual Scan: A quick glance at your panels from the ground (if possible) to identify any obvious issues like large debris accumulation or unusual shadows. This is more of a habit than a formal task.
Monthly
- Visual Inspection: A more thorough visual check, looking for cracks, discoloration, or physical damage. Use binoculars for hard-to-reach panels. This can be done from the ground or roof.
Quarterly (Every 3 Months)
- Inverter Performance Review: Check your inverter display for error codes and monitor overall energy production. Compare current output to historical data and expected levels.
- Vegetation Assessment: Briefly check for any new overgrowth near or shading the panels.
Annually (Every 12 Months)
- Panel Cleaning: This is a key maintenance task. Frequency depends on your local environment. Dusty or heavily polluted areas may require more frequent cleaning.
- Wiring & Connection Inspection: A thorough inspection of all wiring and electrical connections. This is often best left to a qualified professional.
- Mounting Structure Check: Inspect the racking system for signs of corrosion, looseness, or damage. Tighten any necessary bolts.
- DC Disconnect Switch Test: Ensure the DC disconnect switch is functioning correctly.
- Grounding System Inspection: Check the grounding wires and connections. Professional inspection recommended.
Every 2-5 Years (Consider Professional Inspection)
- Comprehensive System Assessment: A complete review of the system's performance and condition by a certified solar technician. This can identify potential issues before they escalate.
- Inverter Health Check: Detailed analysis of inverter functionality and efficiency.
Important Note: These are general guidelines. Severe weather events (hail, storms) may necessitate more frequent inspections. Always refer to your solar panel system's warranty documentation for specific maintenance requirements.
Resources & Links
- EnergySage : A comprehensive resource for solar panel information, including system cost, installation, and maintenance tips. Provides independent reviews and comparisons of solar installers.
- Solar Reviews : User reviews and ratings of solar installers and equipment. Useful for understanding real-world experiences and assessing installer reputation.
- National Renewable Energy Laboratory (NREL) : A U.S. Department of Energy laboratory focusing on renewable energy research and development. Offers technical data, reports, and resources related to solar panel performance and longevity.
- Solar Energy Industries Association (SEIA) : A leading national trade association for the solar energy industry. Provides information on solar policy, incentives, and industry best practices. Offers a directory of solar installers.
- Environmental Protection Agency (EPA) : While not solely focused on solar, the EPA provides information on environmental considerations related to solar panel disposal and recycling. Important for end-of-life panel management.
- Consumer Energy Choices : A resource for understanding solar energy policy and incentives at the state and local level, which can influence maintenance and system optimization strategies.
- Solar Panel Supply : Supplier of solar panels and components. Their website may have educational material on system components, safety and maintenance.
- IQ Energy Group : Residential solar installer with informational articles about solar energy, including maintenance best practices and troubleshooting guides.
- Tesla : A major player in the solar market. Their website provides insights into solar technology and offers maintenance-related information for Tesla solar systems (though applicable principles apply to others too).
- SunPower : A leading solar panel manufacturer and installer. Offers resources about solar panel maintenance, efficiency, and troubleshooting.
Frequently Asked Questions
What is the purpose of this solar panel maintenance checklist?
This checklist provides a comprehensive guide to help you keep your solar panel system operating efficiently and maximize its lifespan. Regular maintenance prevents issues, optimizes energy production, and helps you identify potential problems early on.
Who is this checklist for?
This checklist is designed for homeowners with solar panel systems, installers, and anyone responsible for maintaining a solar energy system. It's adaptable to different system sizes and complexities.
How often should I use this checklist?
We recommend reviewing and completing the checklist at least twice a year - once in the spring and once in the fall. More frequent checks may be needed based on your location and environmental factors (e.g., areas with heavy snow, dust, or pollen).
What basic tools do I need to complete this checklist?
You'll likely need a garden hose, soft cloths, mild soap or solar panel cleaner, safety glasses, gloves, a ladder (used safely and according to manufacturer instructions), and possibly a voltage meter (for more advanced checks - consult a professional if unsure).
Can I clean my solar panels myself, or should I hire a professional?
Cleaning your solar panels yourself is generally safe if done carefully and following safety precautions. However, if you're uncomfortable working at heights or unsure about any part of the process, hiring a professional solar panel cleaning service is recommended.
What are the risks of not maintaining my solar panels?
Neglecting maintenance can lead to reduced energy production, increased system inefficiency, potential damage to components, voided warranties, and even safety hazards.
What does 'shading analysis' refer to?
Shading analysis involves assessing how shadows from trees, buildings, or other objects affect your solar panels' ability to capture sunlight. It's crucial to minimize shading to maximize energy output. The checklist provides guidance on how to identify and address shading issues.
My panels are producing less energy than expected. What should I do?
The checklist includes troubleshooting steps to help you identify potential causes for reduced output. If you can't pinpoint the issue, consult a qualified solar professional for assistance.
Where can I find specific product manuals or warranty information?
Your solar panel system's documentation should provide details about specific cleaning recommendations and warranty coverage. Refer to these documents for detailed instructions and contact information.
Are there any environmental considerations when cleaning my solar panels?
Yes! Use environmentally friendly cleaning products, avoid harsh chemicals, and be mindful of water runoff to prevent pollution.
Found this Article helpful?
Maintenance Management Solution Demo
Maximize equipment uptime & reduce costs! ChecklistGuro streamlines maintenance scheduling, work order management, & asset tracking. Prevent breakdowns, optimize performance, & extend equipment life. Manage it all with our Work OS.
Related Articles
Construction Equipment Maintenance Checklist Template
Paper vs ChecklistGuro in Facility Management
The Ultimate O&M Manual Checklist Template
Excel vs ChecklistGuro in Facility Management
Excel vs ChecklistGuro in Maintenance Management
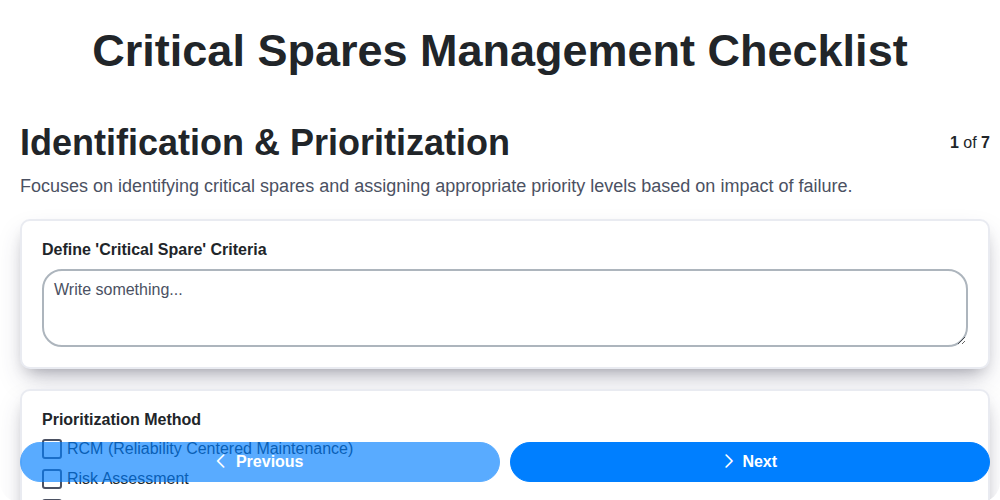
Your Ultimate Guide to Critical Spares Management: A Checklist Template
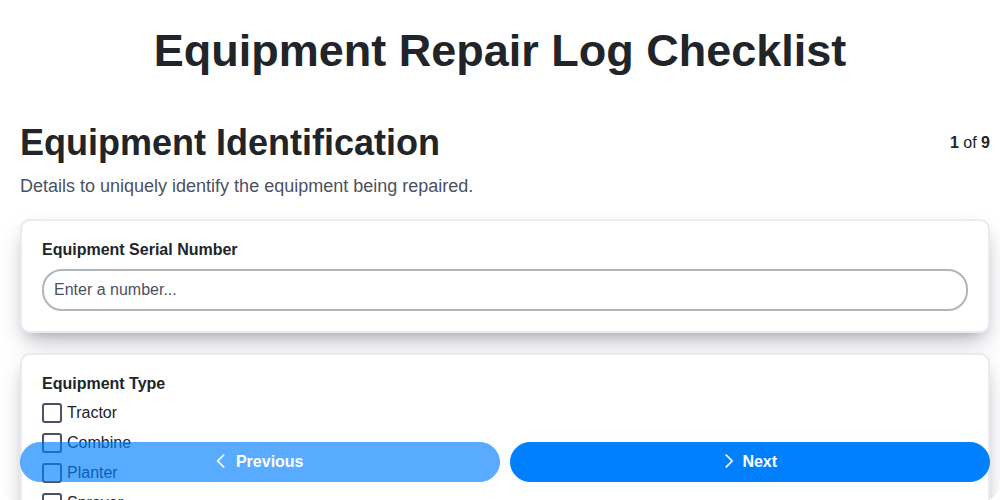
Equipment Repair Log Template: Your Guide to Organized Maintenance
Paper vs ChecklistGuro in Maintenance Management
We can do it Together
Need help with
Maintenance Management?
Have a question? We're here to help. Please submit your inquiry, and we'll respond promptly.