Tractor Oil Level Check: Your Simple Maintenance Checklist
Published: 09/02/2025 Updated: 12/13/2025
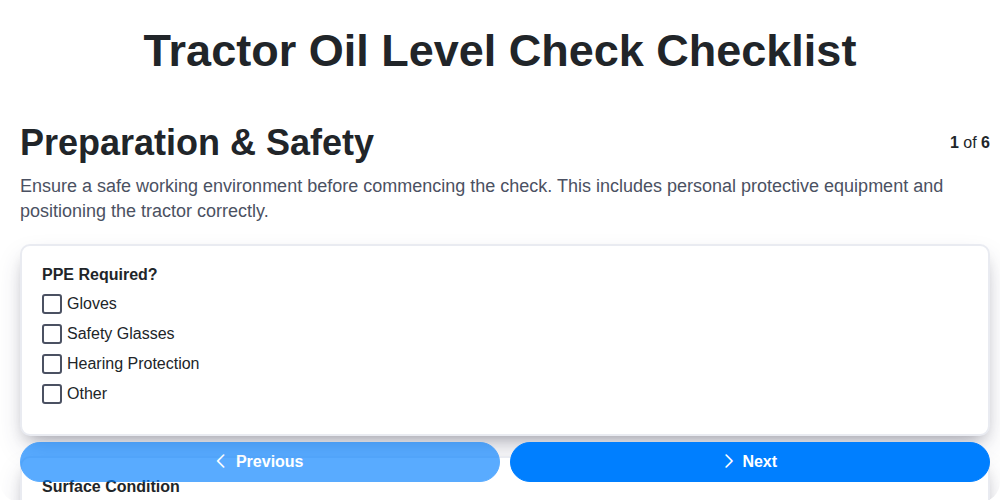
Table of Contents
- Why is Checking Your Oil So Important?
- Gather Your Supplies & Safety First
- Locating the Dipstick: A Quick Guide
- The Step-by-Step Oil Level Check
- Understanding Your Oil Level Reading
- Adding Oil: When and How
- Troubleshooting Low Oil: Potential Causes
- Preventative Maintenance: Keeping Your Tractor Healthy
- Documentation: Tracking Your Oil Checks
- Common Mistakes to Avoid
- Resources: Your Tractor's Owner's Manual
- Conclusion: Your Simple Maintenance Checklist
- Resources & Links
TLDR: This checklist guides you through safely and accurately checking your tractor's oil level - a crucial step for preventing engine damage and keeping your equipment running smoothly. Follow the step-by-step instructions, prioritize safety, and consult your owner's manual for specific details related to your tractor model.
Why is Checking Your Oil So Important?
Engine oil does far more than simply lubricate moving parts; it's the lifeblood of your tractor's engine. Think of it as a multi-tasking superhero, diligently working to keep everything running smoothly. Beyond reducing friction between critical engine components, preventing premature wear and tear, oil plays a vital role in cooling the engine and removing harmful deposits and contaminants. It also creates a protective barrier against corrosion, safeguarding your tractor's internal workings from rust and damage. Neglecting your oil level isn't just a minor oversight; it's a gamble that can lead to costly repairs, downtime, and potential engine failure - a risk simply not worth taking. Regular checks are a small investment that yields significant long-term benefits.
Gather Your Supplies & Safety First
Before you even think about pulling that dipstick, let's set yourself up for success and, most importantly, safety. This isn't just about grabbing a rag; it's about ensuring a smooth and secure process. You're going to need:
- Your Tractor's Owner's Manual: Seriously, don't skip this. It's the bible for your specific model, outlining the correct oil type, dipstick location, and any unique considerations.
- A Clean Rag or Paper Towels: Essential for wiping the dipstick and cleaning up any spills.
- The Correct Type of Oil: Refer to your owner's manual for the precise oil specification (viscosity and API rating). Having the right oil on hand avoids a trip to the store mid-check.
- Gloves: Protect your hands from grease and potential irritants. Nitrile gloves are a good choice.
- Safety Glasses (Optional but Recommended): To shield your eyes from splashes.
- A Level Surface: Park your tractor on a flat, level area for an accurate reading.
And most importantly: Take a moment to assess your surroundings. Ensure the area is well-lit and free of obstacles. Engage the parking brake and allow the engine to cool down completely - a hot engine can cause burns! Safety first - always.
Locating the Dipstick: A Quick Guide
Finding the dipstick might seem straightforward, but its exact location can vary slightly depending on your tractor model. Generally, it's a brightly colored (often yellow or orange) handle protruding from the engine block. Consult your owner's manual - it's your best resource for pinpointing its precise location. If you're having trouble, look for a cylindrical tube extending upwards; the dipstick will pull out of this. Be aware that some tractors might have the dipstick positioned in a less obvious spot, so a thorough visual inspection is always a good idea.
The Step-by-Step Oil Level Check
Let's break down the actual oil level check into manageable steps. First, locate the dipstick - usually brightly colored and near the engine block - and wipe it clean with a rag. Now, fully insert the dipstick back into its tube, ensuring a proper seal. Pull it out again and carefully examine the oil level marking. Ideally, the oil should sit comfortably between the "minimum" and "maximum" (or low and full) marks on the dipstick. If the level is consistently below the minimum, add oil in small increments, rechecking after each addition. Conversely, never overfill-it's just as detrimental as running low. Always refer to your owner's manual for the correct oil type and quantity.
Understanding Your Oil Level Reading
The markings on your dipstick aren't arbitrary; they provide a crucial window into your engine's health. Typically, you're looking for a range - a minimum and a maximum or low and full mark. The ideal oil level sits comfortably between these two points. Think of it like a Goldilocks zone: too low, and your engine components don't have enough lubrication, leading to increased friction and potential damage. Too high, and you risk overpressure and potential leaks.
Understanding the subtleties is also key. Sometimes, you might see markings described as hot and cold. These refer to oil level readings taken with a warm versus a cool engine. A warm engine can cause the oil to expand, potentially skewing the reading if you're not careful. Your owner's manual will specify which reading to prioritize and when to take it. Finally, pay attention to the color of the oil on the dipstick. While a slight tint is normal, excessively dark or foamy oil can indicate underlying problems that warrant further investigation.
Adding Oil: When and How
Knowing when to add oil is just as important as knowing how. You're likely to need to top up your oil between full changes if you notice your oil level consistently hovering just below the minimum mark on the dipstick, or if it drops noticeably after a few operating hours. Frequent top-ups can also signal an underlying issue, like a minor leak or oil burning, so pay close attention and investigate if topping up becomes a habit.
The How-To:
- Gather Your Supplies: You'll need the correct type and weight of oil, as specified in your tractor's owner's manual. A funnel can be extremely helpful to prevent spills.
- Locate the Oil Fill Cap: This is usually marked with an oil can symbol.
- Carefully Add Oil: Using the funnel, add oil in small increments-typically no more than ¼ quart at a time. Adding too much at once can lead to overfilling and engine damage.
- Check the Level: After each addition, wait a few minutes for the oil to settle, then recheck the oil level using the dipstick method described earlier.
- Repeat Until Correct: Continue adding oil in small increments and checking the level until the oil reaches the "full" mark on the dipstick.
- Clean Up: Thoroughly wipe up any spilled oil.
Troubleshooting Low Oil: Potential Causes
Discovering that your tractor's oil level is consistently low warrants more than just a quick top-up. It signals a potential underlying problem that needs addressing to prevent serious engine damage. Here's a breakdown of common causes for low oil, ranging from minor to more complex:
1. Leaks - The Most Common Culprit:
- Valve Cover Gasket Leak: A deteriorated gasket can allow oil to seep out, particularly noticeable after the engine has been running.
- Oil Pan Gasket Leak: Similar to the valve cover, a leaky oil pan gasket allows oil to drip.
- Front or Rear Crankshaft Seal Leak: These seals prevent oil from escaping where the crankshaft exits the engine block. Leakage here often leaves noticeable oil trails.
- Power Steering Pump Leak: While not directly engine oil, a leaking power steering pump can sometimes be mistaken for engine oil loss.
- Filter Issues: A loose or poorly seated oil filter can also cause leaks.
2. Oil Consumption - Burning or Exiting the Engine:
- Worn Piston Rings: As engines age, piston rings can wear down, allowing oil to enter the combustion chamber and burn with the fuel. This is often accompanied by blue smoke from the exhaust.
- Worn Valve Stem Seals: These seals prevent oil from leaking down the valve stems. Deteriorated seals lead to oil burning and reduced oil levels.
- Turbocharger Issues: If your tractor is equipped with a turbocharger, leaks or failures within the turbo can consume significant amounts of oil.
3. Other Potential Causes:
- Incorrect Oil Type: Using a lower-quality oil or an oil with incorrect viscosity can increase consumption.
- Short Trip Driving: Frequent short trips may not allow the engine to reach optimal operating temperature, potentially leading to increased oil consumption.
- PCV Valve Malfunction: A faulty Positive Crankcase Ventilation (PCV) valve can disrupt oil pressure and increase consumption.
To help diagnose the problem, carefully inspect your tractor for signs of leaks and note any unusual noises or exhaust color. If the issue persists or you're unsure of the cause, consult a qualified mechanic for a thorough inspection.
Preventative Maintenance: Keeping Your Tractor Healthy
Regular oil level checks are just the tip of the iceberg when it comes to tractor health. A proactive preventative maintenance schedule is your best defense against costly breakdowns and keeps your machine running efficiently for years to come. This includes tasks like:
- Air Filter Replacement: A clogged air filter restricts airflow, reducing power and fuel efficiency. Check and replace it according to your owner's manual recommendations.
- Hydraulic Fluid Checks: Monitor the level and condition of your hydraulic fluid. Contamination or low levels can affect performance and damage hydraulic components.
- Coolant Levels & Condition: Ensure adequate coolant protection, especially during extreme temperatures. Inspect for leaks and replace as needed.
- Grease Fittings: Regularly lubricate grease fittings to reduce friction and wear on moving parts.
- Belt Inspection: Check belts for cracks, fraying, or looseness and replace them promptly.
- Tire Pressure: Maintain proper tire pressure for optimal traction and fuel efficiency.
- Cleanliness: Keeping your tractor clean not only looks good but also allows you to spot potential issues like leaks and corrosion early on.
By implementing a comprehensive preventative maintenance plan, you're investing in the long-term health and performance of your tractor.
Documentation: Tracking Your Oil Checks
Keeping a detailed record of your oil checks - and all your tractor maintenance - is far more valuable than you might think. It's not just about remembering when you last checked the oil; it's about identifying trends, troubleshooting potential problems, and providing valuable information if you ever need to have your tractor serviced.
Here are a few ways to effectively document your oil checks:
- Dedicated Maintenance Logbook: A physical logbook, either purchased or created yourself, provides a tangible record you can easily access. Include the date, oil level (high/low/ok), any oil added (amount and type), and any observations (e.g., "slight leak noticed," "oil appeared dark").
- Spreadsheet: A digital spreadsheet (like Google Sheets or Microsoft Excel) allows for easy sorting, filtering, and graphing of your maintenance data. You can track multiple tractors in one spreadsheet.
- Mobile Apps: Several tractor maintenance apps are available that allow you to record maintenance tasks, set reminders, and even upload photos.
- Simple Notes: Even a basic notebook or even a note on your phone can serve as a starting point, but be sure to be consistent with your record-keeping.
Why is Documentation So Important?
- Early Problem Detection: Consistent records allow you to spot trends - like a sudden drop in oil level - indicating a potential leak or other issue.
- Warranty Compliance: Proper documentation can be essential if you need to make a warranty claim.
- Resale Value: Detailed maintenance records increase the resale value of your tractor.
- Peace of Mind: Knowing you're on top of your maintenance gives you peace of mind knowing your tractor is in good working order.
Common Mistakes to Avoid
Many tractor owners unknowingly make mistakes during the oil level check that can lead to inaccurate readings or even damage. Here are some of the most frequent errors and how to sidestep them:
- Skipping the Cool-Down Period: Checking hot oil is dangerous (burn risk!) and can give a false reading due to oil expansion. Always wait for the engine to cool completely.
- Ignoring the Owner's Manual: Your manual is the definitive guide! Don't assume you know best - it has specific instructions tailored to your model.
- Not Wiping the Dipstick: Residual oil on the dipstick can skew the reading. Clean it thoroughly each time.
- Incomplete Reinsertion: If the dipstick isn't fully seated, the measurement will be inaccurate. Push it in until you feel it click or seat properly.
- Overfilling the Engine: More isn't always better! Overfilling can cause pressure buildup and damage. Stick to the full mark.
- Ignoring Abnormalities: Blue smoke from the exhaust, unusual noises, or visible leaks aren't normal. Don't ignore them - investigate or seek professional help.
- Using the Wrong Oil: Check the owner's manual. Using the wrong viscosity or type of oil can lead to engine damage.
Resources: Your Tractor's Owner's Manual
Your tractor's owner's manual isn't just a warranty document; it's your primary guide to safe and effective operation and maintenance. Seriously, dig it out! It contains a wealth of information tailored specifically to your tractor model, far beyond what a general blog post can offer.
Inside, you'll find:
- Detailed Oil Specifications: The exact type and viscosity (weight) of oil your tractor requires. Using the wrong oil can cause serious engine damage.
- Dipstick Location: Precise instructions on how to locate the dipstick, which can vary between models.
- Specific Procedures: Step-by-step instructions for oil level checks, tailored to your tractor's design.
- Safety Warnings: Critical safety precautions to observe when working on your tractor.
- Maintenance Schedules: Recommended intervals for oil changes and other essential maintenance tasks.
Don't guess - consult your owner's manual! It's the most reliable source of information for keeping your tractor running smoothly and safely. You can often find digital versions of owner's manuals on the manufacturer's website if you've misplaced the original.
Conclusion: Your Simple Maintenance Checklist
Regularly checking your tractor's oil level is a simple yet vital task that can save you a lot of headaches and expense. This checklist-preparation, dipstick location, level assessment, interpretation, adjustment, and record-keeping-is a small investment of time that pays dividends in engine longevity and reliable performance. Don't delay; incorporate this quick oil level check into your routine maintenance schedule. Your tractor, and your wallet, will thank you for it. Schedule that check today and keep your workhorse running strong!
Resources & Links
- Tractor Supply Co. : A large retailer offering a wide range of tractor parts, fluids, tools, and safety equipment, often needed for oil level checks and general maintenance. Convenient for sourcing necessary supplies.
- Farm & Fleet : Similar to Tractor Supply, Farm & Fleet is another retailer specializing in agricultural supplies, including tractor oils, filters, and tools for maintenance tasks.
- John Deere : The official website for John Deere tractors. Excellent source for genuine parts, owner's manuals (often downloadable as PDFs), and technical information. Use the 'Support' or 'Parts' section.
- Case IH : The official website for Case IH tractors. Similar to John Deere, find owner's manuals, parts catalogs, and technical support information specific to your Case IH tractor model.
- Kubota : The official website for Kubota tractors. Provides information about models, parts, and dealer locations. Check for downloadable owner's manuals and technical data.
- New Holland : Official website for New Holland tractors and agricultural equipment. Provides access to manuals, parts information, and support resources. Locate the 'Support' or 'Parts' section.
- Mahle Filters : A leading manufacturer of oil filters. Their website provides information about filter types and specifications, and can help you identify the correct filter for your tractor.
- Mobil : A well-known lubricant manufacturer. Their site contains information on different oil types and their applications. Use to check the type of oil recommended for your tractor.
- Valvoline : Another major lubricant brand. Provides technical information on oils and lubricants. Helpful in understanding oil specifications and selecting the right product.
- YouTube : A vast video platform. Search for videos demonstrating tractor oil level checks for specific tractor models. (Search terms: 'John Deere oil check', 'Case IH oil level', etc.) Be sure to check the channel's credibility.
- TractorData.com : A resource providing detailed specifications and information on a wide variety of tractor models. Can help identify correct oil type and capacity.
Frequently Asked Questions
Why is checking my tractor oil level important?
Regularly checking your tractor oil level is crucial for engine health. Low oil levels can lead to increased friction, overheating, and ultimately, serious engine damage. It's a simple check that can prevent costly repairs down the line.
How often should I check my tractor oil level?
Ideally, you should check your tractor oil level before each use and at least once a month, especially if you use your tractor frequently or in demanding conditions.
What tools do I need to check the oil level?
You'll need a clean rag or paper towel. Some tractors might have a dipstick, while others require using a sight glass. Refer to your tractor's owner's manual for specific instructions.
What type of oil does my tractor use?
Refer to your tractor's owner's manual for the correct oil type and viscosity. Using the wrong oil can negatively impact engine performance and longevity.
Where can I find my tractor's owner's manual?
Your owner's manual was included with your tractor when it was purchased. If you're missing it, you can often find a digital version on the manufacturer's website or purchase a replacement from a dealership.
Found this Article helpful?
Agriculture Management Solution Demo
Running a farm or agricultural business is complex. ChecklistGuro's Work OS platform simplifies your operations, from crop planning and irrigation management to livestock tracking and harvest scheduling. Increase efficiency, reduce waste, and boost yields! See how ChecklistGuro can revolutionize your agriculture business.
Related Articles

10 Simple Steps to a Healthy Drainage System: Your Checklist Template

Mastering the Daily Crop Scouting Report: Your [Specific Crop] Checklist Template

Irrigation System Checklist: Farm Water Management & Crop Yield Optimization

Unlock Your Garden's Potential: A Soil pH Verification Checklist

PPE Usage Checklist Template: Your Guide to Safety

Water Discharge Permit Compliance Checklist Template

The Ultimate GPS & Precision Farming Calibration Checklist Template

Water Runoff Analysis Checklist Template
We can do it Together
Need help with
Agriculture?
Have a question? We're here to help. Please submit your inquiry, and we'll respond promptly.