UPS Battery Health Checklist Template: A Step-by-Step Guide
Published: 08/24/2025 Updated: 03/24/2026
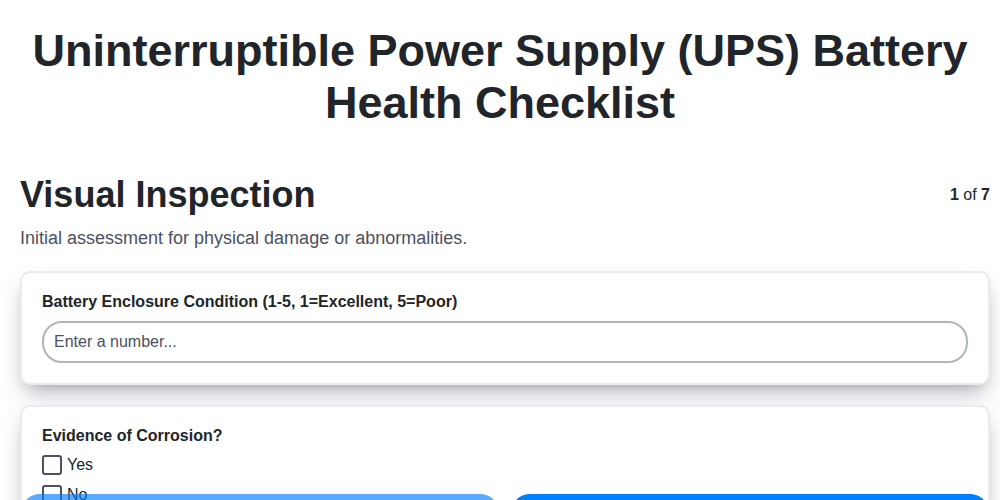
Table of Contents
- Introduction: Why UPS Battery Health Matters
- Understanding UPS Battery Types & Lifespans
- Essential Tools for UPS Battery Health Checks
- Step 1: Visual Inspection - Spotting the Obvious
- Step 2: Measuring Battery Voltage - A Quick Assessment
- Step 3: Evaluating Battery Temperature - Preventing Overheating
- Step 4: Load Bank Testing: The Gold Standard
- Step 5: Interpreting Battery Capacity Test Results
- Step 6: Analyzing UPS System Logs for Battery Warnings
- Step 7: Reviewing Maintenance Records & Schedules
- Step 8: Assessing Environmental Conditions
- Step 9: Examining Connection and Wiring Integrity
- Step 10: Understanding Battery Impedance Testing
- Step 11: Troubleshooting Common Battery Issues
- Step 12: Creating a UPS Battery Maintenance Schedule
- Step 13: Resources and Further Reading
- Conclusion: Proactive Battery Health for Business Continuity
- Resources & Links
TLDR: This checklist template helps you proactively monitor your UPS battery health, preventing unexpected downtime. It guides you through visual inspections, voltage/temperature checks, capacity testing considerations, log analysis, and connection integrity - ensuring your backup power system is always ready when you need it.
Introduction: Why UPS Battery Health Matters
Your Uninterruptible Power Supply (UPS) is your critical lifeline during power interruptions-a safeguard against data loss, equipment damage, and costly downtime. But that lifeline is only as strong as its weakest link: the battery. Often overlooked in the rush of daily operations, UPS battery health directly impacts your ability to ride out outages and maintain business continuity.
Think of it this way: a UPS provides temporary power, but it's the battery that actually delivers that power. A degraded or failing battery can result in a shortened runtime, unexpected shutdowns, or even complete UPS failure when you need it most. Beyond the immediate disruption, neglecting battery health can lead to costly repairs, lost productivity, and damage to reputation. This isn't just about preventing outages; it's about protecting your data, your operations, and your bottom line-making consistent monitoring and proactive maintenance absolutely essential.
Understanding UPS Battery Types & Lifespans
Choosing the right UPS battery and understanding its expected lifespan is crucial for reliable backup power. Here's a breakdown of common battery types and their typical lifespans, recognizing that actual longevity is heavily influenced by usage patterns, operating environment, and maintenance.
1. Lead-Acid Batteries (Flooded & VRLA):
- Flooded Lead-Acid (FLA): Historically common, FLA batteries require regular maintenance, including topping off with distilled water. They generally offer a lower cost per watt-hour but have a shorter lifespan (typically 3-5 years) and require dedicated ventilation.
- Valve Regulated Lead-Acid (VRLA): A significant improvement over FLA, VRLA batteries (including AGM and Gel) are sealed and maintenance-free.
- AGM (Absorbent Glass Mat): AGM batteries offer good performance, are relatively spill-proof, and can be mounted in various orientations. Expect a lifespan of 3-5 years.
- Gel: Gel batteries are even more resistant to vibration and can tolerate deeper discharges. Their lifespan is typically similar to AGM, around 3-5 years.
2. Lithium-Ion (Li-Ion) Batteries:
- Increasingly popular for their high energy density, longer lifespan, and lighter weight. Li-Ion batteries offer a significantly longer lifespan (often 5-10+ years) compared to lead-acid.
- They also boast higher efficiency and require less frequent replacement, leading to lower total cost of ownership despite a higher initial investment.
- However, Li-Ion batteries often require sophisticated battery management systems (BMS) to ensure safe and optimal operation.
Key Factors Influencing Lifespan:
- Depth of Discharge (DoD): Regularly discharging batteries to a deep level (e.g., below 50% state of charge) significantly reduces their lifespan.
- Operating Temperature: High temperatures accelerate battery degradation. Ideal operating temperatures are generally between 20°C and 25°C (68°F and 77°F).
- Load Cycling: Frequent and rapid cycling (repeatedly charging and discharging) can stress batteries and shorten their life.
- Maintenance: Regular cleaning, inspection, and (for FLA batteries) water replenishment are vital for maximizing lifespan.
Essential Tools for UPS Battery Health Checks
Performing the battery health checklist effectively requires having the right tools on hand. While some checks, like visual inspections, are straightforward, others demand more specialized equipment. Here's a breakdown of what you're going to need, categorized by importance and cost:
1. Basic & Affordable (Essential for most checks):
- Multimeter: A digital multimeter is critical for measuring battery voltage and resistance. Look for one with a good accuracy rating and auto-ranging functionality. (Cost: $20 - $100)
- Wire Brush: For cleaning corroded battery terminals. Choose a brass or stainless steel brush to avoid damaging the terminals. (Cost: $5 - $15)
- Baking Soda & Water: A mild cleaning solution for removing corrosion. (Cost: $5)
- Infrared Thermometer (or Touch Thermometer): For quickly assessing battery temperature without contact. (Cost: $20 - $50)
- Flashlight: Essential for clear visibility in battery compartments. (Cost: $5 - $20)
2. Intermediate & Recommended (For more detailed assessments):
- Battery Impedance Tester: Offers a non-destructive way to assess battery internal resistance, which increases with age and degradation. (Cost: $200 - $1000)
- Digital Camera/Smartphone: Documenting battery conditions (corrosion, labels, etc.) is invaluable for tracking changes and diagnosing problems. (Cost: Most people already have one!)
- Voltage Tester with Lead Load: Useful for verifying voltage under different loads.
3. Advanced & Specialized (Typically for professionals):
- Load Bank: A device used to apply a controlled electrical load to the UPS system to test battery capacity under realistic conditions. (Cost: $1000 - $10,000+) Professional services are often a better option for this.
- Battery Capacity Analyzer: A sophisticated instrument that precisely measures battery capacity and provides detailed performance data. (Cost: $1000 - $5000+)
Step 1: Visual Inspection - Spotting the Obvious
A quick visual inspection is your first line of defense against unexpected UPS battery failures. Don't underestimate its importance - many issues are readily apparent with a careful look. Start by examining the battery compartment for any signs of corrosion around the terminals. This often appears as a white or bluish-green powdery substance and indicates a chemical reaction that can damage the battery and connections. Clean corrosion immediately with a wire brush and a solution of baking soda and water (always follow manufacturer's safety guidelines).
Next, carefully inspect the battery cases themselves. Look for any cracks, bulges, or leaks - these are clear indicators of physical damage and warrant immediate replacement of the affected battery. Even minor damage can compromise the battery's ability to hold a charge and can pose a safety hazard. Finally, ensure the entire battery compartment is free from excessive dust and debris, which can contribute to corrosion and overheating. A clean environment promotes better battery health and longevity.
Step 2: Measuring Battery Voltage - A Quick Assessment
Voltage measurement is a simple yet crucial indicator of battery health. Using a multimeter, carefully measure the DC voltage of each individual battery within the UPS battery string. You're aiming for a reading that's close to the manufacturer's specified voltage - typically around 12V for a 12V battery, but always consult your UPS documentation for the correct value.
What to Look For:
- Significant Differences: Pay close attention to any substantial voltage discrepancies between batteries within the string. A difference of even a few tenths of a volt can signal a weakening battery or a connection problem.
- Low Voltage Readings: Consistently low voltage readings across multiple batteries indicate a potential degradation issue requiring further investigation and likely replacement.
- Record Your Findings: Keep a log of your measurements. This historical data allows you to track voltage trends over time and detect subtle changes that might not be immediately apparent. A simple spreadsheet will do.
Important Safety Note: Always exercise caution when working with electrical equipment. Ensure the UPS is properly grounded and follow all safety precautions outlined in your multimeter's manual.
Step 3: Evaluating Battery Temperature - Preventing Overheating
Battery temperature is a critical factor impacting performance and lifespan. Excessive heat accelerates degradation, significantly shortening the usable life of your UPS batteries and potentially triggering premature failure. Understanding how to monitor and manage battery temperature is essential for preventative maintenance.
Why is Temperature So Important?
For every 8°C (14°F) increase in temperature, the battery's lifespan can be halved. This is due to accelerated chemical reactions within the battery cells. High temperatures also increase the risk of gassing, corrosion, and even thermal runaway - a dangerous condition where the battery overheats uncontrollably.
How to Assess Battery Temperature:
- Infrared Thermometer: The easiest and most convenient method is using an infrared (IR) thermometer. Point the thermometer at the top of the battery casing to get a surface temperature reading. Note: Surface temperature might not accurately reflect the core temperature, but it provides a good indicator.
- Touch Thermometer: A simple touch thermometer can also be used, but be cautious and avoid direct contact with potentially corrosive terminals.
- Manufacturer Specifications: Refer to the battery manufacturer's datasheet for the recommended operating temperature range. Typical ranges are between 20°C (68°F) and 35°C (95°F).
What to Do About High Temperatures:
- Improve Ventilation: Ensure the battery compartment is well-ventilated. Consider adding fans or improving airflow.
- Reduce Load: If the batteries are consistently overheating, reduce the load on the UPS.
- Relocate the UPS: If possible, relocate the UPS to a cooler environment.
- Address Ambient Temperature: Control the room temperature. Air conditioning or other cooling methods can help.
It's crucial to regularly monitor battery temperatures and address any concerns promptly to maximize battery life and maintain a reliable backup power solution.
Step 4: Load Bank Testing: The Gold Standard
Load bank testing is widely considered the gold standard for evaluating UPS battery health. Unlike voltage and impedance testing, which offer insights but lack conclusive data on actual capacity, a load bank test directly assesses the battery's ability to deliver power under load. This involves connecting a controlled electrical load - essentially a device that draws power - to the UPS system and measuring how long the battery can sustain the load before the UPS switches to generator power or shuts down.
The test simulates a real-world outage scenario, revealing the battery's true runtime capability. Results are typically expressed in Amp-hours (Ah) or as a percentage of the battery's rated capacity. A significant drop in runtime compared to the battery's specifications is a clear indication of degradation.
Here's what's involved and why it's so valuable:
- Simulates Real-World Conditions: Accurately replicates the power draw of your critical equipment during an outage.
- Provides Quantitative Data: Delivers precise measurements of battery capacity and runtime.
- Identifies Hidden Issues: Can uncover problems that may not be apparent through other testing methods.
- Provides a Baseline for Comparison: Establishing a baseline reading allows for tracking performance over time and predicting future maintenance needs.
Important Considerations:
- Requires Specialized Equipment: Load bank testing necessitates specialized equipment and expertise, making it typically performed by trained professionals.
- Safety Precautions: Strict safety protocols must be followed during load bank testing to prevent equipment damage or personal injury.
- Professional Services: Unless you possess the necessary equipment and expertise, it's highly recommended to engage a qualified UPS service provider for load bank testing.
Step 5: Interpreting Battery Capacity Test Results
The capacity test is arguably the most revealing diagnostic tool for your UPS batteries. But simply running the test isn't enough - understanding the results is crucial. Here's a breakdown of what to look for:
1. Percentage of Rated Capacity:
- The primary metric is the percentage of rated capacity achieved during the test. A 100% result means the battery delivered its full, original power output.
- 90-100%: Excellent condition. Batteries are performing as expected.
- 70-90%: Considered marginal. Batteries are showing signs of aging and should be monitored closely. Plan for replacement within the next 12-18 months, depending on criticality.
- Below 70%: Immediate replacement is highly recommended. Batteries are significantly degraded and pose a high risk of failure during a power outage.
2. Discharge Time:
- Compare the actual discharge time to the expected discharge time based on the battery's rated capacity and the load applied during the test. A shorter discharge time indicates reduced capacity.
3. Voltage Sag:
- Observe the battery voltage during the discharge test. A significant voltage sag, especially early in the discharge cycle, suggests internal resistance has increased, a common sign of aging.
4. Temperature Correlation:
- Note the battery temperature during and after the test. Unusually high temperatures can indicate poor internal connections or excessive internal resistance, contributing to capacity loss.
5. Trend Analysis:
- The most valuable insight comes from tracking capacity test results over time. Even a seemingly minor decrease in capacity from one test to the next can be a warning sign. Create a graph or spreadsheet to visualize the data and identify trends.
Remember to always consult the battery manufacturer's specifications for specific performance benchmarks and acceptance criteria.
Step 6: Analyzing UPS System Logs for Battery Warnings
UPS systems are surprisingly verbose, and their logs are a goldmine of information about battery health - if you know how to interpret them. Don't assume everything is fine just because the UPS seems to be working. Proactive log analysis can identify subtle issues before they escalate into full-blown outages.
Here's what to look for:
- Low Battery Voltage Alerts: These are the most obvious warning signs. Frequent or persistent low battery voltage messages indicate a battery that's struggling to maintain its charge.
- Overload Warnings: While typically related to power consumption, repeated overload warnings can stress the batteries and shorten their lifespan. Investigate and address any consistently high load levels.
- Battery Fault or Error Codes: UPS systems often use specific error codes to identify battery problems. Consult your UPS manufacturer's documentation to understand the meaning of these codes and recommended actions.
- Self-Test Failures: If the UPS's self-test regularly fails, it's a strong indication of a battery issue. Self-tests simulate a power outage to verify the UPS's ability to switch to battery power - a failed test means the battery isn't performing as expected.
- Abnormal Runtime: Keep an eye on the UPS's reported runtime under load. A noticeable decrease in runtime, especially compared to previous measurements, signals battery degradation.
- Temperature Excursions: Some UPS systems log battery temperature. Frequent temperature spikes or consistent operation above the recommended temperature range are concerning.
Regularly reviewing these logs, even a quick scan once a week, can provide valuable insights into the health of your UPS battery and help you avoid costly downtime. Don't let the silence of a functioning UPS lull you into complacency-dive into the data!
Step 7: Reviewing Maintenance Records & Schedules
Consistent, documented maintenance is the backbone of a reliable UPS system. Don't rely solely on reactive troubleshooting; a proactive approach prevents issues before they impact your operations. Here's what to look for when reviewing those crucial records:
- Replacement Dates: Verify the age of your batteries against the manufacturer's recommended replacement schedule (typically 3-5 years, but this can vary significantly based on application and usage). A battery nearing its end of life is a prime candidate for preventative replacement.
- Past Service Reports: Scan service reports for recurring issues or patterns. Do you see consistent entries regarding battery voltage imbalances, high internal resistance, or frequent load transfers? These signals can indicate early signs of battery degradation, even if the system currently appears functional.
- Testing Results: Load bank testing or impedance testing results should be readily available and compared against baseline readings. Any significant deviation from these baselines warrants further investigation.
- Scheduled Preventative Maintenance (SPM) Tasks: Confirm that all scheduled SPM tasks, such as terminal cleaning, connection tightening, and visual inspections, have been completed on time.
- Contractor Documentation: If you utilize a third-party contractor for UPS maintenance, ensure that all maintenance activities are properly documented and readily accessible. Review their reports for any recommendations or concerns.
- Record Keeping System: Evaluate the current record-keeping system. Is it organized, easily accessible, and comprehensive? A well-structured system is essential for effective maintenance tracking.
Step 8: Assessing Environmental Conditions
UPS batteries are sensitive to their surroundings. Extreme temperatures, high humidity, and inadequate ventilation can significantly reduce battery lifespan and impact performance. Here's what to look for and how to mitigate potential issues:
Temperature Control: Ideally, UPS battery rooms should be climate-controlled, maintaining a consistent temperature between 15°C (59°F) and 25°C (77°F). High temperatures accelerate battery degradation, shortening their operational life. Conversely, excessively cold temperatures can reduce battery capacity. Regularly monitor the room temperature and implement measures like ventilation or air conditioning to keep it within the recommended range.
Humidity Management: High humidity promotes corrosion on battery terminals and connections. Aim for a relative humidity level between 45% and 75%. If humidity is consistently high, consider using dehumidifiers to lower it.
Ventilation: Proper ventilation is crucial to remove heat generated by the batteries and prevent the buildup of harmful gases released during charging and discharging. Ensure adequate airflow around the battery array and consider installing exhaust fans if necessary. Avoid obstructions that restrict airflow. Dust and debris accumulation can also hinder ventilation, so regular cleaning is essential.
Gas Monitoring (For Large Installations): In larger installations, consider installing gas detectors to monitor for the presence of hydrogen gas, which can be released during battery charging. This is a safety precaution to prevent potential hazards.
By carefully managing the environmental conditions surrounding your UPS batteries, you can maximize their lifespan and ensure reliable backup power when you need it most.
Step 9: Examining Connection and Wiring Integrity
Loose or corroded connections are surprisingly common culprits behind UPS battery failures. They create resistance, reducing efficiency and potentially leading to system instability and unexpected shutdowns. This step focuses on visually and electrically verifying the integrity of your battery connections and wiring.
Visual Inspection:
Begin with a thorough visual inspection of all battery terminals, cable connections, and wiring harnesses. Look for signs of corrosion (a white or bluish-green powdery substance), discoloration, or damage. Even a small amount of corrosion can significantly impede current flow. Tighten any loose connections you find. If corrosion is present, carefully clean the terminals with a wire brush and a solution of baking soda and water (follow manufacturer's guidelines for cleaning solutions - never use harsh chemicals).
Electrical Testing:
Beyond the visual check, use a multimeter to perform a resistance test on the battery cables. A low resistance reading (ideally close to zero ohms) indicates good connectivity. Higher resistance values suggest corrosion, loose connections, or damaged wiring that requires immediate attention. Check the resistance between the battery terminals and the UPS connection points as well. Finally, inspect the wiring itself for any signs of cracking, fraying, or physical damage, especially where it bends or passes through tight spaces. Replace any damaged wiring to prevent future problems. Remember to always disconnect the UPS from the mains power before conducting any electrical tests.
Step 10: Understanding Battery Impedance Testing
While load bank testing provides the most accurate assessment of battery capacity, impedance testing offers a valuable interim measure and a faster diagnostic tool. Impedance, in simple terms, refers to a battery's internal resistance to electrical current. A brand-new battery exhibits a low impedance. As a battery ages and degrades, its internal resistance increases. This rise in impedance isn't always directly correlated with a drop in capacity, but it's a strong indicator of deteriorating battery health and impending failure.
How Impedance Testing Works:
Impedance testing utilizes a specialized instrument that applies a small, controlled current to the battery and measures the resulting voltage drop. This data is then used to calculate the battery's impedance value. The higher the impedance reading, the greater the internal resistance and the more likely the battery is nearing the end of its useful life.
What to Look For:
- Baseline Readings: Establishing baseline impedance readings when the batteries are new is crucial for comparison.
- Trending: Monitor impedance readings over time. A steady increase in impedance signifies degradation.
- Comparison: Compare impedance readings between individual batteries within a string. Significant differences suggest a weaker battery that may be contributing to overall system performance issues.
- Manufacturer Specifications: Consult the battery manufacturer's documentation for recommended impedance limits. Exceeding these limits typically warrants further investigation or battery replacement.
Important Considerations:
- Impedance testing is a diagnostic tool, not a capacity test. While it indicates potential issues, it doesn't definitively measure remaining capacity.
- The accuracy of impedance testing depends on the quality of the test equipment and the skill of the technician performing the test.
Step 11: Troubleshooting Common Battery Issues
Even with diligent maintenance, occasional hiccups can arise. Here's a rundown of frequent battery problems and potential solutions:
1. Rapid Battery Discharge:
- Possible Cause: Excessive load on the UPS, sulfation (a buildup of lead sulfate crystals), or a short circuit.
- Troubleshooting: Reduce the load on the UPS. If sulfation is suspected (often indicated by decreased runtime), consider a desulfation process (though results vary). Inspect wiring for shorts.
2. Low Battery Voltage:
- Possible Cause: Aging batteries, insufficient charging, or a faulty charger.
- Troubleshooting: Verify charger output voltage. Check battery cell voltages - significant imbalances indicate a failing cell. Replace batteries nearing end-of-life.
3. Overheating:
- Possible Cause: Poor ventilation, excessive load, or faulty batteries.
- Troubleshooting: Improve ventilation around the batteries. Reduce the load on the UPS. Inspect batteries for physical damage or swelling.
4. UPS Displaying "Battery Fault" or Similar Error:
- Possible Cause: A wide range of issues, including faulty batteries, charger problems, or wiring errors.
- Troubleshooting: Consult the UPS manufacturer's troubleshooting guide for specific error codes. Systematically check battery connections, voltage levels, and charger output.
5. Decreased Runtime:
- Possible Cause: Battery degradation, increased load, or charger inefficiency.
- Troubleshooting: Test battery capacity (load bank testing). Reduce load. Verify charger functionality.
Important Note: Never attempt to repair individual battery cells. Always replace the entire battery string. If you're uncomfortable troubleshooting these issues, contact a qualified UPS technician.
Step 12: Creating a UPS Battery Maintenance Schedule
A one-off inspection isn't enough to guarantee reliable UPS battery performance. Creating and adhering to a regular maintenance schedule is critical for maximizing battery lifespan and preventing unexpected downtime. This schedule shouldn't be arbitrary; it should be based on manufacturer recommendations, usage patterns, and the criticality of the equipment being protected.
Here's a framework for developing your UPS battery maintenance schedule:
- Daily/Weekly Visual Checks: Assign someone (or rotate responsibilities) to perform quick visual inspections for corrosion, leaks, and physical damage. Log these observations.
- Monthly Voltage & Temperature Monitoring: Regularly measure and record battery voltage and temperature. Establish baseline readings and track any deviations.
- Quarterly Connection Checks: Tighten connections, inspect wiring, and ensure proper ventilation.
- Annual Load Bank Testing (or Impedance Testing): This is the gold standard for capacity assessment. Schedule this proactively and document results.
- Battery Replacement: Adhere to manufacturer's recommended replacement intervals (typically 3-5 years). Don't wait for failure-proactive replacement is far less disruptive.
- Review and Adjust: At least annually, review your maintenance schedule and adjust it based on the results of inspections, testing, and usage patterns. Factors like increased load or environmental changes might warrant more frequent testing.
- Documentation: Maintain meticulous records of all maintenance activities, test results, and any corrective actions taken. This documentation is invaluable for troubleshooting and planning future maintenance.
Implementing this disciplined approach to UPS battery maintenance demonstrates a commitment to business continuity and minimizes the risk of costly interruptions.
Step 13: Resources and Further Reading
Keeping your UPS battery healthy requires ongoing effort and access to reliable information. Here's a curated list of resources to deepen your understanding and guide your maintenance practices:
- UPS Manufacturer Websites: The primary source for your UPS's specific requirements. Consult the documentation for your exact model. (e.g., APC, Eaton, Tripp Lite, Vertiv)
- Eaton's Battery Health Guide: https://www.eaton.com/us/en-us/products/power-quality/battery-health-guide.html - A comprehensive guide covering battery types, testing methods, and maintenance best practices.
- APC's Battery Replacement Guide: https://www.apc.com/gb/fa/battery-replacement-guide/ - Step-by-step instructions and essential information about UPS battery replacement.
- The Uptime Institute's Tier Standards: https://www.uptimeinstitute.com/tiers/ - Understand the importance of reliable power infrastructure and its impact on business continuity.
- Electrical Power Quality Association (EPQA): https://epqa.org/ - A professional association offering resources and training on power quality, including battery maintenance.
- Industry Forums & Communities: Engage with other professionals in online forums and communities dedicated to data centers and power management. These can be valuable sources of practical advice and troubleshooting tips.
Conclusion: Proactive Battery Health for Business Continuity
Ignoring your UPS battery's health is a gamble you simply can't afford to take. Downtime isn't just about lost productivity; it's about damaged reputation, potential financial losses, and compromised data security. The steps outlined in this checklist - from a simple visual inspection to comprehensive capacity testing - represent a small investment of time and resources that yields significant returns in the form of increased reliability and peace of mind.
Remember, a UPS is only as good as its weakest link, and that's often the battery. By implementing a proactive battery health program and regularly performing the checks we're detailed, you're not just maintaining a piece of equipment; you're safeguarding your business continuity. Don't wait for the lights to go out-take action today to protect your operations and ensure your business remains resilient.
Resources & Links
- UPS (Official Website) : The official UPS website provides product information, technical specifications, and support resources for UPS systems, including battery information and documentation. Crucial for understanding specific UPS models you're working with.
- Exeltech : Exeltech is a leading provider of UPS batteries and related services. Their website features technical articles, battery testing guides, and product specifications - a good source for understanding battery technology and maintenance.
- Vertiv : Vertiv offers a broad range of power solutions, including UPS systems and batteries. Their website provides resources on power management, including battery health and maintenance best practices.
- Eaton : Eaton is another major player in power management. Their website offers technical documentation, white papers, and solutions for UPS battery maintenance and monitoring.
- FLIR (Thermal Cameras) : Step 3 discusses battery temperature. FLIR is a leading manufacturer of thermal imaging cameras. Their website provides information about thermal imaging technology and suitable cameras for identifying battery overheating issues.
- Brookbank Engineering : Brookbank specializes in load bank testing equipment. Their website details load bank solutions for testing UPS systems and battery capacity. Useful if you're considering a full load bank test.
- Battery University : A comprehensive resource for all things battery-related. Covers battery chemistry, charging, discharging, and maintenance. Provides detailed technical information relevant to understanding battery behavior.
- National Institute of Standards and Technology (NIST) : NIST provides technical information and standards related to electrical power and battery performance. May contain relevant standards for UPS battery testing and maintenance.
- Victron Energy : While focused on renewable energy systems, Victron provides valuable resources on battery management, monitoring, and performance, which are applicable to UPS battery health as well.
- TDK Corporation : TDK provides information about capacitors and other power components, which influence UPS performance. While indirect, understanding these aspects provides a broader view of the system's health.
- Digi-Key Electronics : Digi-Key is a major distributor of electronic components. Their website provides datasheets and technical specifications for various battery types and related components.
- Mouser Electronics : Similar to Digi-Key and Mouser, Mouser is a leading electronic component distributor. Provides access to datasheets and technical resources related to battery components.
Frequently Asked Questions
What is a UPS battery health checklist and why do I need one?
A UPS battery health checklist is a document outlining the steps and checks needed to ensure your Uninterruptible Power Supply (UPS) battery is functioning correctly and providing reliable backup power. It's crucial for preventing unexpected downtime, extending battery lifespan, and ensuring data protection in case of power outages.
Who is this checklist template for?
This template is designed for anyone responsible for maintaining UPS systems, including facility managers, IT professionals, electricians, and maintenance personnel - regardless of their technical expertise.
What's included in the UPS battery health checklist template?
The template covers essential checks like visual inspection for corrosion, voltage and load testing, battery age verification, capacity testing, and checking UPS system logs. It also includes sections for recording results and tracking maintenance schedules.
How often should I use the UPS battery health checklist?
The frequency depends on the UPS's age, usage, and criticality. A general guideline is to perform a visual inspection monthly, a load test quarterly, and a full capacity test annually. Critical systems may require more frequent checks.
What equipment do I need to use this checklist?
You'll generally need a multimeter to measure voltage, a load tester (optional but recommended for more accurate capacity testing), and access to the UPS system's user interface or software for accessing logs and status information.
Can I customize the checklist template?
Absolutely! The template is designed to be adaptable. Feel free to add or remove checks based on your specific UPS model, environment, and maintenance procedures.
What does 'float voltage' refer to in the checklist?
Float voltage is the constant voltage applied to the battery during normal operation to compensate for self-discharge and maintain its full charge. The checklist encourages verifying this voltage is within the manufacturer's recommended range.
What does 'capacity testing' involve?
Capacity testing simulates a power outage and measures how long the UPS can sustain a given load. This indicates the battery's remaining charge capacity and overall health. It's more thorough than voltage checks alone.
What should I do if the checklist reveals a problem with my UPS battery?
If the checklist identifies issues like low voltage, excessive corrosion, or reduced capacity, you should consult the UPS manufacturer's documentation or contact a qualified UPS technician for repair or replacement options. Don't attempt repairs yourself unless you're properly trained and equipped.
Where can I find the UPS manufacturer's specifications?
The UPS manufacturer's documentation, often available on their website, will provide critical specifications for voltage levels, charging parameters, and maintenance procedures. Refer to these guidelines for accurate assessment and troubleshooting.
Found this Article helpful?
Facility Management Solution Demo
Keep your facilities running smoothly! ChecklistGuro streamlines maintenance, inspections, and vendor management. Reduce downtime, optimize efficiency, & improve safety. Manage it all with our Work OS.
Related Articles
Industrial Floor Cleaning & Safety Checklist Template
Display Case Temperature Monitoring Checklist Template
The Ultimate Refrigeration Maintenance Checklist: Keeping Your Food Safe
Escalator & Moving Walkway Inspection Checklist Template
The Ultimate Guest Room Cleaning & Inspection Checklist Template

The Ultimate Security Camera Review Checklist Template
Forklift Inspection & Maintenance Checklist Template
Emergency Generator Load Testing Checklist Template
We can do it Together
Need help with
Facility Management?
Have a question? We're here to help. Please submit your inquiry, and we'll respond promptly.