Streamline Biohazard Waste: Your Essential Checklist Template
Published: 09/01/2025 Updated: 12/13/2025
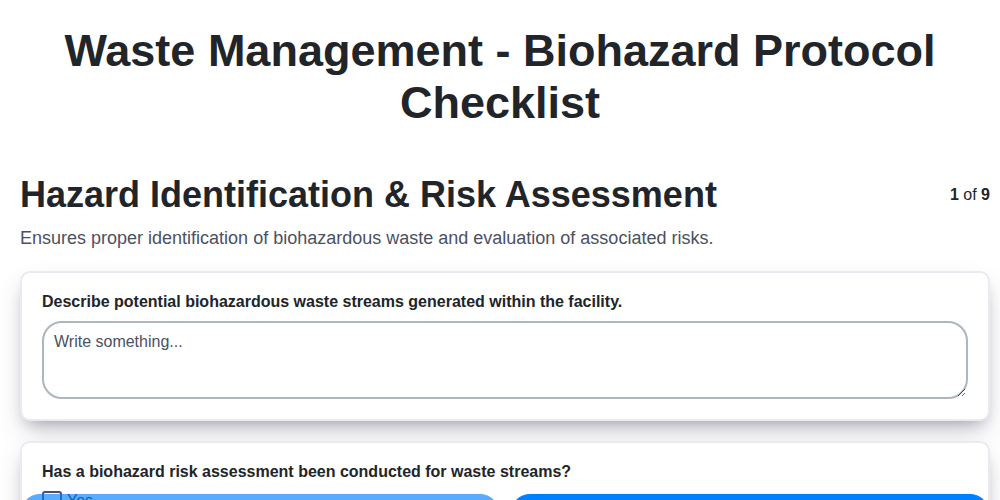
Table of Contents
- Introduction: Why a Biohazard Waste Checklist Matters
- Understanding Biohazard Waste Categories
- Step 1: Hazard Identification and Risk Assessment
- Step 2: Proper Waste Segregation: Color-Coding and Containers
- Step 3: Container Management: Labeling, Storage, and Integrity
- Step 4: Safe Transportation within Your Facility
- Step 5: Choosing a Compliant Disposal Vendor
- Step 6: Tracking Your Waste: Manifest Systems and Documentation
- Step 7: Spill Response: Preparedness and Procedures
- Step 8: Essential Training for Your Team
- Step 9: Regulatory Landscape: Staying Compliant
- Step 10: Record Keeping: Your Documentation Backbone
- Step 11: Auditing and Continuous Improvement
- Template Download: Your Biohazard Waste Checklist
- Resources & Links
TLDR: Need to manage biohazard waste safely and compliantly? This free checklist template breaks down the process - from hazard assessment to disposal - step-by-step. Download it now to streamline your procedures, protect your team, and ensure regulatory adherence.
Introduction: Why a Biohazard Waste Checklist Matters
Biohazardous waste presents unique and significant risks. Improper handling can lead to infections, injuries, and legal repercussions for your organization. Beyond the immediate health concerns, non-compliance with regulations can result in hefty fines and damage to your reputation. A standardized, documented approach-like a checklist-isn't just about ticking boxes; it's about fostering a culture of safety, ensuring consistency in procedures across all personnel, and demonstrating due diligence in the face of potential hazards. This proactive step minimizes errors, reduces the likelihood of accidents, and offers a clear audit trail to showcase your commitment to responsible waste management practices.
Understanding Biohazard Waste Categories
Biohazardous waste isn't a monolithic entity; it's categorized based on the level of risk it poses. Proper segregation starts with correctly identifying these categories. Here's a breakdown of the most common types you'll encounter:
Sharps Waste: This is arguably the highest-risk category, including needles, syringes, scalpels, broken glass that has been in contact with biohazardous materials, and other items capable of puncturing or lacerating skin. Sharps waste always requires dedicated, puncture-resistant containers.
Pathological Waste: This encompasses tissues, organs, body parts, and fluids removed during surgery, autopsy, or other medical procedures. It often requires specific handling and disposal methods due to its potential for infectious disease transmission.
Infectious Waste (or Biological Waste): A broad category including materials contaminated with infectious agents, such as blood, body fluids, cultures, stocks of infectious agents, and waste from patients known or suspected to be infected with contagious diseases. This category often carries strict autoclave or incineration requirements.
Medical/Laboratory Waste: This refers to waste generated in healthcare or laboratory settings that is potentially infectious. It can include petri dishes, swabs, bandages, and other disposable items that may have come into contact with biohazardous materials.
Animal Waste: Waste from laboratory animals that have been infected with or exposed to biohazardous agents, or carcasses of animals used in research. This requires specific handling and disposal procedures based on the nature of the biohazard.
Liquid Biohazardous Waste: This category includes blood, urine, and other body fluids. It often requires disinfection before disposal, and may be treated via sewer systems with proper authorization and pre-treatment.
Understanding these distinct categories is the foundation for effective and compliant biohazard waste management. Misidentification can lead to improper disposal, potentially jeopardizing public health and regulatory compliance.
Step 1: Hazard Identification and Risk Assessment
Identifying potential biohazards and assessing the risks they pose is the foundational step in any robust waste management protocol. This isn't just about ticking a box; it's about proactively minimizing potential harm. Begin by comprehensively listing all waste streams generated within your facility. Consider everything - from routine lab cultures and blood-soaked gauze to sharps, anatomical waste, and potentially infectious materials.
Next, for each identified waste type, evaluate the associated risks. This includes assessing the potential for infection transmission, injury from sharps, and environmental contamination. Think about the quantity of waste generated, the handling procedures involved, and the potential for accidental exposure. A simple risk matrix - plotting the likelihood of an event against the severity of its potential consequences - can be a valuable tool.
Don't forget to review your processes regularly. Are there opportunities to reduce waste generation through safer alternatives or improved techniques? Are new procedures introducing novel biohazards that need to be accounted for? Staying informed about emerging infectious diseases and evolving regulations is also crucial for proactive risk assessment. Document your findings - the identified hazards, assessed risks, and proposed mitigation strategies - to ensure a clear record of your hazard identification process.
Step 2: Proper Waste Segregation: Color-Coding and Containers
Effective waste segregation begins with a clear understanding of color-coding and container selection. This isn't arbitrary; it's a crucial system designed to minimize risk and ensure proper treatment. While specific color requirements can vary by local regulations (always consult your jurisdiction's guidelines!), the following is a commonly accepted standard.
Understanding the Colors:
- Red: Primarily for sharps waste. This includes needles, syringes, lancets, broken glass contaminated with biohazardous material, and scalpels. Puncture-resistant, leak-proof containers are mandatory for sharps.
- Yellow: Typically used for infectious waste, pathological waste (tissue samples, body parts), and microbiological waste (cultures, stocks).
- Orange: Often designated for contaminated animal waste, carcasses, and potentially infectious bedding.
- Black: Commonly used for pharmaceutical waste (expired or unused medications). Special handling is often required for this type of waste.
- Brown: Frequently used for soiled bedding, rags, and absorbent materials contaminated with biohazardous substances.
- Blue: Sometimes used for non-hazardous recyclable materials contaminated with small amounts of biohazardous material that can be autoclaved before recycling. Verify your local regulations.
Container Selection is Critical:
Using the correct container isn't just about color; it's about functionality. Ensure containers are:
- Clearly Labeled: Each container must have a biohazard symbol and a clear description of the acceptable waste.
- Leak-Proof: Prevent spills and contamination.
- Durable: Able to withstand handling and transportation.
- Appropriate Size: Avoid overfilling - this increases risk of spills and injury.
- Securely Closed: Prevents odors and potential hazards.
Pro Tip: Regularly inspect containers for damage and replace them as needed. Training staff on proper waste segregation procedures and container handling is essential for maintaining a safe and compliant environment.
Step 3: Container Management: Labeling, Storage, and Integrity
Proper container management is the backbone of a safe biohazard waste program. It's not enough to simply have containers; they must be handled, labeled, stored, and maintained correctly to prevent contamination and ensure regulatory compliance. Let's break down each critical aspect.
Labeling: Clarity is Paramount
Every container holding biohazardous waste must be clearly and accurately labeled. This isn't negotiable. Labels should include:
- The Universal Biohazard Symbol: Instantly recognizable and serves as a warning.
- A Description of the Waste: Be specific (e.g., "Sharps - Infectious Waste," "Blood-Soaked Gauze - Contaminated," "Cell Culture - Viral"). Avoid vague terms.
- Date of Accumulation: Helps track how long waste has been stored and ensure timely disposal.
- Responsible Department/Area: Allows for easy traceability.
- Sequential Numbering (Recommended): Provides a unique identifier for tracking purposes, particularly useful for large facilities.
Storage: Securing the Waste
Biohazard waste containers should be stored in a designated, secure area that meets the following criteria:
- Restricted Access: Only authorized personnel should have access to the storage area.
- Well-Ventilated: Proper ventilation minimizes odor and potential hazards.
- Protected from the Elements: Avoid direct sunlight and extreme temperatures.
- Clearly Marked: The storage area itself must be clearly identified with biohazard signage.
- Secondary Containment (Recommended): A secondary containment system (e.g., a spill tray or berm) can prevent the release of waste in case of container failure.
Maintaining Container Integrity
Containers aren't designed to last forever. Regular inspection is crucial:
- Visual Inspections: Check for cracks, leaks, dents, or other signs of damage.
- Replace Damaged Containers Immediately: Never attempt to repair a damaged biohazard container.
- Proper Closure: Ensure all lids are securely fastened after each use.
- Appropriate Container Selection: Use the correct type of container for the waste being collected (e.g., puncture-resistant sharps containers for needles and syringes).
- Avoid Overfilling: Overfilled containers are more likely to leak or rupture. Follow established volume limits.
Step 4: Safe Transportation within Your Facility
Moving biohazardous waste within your facility requires careful planning and execution to prevent accidental exposures and contamination. It's not simply about wheeling a cart from one location to another; it's about safeguarding personnel and maintaining a clean environment.
First, designate specific transportation routes that minimize disruption to other activities and reduce the risk of collisions. Clearly mark these routes with appropriate signage, especially in high-traffic areas. Use dedicated carts or dollies specifically for biohazardous waste transportation - never use these for general materials. Ensure these carts are leak-proof and sturdy enough to handle the weight of the containers.
Personnel transporting waste must wear appropriate personal protective equipment (PPE), which typically includes gloves, eye protection (safety glasses or face shield), and a lab coat or gown. Consider the potential for splashes or spills and adjust PPE accordingly. Secondary containment is also crucial - consider using plastic bags or trays to further contain any potential leaks during transport.
Never leave biohazardous waste unattended, even for a brief period. Always ensure the receiving area is ready to accept the waste before transferring it. Finally, document all internal transfers in a log, recording the date, time, origin, and destination of the waste. This traceability is essential for maintaining accountability and investigating any potential incidents.
Step 5: Choosing a Compliant Disposal Vendor
Selecting a biohazard waste disposal vendor isn't just about finding the lowest price - it's about ensuring full regulatory compliance and responsible handling of potentially harmful materials. Here's what to look for:
Verify Credentials & Licensing: Ensure the vendor possesses all necessary federal, state, and local licenses and permits to transport and dispose of biohazardous waste. Don't hesitate to request copies of these credentials and verify their validity with the issuing agencies. Many states have online databases for this purpose.
Experience & Expertise: Choose a vendor with a proven track record and significant experience in biohazard waste management. Ask about their specialization-do they handle the specific types of waste you generate?
Service Range & Traceability: A reputable vendor should offer a comprehensive suite of services, including waste tracking (manifests), secure transportation, and compliant disposal methods (incineration, autoclaving, etc.). The manifest system is crucial for documenting the entire waste lifecycle, from origin to final destination.
Compliance Assurance: Inquire about their quality control and compliance programs. How do they ensure adherence to regulations at all stages of the process? Do they conduct regular audits?
Insurance Coverage: Verify that the vendor carries adequate liability insurance to cover any potential incidents or environmental damage.
References: Request references from other clients and check their feedback regarding service quality, reliability, and responsiveness.
Emergency Response: Ask about their protocols for handling unexpected events, such as spills or container breaches. A robust emergency response plan is essential for minimizing risk and containing potential hazards.
Choosing the right vendor is a critical step toward responsible biohazard waste management. Don't compromise on compliance or safety-do your due diligence to select a partner you can trust.
Step 6: Tracking Your Waste: Manifest Systems and Documentation
Proper documentation is the backbone of a compliant biohazard waste management program. A manifest system isn't just paperwork; it's a legally required record of waste from "cradle to grave" - from the moment it's generated to its final disposal. Let's break down why this is crucial and what it entails.
What is a Biohazard Waste Manifest?
A biohazard waste manifest is a multi-part form that tracks the movement of regulated medical waste (RMW). It contains detailed information, including:
- Generator Information: Your facility's name, address, contact details, and EPA identification number (if applicable).
- Waste Description: A precise description of the waste being transported (e.g., sharps, pathological waste, infectious waste).
- Waste Quantity: The estimated volume or weight of the waste.
- Transporter Information: Name, license number, and contact details of the company transporting the waste.
- Treatment/Disposal Facility Information: Name, permit number, and address of the facility where the waste will be treated or disposed.
- Signatures and Dates: Required signatures from the generator, transporter, and disposal facility personnel, confirming receipt and proper handling.
Why are Manifests Essential?
- Legal Compliance: Most states and federal regulations mandate the use of manifest systems. Failure to comply can result in significant fines and penalties.
- Chain of Custody: Manifests provide a clear and auditable record of who handled the waste at each stage of the process.
- Accountability: They establish accountability for the safe and responsible management of biohazardous materials.
- Waste Tracking: They facilitate the tracking of waste shipments, ensuring they reach their intended destination.
- Regulatory Audits: They are a key component of demonstrating compliance during regulatory inspections.
Documentation Beyond the Manifest
While the manifest is the cornerstone, robust documentation extends further:
- Waste Inventory Records: Maintain detailed records of the type and quantity of biohazardous waste generated within your facility.
- Training Records: Document employee training on proper waste handling procedures.
- Incident Reports: Record any spills, incidents, or near misses involving biohazardous waste, along with corrective actions taken.
- Contractor Agreements: Keep copies of contracts with waste disposal companies, outlining responsibilities and adherence to regulations.
Tip: Many waste management companies provide electronic manifest systems that streamline the process and improve tracking capabilities. Explore these options to enhance your program's efficiency and compliance.
Step 7: Spill Response: Preparedness and Procedures
A spill of biohazardous material isn't a matter of if it will happen, but when. Proper preparedness and clearly defined procedures are your first line of defense, minimizing risk to personnel and preventing environmental contamination. This section outlines the essential elements of a robust spill response plan.
1. The Spill Kit: Your Ready Arsenal
Every area generating biohazardous waste must have readily accessible spill kits. These kits should include:
- Personal Protective Equipment (PPE): Gloves (heavy-duty, chemical-resistant), disposable gowns or aprons, eye protection (goggles or face shield), and respirators (if required by the specific biohazard).
- Absorbent Materials: Pads, pillows, or granules designed to absorb liquids. Ensure compatibility with the potential spilled material (e.g., some absorbents are not suitable for acids or bases).
- Decontamination Agents: Appropriate disinfectants or autoclaving solutions effective against the potential biohazards. Always consult the SDS (Safety Data Sheet) for correct dilution and contact time.
- Biohazard Waste Bags: Heavy-duty, leak-proof bags for contaminated materials.
- Scoops and Tools: For safe collection of spilled material.
- Warning Signs/Tape: To cordon off the spill area.
2. Defined Procedures: A Step-by-Step Guide
Your spill response procedures should be clearly documented and easily accessible. They should include:
- Immediate Actions: Prioritize safety. Evacuate the immediate area if necessary. Alert personnel and activate the facility's emergency response system.
- Assessment: Identify the spilled material and assess the quantity and extent of the spill.
- Containment: Prevent the spill from spreading by using absorbent materials or barriers.
- Clean-Up: Using appropriate PPE, carefully clean up the spilled material, following established decontamination procedures.
- Decontamination: Thoroughly decontaminate the affected area and all contaminated equipment.
- Waste Disposal: Properly dispose of all contaminated materials as biohazardous waste, following regulatory guidelines.
- Reporting: Document the incident, including the type of spill, quantity, actions taken, and any injuries.
3. Training and Drills: From Theory to Action
Regular training and drills are crucial. Employees should be trained on:
- The location and contents of spill kits.
- Proper use of PPE.
- Spill response procedures.
- Reporting requirements.
Conducting mock spill drills helps reinforce procedures and identifies areas for improvement. Review and update procedures following each drill and any incidents.
Step 8: Essential Training for Your Team
Handling biohazardous waste isn's just about following procedures; it's about understanding why those procedures exist. A well-trained team is your first line of defense against risk, error, and potential harm. Simply put, even the most meticulous checklist is only as good as the people implementing it.
Here's what comprehensive training should cover:
- Hazard Recognition: Employees need to confidently identify biohazardous materials and understand the potential risks associated with each.
- Waste Segregation Best Practices: Hands-on training on proper container selection, labeling, and waste placement is crucial. Refreshing this regularly prevents contamination and errors.
- Spill Response Protocols: Simulated spill drills, using appropriate PPE and clean-up agents, build confidence and competence in handling unexpected events.
- Regulatory Updates: Regulations evolve. Training must include updates on new rules, guidelines, and best practices.
- Safe Container Handling: Proper techniques for closing, transporting, and storing containers to prevent leaks and injuries.
- Documentation Procedures: Clear instructions on how to accurately complete manifests, incident reports, and training records.
Beyond the Basics:
Don't just focus on what to do. Explain why these steps are essential. Understanding the potential consequences of improper handling, from regulatory fines to serious health risks, motivates employees to take safety seriously.
Tracking and Reinforcement:
Document all training sessions, including dates, topics covered, and employee attendance. Regular refresher courses and short, focused reminders (like posters or email tips) keep safety top-of-mind. Periodic observation and feedback can further reinforce best practices and identify areas for improvement.
Step 9: Regulatory Landscape: Staying Compliant
Navigating the regulatory landscape surrounding biohazard waste management can feel like traversing a maze. Unlike general waste disposal, biohazard waste is heavily regulated at the federal, state, and local levels - and these regulations are subject to change. Understanding your obligations is paramount to avoiding costly fines and reputational damage.
At the federal level, while no single overarching law governs biohazard waste, several agencies play a role. The Environmental Protection Agency (EPA) sets standards for certain disposal methods, particularly those impacting the environment. The Occupational Safety and Health Administration (OSHA) focuses on worker safety and mandates proper handling procedures. However, the primary regulatory burden falls on state and local authorities.
State regulations vary widely, dictating everything from container color coding and labeling requirements to approved disposal methods and record-keeping protocols. Some states have detailed, prescriptive rules, while others offer more general guidelines, leaving interpretation to individual facilities. Local ordinances often supplement state regulations, adding further layers of complexity.
Staying abreast of these ever-changing requirements is an ongoing process. Regularly consult official sources like your state's Department of Environmental Protection website, EPA publications, and local health department guidelines. Consider subscribing to industry newsletters or engaging with a regulatory compliance specialist to ensure you remain informed. Don't forget to document your compliance efforts-maintaining records of training, disposal manifests, and internal audits can be invaluable during inspections. Proactive engagement with regulatory agencies can also foster a positive relationship and demonstrate your commitment to responsible waste management practices.
Step 10: Record Keeping: Your Documentation Backbone
Record keeping isn't glamorous, but it's the bedrock of a robust biohazard waste management program. Think of it as your paper (or digital!) trail, proving you've met regulatory requirements and demonstrating due diligence in protecting your staff and the environment. What exactly needs to be documented? Let's break it down.
Essential Records to Maintain:
- Waste Generation Logs: Track the types and quantities of biohazardous waste generated. Even a simple spreadsheet can suffice, noting date, waste type, and estimated volume.
- Training Records: Documentation of all employee training is paramount. This includes dates, topics covered, trainer's name, and employee signatures (or digital confirmation).
- Disposal Manifests: Securely store copies of all disposal manifests - these are your legal proof of proper disposal. Electronic systems often integrate this seamlessly.
- Incident Reports: Any spill, near-miss, or unusual event should be documented with details of the incident, corrective actions taken, and personnel involved.
- Equipment Maintenance Logs: If autoclaving or other on-site treatment is performed, maintain records of equipment maintenance and validation.
- Vendor Contracts: Keep copies of all contracts with waste management vendors, including expiration dates and service level agreements.
Going Digital vs. Paper:
While paper records have their place, digital systems offer several advantages: improved organization, easier searching, enhanced security, and simplified regulatory reporting. Consider a specialized waste management software or integrate your record-keeping into your existing Environmental, Health, and Safety (EHS) system.
Retention Schedules:
Be mindful of retention schedules. Regulations often dictate how long records must be kept. Consult your local and state guidelines to ensure compliance.
Pro-Tip: Develop a clear, easily accessible filing system (physical or digital) to ensure records can be quickly retrieved during audits or emergencies.
Step 11: Auditing and Continuous Improvement
Regular audits aren't just about finding fault; they's the cornerstone of a truly effective biohazard waste management program. Think of them as health checks for your processes. An annual (or even more frequent) audit should encompass every aspect outlined in this checklist, from initial hazard assessments to final disposal records.
What to Audit:
- Procedure Adherence: Observe employees performing waste handling tasks. Are they following established protocols? Are color-coded containers being used correctly?
- Record Keeping: Verify the accuracy and completeness of training records, disposal manifests, and incident reports.
- Container Integrity: Inspect containers for damage and proper labeling.
- Storage Conditions: Confirm that storage areas maintain appropriate temperatures and security.
- Spill Response Readiness: Evaluate the accessibility and adequacy of spill kits, and the preparedness of trained personnel.
Beyond Compliance - Seeking Improvement:
Audit findings shouldn't just lead to corrective actions; they should spark improvements. Ask yourselves:
- Can we streamline processes to reduce waste generation?
- Can we improve employee training to minimize errors?
- Are our containers the most efficient and safest options?
- Can we incorporate new technologies to enhance tracking and accountability?
A culture of continuous improvement means embracing feedback, proactively identifying weaknesses, and consistently seeking ways to refine your biohazard waste management program. This ensures ongoing compliance, maximizes safety, and minimizes environmental impact. Remember, a static program is a vulnerable program.
Template Download: Your Biohazard Waste Checklist
Ready to streamline your biohazard waste management? We're providing a comprehensive, customizable checklist template to help you implement and maintain a compliant program. This isn't just a static list; it's a framework you can adapt to your specific facility's needs, waste types, and regulatory requirements.
What's Included in the Template:
- Detailed Task Breakdown: A clear, step-by-step guide covering all essential aspects of biohazard waste management, from initial hazard identification to final disposal.
- Customizable Fields: Easily update container types, personnel responsible, frequency of tasks, and local regulatory references.
- Checkboxes & Notes: Track completion of tasks and add specific notes for each step.
- Section for Regulatory References: A dedicated space to record relevant local, state, and federal regulations.
How to Use It:
- Download the Template:
- Review & Customize: Thoroughly review each item and tailor it to your facility's specific processes.
- Assign Responsibility: Clearly assign responsibility for each task to specific personnel.
- Implement & Monitor: Integrate the checklist into your existing workflows and regularly monitor for compliance.
- Regularly Update: Keep the checklist updated to reflect any changes in regulations or facility procedures.
Get your free, downloadable template now and take control of your biohazard waste management program!
Resources & Links
- U.S. Environmental Protection Agency (EPA) - RCRA : The Resource Conservation and Recovery Act (RCRA) is the primary federal law governing the disposal of solid and hazardous waste. This website provides comprehensive information on regulations, guidelines, and resources related to waste management, including biohazardous waste. Essential for understanding federal mandates.
- Occupational Safety and Health Administration (OSHA) : OSHA regulations focus on workplace safety, including handling and disposal of biohazardous materials to protect employees. This site provides resources and information on hazard communication and safe work practices, relevant to training and spill response.
- Centers for Disease Control and Prevention (CDC) - Biohazard Waste Management : The CDC provides guidance and resources specifically tailored for healthcare facilities, covering various aspects of biohazard waste management. Includes best practices, recommendations, and information on infectious waste.
- Biohazard Waste Experts : A specialized waste disposal company offering expertise, compliant solutions, and educational resources regarding biohazard waste management. Can provide deeper insights into vendor selection and regulatory specifics.
- Stericycle : A major medical waste management company offering solutions for disposal and compliance. Useful for understanding vendor options and services available for biohazard waste.
- ENVASS : Another leading provider of regulated medical waste management services, providing insights into vendor selection and compliant disposal processes.
- American Society of Heating, Refrigerating and Air-Conditioning Engineers (ASHRAE) : While primarily focused on HVAC, ASHRAE standards indirectly influence biohazard waste management by influencing containment and ventilation practices. Relevant to safe storage practices.
- Association for Professionals in Infection Control and Epidemiology (APIC) : APIC provides resources and education for infection preventionists, a crucial role in ensuring proper biohazard waste management. A valuable resource for training materials and best practice guidelines.
- Waste Segregation Guide : This guide provides a comprehensive overview of waste segregation practices, including color coding and container selection - critical for Step 2. Offers a visual aid and clarification on different waste types.
- Biohazard Waste Training Resources : Safe Management provides training resources that can significantly enhance the effectiveness of your team's understanding and adherence to biohazard waste protocols, directly supporting Step 9.
Frequently Asked Questions
What is biohazard waste?
Biohazard waste, also known as infectious waste, includes materials that pose a risk of causing disease. This can include blood, bodily fluids, cultures, and contaminated sharps. Proper disposal is crucial to protect public health and the environment.
Why is a biohazard waste checklist important?
A checklist ensures consistent and compliant biohazard waste management. It minimizes errors, reduces the risk of exposure, and documents adherence to regulations, simplifying audits and demonstrating due diligence.
Who should use this checklist template?
This checklist is designed for anyone responsible for handling and disposing of biohazard waste, including healthcare professionals, laboratory personnel, cleaning staff, and waste management personnel.
What types of facilities benefit from using this checklist?
Hospitals, clinics, dental offices, laboratories, research facilities, veterinary clinics, and any facility generating biohazard waste can benefit from using this checklist.
What information is included in the checklist template?
The checklist covers key areas like waste segregation, container labeling, storage, transportation, and disposal methods, ensuring all regulatory requirements are addressed.
Can I customize the checklist template?
Yes, absolutely! The template is designed to be flexible. Feel free to add or remove items to reflect your facility's specific procedures and local regulations.
What are the different categories of biohazard waste and how are they segregated?
Common categories include sharps (needles, scalpels), infectious waste (contaminated dressings, cultures), pathological waste (tissues, organs), and pharmaceutical waste. Each category requires specific container types and disposal methods - the checklist guides you through this.
What are the regulatory requirements for biohazard waste disposal?
Regulations vary by state and local jurisdictions. Common requirements include proper containerization, labeling, recordkeeping, and disposal through licensed waste management companies. Consult your local authorities for specific details.
What does 'universal precautions' mean in relation to biohazard waste?
Universal precautions assume that all waste is potentially infectious. They involve using appropriate personal protective equipment (PPE), implementing safe handling procedures, and adhering to strict disposal protocols to minimize exposure risk.
How do I choose the correct biohazard waste container?
Container color codes are generally standardized (red for sharps, black for pathological waste, etc.). Ensure containers are properly labeled with the biohazard symbol and follow regulatory guidelines. The checklist provides guidance on appropriate container selection.
What should I do if I suspect a biohazard waste disposal error has occurred?
Immediately report the incident to your supervisor or designated biohazard safety officer. Document the details of the error, identify the cause, and implement corrective actions to prevent recurrence. Follow your facility's incident reporting procedures.
Found this Article helpful?
Facility Management Solution Demo
Keep your facilities running smoothly! ChecklistGuro streamlines maintenance, inspections, and vendor management. Reduce downtime, optimize efficiency, & improve safety. Manage it all with our Work OS.
Related Articles
Industrial Floor Cleaning & Safety Checklist Template
Display Case Temperature Monitoring Checklist Template
The Ultimate Refrigeration Maintenance Checklist: Keeping Your Food Safe
Escalator & Moving Walkway Inspection Checklist Template
The Ultimate Guest Room Cleaning & Inspection Checklist Template

The Ultimate Security Camera Review Checklist Template
Forklift Inspection & Maintenance Checklist Template
Emergency Generator Load Testing Checklist Template
We can do it Together
Need help with
Facility Management?
Have a question? We're here to help. Please submit your inquiry, and we'll respond promptly.