The Beekeeper's Checklist: A Template for Hive Health and Management
Published: 08/23/2025 Updated: 12/13/2025
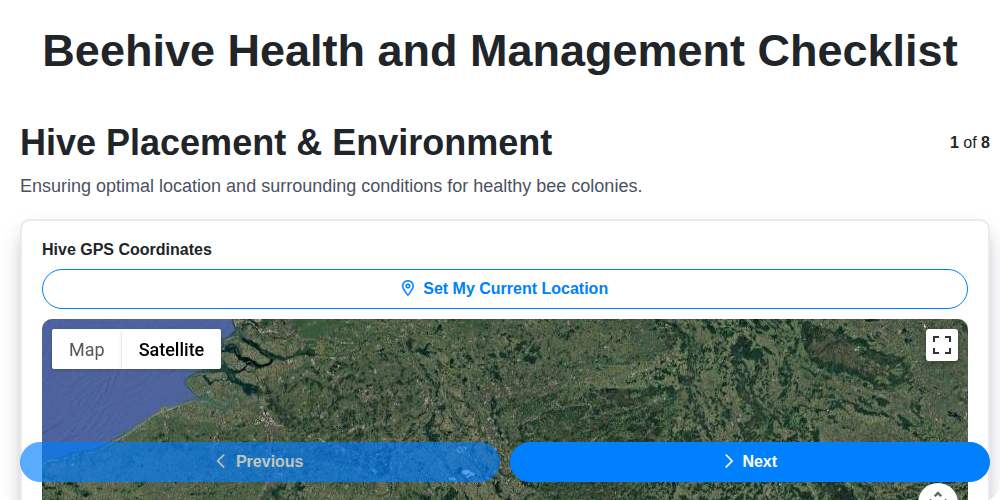
Table of Contents
- Getting Started: Understanding the Beekeeper's Role
- Hive Placement: Setting the Stage for Success
- Regular Hive Inspections: Monitoring Bee Health
- Disease and Pest Management: Protecting Your Colony
- Nutrition and Forage: Fueling the Hive
- Swarm Prevention and Management: Keeping Bees Where They Belong
- Winter Preparation: Ensuring Colony Survival
- Record Keeping: Tracking Progress and Identifying Trends
- Equipment Maintenance: A Well-Maintained Hive is a Healthy Hive
- Safety First: Protecting Yourself and Your Bees
- Requeening: When and Why
- Honey Harvesting: From Hive to Jar
- Resources & Links
TLDR: Struggling to keep your bees healthy? This downloadable checklist template breaks down essential hive management tasks - from environment setup and inspections to disease prevention and winter prep - ensuring you stay on track and your colony thrives. Get organized and be a confident beekeeper!
Getting Started: Understanding the Beekeeper's Role
Becoming a beekeeper is more than just acquiring a hive; it's embracing a role as a caretaker, an observer, and a student of nature. You're not just harvesting honey; you're participating in a complex ecosystem and contributing to the health of your local environment. This responsibility demands respect, patience, and a willingness to continually learn.
Initially, your primary task is observation. Spend time simply watching your bees - how they forage, how they interact within the hive, and how they respond to changes in the weather or surroundings. This observational period allows you to establish a baseline understanding of your colony's behavior, making it easier to identify potential issues later on.
Beyond observation, you become a proactive problem-solver. Disease prevention and management require vigilance and quick action. Unexpected swarms necessitate intervention, and nutritional deficiencies demand supplementation. Every action you take impacts the colony's well-being, so thoughtful decision-making is crucial.
Finally, remember that beekeeping is a continuous learning process. Regulations, best practices, and environmental challenges evolve, so staying informed through workshops, mentorship, and reputable resources is essential for success and responsible stewardship of your bees.
Hive Placement: Setting the Stage for Success
Finding the ideal spot for your beehive isn't just about aesthetics; it's about creating an environment where your bees can thrive. Here's a breakdown of crucial factors to consider when choosing your hive location.
Sunlight and Shelter: Bees are cold-blooded and rely on sunlight to warm up and initiate their daily foraging flights. Ideally, position your hive where it receives morning sun (east-facing is often best) but is shielded from the intense afternoon sun, especially during hot summer months. A natural windbreak like a fence, hedge, or building is also essential to protect your bees from harsh winds, which can deplete their energy reserves and stress the colony.
Water Access: Just like humans, bees need water. Providing a reliable water source nearby (within a few feet) is critical. A shallow dish filled with pebbles or marbles is a good option - this allows bees to land safely without drowning. Avoid providing standing water like a bird bath, as this poses a drowning risk.
Forage Availability: While bees will forage within a few miles of the hive, a location rich in flowering plants (clover, wildflowers, fruit trees, etc.) will give them a significant head start. Consider the bloom seasons in your area and ensure there's a consistent supply of nectar and pollen throughout the year.
Accessibility and Security: You'll need easy access to your hive for inspections and honey harvesting, so choose a location that's convenient for you. However, also prioritize security. Position the hive away from areas with high foot traffic or where it might be disturbed by children or pets. Consider barriers to deter predators like bears or raccoons, if applicable in your area.
Neighborly Considerations: Beekeeping can be a wonderful hobby, but it's important to be a considerate neighbor. Place the hive far enough from property lines to minimize potential disturbances like drifting bees or noise. Open communication with your neighbors can often address concerns and foster a positive relationship.
Regular Hive Inspections: Monitoring Bee Health
Regular hive inspections are the cornerstone of proactive beekeeping. They're more than just a peek inside; they're a health assessment, a population census, and a chance to spot potential problems before they escalate. How often you inspect depends on the season and the age of your colony, but generally, monthly checks during the active season (spring through late summer) are recommended.
During each inspection, focus on these key areas:
- Brood Pattern: A healthy brood pattern is often described as a textbook pattern - a solid, even layout of capped and uncapped brood. Irregularities can indicate queen problems, disease, or nutritional deficiencies.
- Queen Presence & Health: While locating the queen isn't always necessary, look for evidence of her: eggs, young larvae, and a generally healthy appearance of the bees.
- Food Stores: Assess honey and pollen reserves. A lack of food can stunt colony growth and make them vulnerable to starvation.
- Pest & Disease Signs: Keep a keen eye for signs of varroa mites, hive beetles, foulbrood, or other common bee ailments. Early detection is crucial for effective treatment.
- Hive Population: Observe the overall size and activity level of the colony. A thriving hive will be bustling with bees.
- Queen Cells: The presence of queen cells can indicate swarming behavior or a need for requeening. Understanding why they're present is key.
Remember to work gently and methodically, minimizing disturbance to the bees. A calm and deliberate approach will make the inspection easier and safer for both you and the colony.
Disease and Pest Management: Protecting Your Colony
Your bees face a constant barrage of potential diseases and pests, and proactive management is your best defense. Let's break down the most prevalent concerns and outline preventative and treatment strategies.
Varroa Mites: The Biggest Challenge
These parasitic mites are the single greatest threat to honeybee colonies. They feed on bee larvae and adults, weakening them and transmitting viruses. Regular monitoring is absolutely crucial. Use methods like sugar shake, alcohol wash, or sticky boards to check mite levels. Treatment thresholds vary by region and beekeeping philosophy, but generally, action is needed when mite levels exceed 2-3 mites per 100 bees. Several treatment options are available, including organic acids (formic acid, oxalic acid) and synthetic miticides. Always follow label instructions carefully and rotate treatments to prevent mite resistance.
Small Hive Beetles (SHB): A Nuisance and More
SHBs are becoming increasingly common. While often just a nuisance, high populations can damage honeycomb, ferment honey, and stress the colony. Prevention is key: keep hives strong and clean, maintain good sanitation around the apiary, and consider using beetle traps.
American Foulbrood (AFB) & European Foulbrood (EFB): Bacterial Diseases
AFB is a highly contagious bacterial disease that affects bee larvae. Early detection is critical, as it's difficult to eradicate once established. Look for sunken, discolored larvae and a foul odor. EFB, while less severe, can also impact colony strength. Proper hive hygiene and requeening with resistant stock can help prevent these diseases.
Nosema: A Fungal Infection
Nosema is a fungal infection that affects the bees' digestive system, leading to dysentery and weakened colonies. Symptoms include crawling bees, deformed wings, and reduced honey stores. Maintaining strong colonies, ensuring good ventilation, and providing access to clean water can help prevent Nosema.
Preventative Measures & Best Practices:
- Regular Inspections: Thoroughly inspect your hives at least every two weeks.
- Hive Hygiene: Keep your hives and equipment clean.
- Strong Colonies: Healthy, vigorous colonies are more resistant to disease and pests.
- Resistant Stock: Consider requeening with mite-resistant or disease-resistant bee strains.
- Biosecurity: Practice good biosecurity measures to prevent the spread of disease between hives and apiaries.
- Stay Informed: Keep up-to-date on the latest research and best practices for disease and pest management.
Nutrition and Forage: Fueling the Hive
A thriving bee colony is built on a foundation of proper nutrition. It's more than just honey; bees require a balanced diet to support brood rearing, honey production, and overall colony health. Let's break down the essential components and how you can ensure your bees get what they need.
Nectar: The Sweet Energy Source
Nectar is the primary source of carbohydrates for bees. It's converted into honey, which serves as their stored energy reserve. The quality and quantity of nectar depend heavily on the availability of flowering plants. Different flowers offer varying sugar concentrations and nutritional compounds, so a diverse range of blossoms is ideal. During times of nectar dearth (periods with little to no nectar flow), supplemental feeding with sugar syrup (a mixture of sugar and water) can be crucial to prevent starvation and maintain colony strength.
Pollen: The Protein Powerhouse
Unlike nectar, pollen is a solid substance collected from flower anthers. It's the equivalent of a bee's protein source - essential for larval development, brood rearing, and adult bee health. Pollen contains vital amino acids, vitamins, minerals, and fats that nectar simply cannot provide. Different pollen types offer different nutritional profiles, so a variety of pollen sources are best. While bees can collect pollen from many sources, some pollen types are more nutritious than others.
Beyond Nectar and Pollen: Other Nutritional Needs
While nectar and pollen are the mainstays of a bee's diet, they also benefit from other sources. Propolis, a resinous substance collected from tree buds, acts as a natural antibiotic and helps seal cracks in the hive. Royal jelly, secreted by worker bees, is a protein-rich substance used to feed queen bees and larvae. Water is also essential for bee survival, helping regulate hive temperature and facilitate honey processing.
Supporting Forage Availability:
As a beekeeper, you play a vital role in ensuring a reliable forage supply. Consider planting bee-friendly flowers, shrubs, and trees in and around your apiary. Native plants are often the best choice, as they're adapted to your local climate and provide the most nutritious pollen and nectar. Avoid using pesticides that can harm bees and contaminate their food sources. Supporting local beekeepers and promoting bee-friendly practices within your community can also help ensure a healthy and abundant forage supply for all bees.
Swarm Prevention and Management: Keeping Bees Where They Belong
Swarming is a natural and essential part of a bee colony's reproductive cycle. It's how they propagate, but for beekeepers, an unscheduled swarm can mean a loss of bees and honey production. Luckily, it's a behavior we can often anticipate and manage.
Why Do Bees Swarm?
A swarm usually occurs when a colony becomes overcrowded or resource-scarce. The bees recognize this and prepare for a new queen to lead a portion of the colony to a new home. This involves the queen laying queen cells - special structures designed to nurture new queens. These queen cells are your primary warning sign!
Proactive Measures: Preventing the Departure
Prevention is always better than chasing a swarm! Here's how to keep your bees where you want them:
- Regular Inspections: Frequent hive inspections (every 7-10 days during swarm season) are your best defense. Look for those tell-tale queen cells! The sooner you spot them, the more options you have.
- Space is Key: Ensure your hive has enough room for the colony to grow. Add supers (boxes for honey storage) before they become absolutely necessary. A crowded hive is a swarming hive.
- Requeening: Younger queens are less prone to swarming. Consider requeening with a queen known for her docile nature and reduced swarming tendencies.
- Splitting the Hive: If you find multiple queen cells, splitting the hive is a highly effective solution. Create a new colony by taking a portion of the bees, brood, and honey with a queen cell (or a newly hatched queen). This relieves the pressure on the original hive and prevents swarming.
Dealing with Existing Queen Cells:
Sometimes, despite your best efforts, queen cells appear. Here's what to do:
- Early Stage Removal: If you catch them early, simply remove the queen cells. Be diligent and inspect regularly to ensure new ones haven't been built.
- Knife Method: Carefully slice out the cells, ensuring you don't injure the bees or larvae.
- Honeycomb Replacement: You can also replace frames with existing queen cells with fresh, empty frames to deter further queen cell construction.
If a Swarm Does Occur:
Despite prevention efforts, sometimes a swarm is inevitable. Be prepared with a swarm trap and know how to safely capture and relocate them to a new hive. More on swarm capture in a separate post!
Winter Preparation: Ensuring Colony Survival
As autumn transitions to winter, your bees' focus shifts from foraging and growth to conserving energy and surviving the cold. Proper preparation during this critical period can mean the difference between a thriving colony in the spring and a heartbreaking loss. Here's a breakdown of key steps to maximize your bees' chances of winter survival.
1. Food Stores: The Foundation of Survival
Adequate honey stores are absolutely essential. A general rule of thumb is that a strong colony (60,000+ bees) needs approximately 60-90 pounds of honey to see them through the winter. Smaller or weaker colonies will need proportionally less, but don't skimp! If you've assessed your colony and believe they lack sufficient honey reserves, supplemental feeding with sugar syrup (2: 1 sugar to water ratio) is a wise precaution. Remember, bees consume honey to generate heat, so ample stores are crucial for maintaining brood nest temperature.
2. Moisture Management: Preventing a Damp Disaster
Moisture buildup within the hive is a silent killer during winter. Warm, moist air exhaled by the bees condenses on the cold hive walls, leading to chilling, mold growth, and potential disease. Ensure adequate ventilation by slightly propping up the inner cover, using a screened bottom board, or providing ventilation holes near the top of the hive. Avoid excessive hive insulation, which can trap moisture.
3. Wind Protection: Shielding from the Elements
Harsh winter winds can strip heat from the hive, depleting precious honey stores and stressing the colony. Position hives in a sheltered location, protected from prevailing winds by natural windbreaks like trees or shrubs, or by constructing artificial windbreaks.
4. Snow Load: Protecting the Hive Structure
Heavy snowfall can place significant strain on the hive structure, potentially damaging walls and roofs. If heavy snowfall is anticipated, consider shoveling snow away from the hive to reduce the load.
5. Rodent Control: Preventing Unwanted Guests
Mice and other rodents can quickly decimate a bee colony during the winter months. Implement preventative measures like metal hive wraps, mouse traps, and removing potential nesting sites near the hive.
6. Minimal Disturbance: Letting Them Rest
Avoid unnecessary hive inspections during the winter. Disturbing the colony wastes valuable energy and can disrupt their critical winter cluster. Unless there's a specific concern, let the bees rest undisturbed until the signs of spring appear.
Record Keeping: Tracking Progress and Identifying Trends
Keeping meticulous records is arguably one of the most valuable, yet often overlooked, aspects of beekeeping. It's more than just a formality; it's your key to understanding your colonies' health, identifying patterns, and ultimately, becoming a better beekeeper. Think of it as your beekeeping diary - a place to document successes, learn from challenges, and build a historical perspective on your hives.
What exactly should you record? The possibilities are vast, but here's a solid foundation to get you started:
- Inspection Dates & Observations: Note the date of each hive inspection and detail your observations. Include details like brood pattern (solid, spotty, etc.), queen presence (sighted or inferred), population size (strong, moderate, weak), honey/pollen stores, and any unusual behavior.
- Treatments & Medications: Precisely record any treatments administered - for mites, diseases, or other issues. Include the product used, application method, dosage, and date. This helps track efficacy and avoid accidental over-treatment.
- Weather Data: Keep a log of weather conditions affecting your hives (temperature, rainfall, wind). This can correlate with colony growth, honey production, and disease prevalence.
- Swarm Events: Document any swarm attempts, including dates, suspected causes (queen cell presence, overcrowding), and actions taken.
- Honey Harvests: Record harvest dates, yields (weight or volume), and quality notes (color, clarity, taste).
- Queen Management: Track queen introduction dates, requeening events, and queen status (marked, unmarked, age).
- Equipment Changes: Note any significant equipment modifications or additions to your hives.
Beyond the Basics: Identifying Trends
Record keeping isn't just about documenting what happened; it's about learning from it. Over time, your records will reveal trends that can inform your management decisions. For example:
- Seasonal Population Fluctuations: Identifying predictable population declines and peaks can help you plan for feeding and mite control.
- Disease Outbreaks: Early detection of disease patterns allows for proactive intervention.
- Effectiveness of Management Techniques: Track the impact of different methods for mite control, swarm prevention, or honey production.
Tools for Record Keeping
Whether you prefer pen and paper or digital tools, the best record-keeping system is the one you'll actually use consistently. Options include:
- Notebooks or Journals: Simple and readily accessible.
- Spreadsheets (Excel, Google Sheets): Allow for easy data organization and analysis.
- Beekeeping Apps: Offer specialized features for hive tracking, treatment schedules, and photo storage (search for beekeeping app in your app store).
Equipment Maintenance: A Well-Maintained Hive is a Healthy Hive
A well-maintained hive isn't just about the bees; it's about the entire ecosystem you're creating. Just like a car needs regular servicing, your beekeeping equipment requires consistent care to ensure its longevity and your safety. Neglecting maintenance can lead to costly replacements, increased risks of disease spread, and even potential injury.
Let's break down essential maintenance tasks, categorized by equipment type:
Hive Components (Bottom Board, Supers, Frames):
- Annual Inspection: Remove all components from the hive at least once a year (ideally during a period of low bee activity) for a thorough inspection.
- Cleaning: Use a hive-safe cleaning solution (hot water and a mild detergent work well) to remove propolis, wax, and debris. Avoid harsh chemicals that can contaminate the honey.
- Repairs: Check for cracks, warping, or rot in wooden components. Replace damaged frames and repair or replace cracked boxes.
- Painting/Sealing: Repaint or reseal wooden boxes every few years to protect them from the elements and extend their lifespan. Use bee-friendly paint or sealant.
Protective Gear (Suit, Veil, Gloves):
- Suit & Veil: Regularly inspect for tears or holes. Patch any damage promptly. Clean your suit occasionally to remove propolis and bee debris.
- Gloves: Check for punctures or thinning. Replace worn-out gloves. Clean them to remove sticky residues.
- Boots: Clean and disinfect your boots after each hive visit to prevent the spread of disease.
Tools (Smoker, Hive Tool):
- Smoker: Keep the smoker clean and free of clogs. Replenish the fuel (pine needles, wood shavings) regularly. Inspect the bellows for leaks.
- Hive Tool: Clean the hive tool after each use to remove propolis and wax. Sharpen the blade as needed. Rust can be removed with a wire brush or steel wool.
Honey Extraction Equipment (Extractor, Uncapping Knife, Strainers):
- Extractor: Thoroughly clean and sanitize the extractor after each honey harvest. Inspect the drum for damage.
- Uncapping Knife: Keep the blade sharp and clean.
- Strainers: Clean and sanitize strainers meticulously to prevent contamination of the honey.
Regular maintenance is an investment in the health of your bees, the efficiency of your operation, and your own safety. A little preventative care goes a long way!
Safety First: Protecting Yourself and Your Bees
Beekeeping is a rewarding endeavor, but it's crucial to prioritize safety-both yours and your bees'. A sting can be more than just uncomfortable; allergic reactions can be serious. Here's how to minimize risks:
Personal Protective Gear is Non-Negotiable: Always wear a bee veil, and consider a full bee suit, gloves, and boots. Even experienced beekeepers should suit up. Don't skip this step!
Gentle Movements & Calm Demeanor: Bees react to vibrations and sudden movements. Approach the hive slowly and deliberately. Avoid jerky motions and speak calmly.
Smoke is Your Friend (Used Properly): A smoker disrupts the bees' communication system, making them less likely to sting. Puff smoke gently into the hive before opening it, and use it sparingly. Over-smoking can stress the colony.
Bee-Friendly Environment: Minimize stress on your bees by keeping the area around the hive tidy and free of obstacles. Avoid mowing the grass too close to the hive and provide a consistent water source.
Allergy Awareness: Be aware of the potential for allergic reactions to bee stings. Know your own allergy status, and have a plan in place if you experience a reaction (e.g., carrying an EpiPen). Have a first-aid kit readily available.
Dealing with Swarms: If a swarm occurs, do not attempt to handle it yourself unless you are a trained and experienced beekeeper. Contact a local beekeeping association or swarm removal service.
Respect the Bees: Remember that you are entering the bees' home. Treat them with respect and observe their behavior. A little mindfulness goes a long way in preventing stings and fostering a healthy relationship with your colony.
Requeening: When and Why
Sometimes, even with the best care, a queen's performance declines, or unforeseen circumstances necessitate a replacement. Requeening - introducing a new queen into your hive - isn't something to be done lightly, but understanding the signs and motivations can significantly improve colony health and productivity.
Signs Your Queen Might Need Replacing:
- Decreased Egg Laying: A significant drop in the number of eggs laid indicates a queen's declining vigor. She may be old, diseased, or simply not as productive.
- Spotty Brood Pattern: A patchy, irregular brood pattern suggests the queen's fertility is compromised. Look for gaps and inconsistencies in the capped brood.
- Colony Population Decline: A shrinking colony size, despite adequate resources, can be a sign of a failing queen.
- Aggressiveness: Occasionally, a queen's temperament can become excessively aggressive, making hive management difficult and potentially dangerous.
- Queen Mortality: Obviously, if you find a dead queen during an inspection, requeening is necessary.
Why Choose to Requeen?
Beyond addressing failing queen performance, there are other compelling reasons to introduce a new queen:
- Swarm Prevention: Younger queens tend to be less prone to swarming. Requeening with a queen bred for docility can help reduce the likelihood of swarms.
- Improved Honey Production: Vigorous queens lay more eggs, leading to a larger workforce and potentially higher honey yields.
- Introducing Desired Traits: You can select queens bred for specific traits, such as disease resistance, gentleness, or high productivity, to improve the overall health and performance of your hive.
- Reversing Colony Reversion: Sometimes colonies revert to darker bee genetics, requeening with a queen from a more desirable lineage can reverse that.
Requeening can seem daunting, but with proper planning and execution, it's a valuable tool for maintaining healthy and productive bee colonies.
Honey Harvesting: From Hive to Jar
The moment every beekeeper anticipates! Harvesting honey is a rewarding culmination of the season's hard work, both by you and your busy bees. However, it's a process that requires careful planning and respect for the hive's needs. Here's a breakdown of how to safely and effectively harvest your liquid gold.
Assessing Readiness: Honey is ready for harvest when the honey supers (the boxes above the brood chamber) are mostly capped - ideally, at least 80% of the cells should be sealed with beeswax. Capping indicates that the honey has reached the correct moisture content, making it stable and less prone to fermentation. Gently remove a few cells with your hive tool to check. If the honey is runny or appears uncapped, it's not quite ready. Patience is key!
Gentle Removal & Bee Control: Before opening the hive, consider using a bee escape board placed between the honey super and the brood box. This allows the bees to move down, leaving the honey super relatively bee-free within 24-48 hours. Alternatively, a fume board can be used, though it can stress the colony and should be used with caution and experience. Always wear protective gear!
Removing the Honey Supers: Once the majority of bees have cleared the super, carefully remove the frames. Brush off any remaining bees with a soft brush; avoid shaking the frames, as this can damage the comb and injure bees. Place the frames in a clean, covered container.
Extracting the Honey: There are several methods for extracting honey:
- Manual Crushing: A traditional, labor-intensive method suitable for small-scale operations.
- Radial Extractor: Efficient for medium-sized operations.
- Tangential Extractor: A good option for smaller harvests and preserves more of the comb.
Follow the extractor's instructions carefully. Honey must be extracted gently to avoid damaging the comb.
Filtering and Bottling: After extraction, the honey will contain wax particles, pollen, and air bubbles. Strain the honey through a double sieve (cheesecloth or specialized honey filters) to remove these impurities. Allow the honey to settle for a few days to allow smaller particles to settle. Warm (not hot!) honey flows more easily, but overheating can degrade its quality and beneficial enzymes. Bottle the honey in clean, dry jars, leaving a small headspace. Label the jars clearly with the type of honey, harvest date, and your beekeeping operation's name.
Important Considerations: Always leave enough honey in the hive (typically around 60-80 pounds, depending on your climate) to ensure the bees have adequate food stores to survive the winter or leaner times.
Resources & Links
- University of Maryland Bee Lab : A leading research institution for bee health and beekeeping practices, providing research-backed information, educational resources, and publications. Excellent for understanding bee biology and advanced beekeeping techniques.
- BeeSource : A large online community and resource hub for beekeepers of all levels. Contains forums, articles, and a marketplace for beekeeping supplies. Good for troubleshooting and connecting with other beekeepers.
- American Honey Producers Cooperative (AmeriHoney) : A cooperative of beekeepers offering information on honey production, bee health, and the industry as a whole. Offers practical advice and industry insights.
- University of Minnesota Extension - Bees : Provides a wealth of information, specifically geared towards Midwestern beekeepers, covering hive management, disease identification, and legal considerations. Excellent for practical, region-specific guidance.
- Crown Bees : Provides beekeeping supplies and educational resources, including instructional videos and articles covering a wide range of beekeeping topics from beginner to advanced. Focuses on practical, hands-on beekeeping.
- Bush Bees : Offers detailed information and resources specifically on natural beekeeping and the use of top bar hives. Helpful for understanding alternative hive management methods.
- Dadant & Sons : A long-standing supplier of beekeeping equipment and resources. Offers a comprehensive catalog and articles covering various aspects of beekeeping.
- Mann Lake Ltd. : Another major supplier of beekeeping supplies and education, offering articles, videos, and product information.
- USDA Agricultural Research Service - Bees and Pollinators : Provides research-based information on bee health, pollination, and related topics. A reliable source for scientific updates and data.
- Moreflow Honey : While primarily a supplier of honey harvesting equipment, they have a significant amount of educational resources on honey production and beekeeping techniques.
- Bee Removal Experts : Although a bee removal business, their website offers resources and information about bee identification, behavior, and swarm prevention, which is beneficial for beekeepers.
- California Almond Board : Offers information about pollination, bee health and the almond industry, including resources relevant to beekeepers providing pollination services.
Frequently Asked Questions
What is the purpose of this checklist?
This checklist serves as a template to help beekeepers regularly assess and maintain the health and productivity of their beehives. It provides a structured approach to hive inspections and helps ensure consistent management practices.
Does this checklist include information about swarm prevention?
While the checklist itself doesn't contain explicit swarm prevention techniques, regular hive inspections, as guided by this checklist, will allow you to identify signs of swarming behavior and take proactive measures to prevent it.
Found this Article helpful?
Agriculture Management Solution Demo
Running a farm or agricultural business is complex. ChecklistGuro's Work OS platform simplifies your operations, from crop planning and irrigation management to livestock tracking and harvest scheduling. Increase efficiency, reduce waste, and boost yields! See how ChecklistGuro can revolutionize your agriculture business.
Related Articles

10 Simple Steps to a Healthy Drainage System: Your Checklist Template

Mastering the Daily Crop Scouting Report: Your [Specific Crop] Checklist Template

Irrigation System Checklist: Farm Water Management & Crop Yield Optimization

Unlock Your Garden's Potential: A Soil pH Verification Checklist

PPE Usage Checklist Template: Your Guide to Safety

Water Discharge Permit Compliance Checklist Template

The Ultimate GPS & Precision Farming Calibration Checklist Template

Water Runoff Analysis Checklist Template
We can do it Together
Need help with
Agriculture?
Have a question? We're here to help. Please submit your inquiry, and we'll respond promptly.