Ensuring Structural Integrity: Your Column & Beam Alignment Checklist Template
Published: 08/31/2025 Updated: 04/23/2026
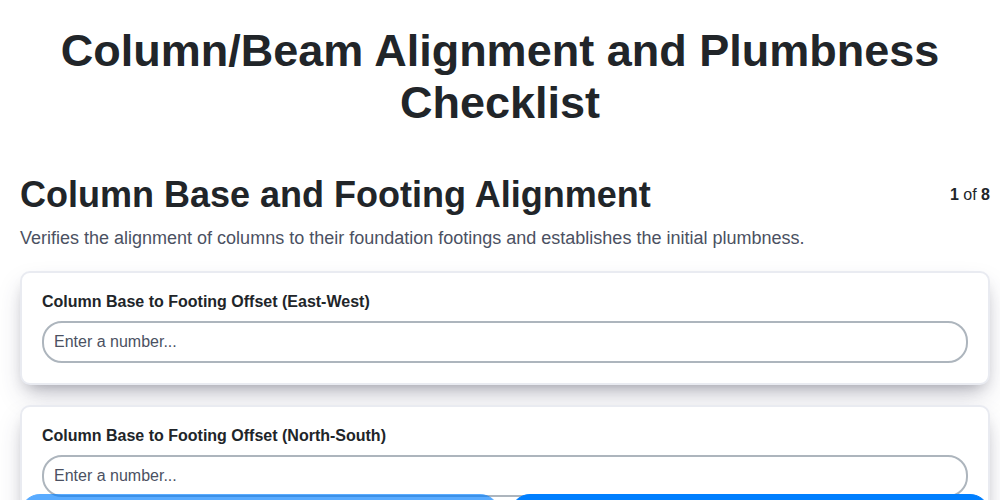
Table of Contents
- Introduction: Why Column & Beam Alignment Matters
- Understanding the Risks of Misalignment
- Your Column & Beam Alignment Checklist Template
- Step 1: Column Base & Footing Alignment Verification
- Step 2: Establishing a Vertical Reference - Column Plumbness
- Step 3: Column Head Precision - Ensuring a Solid Foundation
- Step 4: Beam-to-Column Connection Alignment
- Step 5: Beam Levelness - A Critical Horizontal Check
- Step 6: Leveraging Survey Data & Reference Points
- Step 7: Corrective Actions and Adjustment Techniques
- Step 8: Re-checking and Documentation - The Final Verification
- Tools and Equipment for Accurate Alignment
- Common Pitfalls & How to Avoid Them
- Resources & Links
TLDR: This checklist template helps construction teams ensure columns and beams are perfectly aligned and plumb - preventing costly mistakes and structural weaknesses. It walks you through key checks (base/footing, plumbness, head alignment, beam connections, and more) to guarantee a solid foundation and a safe, aesthetically pleasing structure. Download the template and simplify your quality control process!
Introduction: Why Column & Beam Alignment Matters
Structural integrity isn't just about the strength of the materials used; it's fundamentally about how those materials are assembled. A building's skeleton - its columns and beams - must be precisely aligned to ensure that loads are distributed evenly and safely throughout the structure. Even seemingly minor deviations can lead to a cascade of problems, from noticeable aesthetic flaws to potentially catastrophic structural failures. Think of it like a chain - if one link is weak or out of alignment, the entire chain's strength is compromised. Beyond the immediate risk of instability, misalignment introduces complications down the line, increasing the likelihood of issues with cladding installation, interior finishes, and ultimately, the long-term durability of the building. Therefore, meticulous attention to column and beam alignment isn't just a best practice; it's a non-negotiable aspect of responsible construction.
Understanding the Risks of Misalignment
Ignoring even slight deviations from perfect alignment can trigger a cascade of problems that impact not only the structure's integrity but also the project's timeline and budget. Aesthetically, misaligned elements create a jarring visual experience, detracting from the intended design and potentially requiring costly rework. Functionally, compromised load distribution leads to increased stress on individual structural members, accelerating fatigue and increasing the risk of premature failure. This isn't just a theoretical concern; it manifests in issues like cracked concrete, bowed beams, and uneven settling. Beyond the immediate structural concerns, misalignment complicates subsequent construction phases - installing cladding, drywall, or flooring becomes significantly more challenging, leading to increased labor costs and potential delays. Finally, correcting misalignment issues often necessitates demolition and reconstruction, dramatically inflating project expenses and impacting overall schedule adherence. The seemingly small investment of time and precision during initial alignment checks ultimately pays dividends by mitigating these substantial risks.
Your Column & Beam Alignment Checklist Template
Creating a consistent and thorough process is key to avoiding costly errors. This template provides a framework you can adapt for your specific projects. Remember to always reference your project's engineering drawings and specifications for precise tolerances and requirements.
Project Name: [Enter Project Name Here] Project Number: [Enter Project Number Here] Date: [Date of Inspection] Inspector: [Name of Inspector]
Column/Beam Identification: (e.g., C1-B1, C2-B2, etc.)
| Check Item | Specification/Tolerance (from Drawings) | Measured Value | Pass/Fail | Comments/Corrections Made | Initials |
|---|---|---|---|---|---|
| Column Base & Footing Alignment | |||||
| Column Verticality (Plumbness) | |||||
| Column Head Alignment | |||||
| Beam Alignment to Column | |||||
| Beam Levelness | |||||
| Column/Beam Connection Alignment | |||||
| Reference to Survey Data & Points |
Notes: [Space for overall project notes, unusual conditions, or further observations.]
Re-Check Date: [Date of re-check after corrections] Re-Check Initials: [Initials of person re-checking after corrections]
Step 1: Column Base & Footing Alignment Verification
The foundation of a structurally sound building begins with a precise connection between the column and its footing. This initial alignment sets the stage for everything that follows, so meticulous verification is paramount. The process isn't just about ensuring the column sits squarely; it's about guaranteeing that the load transfer from the column to the footing is even and predictable.
Here's how to verify column base and footing alignment:
- Visual Inspection: Begin with a thorough visual check. Look for any obvious signs of shifting, tilting, or uneven settling of the column base. Note any irregularities.
- Dimensional Measurement: Utilize a tape measure to measure the distance from the column base to the edges of the footing. Take measurements on all four sides of the column, creating a square pattern. Accurate measurements are crucial here.
- Comparison to Drawings: Compare the measured distances to the dimensions specified on the architectural and structural drawings. These drawings represent the design intent, and deviations require investigation.
- Tolerance Check: Evaluate whether the differences between the measured dimensions and the design dimensions fall within the specified tolerance limits. Building codes often dictate allowable tolerances, and these must be strictly adhered to.
- Addressing Discrepancies: If discrepancies are found outside of the permitted tolerances, immediate corrective action is necessary. This might involve re-setting the column base, adjusting the footing, or consulting with a structural engineer to determine the appropriate solution. Documentation of any corrective measures taken is essential.
Step 2: Establishing a Vertical Reference - Column Plumbness
Accurate column plumbness is foundational to a structurally sound building. Simply put, if your columns aren't perfectly vertical, the entire structure's load distribution and aesthetic appeal are compromised. Establishing a reliable vertical reference is the first step in verifying this critical alignment.
There are several methods for checking column plumbness, each with its pros and cons. A traditional spirit level is a common starting point, but remember that shorter levels are more susceptible to error. Longer levels (4ft or greater) offer improved accuracy over longer distances. Carefully move the level up the column's face, checking at multiple points-don't rely on just one spot!
For larger projects or taller columns, a laser level becomes invaluable. These devices project a precise laser beam that can be used to establish a vertical plane, greatly simplifying the process and increasing efficiency.
Another reliable technique involves using a plumb bob. A plumb bob is a weight suspended from a string - the string's verticality is dictated by gravity. By comparing the column's edge to the plumb line, you can accurately determine any deviation from perfect verticality. This is particularly useful for long columns where laser levels might be impractical.
Regardless of the method you choose, meticulous attention to detail is essential. Even slight deviations can accumulate and cause significant issues later in the construction process. Don't hesitate to re-check your measurements and consult with a more experienced colleague if you're unsure.
Step 3: Column Head Precision - Ensuring a Solid Foundation
The column head represents the critical interface where a column transfers its load to the beam above. Achieving precision here is non-negotiable for structural integrity and ease of construction. It's more than just ensuring the column is level; it's about creating a perfectly prepared surface for the beam's connection.
First, meticulously check the column head's levelness using a precision level. Even slight deviations can complicate the beam-setting process and compromise the connection. The tolerance here will likely be stricter than general plumbness checks - refer to your project specifications.
Beyond levelness, confirm the column head's dimensions match the engineering drawings. Are the faces square and true? Any irregularities can impact the beam's seating and bolt hole alignment. Visual inspection is crucial, but backed up with accurate measurements.
Finally, check the top surface for any debris, protrusions, or imperfections. These can interfere with the beam's proper contact and load distribution. A clean, smooth surface guarantees a solid, reliable connection. Remember, the strength of your structure starts with a meticulously prepared column head.
Step 4: Beam-to-Column Connection Alignment
Ensuring a precise beam-to-column connection is paramount for structural integrity. It's not enough for the beam and column to look aligned; the connection points must be accurately positioned to facilitate proper bolting or welding.
Here's what to check:
- Bolt Hole Alignment: This is critical. Use a level and measuring tape to verify that bolt holes in both the beam and column are perfectly aligned. Any offset can lead to connection difficulties and compromise the joint strength. Use a straight edge or laser alignment tool for enhanced precision.
- Connection Geometry: Carefully examine the connection geometry against the structural drawings. This includes the beam's vertical and horizontal position relative to the column, the angle of the connection (if applicable), and the overall shape of the joint. Minor discrepancies here can introduce stress concentrations and potentially weaken the entire structure.
- Web Plate/Flange Positioning: If the connection involves web plates or flange plates, verify their accurate positioning relative to the beam and column. Small errors here can significantly impact the load-transfer capability of the connection.
- Chamfering and Edge Preparation: Assess the chamfering and edge preparation on the connection surfaces. Proper preparation ensures even pressure distribution during bolting or welding.
- Visual Inspection: Perform a thorough visual inspection of the entire connection area. Look for any signs of distortion, damage, or misalignment.
Step 5: Beam Levelness - A Critical Horizontal Check
A beam's levelness isn't just about aesthetics; it's fundamentally tied to the structural integrity of the entire system. Even a slight deviation from perfectly horizontal can create uneven load distribution, leading to stress concentrations and potential cracking down the line. Think of it this way: a warped beam will impact how weight is transferred to the columns, potentially compromising their stability.
To accurately assess beam levelness, don't rely on a short, handheld level. Use a long level - ideally spanning a significant portion, or even the entire length, of the beam. Take multiple readings at different points along the beam's span. A single reading can be misleading, as the beam might exhibit slight variations over its length. If you notice a consistent downward slope or upward bow, it indicates a problem that needs addressing.
Common causes of beam deviation include insufficient support during installation, settlement of underlying supports, or issues with the material itself (e.g., warping due to moisture). Correcting this often involves re-supporting the beam, shimming the supports, or in more severe cases, replacing the beam entirely. Don't underestimate the importance of this check - a level beam is a foundation for a stable and long-lasting structure.
Step 6: Leveraging Survey Data & Reference Points
The field isn't operating in a vacuum. Established survey points and reference lines serve as the backbone for ensuring accuracy across the entire project. This step involves cross-referencing your column and beam alignment with these pre-defined markers.
Here's how to effectively utilize this data:
- Locate and Verify Existing Points: Before any alignment checks begin, ensure you can confidently locate and identify the survey points established during the site preparation phase. These are typically marked with physical monuments or embedded markers.
- Compare Field Measurements to Survey Data: Take measurements of column and beam positions and compare them directly to the coordinates and elevations recorded in the survey data. Discrepancies, even seemingly minor ones, should be investigated and corrected.
- Utilize Reference Lines: Surveyors often establish straight, visible reference lines (string lines, laser lines) to guide the placement of structural elements. Use these lines as visual guides during alignment checks, ensuring columns and beams sit squarely within the designated area.
- Elevation Verification: Confirm the vertical position (elevation) of columns and beams matches the survey data. This is crucial for ensuring proper integration with subsequent construction phases, such as flooring or cladding.
- Continuous Monitoring: As construction progresses, periodically re-verify alignment against the survey data to account for potential settling or movement. This proactive approach can prevent larger issues down the line.
By integrating survey data and reference points into your alignment verification process, you're establishing a robust framework for structural accuracy and minimizing the risk of costly rework.
Step 7: Corrective Actions and Adjustment Techniques
Minor deviations from alignment tolerances are common during construction, and addressing them proactively is key to a structurally sound building. The correction methods employed will depend on the nature and severity of the misalignment. Here's a breakdown of typical corrective actions:
1. Shimming: This is the most frequent method for correcting minor column or beam misalignments. Shims - thin, tapered pieces of material (often metal or plastic) - are inserted between the column base and footing, or between the beam and column. By strategically placing shims, you can incrementally adjust the vertical and horizontal position of the structural element.
2. Temporary Bracing: Before making any adjustments, secure the misaligned element with temporary bracing. This prevents movement or settling during the correction process. Strong, well-placed bracing is essential, especially when dealing with heavier beams.
3. Re-pouring Concrete Footings (Minor Adjustments): For slight deviations in column base alignment, a small amount of concrete can be added or removed to create a new, level base. This requires careful planning and execution to avoid disrupting the overall foundation.
4. Using Adjustable Anchor Bolts: Where feasible, consider using adjustable anchor bolts. These allow for minor adjustments in beam or column position during the connection process.
5. Grouting: In some cases, grouting can be used to fine-tune alignment. This involves carefully injecting grout into gaps or voids between the structural element and its supporting base.
6. Re-setting Columns (Significant Misalignment): If a column is significantly out of alignment, it may be necessary to completely remove and re-set it, ensuring proper footing placement and plumbness. This is a more involved process and requires careful planning and coordination.
Important Considerations:
- Document Every Adjustment: Meticulously record all corrective actions taken, including the number and placement of shims, the volume of concrete added or removed, and any adjustments to anchor bolts.
- Verify with Re-Checks: After each adjustment, immediately re-check the alignment using the methods outlined in the initial checklist.
- Consult with an Engineer: For significant misalignments or if unsure about the appropriate corrective action, always consult with a structural engineer.
Step 8: Re-checking and Documentation - The Final Verification
Correcting alignment isn't the end; it's the beginning of a meticulous final verification process. Once adjustments - whether minor shims or more significant repositioning - are made, a complete re-check of every parameter outlined in the checklist is absolutely mandatory. Don't assume that because one measurement is now within tolerance, the rest are too. Each step - from column base alignment to beam levelness and connection integrity - must be revisited and verified.
This final verification isn't just about confirming numbers; it's about ensuring the cumulative effect of all corrections has resulted in a structurally sound and accurately positioned element. Take fresh measurements, utilize the same equipment and techniques used during the initial assessment, and compare the results against the original specifications. If any discrepancies remain, further investigation and correction are required.
Crucially, documentation is paramount. A comprehensive record of the entire process - including initial measurements, adjustments made, the rationale behind those adjustments, and the final verified measurements - provides a valuable audit trail. This documentation should include:
- Date and Time of Checks: Essential for tracking changes over time.
- Personnel Involved: Clearly identify who performed the checks.
- Equipment Used: Specify the models and calibration dates of all measuring tools.
- Measurement Data: Record all measurements, including those that fall outside tolerance.
- Photographic Evidence: Photos of the alignment process, particularly before and after adjustments, provide a visual record.
- Signatures: Obtain signatures from the individuals responsible for the verification, acknowledging the accuracy and completeness of the data.
This thorough documentation serves not only as proof of due diligence but also as a resource for future reference, maintenance, and any potential investigations. A well-documented process instills confidence in the structural integrity of the project and contributes to its long-term success.
Tools and Equipment for Accurate Alignment
Achieving precise column and beam alignment demands the right tools. While basic instruments suffice for smaller projects, larger and more complex structures benefit from more sophisticated equipment. Here's a breakdown of essential tools and their applications:
1. Essential Tools:
- Tape Measure: For basic dimensional verification and distance measurement.
- Spirit Level: The workhorse for checking plumbness and levelness. Opt for longer levels (4ft or greater) for improved accuracy over longer spans.
- Plumb Bob: A simple and reliable tool for establishing vertical reference lines.
- Square (Speed Square, Framing Square): Used for ensuring right angles and verifying squareness of column bases and beam connections.
2. Advanced Equipment:
- Laser Level: Projects a horizontal or vertical laser beam, enabling accurate alignment over long distances. Self-leveling laser levels further simplify the process.
- Rotary Laser Level: Rotates a laser beam, creating a circular plane for setting grade or establishing horizontal reference lines. Requires a receiver for accurate readings.
- Digital Level: Offers increased precision and often includes features like data logging and angle measurement in various units.
- Total Station: A sophisticated surveying instrument that combines an electronic theodolite and an electronic distance meter. Used for precise measurements of angles and distances.
- Laser Scanner: Captures a 3D point cloud of the structure, allowing for detailed alignment analysis and comparison with design models.
- Alignment Pins & Shims: Small, adjustable pins and thin shims are crucial for making fine adjustments and achieving the desired alignment.
Common Pitfalls & How to Avoid Them
Even with a meticulous checklist, alignment issues can creep in. Recognizing these common pitfalls and proactively addressing them can save time, money, and headaches.
1. Rushing the Initial Column Base Setting: This is foundational. A slight error here compounds as the structure rises. Avoid it by: Taking extra time for accurate footing layout and ensuring the column base sits squarely. Double-check measurements before pouring concrete.
2. Ignoring Soil Settlement: Unstable ground can cause columns to shift over time. Avoid it by: Conducting thorough geotechnical investigations before construction. Implement appropriate soil stabilization techniques if necessary, as directed by the engineer. Regular monitoring during construction can also reveal subtle shifts.
3. Relying Solely on Visual Inspection: Our eyes can deceive us. A slight misalignment can be masked by surrounding elements. Avoid it by: Always supplementing visual checks with precise measurements using levels, tapes, and other tools.
4. Inadequate Communication: Misunderstandings between the surveying team, the construction crew, and the structural engineer can lead to errors. Avoid it by: Establishing clear lines of communication. Hold regular coordination meetings and clearly document all decisions.
5. Using Uncalibrated Equipment: A faulty level or tape measure can introduce significant errors. Avoid it by: Regularly calibrating all measuring equipment. Keep calibration records readily available.
6. Neglecting Temporary Bracing: Columns can easily shift if not properly braced during construction. Avoid it by: Implement a robust temporary bracing system, especially for tall or slender columns.
7. Ignoring Weather Conditions: Strong winds or uneven ground moisture can temporarily affect alignment. Avoid it by: Be mindful of weather forecasts. Adjust work schedules or implement additional bracing if necessary. Protect exposed surfaces from moisture.
Resources & Links
- National Institute of Standards and Technology (NIST) : NIST provides research and standards related to construction materials, tolerances, and measurement techniques. While not directly about alignment, their work on precision and accuracy informs best practices. Search their publications for information on measurement uncertainty and quality control relevant to construction.
- American Society of Civil Engineers (ASCE) : ASCE is a leading professional organization for civil engineers. Their website offers publications, standards (e.g., related to steel construction and tolerances), and continuing education resources that can be incredibly valuable for understanding structural engineering principles and best practices for ensuring structural integrity.
- American Institute of Steel Construction (AISC) : AISC is the leading authority on steel construction. Their specifications (AISC 360) contain detailed requirements and guidance for steel construction, including tolerances and alignment criteria. While purchasing the full standard is recommended for detailed work, their website provides helpful information and resources.
- International Code Council (ICC) : The ICC develops building codes (like the International Building Code - IBC) which specify minimum requirements for structural performance. Understanding the code requirements related to tolerances and alignment is critical for ensuring compliance. Consult the relevant edition of the IBC for specific requirements.
- Engineer's Daily : Engineer's Daily is a platform featuring articles, discussions, and resources for engineers. Search for articles related to construction tolerances, alignment, and surveying to find practical advice and insights from experienced professionals. Offers real-world examples and troubleshooting tips.
- Surveying Resources : Provides information and articles related to surveying techniques, equipment, and best practices. Offers guidance on establishing control points, performing leveling, and using total stations - all essential for accurate column and beam alignment verification. Specifically useful for Step 4 and 6.
- Trimble : Trimble is a leading manufacturer of surveying equipment, including total stations, laser scanners, and GPS systems. Their website provides product information, application notes, and training resources that can help you understand how to use these tools for accurate alignment verification. Good for understanding step 2,4 and 6.
- Leica Geosystems : Similar to Trimble and other manufacturers, Leica Geosystems provides professional-grade surveying equipment and software. Their website features product details, application examples, and training materials. Focuses on equipment for step 2,4 and 6.
- Construction Dive : Construction Dive publishes industry news and insights. Searching their site for keywords like 'structural tolerances,' 'column alignment,' or 'beam alignment' can surface relevant articles and case studies.
- Bosch Professional : Bosch Pro offers a range of construction tools including levels, lasers, and measuring tools that are essential for alignment checks. Their website provides product specifications and application guidance. Useful for almost all steps.
Frequently Asked Questions
What is structural integrity and why is it important?
Structural integrity refers to the ability of a building's framework (columns, beams, walls, etc.) to withstand loads and stresses without failure. It's crucial for safety, preventing collapse, and ensuring the long-term durability of the structure.
What is this Column & Beam Alignment Checklist Template designed to do?
This template provides a structured process to verify the proper alignment of columns and beams during construction or renovation. It helps identify deviations from design specifications early on, preventing costly rework and ensuring the structure's stability.
Who should use this checklist?
This checklist is valuable for construction crews, engineers, inspectors, and project managers involved in building projects, especially those dealing with concrete, steel, or wood framing.
What kind of equipment will I need to use this checklist?
You'll typically need basic surveying tools such as a laser level, tape measure, plumb bob, optical square, and potentially a total station depending on the project's complexity and required precision. The template outlines these needs.
How often should I use this checklist?
The checklist should be used during key phases of construction, including: after column installation, after beam installation, after concrete pouring (for columns and beams), and during any significant structural modifications.
What do I do if the checklist reveals misalignment?
If measurements indicate misalignment, the checklist guides you to halt work, document the deviation, and consult with a structural engineer to determine the necessary corrective actions. Do NOT proceed without correction.
Can I modify the checklist template?
Yes, the checklist is designed to be adaptable. Feel free to add or modify sections to suit the specific requirements of your project, but always ensure any changes maintain the core principles of structural verification.
What is the significance of documenting measurements?
Detailed documentation provides a traceable record of the verification process. This is crucial for quality control, resolving disputes, and demonstrating compliance with building codes and regulations.
Is this checklist a substitute for a professional structural engineer's review?
No. This checklist is a tool to aid in verification, but it should *always* be complemented by the expert review and sign-off of a qualified structural engineer. The engineer is responsible for the overall structural design and safety.
Where can I find more information about building codes and structural engineering standards?
Refer to your local building codes and regulations, as well as industry standards such as those published by the American Concrete Institute (ACI) or the American Institute of Steel Construction (AISC).
Found this Article helpful?
Construction Management Solution Demo
Build smarter, not harder! ChecklistGuro streamlines construction projects from planning to closeout. Manage tasks, inspections, safety protocols & more - all in one place. Reduce delays, improve communication, and deliver projects on time & on budget.
Related Articles

The Ultimate Concrete Vibration Checklist Template

Unlock Value: Your Free Value Engineering Checklist Template

The Ultimate HVAC Ductwork Installation Checklist Template

The Ultimate Rebar Placement Checklist Template

Your Concrete Mix Design Verification Checklist: A Step-by-Step Guide

Backfilling & Compaction Checklist: A Foundation's Best Friend

The Ultimate Concrete Delivery & Placement Checklist Template

Your Ultimate Stakeholder Communication Plan Checklist Template
We can do it Together
Need help with
Construction?
Have a question? We're here to help. Please submit your inquiry, and we'll respond promptly.