Your Guide to Paving Perfection: The Compaction Verification Checklist Template
Published: 09/02/2025 Updated: 12/13/2025
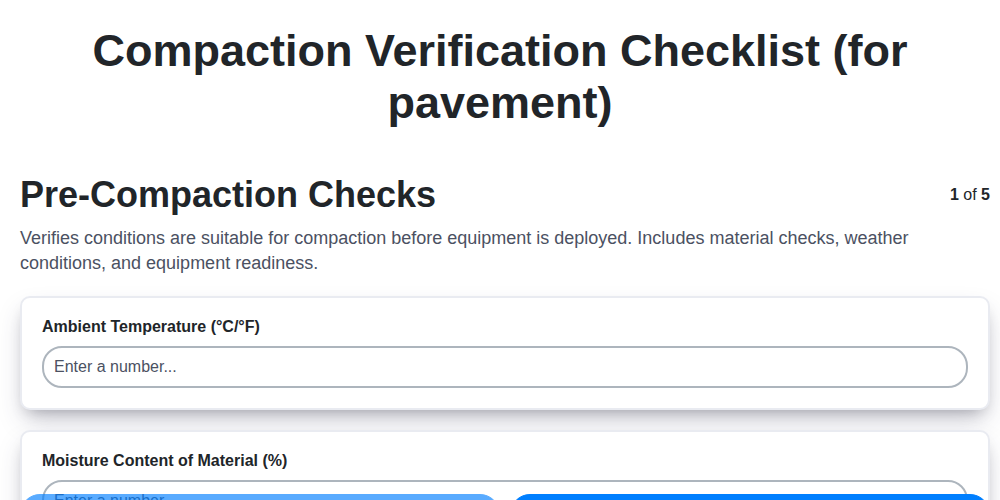
Table of Contents
- Introduction: Why Compaction Matters
- Understanding the Basics: What is Compaction Verification?
- The Checklist Template: A Step-by-Step Breakdown
- Phase 1: Pre-Compaction Checks - Setting the Stage
- Phase 2: Initial Compaction - Laying the Foundation
- Phase 2.1: Density Testing Explained
- Phase 3: Intermediate Compaction - Building Strength and Stability
- Phase 4: Final Compaction - Achieving a Smooth and Durable Surface
- Equipment Considerations: Choosing the Right Tools
- Moisture Management: The Key to Effective Compaction
- Density Testing Methods: A Comparative Overview
- Documentation & Reporting: Maintaining a Record of Success
- Common Challenges & Troubleshooting
- Best Practices for Paving Perfection
- Future Trends in Compaction Technology
- Resources & Links
TLDR: Need to ensure your pavement lasts? This checklist template guides you through every step of compaction - from pre-checks and initial passes to final density testing and documentation. It's your shortcut to avoiding costly repairs and achieving paving perfection by guaranteeing proper material settling and structural integrity.
Introduction: Why Compaction Matters
Compaction isn't just about achieving a smooth surface; it's the bedrock of pavement durability and longevity. Think of it this way: a loosely compacted pavement layer is like a house built on shifting sand - it won't stand the test of time. Proper compaction dramatically increases the pavement's load-bearing capacity, reducing the risk of premature cracking, rutting, and potholes. Insufficient compaction leads to increased maintenance costs, traffic disruptions, and ultimately, a shorter lifespan for your infrastructure investment. By ensuring proper density, we're not just building a road; we're creating a reliable foundation for years to come.
Understanding the Basics: What is Compaction Verification?
Compaction verification isn't just about checking numbers; it's about ensuring the long-term health and performance of your pavement. Essentially, it's the process of systematically evaluating whether the compaction effort has achieved the density and uniformity specified in the project's design. Why is this so crucial? Because proper compaction dramatically improves a pavement's load-bearing capacity, reduces permeability (preventing water damage), and minimizes the risk of premature failure - things like cracking, rutting, and potholes.
Think of it this way: imagine building a house on a shaky foundation. It won't last long, no matter how beautiful the design. Similarly, a poorly compacted pavement layer compromises the entire structure above it. Compaction verification provides the evidence that the 'foundation' - the compacted layers - are solid and ready to support the intended traffic loads and environmental conditions. It's a critical step in quality control, bridging the gap between design intent and on-site execution.
The Checklist Template: A Step-by-Step Breakdown
Let's move beyond the general overview and dive into a practical checklist template you can adapt for your projects. This isn't just a list; it's a framework designed for consistency and accountability. Remember, the specific details within each step will be dictated by your project specifications. This template includes example values and notes - replace them with your project's requirements. You'll find a downloadable version at the end of this article, but here's a detailed look at the structure:
Project Name: [Enter Project Name] Date: [Date of Inspection] Inspector: [Inspector's Name & Certification] Material Type: [e.g., Asphalt, Concrete, Aggregate Base] Layer Thickness (Planned): [e.g., 4 inches]
1. Pre-Compaction Checks:
| Task | Details/Measurements | Acceptable Range | Result | Pass/Fail | Notes |
|---|---|---|---|---|---|
| Material Gradation | Report # [Reference Lab Report] | [Specification Range - e.g., 2.35mm sieve: 90-100%] | |||
| Moisture Content | Method: [e.g., Oven Drying] | [Specification Range - e.g., 3-5%] | |||
| Roller Calibration | Calibration Date: [Date], Report #: [Reference Report] | Frequency within specified tolerance | |||
| Layer Thickness Verification | Location: [GPS Coordinates/Station #] | Within +/- [Tolerance - e.g., 0.25 inches] of planned |
2. Initial Compaction (Lift 1):
| Task | Details/Measurements | Acceptable Range | Result | Pass/Fail | Notes |
|---|---|---|---|---|---|
| Initial Rolling Pattern | Transverse passes @ [Degree Angle] | ||||
| Density Test 1 | Location: [GPS Coordinates/Station #], Method: [Nuclear Gauge], Moisture: [Moisture Content at test time] | [Specification Range - e.g., 95% Proctor] | |||
| Density Adjustment | Roller Speed/Vibration Setting |
3. Subsequent Lifts (Repeat steps from Initial Compaction for each lift):
- Include overlap with previous lift (e.g., 6-inch overlap)
- Vary test locations to ensure representative results
4. Final Inspection:
| Task | Details/Measurements | Acceptable Range | Result | Pass/Fail | Notes |
|---|---|---|---|---|---|
| Surface Smoothness | Visual Inspection, Reference: [Specification Reference] | No visible defects | |||
| Final Density | Multiple tests, averaging results | Within specification range |
Overall Pass/Fail: [Pass/Fail] Inspector Signature: _________________________
Phase 1: Pre-Compaction Checks - Setting the Stage
Before a single roller makes contact with the pavement, a series of vital checks must be completed. This phase isn't just about ticking boxes; it's about ensuring the foundation for a durable and long-lasting pavement is perfectly prepared. Ignoring these preliminary steps significantly increases the risk of compaction issues down the line, leading to costly rework and premature pavement failure.
Let's start with the materials. Verification of both gradation and density of the base material is essential - are we working with what we expect? Moisture content is equally critical; too little, and compaction is difficult; too much, and we risk instability and segregation. Project specifications usually dictate a specific moisture range, and adherence is non-negotiable.
Then comes the equipment itself. This isn't a cursory glance; it's a meticulous inspection. Each compaction device, from plate compactors to heavy rollers, must be in optimal working condition. We need documented proof of pre-use inspections, ensuring gauges are accurate, vibrations are consistent, and all mechanical components are functioning correctly. Incorrectly calibrated equipment introduces uncontrolled variables, compromising the entire compaction process.
Finally, the surface must be pristine. Removing debris, rocks, and any obstructions creates a uniform canvas for compaction. Layer thickness verification is also crucial, ensuring each lift meets the specified dimensions. A properly prepared surface allows for consistent and predictable results, ultimately contributing to a superior final product. Don't underestimate the power of a solid start - it's the bedrock of pavement longevity.
Phase 2: Initial Compaction - Laying the Foundation
The first lift of pavement is arguably the most critical, acting as the bedrock for everything that follows. This initial compaction phase establishes the foundation for achieving the desired structural integrity and load-bearing capacity. It's about more than just pressing the material down; it's about creating a stable and uniform base.
Begin with a light initial pass using the designated roller, typically a pneumatic roller or a vibratory roller operating at a lower amplitude and speed. The objective here isn't to achieve full compaction, but rather to settle the material and allow for initial consolidation. Following this, a density test is performed - crucial for validating the process. Use the method specified in your project documentation (e.g., Sand Cone, Nuclear Density Gauge) and record the results meticulously, noting the location and testing method.
If the density falls outside the acceptable range defined in your project specifications, immediate corrective action is necessary. This often involves adjusting the moisture content - adding water to dry material or removing excess moisture from wet material. Following any adjustment, a second compaction pass is performed, and density testing is repeated until the specified density is achieved. Careful observation of the material's behavior during compaction is vital; look for signs of segregation, uneven settling, or material movement. Document everything - the initial readings, the adjustments made, and the subsequent readings. Remember, a solid foundation is the key to a long-lasting pavement.
Phase 2.1: Density Testing Explained
Density testing is the cornerstone of verifying successful compaction. It's not enough to think you're achieving the right compaction; you need empirical data to prove it. Several methods are commonly used, each with its strengths and limitations.
Two Primary Methods:
- Nuclear Density Gauge (NDG): This method uses gamma radiation to measure both density and moisture content. It's relatively quick and efficient for large areas. However, it requires specialized training and licensing due to the radiation source, and the readings can be affected by soil composition and moisture variations. Regular calibration is essential.
- Sand Cone Test: A more traditional method, the sand cone test involves digging a hole in the compacted material and filling it with a standardized amount of sand. The volume of sand required indicates the density of the soil. While less expensive and requiring less specialized equipment than an NDG, it's more time-consuming and susceptible to operator variability.
Understanding the Results:
Project specifications will define the required density range, often expressed as a percentage of maximum dry density (PMMD). A reading below this threshold indicates under-compaction, while exceeding it suggests over-compaction. Both scenarios require adjustments to the compaction process. It's crucial to understand that density readings are just one piece of the puzzle; visual inspection and operator experience also play critical roles in assessing overall compaction quality.
Phase 3: Intermediate Compaction - Building Strength and Stability
The intermediate compaction phase is where the pavement foundation truly gains strength and stability. This isn't just about smoothing out the surface; it's about creating a dense, interlocking matrix of aggregate particles that can effectively distribute loads and resist deformation. Proper execution here is crucial to avoid premature failure and costly repairs down the line.
This phase involves multiple passes with compaction equipment, often using a combination of static rollers and vibratory rollers to achieve optimal density. Overlap between passes (typically 25-50%) is critical to ensure uniform compaction and prevent localized weak spots. A defined rolling pattern - whether transverse, circular, or a combination - should be strictly adhered to, as dictated by the project specifications and soil conditions.
Careful attention to moisture control remains paramount. While the initial lift establishes a baseline, subsequent lifts may require adjustments to moisture content to facilitate optimal compaction. Too little moisture and the aggregate won't bind effectively; too much and the material becomes unstable and difficult to compact. Regular visual inspection is essential to identify any signs of distress, such as cracking, rutting, or segregation. These issues need to be addressed promptly to prevent them from escalating into larger problems. Consistent record-keeping, including pass counts and density test results, is vital to track progress and identify any deviations from the plan. Ultimately, this phase is about systematically building a robust and reliable pavement foundation, layer by layer.
Phase 4: Final Compaction - Achieving a Smooth and Durable Surface
The final compaction phase is your last opportunity to ensure a durable and aesthetically pleasing pavement surface. This isn't about simply meeting density requirements; it's about creating a surface that's smooth, uniform, and ready to withstand traffic loads and environmental conditions.
Here, a lighter rolling pattern is typically employed. Often, this involves multiple passes with a pneumatic roller, or a vibratory roller set to a lower frequency, to achieve surface smoothness. Visual inspection becomes critically important at this stage. Look for any signs of rutting, cracking, or inconsistencies in the surface. Minor imperfections discovered now are far easier and more cost-effective to correct than dealing with them later.
A final, thorough density test is performed across a representative sample of the surface. These results must definitively confirm compliance with project specifications. Photographic documentation is essential - capturing the final compacted surface provides visual proof of the work completed and can be invaluable for future reference or dispute resolution. Protecting this newly compacted surface from immediate traffic and potential damage is also crucial until the pavement has adequately cured. This might involve signage, temporary barriers, or other protective measures.
Equipment Considerations: Choosing the Right Tools
Selecting the appropriate compaction equipment is just as crucial as understanding the compaction process itself. Using the wrong tools can lead to ineffective compaction, material segregation, and ultimately, pavement failure. Here's a breakdown of common equipment and their typical applications:
1. Plate Compactors: Ideal for granular materials like sand and gravel, plate compactors are frequently used for sub-base preparation and patching. Their versatility makes them suitable for confined spaces. Consider the size and frequency of the plate based on the material's density and area to be compacted.
2. Sheepsfoot Rollers: These are indispensable for cohesive soils (like clay) and stabilized bases. The protruding feet penetrate the soil, providing kneading action that effectively compacts the material. Different foot configurations exist; select based on soil type and moisture content.
3. Pneumatic Tire Rollers (Rubber Tire Rollers): Primarily used for asphalt and granular materials, rubber tire rollers provide impact compaction and excellent surface finish. The inflation pressure and tire arrangement significantly impact compaction effectiveness. They are also great for breakdown passes in asphalt paving.
4. Vibratory Rollers: These machines combine static weight with vibration, making them suitable for a wide range of materials including gravel, sand, and asphalt. Different vibration frequencies and amplitudes should be matched to the material being compacted. Smooth drum rollers are preferred for asphalt, while padfoot drum rollers are effective for granular materials.
5. Combination Rollers: Offering the benefits of both pneumatic tire and vibratory compaction, combination rollers are versatile and often used in asphalt paving for both breakdown and finishing passes.
Key Considerations:
- Material Type: The most critical factor in selecting equipment.
- Layer Thickness: Affects the required compaction effort.
- Soil Moisture Content: Impacts the effectiveness of different rollers.
- Area Size & Accessibility: Confined spaces might necessitate smaller, more maneuverable equipment.
- Equipment Calibration: Regular calibration is essential to ensure consistent performance.
Always consult the manufacturer's specifications and project requirements to determine the most appropriate equipment for your specific needs.
Moisture Management: The Key to Effective Compaction
Compaction isn't solely about the roller; it's intrinsically linked to moisture content. Too little moisture, and the material won't bind properly, resulting in low density and potential cracking. Conversely, excessive moisture can hinder compaction, create voids, and lead to instability. Achieving the "sweet spot" - the optimum moisture content - is paramount for successful pavement construction.
This isn't a simple matter of adding water; it's about careful assessment and control. Soil type significantly impacts its ideal moisture range. Clay soils, for instance, require different moisture management than granular soils like gravel or sand. Regularly testing the moisture content using approved methods (e.g., moisture-density relationship testing, field moisture determination) is crucial.
Controlling moisture isn't just about adding water; it's about removing it too. During hot, dry conditions, moisture can evaporate rapidly, leading to inconsistent compaction. Techniques like lightly sprinkling water, using windbreaks, or scheduling work during cooler times can help maintain the targeted moisture level. Always monitor weather forecasts and adjust compaction strategies accordingly. Remember, a proactive moisture management plan is the foundation for durable and long-lasting pavement.
Density Testing Methods: A Comparative Overview
Choosing the right density testing method is crucial for verifying compaction success. Each method has its strengths and weaknesses regarding accuracy, speed, cost, and suitability for different material types. Here's a comparison of common techniques:
1. Sand Cone Test (ASTM D1556):
- Principle: Measures the volume of a hole created by the material being tested. The volume is then used to calculate density.
- Pros: Relatively inexpensive, simple to perform, suitable for granular materials (e.g., gravel, crushed stone).
- Cons: Labor-intensive, time-consuming, lower accuracy compared to nuclear methods, influenced by operator skill, not ideal for cohesive soils.
- Typical Applications: Acceptance testing of granular base courses and subgrades.
2. Nuclear Density Gauge (ASTM N193):
- Principle: Employs a radioactive source to measure the density of the soil by counting gamma rays.
- Pros: Fast, relatively easy to use, can be used in difficult-to-access locations, less reliant on operator skill than the Sand Cone method.
- Cons: Higher equipment cost, requires specialized training and licensing to operate, potential radiation safety concerns.
- Typical Applications: Field density testing of various soil and aggregate layers, including subgrades, base courses, and asphalt.
3. Rubber Balloon Method (ASTM D7922):
- Principle: Measures the volume displacement of a calibrated rubber balloon inserted into a hole in the compacted material.
- Pros: Simple to use, relatively inexpensive, less reliant on operator skill than the Sand Cone test.
- Cons: Can be slow, accuracy can be affected by the balloon's ability to conform to the material's shape.
- Typical Applications: Testing of soils and aggregates, particularly useful for areas with limited access.
4. Extrusion Method (ASTM D7922):
- Principle: Utilizes a cylindrical tool to extract a sample of material, which is weighed and measured to determine density.
- Pros: Provides a direct measurement of density, less susceptible to surface irregularities.
- Cons: Can be more disruptive to the compacted layer, potentially affecting surrounding material.
- Typical Applications: Quality control in asphalt and concrete compaction.
Selecting the appropriate method depends on project requirements, budget constraints, soil type, and desired accuracy. It's common to use a combination of methods to ensure reliable results.
Documentation & Reporting: Maintaining a Record of Success
Maintaining meticulous documentation and consistent reporting isn't just about satisfying project requirements; it's the backbone of a successful pavement compaction process. A well-documented project demonstrates quality control, facilitates troubleshooting, and provides a valuable resource for future projects. Here's what your documentation and reporting should encompass:
Daily Compaction Logs: These are your primary record. Each log should include: date, time, weather conditions (temperature, precipitation, wind speed), equipment used (including serial numbers and last calibration date), operator names, material types and quantities placed, density test results (location, method, and readings - don't just note pass/fail, record the actual values!), moisture adjustments made, and any deviations from the approved compaction plan with explanations. Digital logs, accessible in real-time, are increasingly preferred for ease of data collection and analysis.
Test Reports & Data Analysis: Compile density and moisture test results into formal reports, clearly identifying trends and potential problem areas. Don't just present raw data; include brief analyses explaining the findings and any corrective actions taken. Visualizations, such as graphs showing density versus location or moisture content over time, can be incredibly valuable.
Photographic Evidence: A picture is worth a thousand words. Take regular photographs throughout the compaction process, capturing the material placement, rolling pattern, surface conditions, and any areas of concern. Properly labeled photos provide compelling visual documentation and are invaluable for communicating progress and addressing issues.
Record Retention & Accessibility: Establish a clear record retention policy in accordance with project specifications and legal requirements. Ensure records are stored securely and are easily accessible to authorized personnel. Cloud-based storage solutions offer enhanced accessibility and disaster recovery capabilities.
Communication with Stakeholders: Regular communication with project engineers, owners, and other stakeholders is crucial. Provide concise, informative reports summarizing compaction progress, highlighting any challenges encountered, and outlining corrective actions implemented. Open and transparent communication fosters trust and demonstrates your commitment to quality.
Common Challenges & Troubleshooting
Achieving consistent, high-quality pavement compaction isn's always straightforward. Here's a look at some frequent challenges and how to address them:
1. Moisture Imbalance: Too much or too little moisture drastically impacts compaction. If material is too wet, it's difficult to compact; if it's too dry, it can become brittle and prone to cracking. * Troubleshooting: Utilize moisture control techniques like adding water (with careful measurement) or using desiccants. Consider using a moisture meter for accurate readings. Adjust roller speed and vibration frequency.
2. Equipment Issues: Malfunctioning rollers or plate compactors can lead to inconsistent density. * Troubleshooting: Implement a rigorous pre-use equipment inspection routine. Ensure proper calibration of gauges and vibration frequencies. Address any mechanical issues promptly. Keep maintenance logs detailed and accessible.
3. Layer Thickness Variations: Inconsistent layer thickness can compromise the overall compaction quality. * Troubleshooting: Improve grading operations to ensure uniform layer application. Employ precise leveling techniques. Utilize automated grade control systems where appropriate. Double-check measurements frequently.
4. Temperature Effects: Extreme temperatures can hinder compaction. Cold temperatures reduce material plasticity, while high temperatures can cause material to soften and deform. * Troubleshooting: Adjust compaction procedures based on temperature conditions. Consider using heating or cooling methods to maintain optimal material temperatures. Reduce roller weight or speed in hot weather.
5. Material Segregation: Sometimes, base material can segregate during placement, leading to areas of higher or lower density. * Troubleshooting: Improve material handling and placement techniques to prevent segregation. Rake and blend the material before compaction. Consider using a vibratory spreader to homogenize the material.
6. Difficulty Achieving Specified Density: Consistently hitting the target density can be tricky. * Troubleshooting: Re-evaluate the compaction plan. Adjust roller weight, speed, and vibration frequency. Review material properties and moisture content. Conduct additional density testing to identify problem areas. Consider using a different compaction technique.
Best Practices for Paving Perfection
Consistent moisture content is arguably the single most impactful factor in achieving successful pavement compaction. Too little moisture and the material won't bind effectively; too much, and you'll be fighting to remove excess water, potentially weakening the final product. A proactive approach to moisture management is essential.
Start by accurately determining the optimal moisture content for your specific material - this should be clearly defined in your project specifications. Don't rely on guesswork. Regularly monitor moisture levels throughout the compaction process, adjusting as needed. Consider using moisture meters for precise readings.
Remember that weather plays a significant role. Hot, dry conditions require more frequent watering, while rainy weather demands immediate adjustments to prevent over-saturation. Document all moisture adjustments made and the reasoning behind them - this provides a valuable record and helps inform future decisions. A little extra attention to moisture control delivers a lot of dividends in the long run.
Future Trends in Compaction Technology
The future of pavement compaction isn't just about incremental improvements; it's about a fundamental shift driven by digital integration and a growing emphasis on sustainability. We're seeing advancements across several key areas. Real-time data acquisition and analysis, facilitated by IoT sensors embedded in rollers, will become standard. This allows for continuous monitoring of compaction effort, material stiffness, and temperature, enabling operators to make immediate adjustments and optimize performance-moving beyond reactive compaction to a proactive, data-driven approach. Expect to see sophisticated software platforms that integrate this data, providing comprehensive compaction reports and predictive analytics to prevent future issues.
Furthermore, the rise of autonomous and semi-autonomous compaction equipment promises increased efficiency and precision, particularly on large-scale projects. These machines, guided by GPS and laser scanning, can maintain consistent rolling patterns and compaction depths, reducing operator fatigue and improving overall quality. Finally, a strong push towards electric and alternative fuel compaction equipment aligns with global sustainability goals, reducing carbon emissions and noise pollution on construction sites. Biofuels and hybrid systems are already emerging, and fully electric rollers are rapidly gaining traction, promising a quieter, greener future for pavement construction.
Resources & Links
- Federal Highway Administration (FHWA) : The FHWA website offers extensive resources, specifications, and guidelines related to pavement construction and compaction, including technical reports and manuals. It's a primary source for understanding national standards.
- Asphalt Pavement Alliance (APA) : The APA provides information on asphalt pavement design, construction, and maintenance. Their website includes technical resources, best practices, and research findings on compaction.
- National Stone, Sand & Gravel Association (NSSGA) : NSSGA provides resources for aggregate producers, which are crucial for pavement construction. They offer information on material specifications, quality control, and compaction techniques relevant to base and subbase layers.
- Portland Cement Association (PCA) : PCA focuses on concrete construction and related materials. They have technical resources applicable to the base and sub-base layers under asphalt or concrete pavements, including guidance on compaction methods for soil and granular materials.
- Proctor Gauge : A leading supplier of compaction testing equipment. Their website offers information about density testing, equipment usage, and relevant specifications. Useful for Phase 2.1.
- Terrameter : Manufacturer of nuclear density gauges. Their website provides details on nuclear density testing methods, equipment, and safety protocols. Relevant to Density Testing Methods section.
- RTEC Corporation : Offers dynamic compaction (DC) equipment and services. While not a standard method for all paving, this resource sheds light on advanced compaction techniques for large projects and difficult soil conditions.
- Caterpillar : A major equipment manufacturer, Caterpillar offers various compaction equipment, including rollers and compactors. Their website provides details on equipment types, specifications, and operation.
- John Deere Construction & Forestry : Another leading equipment manufacturer with compaction equipment, offering similar information to Caterpillar, useful for the Equipment Considerations section.
- Wacker Neuson : Specializes in compaction equipment including rammers, plate compactors and rollers. Their site contains product details, applications and resources related to effective compaction.
- Dynatest : Dynatest offers a range of non-destructive testing equipment used for evaluating pavement quality, offering insights after compaction to assess performance. Useful for understanding quality and potentially future trends.
- GeoTechnologies : Provides geotechnical investigation and testing services including compaction testing. Provides a deeper understanding of soil behavior under compaction.
Frequently Asked Questions
What is compaction verification and why is it important?
Compaction verification is the process of ensuring that the soil or aggregate base beneath pavement (like asphalt or concrete) is properly compacted to the required density. It's crucial because proper compaction provides a stable foundation, preventing premature pavement failure, cracking, rutting, and costly repairs. It ensures the pavement distributes loads effectively and extends its lifespan.
What is a compaction verification checklist template?
A compaction verification checklist template is a structured document used to systematically record and document the compaction process. It outlines the steps taken, measurements recorded, and any corrective actions implemented to ensure proper compaction meets specified requirements. It ensures consistency and provides a record for quality control.
Who should use this compaction verification checklist template?
This template is designed for anyone involved in paving projects, including contractors, site supervisors, quality control inspectors, and paving engineers. It's useful for residential driveways, commercial parking lots, roads, and any project requiring a properly compacted base.
What information do I need before using the checklist template?
Before using the template, you're going to need the project specifications. This includes: the required compaction levels (usually expressed as percentages of maximum dry density), the testing methods (e.g., Proctor test, nuclear density gauge, sand cone), and any applicable standards or guidelines. You'll also need to understand the soil types being compacted.
What are the key sections of the compaction verification checklist template?
The template typically includes sections for project details, equipment used, testing locations and results (moisture content, density, compaction percentage), weather conditions, operator details, and areas for observations, corrective actions, and approvals. It also includes space for documentation of any deviations from the standard procedures.
What equipment is typically used for compaction verification?
Commonly used equipment includes plate compactors, vibratory rollers, and density gauges (nuclear density gauges are popular but require certifications and safety protocols; sand cone tests are a more traditional alternative). The specific equipment will depend on the type of material being compacted and the project requirements.
How do I interpret the density test results? What does a 'pass' or 'fail' mean?
Density results are compared to the project specifications. A 'pass' means the compacted density meets or exceeds the specified percentage of maximum dry density (e.g., 95% of Max Dry Density). A 'fail' indicates the density is below the required level, necessitating corrective actions such as adding or removing material and re-compacting.
What should I do if compaction verification fails?
If compaction fails, immediately halt the paving operation. Identify the cause of the failure (e.g., incorrect moisture content, inadequate compaction effort, improper equipment). Implement corrective actions such as adjusting the moisture content, increasing compaction passes, or using a different compactor. Re-test the area and document the corrective actions taken.
How does moisture content affect compaction?
Moisture content is crucial for effective compaction. Too little moisture will result in insufficient binding between particles, while too much moisture can hinder compaction and create instability. The optimum moisture content is typically determined through a Proctor test.
Can I use this checklist template for different types of paving materials (asphalt, concrete)?
Yes, the template is adaptable. However, you may need to modify the specifications and requirements based on the specific material being compacted and the relevant standards for that material.
Found this Article helpful?
Construction Management Solution Demo
Build smarter, not harder! ChecklistGuro streamlines construction projects from planning to closeout. Manage tasks, inspections, safety protocols & more - all in one place. Reduce delays, improve communication, and deliver projects on time & on budget.
Related Articles

The Ultimate Concrete Vibration Checklist Template

Unlock Value: Your Free Value Engineering Checklist Template

The Ultimate HVAC Ductwork Installation Checklist Template

The Ultimate Rebar Placement Checklist Template

Your Concrete Mix Design Verification Checklist: A Step-by-Step Guide

Backfilling & Compaction Checklist: A Foundation's Best Friend

The Ultimate Concrete Delivery & Placement Checklist Template

Your Ultimate Stakeholder Communication Plan Checklist Template
We can do it Together
Need help with
Construction?
Have a question? We're here to help. Please submit your inquiry, and we'll respond promptly.