Concrete Strength Testing Checklist Template: Your Guide to Reliable Results
Published: 08/31/2025 Updated: 12/13/2025
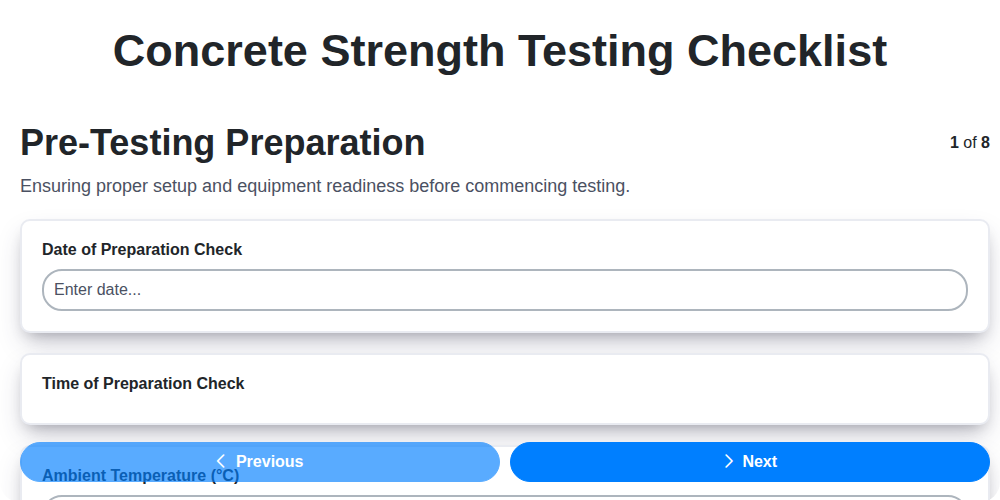
Table of Contents
- Introduction: Why a Concrete Strength Testing Checklist Matters
- Understanding Concrete Strength Testing Standards
- Pre-Testing Preparation: Setting the Stage for Accuracy
- Sample Extraction & Handling: Maintaining Integrity
- Cylinder Preparation & Storage: The Curing Process
- Testing Equipment Calibration & Verification
- The Testing Procedure: Step-by-Step Execution
- Data Analysis and Interpretation: Unveiling the Results
- Documentation and Reporting: Creating a Traceable Record
- Quality Control & Continuous Improvement
- Common Pitfalls and How to Avoid Them
- Resources & Links
TLDR: This checklist template ensures accurate concrete strength testing by standardizing the process-from preparing samples and calibrating equipment to recording results and documenting everything. Use it to minimize errors, improve consistency, and ultimately build stronger, safer structures.
Introduction: Why a Concrete Strength Testing Checklist Matters
Concrete is the backbone of so much of our built environment-from towering skyscrapers to vital infrastructure. But its strength isn't inherent; it's a carefully engineered property that must be verified to ensure safety and longevity. Concrete strength testing, specifically assessing compressive strength, is a crucial quality control process. However, even minor deviations from established procedures can lead to significant inaccuracies, impacting structural integrity and potentially leading to costly failures.
Think of it like baking a cake: following the recipe precisely is vital for the desired outcome. Similarly, a checklist for concrete strength testing isn't just a formality; it's a critical safeguard. It minimizes human error, promotes consistency across tests, and acts as a built-in reminder of the steps necessary for reliable data. This seemingly simple practice transforms the testing process from a subjective assessment into a systematic and verifiable procedure, ensuring the concrete meets the required specifications and contributing to a safer and more durable structure.
Understanding Concrete Strength Testing Standards
Navigating the world of concrete strength testing can feel overwhelming, largely due to the sheer number of established standards. These standards dictate everything from cylinder dimensions and curing methods to loading rates and data analysis. While variations exist, they all strive for consistency and reliability in determining a concrete's compressive strength.
The most widely recognized standard in the United States is ASTM C39 / C39M - Standard Test Method for Compressive Strength of Cylindrical Concrete Specimens. This standard details the procedure for preparing, curing, and testing concrete cylinders. However, it's crucial to understand that ASTM C39 is not a standalone solution; it's often referenced and supplemented by other standards.
Beyond ASTM C39: Key Complementary Standards
- ASTM C191: Standard Practice for Making Concrete Test Specimens - This details proper methods for molding and sampling concrete. It's vital for ensuring representative samples are obtained.
- ASTM C109 / C109M: Test for Chemical Composition of Fresh Concrete - While not directly related to strength testing, understanding the concrete mix design is essential for accurate interpretation of results.
- EN 12390 (European Standard): This comprehensive standard is widely used in Europe and provides a similar framework to ASTM standards, including provisions for specimen preparation, curing, and testing.
Why Standardization Matters
These standards aren't arbitrary; they're the result of years of research and refinement. They ensure that concrete strength tests are conducted consistently, allowing for meaningful comparisons between different mixes, projects, and even time periods. Adhering to recognized standards minimizes variability and increases confidence in the results. Furthermore, compliance with these standards is often required for project approvals and quality control purposes.
Familiarizing yourself with the relevant standards for your project is a critical first step in ensuring the integrity of your concrete strength testing program.
Pre-Testing Preparation: Setting the Stage for Accuracy
Before a single cylinder even touches the testing machine, meticulous preparation is essential. This isn't just about gathering equipment; it's about establishing a framework for reliable results. Start by thoroughly reviewing the project specifications. Confirm the required cylinder age at testing, the acceptable strength range, and the frequency of testing - deviations here can have significant consequences.
Next, assemble all necessary materials. Ensure you have adequate cylinders (typically more than required, allowing for potential failures), molds if needed, accurately sized tampers, measuring tools, and of course, the calibrated testing equipment. Don't overlook personal protective equipment (PPE) - safety is paramount.
Crucially, record the batch information. Note the concrete mix design, the supplier, and the unique batch number. This traceability is vital for investigating any discrepancies or failures. Also, document the ambient temperature and humidity. These environmental factors can influence the curing process and, consequently, the final strength. Finally, meticulously plan the sampling process: determine the number of cylinders required and their precise locations within the concrete pour. This ensures representative sampling for accurate assessment. A well-prepared start translates to trustworthy data throughout the entire process.
Sample Extraction & Handling: Maintaining Integrity
The initial steps of concrete sampling are pivotal; compromised samples lead to unreliable results, no matter how meticulous the subsequent testing. This stage demands precision and an understanding of how improper techniques can introduce significant flaws.
Timing is Everything: Cylinders should ideally be extracted as close as possible to the cessation of concrete placement. Delays can allow for variations in moisture content and temperature, influencing the curing process and ultimately affecting strength. While immediate extraction is preferred, a maximum delay of 1-2 hours is generally acceptable, carefully documented.
The Right Technique: The filling process is crucial. Use a vibrating table or tamper to consolidate the concrete into the cylinder molds. The standard practice is to deliver 25 tamping strokes per layer, ensuring thorough consolidation and minimizing air voids. Over-tamping or inconsistent technique can introduce weaknesses.
Labeling: A Chain of Custody: Each cylinder must be clearly and permanently labeled immediately after extraction. Use waterproof markers and durable labels resistant to abrasion and chemical exposure. The label should include project name, location (e.g., pour number, elevation), mix design identification, date, and time of extraction. This creates a clear chain of custody and allows for accurate tracking throughout the process.
Gentle Handling: Concrete cylinders are surprisingly fragile. Avoid dropping or striking them during transport. Use padded carriers or carts to minimize the risk of damage. Any visual cracks or defects observed during handling should be meticulously documented.
Documentation is Key: A sampling record, documenting the date, time, location, mix design, and sampler's name, should accompany each set of cylinders. This record serves as a critical reference point for any discrepancies or investigations that may arise.
Cylinder Preparation & Storage: The Curing Process
The curing process is arguably the most crucial phase in concrete strength testing. It's not simply about keeping the cylinders wet; it's about creating an environment that allows the concrete to hydrate properly and develop its intended strength. Improper curing can significantly undermine the validity of your test results, leading to inaccurate assessments of concrete quality and potentially compromising structural integrity.
The most common and widely accepted method is submerged curing, where cylinders are completely immersed in potable water. The water should be free from contaminants that could interfere with hydration. Maintaining a consistent temperature is paramount; ideally, the water should be kept at 23°C ± 2°C (73.4°F ± 3.6°F). Temperature fluctuations can introduce stress within the concrete and affect its strength development.
Regular monitoring of the curing environment is essential. This includes checking the water level daily and replenishing as needed. Water changes are also recommended periodically, especially if there's any suspicion of contamination or bacterial growth. Documenting these changes - date, time, volume, and any observations - provides a detailed record of the curing process and allows for traceability if any issues arise.
While submerged curing is preferred, other methods, such as covering cylinders with wet burlap or plastic sheeting, are sometimes used. However, these methods require diligent monitoring to ensure continuous moisture and temperature control. Regardless of the chosen method, consistency and meticulous record-keeping are the cornerstones of reliable results.
Testing Equipment Calibration & Verification
The reliability of concrete strength testing hinges on the proper functioning of the testing equipment. A faulty machine or inaccurate load cell can produce misleading results, compromising structural safety. Therefore, rigorous calibration and verification procedures are non-negotiable.
Calibration: The Foundation of Trust
Calibration is the process of comparing the testing machine's output against known standards and adjusting it to ensure accuracy. This must be performed by qualified and certified technicians using traceable standards. Calibration intervals are typically dictated by equipment manufacturers' recommendations and relevant standards (e.g., ASTM E7, ASTM E1037). Keep meticulous records of all calibrations, including the date, technician's credentials, standard used, and any adjustments made. These records should be readily accessible and retained for the required period.
Verification: Daily Assurance
Verification, a less formal process, should be conducted before each testing session. It provides a quick check to ensure the equipment is performing within acceptable limits. Common verification steps include:
- Zero and Span Check: Confirming zero load and full-scale output are accurate.
- Load Cell Verification: Checking the output of the load cell at various load points within its range to ensure linearity.
- Machine Alignment: Visually inspecting the machine to ensure proper alignment of platens.
Any deviation from expected results during verification requires immediate investigation and potential corrective action, which may include recalibration or repair. Don't proceed with testing if verification results are questionable - the integrity of the results depends on it. Regular verification is your first line of defense against undetected equipment drift.
The Testing Procedure: Step-by-Step Execution
This section details the precise steps for performing a concrete strength test, assuming cylinders have been properly prepared and stored, and the testing equipment is calibrated and verified. Deviation from these steps can compromise accuracy and should be avoided.
1. Cylinder Placement & Alignment:
Carefully remove the cylinder from the curing tank, gently wiping away any excess water. Center the cylinder vertically within the testing machine's platens. Ensure the cylinder's longitudinal axis is perfectly aligned with the load application - even slight misalignment can introduce errors and influence the observed strength. A leveling bubble on the testing machine is essential.
2. Gauge Contact Verification:
Confirm that the load cell's gauges (bearing plates) are clean and properly seated against the cylinder's ends. Any debris or uneven contact will alter the effective load application area and skew the results. Inspect for any surface defects on the cylinder ends that might interfere with gauge contact.
3. Initial Zeroing:
Before initiating the test, perform a 'zero' adjustment on the testing machine's display. This ensures that the readings start from a baseline of zero load.
4. Test Initiation and Loading Rate:
Begin the test using the designated start button or command on the testing machine. Maintain a consistent loading rate of 0.25 ± 0.05 MPa/second. The machine's control system should automatically regulate this rate. Do not manually adjust the loading speed during the test.
5. Visual Observation during Loading:
During the test, carefully observe the cylinder for any signs of distress or unusual behavior, such as cracking, bulging, or uneven deformation. While these observations don't invalidate the test immediately, they should be documented in the test report for further review.
6. Failure Point Determination:
The test continues until the cylinder fails completely. "Failure" is generally defined as the point where the cylinder visibly separates into two or more pieces. The machine will automatically record the peak load achieved during the test.
7. Data Recording & Post-Test Inspection:
Immediately after failure, record the peak load displayed by the machine into the designated test report. Note the failure pattern - whether it was a clean break, cone-shaped failure, or other characteristic. Examine the fractured cylinder pieces and note any unusual features that might provide insights into the concrete's behavior.
Data Analysis and Interpretation: Unveiling the Results
The culmination of meticulous preparation and execution is the data analysis phase. Simply obtaining numbers isn't enough; understanding what those numbers mean is crucial for informed decision-making. Here's a breakdown of how to effectively analyze and interpret concrete strength testing data.
1. Preliminary Data Review:
Begin by meticulously reviewing all recorded data for any outliers or inconsistencies. Look for unusual load-deflection curves, unexpected breaking patterns, or discrepancies between replicates. These anomalies may indicate equipment malfunctions, procedural errors, or variations in material properties that warrant further investigation. Document any observations, even seemingly minor ones, as they could be valuable for troubleshooting later.
2. Strength Calculation & Averaging:
Confirm the accuracy of the compressive strength calculation, ensuring the correct formula is applied using the breaking load and cross-sectional area. For a given test age, calculate the average strength from the cylinder replicates (typically three or more). Calculate the standard deviation to assess the data's variability. A high standard deviation suggests inconsistencies in mixing, placing, or curing.
3. Comparing to Project Specifications:
The calculated average strength must be rigorously compared to the minimum strength requirements outlined in the project specifications. Consider not only the average value but also the range of results. If the lowest value is below the specified minimum, the concrete batch likely fails the test, regardless of the average.
4. Age Considerations & Strength Gain:
Concrete strength increases with time. Analyze strength results at different ages (e.g., 7-day, 28-day) to understand the concrete's strength gain characteristics. Plot strength versus time to visualize the strength development curve. This information is critical for formwork removal, load application, and overall project scheduling. Compare the actual strength gain to predicted values based on mix design and historical data.
5. Statistical Analysis (Beyond the Basics):
For more detailed analysis, consider applying statistical methods like:
- T-tests: To compare strengths at different ages or between different batches.
- Regression analysis: To model the relationship between strength and factors like cement content or water-cement ratio.
- Control Charts: Implementing Statistical Process Control (SPC) to monitor trends in strength data and identify potential problems before they lead to failures.
6. Reporting and Communication:
Clearly and concisely communicate the findings in the test report. Include not only the numerical results but also a qualitative assessment of their significance. Highlight any anomalies or deviations from expected behavior and provide recommendations for corrective actions. Ensure the report is readily accessible to all relevant stakeholders, including project engineers, concrete producers, and quality control personnel.
Documentation and Reporting: Creating a Traceable Record
A robust documentation and reporting system is the backbone of reliable concrete strength testing. It's not enough to simply obtain results; you need to create a complete, traceable record that can withstand scrutiny and demonstrate compliance. This record serves multiple purposes: verifying accuracy, identifying trends, facilitating audits, and providing evidence of due diligence.
Your test report should be more than just a list of numbers. It's a narrative of the entire testing process. Essential components include:
- Project and Client Information: Clearly identify the project name, location, client details, and contract number.
- Concrete Mix Design Details: Document the mix proportions, cement type, aggregate characteristics, and any admixtures used. Include the source and batch number of the concrete.
- Cylinder Identification: Each cylinder must have a unique identifier linked to its origin (pour location, batch number). This is crucial for traceability.
- Testing Date and Time: Record the precise date and time of the test.
- Equipment Details: Specify the model and serial number of the testing machine and load cells used. Include dates of their most recent calibrations and verification.
- Test Results: Present the breaking load and calculated compressive strength prominently. Include units of measurement.
- Observations: Note any unusual observations made during the testing process, such as cracking patterns, deviations from expected behavior, or equipment malfunctions.
- Technician Signature & Credentials: The technician performing the test must sign and date the report, verifying its accuracy. Their qualifications should be readily available for review.
- Photographic Evidence (Recommended): Consider including photographs of the tested cylinder, particularly if any anomalies are observed. This provides visual documentation and can be invaluable during audits.
Beyond the immediate test report, maintain comprehensive records including:
- Calibration Certificates: Copies of all equipment calibration certificates.
- Material Certificates: Certificates from concrete suppliers detailing material properties.
- Daily Checklists: Logs of daily equipment checks and maintenance.
These records, when properly organized and accessible, create a complete chain of custody, demonstrating the integrity of the testing process from concrete production to final report. Digital storage and cloud-based accessibility are increasingly preferred for efficient record management and collaboration.
Quality Control & Continuous Improvement
Quality control isn't just about identifying problems after they occur; it's about building a system that minimizes their likelihood from the outset. Our commitment to concrete strength testing goes beyond simply following procedures-it's about actively seeking ways to enhance our performance and reliability.
This begins with rigorous internal audits. These audits aren't punitive; they're opportunities for learning and improvement. We regularly review our processes, checklist adherence, and equipment maintenance logs to identify potential weaknesses. These findings are then addressed through targeted training, revised procedures, or equipment upgrades.
Statistical Process Control (SPC) plays a vital role. By tracking key metrics like average strength, variability, and outlier frequency, we can identify trends and proactively address potential issues before they escalate. Control charts help us monitor these metrics and determine if our process is in a state of statistical control.
Beyond internal measures, we actively solicit feedback from project stakeholders and incorporate their insights into our procedures. This collaborative approach ensures our testing practices align with their needs and expectations.
Finally, we foster a culture of continuous learning. Encouraging technicians to attend workshops, stay abreast of industry best practices, and propose innovative solutions ensures we remain at the forefront of concrete strength testing excellence. We view every test, successful or otherwise, as a chance to refine our methods and deliver even more reliable results.
Common Pitfalls and How to Avoid Them
Even with a robust checklist, subtle errors can creep into concrete strength testing, compromising results. Here's a look at frequent pitfalls and practical steps to sidestep them:
1. Inconsistent Curing Conditions: Fluctuating water temperatures, evaporation, or inconsistent curing times are major culprits. Avoidance: Invest in reliable temperature monitoring equipment for curing tanks. Maintain a log of water changes and temperature readings. Consider insulated curing tanks or humidity-controlled rooms for critical projects.
2. Improper Cylinder Consolidation: Inadequate vibration or incorrect tamping techniques lead to air voids, weakening the cylinder and skewing results. Avoidance: Ensure technicians are thoroughly trained in proper consolidation methods. Use a consistent number of strokes per layer, following manufacturer recommendations. Regularly inspect tamping rods for wear.
3. Load Cell Miscalibration: A drifting or inaccurate load cell significantly impacts strength readings. Avoidance: Adhere to strict calibration schedules for load cells, traceable to national standards. Perform daily or weekly verification checks (zero and span checks) before testing. Keep meticulous records of calibration data.
4. Premature or Delayed Testing: Testing cylinders too soon or too late can artificially inflate or deflate strength values. Avoidance: Strictly follow the prescribed testing age (typically 28 days). Document any deviations from the standard age and investigate potential impact.
5. Incorrect Cylinder Dimensions: Errors in measuring cylinder diameter or height lead to calculation errors. Avoidance: Use calibrated calipers or micrometers for accurate measurements. Double-check measurements and perform calculations carefully.
6. Ignoring Equipment Maintenance: Neglecting routine maintenance of testing machines, calipers, and other equipment introduces inaccuracies. Avoidance: Implement a preventative maintenance program for all testing equipment, following manufacturer recommendations. Keep maintenance records.
7. Lack of Standardization: Inconsistent testing procedures between technicians or labs introduce variability. Avoidance: Develop and enforce standardized testing protocols, including detailed instructions, training materials, and performance metrics.
8. Environmental Factors: Ambient temperature and humidity can subtly influence results. Avoidance: Consider environmental conditions and, if necessary, control laboratory conditions to minimize their impact. Document any significant environmental fluctuations.
Resources & Links
- American Concrete Institute (ACI) : ACI is a leading authority worldwide for the development and distribution of concrete knowledge. Their publications, certifications, and educational programs cover all aspects of concrete - from mix design to construction to repair. Includes resources on standards, best practices, and technical documents related to concrete strength testing.
- ASTM International : ASTM develops and publishes voluntary consensus standards for a wide range of materials, products, systems, and services. Crucial for defining the testing methods used in concrete strength determination (e.g., ASTM C39, ASTM C42). Their website allows searching for specific standards.
- American National Standards Institute (ANSI) : ANSI doesn't create standards themselves, but coordinates the standards development process and ensures standards are representative of stakeholders. Understanding ANSI's role helps comprehend the framework behind concrete testing standards.
- Fabry & Company - Concrete Testing Equipment : A reputable supplier of concrete testing equipment. Their website offers product information, technical specifications, and often includes resources about proper equipment usage and calibration.
- Walter Buehrer - Concrete Testing Equipment : Another leading supplier of concrete testing equipment with useful information on calibration, maintenance, and related standards. Good for understanding the equipment involved in strength testing.
- Portland Cement Association (PCA) : PCA provides technical support and guidance to the cement and concrete industries. Their publications cover a broad range of topics, including concrete strength, durability, and performance. Offers guides and best practices.
- National Ready Mixed Concrete Association (NRMCA) : The NRMCA promotes the use of ready mixed concrete. Their website contains information on concrete production, testing, and quality control, focusing on the ready-mix perspective. Provides resources on mix design and testing.
- Geoengineer.com - Concrete Technology : Geoengineer.com is a comprehensive resource for civil engineers, with a large section dedicated to concrete technology. Provides explanations of testing procedures, standards, and common issues.
- EngineeringClicks - Civil Engineering Resources : EngineeringClicks offers a variety of resources, including articles and guides related to concrete technology and testing. May provide additional perspectives on the practical application of strength testing checklists.
- Labman - Concrete Testing Equipment & Services : Labman specializes in concrete testing equipment and provides related services. Their website provides useful information on equipment, calibration, and testing procedures. Offers equipment sales and service.
- Concrete Construction - Magazine : Concrete Construction magazine provides in-depth articles, product reviews, and technical information on all aspects of concrete construction, including testing and quality control. Articles often cover practical considerations.
- Ispat Gusset - Concrete Testing Equipment : Another reputable supplier of concrete testing equipment. Their website provides product information and resources pertaining to maintaining reliable concrete strength testing results.
Frequently Asked Questions
What is concrete strength testing and why is it important?
Concrete strength testing determines the compressive strength of concrete, which is its ability to withstand crushing forces. It's crucial for ensuring the structural integrity and safety of buildings and infrastructure. Reliable results confirm the concrete meets design specifications and prevents premature failures.
What is a concrete strength testing checklist template and how does it help?
A concrete strength testing checklist template is a structured guide outlining the steps and considerations needed for accurate and consistent strength testing. It helps ensure all necessary procedures are followed, minimizes errors, and promotes reliable results. It acts as a reference for technicians and quality control personnel.
Who should use this checklist template?
This template is designed for concrete testing technicians, quality control personnel, engineers, construction supervisors, and anyone involved in the concrete strength testing process. It's valuable for both experienced professionals and those relatively new to the field.
What are the key steps typically covered in a concrete strength testing checklist?
The checklist generally covers aspects like specimen preparation (mixing, molding, curing), testing equipment calibration, proper testing procedures (applying load, measuring deformation), data recording, and documentation of any deviations or observations. It also includes checks for environmental conditions.
What information needs to be recorded on a concrete strength testing checklist?
Important information to record includes project name, date and time of testing, concrete mix details, specimen identification numbers, testing equipment serial numbers, test results (compressive strength, strain), environmental conditions (temperature, humidity), and technician's signature.
How often should I calibrate my testing equipment?
Calibration frequency depends on the equipment manufacturer's recommendations and the usage intensity. Typically, equipment should be calibrated annually or after a specific number of tests. The checklist will often include a reminder for calibration tracking.
What should I do if I encounter a problem or deviation during testing?
The checklist includes a section for documenting any deviations from standard procedures. Immediately note the problem, the corrective action taken, and the reason for the deviation. Consult with a senior technician or engineer if necessary.
Can I customize the checklist template?
Yes, the checklist template is designed to be adaptable. You can modify it to reflect your specific project requirements, company standards, and local regulations. However, ensure any changes maintain the integrity of the testing process.
Where can I find more information about concrete strength testing standards?
Refer to relevant industry standards like ASTM C39 (Standard Test Method for Compressive Strength of Cylindrical Concrete Specimens) and ACI 318 (Building Code Requirements for Structural Concrete). Your local building codes may also have specific requirements.
What are the consequences of inaccurate concrete strength testing results?
Inaccurate results can lead to structural failures, safety hazards, costly repairs, delays in construction, and potential legal liabilities. Reliable results are critical for ensuring long-term safety and performance.
Found this Article helpful?
Construction Management Solution Demo
Build smarter, not harder! ChecklistGuro streamlines construction projects from planning to closeout. Manage tasks, inspections, safety protocols & more - all in one place. Reduce delays, improve communication, and deliver projects on time & on budget.
Related Articles

The Ultimate Concrete Vibration Checklist Template

Unlock Value: Your Free Value Engineering Checklist Template

The Ultimate HVAC Ductwork Installation Checklist Template

The Ultimate Rebar Placement Checklist Template

Your Concrete Mix Design Verification Checklist: A Step-by-Step Guide

Backfilling & Compaction Checklist: A Foundation's Best Friend

The Ultimate Concrete Delivery & Placement Checklist Template

Your Ultimate Stakeholder Communication Plan Checklist Template
We can do it Together
Need help with
Construction?
Have a question? We're here to help. Please submit your inquiry, and we'll respond promptly.