Your Scouting Companion: The Crop Disease and Insect Scouting Checklist
Published: 11/22/2025 Updated: 12/13/2025
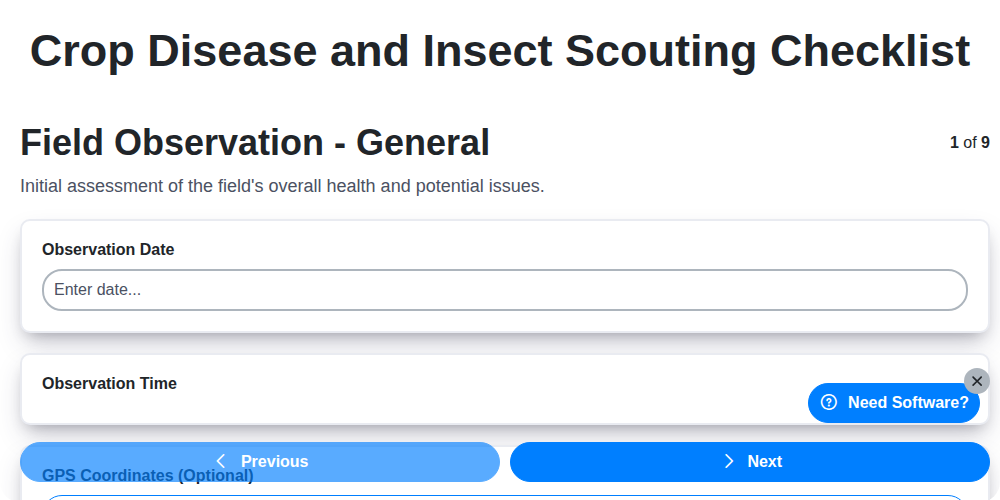
Table of Contents
- Introduction: Why Scouting Matters
- 1. Field Observation - General: A Bird's-Eye View
- 2. Crop Stand & Vigor: Assessing Plant Health
- 3. Leaf/Stem Symptoms: Close-Up Inspection
- 4. Root Inspection: Digging Deeper
- 5. Insect Identification & Counts: The Tiny Threat
- 6. Weed Identification & Density: Competition is Key
- 7. Environmental Conditions: The Context of the Problem
- 8. Action Taken / Recommendations: What to Do Now
- 9. Follow-Up Date: Staying on Track
- Scouting Checklist Template (Downloadable)
- Resources & Links
TLDR: Feeling overwhelmed by crop health? This checklist is your easy-to-use guide! It breaks down field scouting into simple steps - from checking overall plant health and leaves to identifying pests and weeds - so you can spot problems early, take action, and track your progress for a healthier, more productive harvest.
Introduction: Why Scouting Matters
Successful crop production isn't about luck; it's about informed decisions. And those decisions need to be based on what's actually happening in your fields. That's where scouting comes in. Regular, thorough scouting - systematically observing your crops - is the frontline defense against yield-robbing pests, diseases, and nutrient deficiencies. It's more than just a casual walk through the rows; it's a structured process that allows you to identify problems early, when they're often easiest and most cost-effective to manage. Ignoring scouting can lead to widespread infestations or diseases going unnoticed until they're severe, requiring more drastic (and expensive) interventions. This checklist provides a framework for consistent, effective scouting, empowering you to proactively protect your crops and maximize your harvest.
1. Field Observation - General: A Bird's-Eye View
Begin your scouting journey with a broad perspective. Don't rush straight into detailed inspections; take a moment to observe the entire field from various vantage points. Look for obvious patterns or areas that immediately stand out. Are there sections consistently showing stunted growth, discoloration, or unusual dryness? Note the overall field topography - low-lying areas can be prone to water stress or disease spread. Pay attention to the edges of the field as well; these are often the first areas impacted by external factors like wind, drift from neighboring fields, or pest migration. Document any unusual circumstances, such as recent heavy rainfall, localized flooding, or evidence of wildlife activity. This initial overview will inform your focused scouting efforts and help prioritize your investigation.
2. Crop Stand & Vigor: Assessing Plant Health
A healthy crop stand and robust plant vigor are the foundation for a successful harvest. This assessment goes beyond simply counting plants; it's about evaluating their overall health and potential.
Begin by observing the uniformity of emergence and plant spacing. Are plants evenly distributed, or are there patches of missing or overcrowded plants? Uneven emergence can signal issues with seed quality, soil conditions, or planting depth. Overcrowding can lead to competition for resources, stunting growth and increasing disease susceptibility.
Next, look at plant height and overall appearance. Compare plants within the field and to established growth stages for your specific crop. Stunted growth, yellowing, or unusual coloring can indicate nutrient deficiencies, water stress, or early signs of disease. Assess leaf angle and stem strength - are plants leaning or prone to lodging? A strong, upright stand is a good indicator of overall plant health and resilience. Note any unusual growth patterns or deformities. This seemingly minor observation can be an early warning sign of a developing problem.
3. Leaf/Stem Symptoms: Close-Up Inspection
This is where your keenest observational skills come into play. Don't just glance; examine leaves and stems closely. Look for subtle changes in color, texture, and shape. Here's a breakdown of what to look for:
- Color Changes: Yellowing (chlorosis), reddening, purpling, or bronzing can all be signs of disease, nutrient deficiencies, or insect feeding. Note the pattern - is it uniform across the leaf, or localized to specific areas?
- Lesions/Spots: Look for spots, blotches, or lesions. Note their size, color, shape, and whether they are raised or sunken. Are they surrounded by a halo?
- Distortions: Curling, twisting, puckering, or stunted growth of leaves and stems are frequently linked to viral diseases or insect damage.
- Wilting: Consistent wilting, even with adequate moisture, could indicate vascular diseases or root problems.
- Necrosis: Dead, brown or black tissue (necrosis) suggests advanced disease or severe damage.
- Exudates: Look for any unusual fluids or masses on the leaves or stems - these could be honeydew (from aphids or scale) or fungal structures.
- Compare: Compare the affected plants to healthy plants in the same field. This helps you identify deviations and pinpoint problems.
Pro Tip: Use a hand lens or magnifying glass for a more detailed look. Take photos of any suspicious symptoms - they're invaluable for later diagnosis and consulting with an expert.
4. Root Inspection: Digging Deeper
Root inspection is often overlooked, but it's a crucial step in diagnosing crop diseases and understanding overall plant health. Visible symptoms above ground can sometimes be misleading, and the real story may lie beneath the soil.
Here's how to conduct a thorough root inspection:
- Representative Samples: Don't just grab a root from the easiest spot! Select several plants across the field, representing different areas and potentially exhibiting different symptoms.
- Gentle Excavation: Carefully dig around the base of the plant to expose the root system. Try to minimize root damage during excavation.
- Visual Examination: Look for signs of:
- Discoloration: Brown, black, red, or yellowing can indicate disease or nutrient deficiencies.
- Galls or Swellings: These could be caused by nematodes, bacteria, or fungi.
- Lesions or Rot: Look for areas of decay or softening.
- Root Nests: These can indicate insect infestations (like rootworms).
- Stunted Root Growth: A lack of robust root development can severely limit nutrient and water uptake.
- Wash the Roots (Optional): Gently washing the roots with water can help reveal subtle signs of infection or damage that might be obscured by soil.
- Record Observations: Note the type and extent of any abnormalities found. Photograph any concerning features for later analysis or consultation.
Important Note: If you're unsure about what you're seeing, take good quality photographs and consult with a local extension agent or plant pathologist for accurate identification.
5. Insect Identification & Counts: The Tiny Threat
Insects can cause significant damage to crops, impacting yield and quality. Accurate identification and population monitoring are crucial for timely intervention. Don't just see bugs - know what you're looking at!
What to Look For:
- Visual Inspection: Carefully examine leaves (upper and lower surfaces), stems, flowers, and fruits. Look for feeding damage (chewed holes, stippling, discoloration), egg masses, larvae, and adult insects. Use a magnifying glass for closer inspection of small pests.
- Sticky Traps: Place yellow sticky traps strategically within the field to monitor flying insects (aphids, whiteflies, leafhoppers). Regularly check and record the number of insects caught.
- Sweep Nets: Use a sweep net to sample insect populations in areas of the field. Count and identify the insects collected.
- Beat Sheets: Shake branches over a white sheet to dislodge insects and observe their presence and abundance.
- Insect Counts: Establish a consistent method for counting insects (e.g., number of insects per leaf, per plant, or per area). Document these counts.
- Record Insect Stage: Note the life stage of the insects present (egg, larva, pupa, adult). This information influences treatment decisions.
- Beneficial Insects: Don't forget to look for beneficial insects (ladybugs, lacewings, parasitic wasps). Their presence indicates a level of natural pest control. Record their presence, too.
Identification Resources: Your local extension office, university websites, and reputable agricultural resources provide excellent guides and resources for insect identification. Accurate ID is critical for choosing the right control methods.
6. Weed Identification & Density: Competition is Key
Weeds aren't just unsightly; they're actively competing with your crop for vital resources like sunlight, water, and nutrients. Accurate weed identification is the first step in effective management. Don't just note broadleaf weeds or grasses - try to identify the specific species present. Knowing what you're dealing with informs your control strategies.
During scouting, record the types of weeds you find. Use a weed identification guide (many excellent apps are available!) if you're unsure. Beyond identification, quantify the density. This can be done in several ways:
- Percentage Coverage: Estimate the percentage of the field covered by weeds.
- Number of Plants per Square Foot: Count the number of weeds within a defined area (e.g., 1-foot square). This is particularly useful for sparse weed infestations.
- Density per Row Foot: In row crops, count the weeds per foot of row.
High weed density significantly reduces crop yield and quality. Early detection and targeted interventions, like spot treatments or cultural practices, are crucial for maintaining a competitive edge for your crop. Document your findings clearly so you can track weed populations over time and evaluate the effectiveness of your control measures.
7. Environmental Conditions: The Context of the Problem
Understanding the environmental conditions surrounding your crop isn't just interesting; it's crucial for diagnosing problems and predicting future outbreaks. Disease and insect pressure are often directly linked to weather patterns, soil conditions, and even recent history.
Here's what to note:
- Temperature: Record both daily high and low temperatures. Sudden shifts or prolonged periods of extreme heat or cold can stress plants, making them more susceptible to disease.
- Rainfall/Humidity: Note the amount of rainfall, frequency of rain events, and relative humidity. Many fungal diseases thrive in wet conditions. High humidity, even without rain, can also encourage disease development.
- Wind: Strong winds can physically damage plants, creating entry points for pathogens and insects. They also influence humidity levels.
- Sunlight: Record the amount of sunlight the crop receives. Insufficient sunlight can weaken plants, while excessive sunlight can cause stress.
- Soil Moisture: Assess soil moisture levels. Consistently wet or dry soil conditions can impact plant health and nutrient uptake.
- Recent Weather Events: Document any significant recent weather events like hailstorms, frost, or unusually warm periods.
- Historical Weather Data: Briefly review historical weather data for the area. Patterns in weather can sometimes reveal recurring disease or insect pressure.
By systematically recording these environmental factors, you're building a crucial piece of the diagnostic puzzle. This information can help you understand why a problem is occurring and help you anticipate similar problems in the future.
8. Action Taken / Recommendations: What to Do Now
Based on your scouting observations, this section is where you document the specific actions taken or recommended to address any identified issues. Be as detailed as possible - future you (and potentially colleagues) will thank you!
Here's a breakdown of what to include, tailored to common findings:
For Disease:
- Confirmed Diagnosis: Clearly state the confirmed disease (if possible - a lab confirmation is ideal). If unsure, note your suspicion and reasons.
- Treatment Options: Outline the recommended fungicide application (product name, rate, timing). Consider resistance management strategies - rotating fungicide modes of action is crucial.
- Cultural Practices: Recommend adjustments to irrigation, fertilization, or plant spacing to improve air circulation and reduce disease pressure.
- Resistant Varieties: Suggest planting disease-resistant varieties in future seasons.
For Insect Pests:
- Control Measures: Detail insecticide applications (product name, rate, timing). Emphasize Integrated Pest Management (IPM) principles - consider biological control options (beneficial insects) before resorting to broad-spectrum insecticides.
- Thresholds: Note if pest populations are currently below economic thresholds and require no action. Document the reasoning behind this decision.
- Monitoring: Recommend continued monitoring for insect resurgence.
- Trapping: Suggest implementing or maintaining insect traps to track pest populations.
For Weeds:
- Herbicide Application: Document herbicide application (product name, rate, timing). Consider environmental conditions affecting herbicide efficacy.
- Mechanical Control: Suggest hand-weeding or cultivation for isolated infestations.
- Preventative Measures: Recommend improved weed management practices for next season (e.g., cover cropping, residue management).
General Notes:
- Record everything: Even if no action is taken, note the reasons why.
- Consult Experts: If unsure about the best course of action, contact your local agricultural extension office or a certified crop advisor.
- Regulatory Compliance: Always adhere to label instructions and local regulations regarding pesticide application.
9. Follow-Up Date: Staying on Track
Scouting isn't a one-and-done activity. The Follow-Up Date section of your checklist is crucial for ensuring effective disease and pest management. Record the date you plan to revisit the field for another scouting round. This date should be determined by several factors:
- Severity of Findings: If you're seeing significant disease pressure or insect infestations, a shorter follow-up interval (e.g., 3-5 days) is warranted.
- Crop Growth Stage: As your crop progresses through its growth stages, its vulnerability to certain issues can change. Adjust follow-up dates accordingly.
- Weather Forecast: Unusual weather patterns (e.g., a period of heavy rain following dry conditions) can dramatically impact disease development. Factor this into your schedule.
- Treatment Response: If you're monitoring the effectiveness of a treatment, the follow-up date should allow you to assess its impact.
Don't just record the date; briefly note why you chose that interval. This provides valuable context when reviewing your scouting history and helps refine your approach over time. Consistency is key - regular, planned scouting is far more effective than reactive measures.
Scouting Checklist Template (Downloadable)
We understand that consistently and thoroughly scouting your crops is crucial for early detection and effective management of disease and insect pressures. To help streamline this process and ensure you cover all essential areas, we've created a downloadable scouting checklist template.
This checklist is designed to be used in the field and captures vital information for informed decision-making. It's organized into key sections to guide your observations:
- Field Observation - General: A quick overview of the field's overall condition and any immediately noticeable concerns.
- Crop Stand & Vigor: Assessing plant population, uniformity, and overall health.
- Leaf/Stem Symptoms: Detailed examination for signs of disease or physiological stress. Include photos if possible!
- Root Inspection (Representative Samples): Digging up representative plants to check for root rot, galls, or other issues.
- Insect Identification & Counts: Identifying insect pests and noting their abundance. Use reference guides or apps if needed.
- Weed Identification & Density: Recognizing weed species and estimating their population density.
- Environmental Conditions: Recording temperature, rainfall, humidity, and other relevant weather factors.
- Action Taken / Recommendations: Documenting any treatments applied and suggesting further steps.
- Follow-Up Date: Scheduling a return visit to monitor progress and adjust strategies.
We encourage you to customize this template to suit your specific crop and region. Regularly using this checklist will contribute significantly to proactive crop management and minimize potential yield losses. Remember to keep records of your scouting efforts - these data are invaluable for tracking trends and making informed decisions in the future.
Resources & Links
- Purdue University Entomology: A leading resource for insect identification, life cycles, and management strategies. Their website has extensive fact sheets and diagnostic tools helpful for accurate insect identification - crucial for scouting.
- University of Minnesota Extension: Provides crop scouting guides, disease identification resources, and fact sheets tailored for various crops and regions. Good for understanding common pests and diseases in your area.
- Plantix: A mobile app allowing you to upload photos of crop issues and receive potential diagnoses and management recommendations. While not a replacement for expert scouting, it can be a helpful preliminary tool.
- Michigan State University Extension: Offers a wealth of information on crop health, including scouting guides, disease diagnostic tools, and pest management strategies. Their publications cover a wide range of crops and regions.
- University of California Integrated Pest Management (IPM): Provides research-based information on pest and disease management practices, focusing on integrated approaches. Excellent for learning about preventative measures and sustainable control methods.
- European and Mediterranean Plant Protection Organization (EPPO): A global organization providing information and standards for plant protection. Their data sheets on pests and diseases are highly detailed and scientifically accurate (though may be more technical).
- USDA AMS - Plant Health Information: Information and regulations from the USDA regarding plant health, pests and diseases affecting crops. Provides alerts and updates on significant outbreaks.
- Ohio State University CropWatch: Provides timely updates and reports on crop pests and diseases, based on observations from scouts in the field. A good source for regional specific issues.
- Grow Veg: While geared towards home gardeners, this site offers excellent visual guides and descriptions of common plant diseases and pests. Can be useful for recognizing early signs of problems.
- California Department of Food and Agriculture - Pest Orders: If you're in California, this site has information on pest and disease quarantines and regulatory actions related to plant health.
Frequently Asked Questions
What is crop scouting and why is it important?
Crop scouting is the process of regularly inspecting your crops to monitor their health and identify potential problems like diseases, insect infestations, and nutrient deficiencies. It's crucial for early detection, allowing for timely intervention and preventing widespread damage, ultimately protecting your yield and quality.
What is the purpose of this checklist?
This checklist is designed to guide you during your crop scouting process. It provides a systematic approach to ensure you're checking the right things and helps you document your findings for informed decision-making and tracking progress.
How often should I scout my crops?
Scouting frequency depends on the crop, the region, and the current pest/disease pressure. Generally, scouting weekly is a good starting point, increasing frequency during periods of high risk (e.g., during wet weather or known insect outbreaks).
What equipment do I need for scouting?
Essential equipment includes: a notebook and pen (or digital device), a magnifying glass or hand lens, a measuring tape, a flagging tape, and potentially specialized tools like insect traps or soil testing kits. Comfortable clothing and sturdy footwear are also important.
What are some common signs of crop diseases to look for?
Signs can vary greatly depending on the disease, but common signs include leaf spots, wilting, discoloration, lesions, unusual growth patterns, and fungal growth. Refer to specific crop guides for details on identifying particular diseases.
How can I identify insect infestations?
Look for signs like chewed leaves, insect presence (adults, larvae, eggs), webbing, honeydew (shiny residue on leaves), and distorted growth. Knowing the common pests for your crop is key.
What does 'action threshold' mean in the checklist?
The action threshold is the level of pest or disease infestation at which you need to take control measures. It's a balance between economic benefit and environmental impact - you don't want to spray preventatively.
Where can I find more information about specific pests and diseases affecting my crops?
Your local agricultural extension office, university cooperative extension services, and reputable online resources (such as university websites and government agricultural agencies) are excellent sources of information.
How should I record my scouting observations?
Record the date, location, crop stage, pest/disease present, severity level, and any actions taken. Photos are also extremely helpful for documenting progress and consulting with experts.
What should I do if I'm unsure about a pest or disease identification?
Contact your local agricultural extension agent, a certified crop advisor, or a plant pathologist for assistance. Don't guess - accurate identification is crucial for effective treatment.
Found this Article helpful?
Farm Management Solution Demo
Grow your farm smarter & more efficiently! ChecklistGuro streamlines crop planning, task management, & resource tracking. Maximize yields, reduce waste, & improve profitability. Manage it all with our Work OS.
Related Articles
Unlock Higher Yields: Your Precision Agriculture Checklist Template
The Ultimate Farm Safety Inspection Report Checklist Template

Irrigation System Checklist: Farm Water Management & Crop Yield Optimization

Livestock Health & Welfare Checklist: Your Farm Animal Care & Biosecurity Template
Crop Insurance Policy Review Checklist: A Farmer's Guide

Water Discharge Permit Compliance Checklist Template

The Ultimate GPS & Precision Farming Calibration Checklist Template
Mapping the Threat: A Checklist for Proactive Pest & Disease Pressure Management
We can do it Together
Need help with
Farm Management?
Have a question? We're here to help. Please submit your inquiry, and we'll respond promptly.