The Ultimate Crop Planting and Harvesting Checklist: A Step-by-Step Guide
Published: 11/22/2025 Updated: 12/14/2025
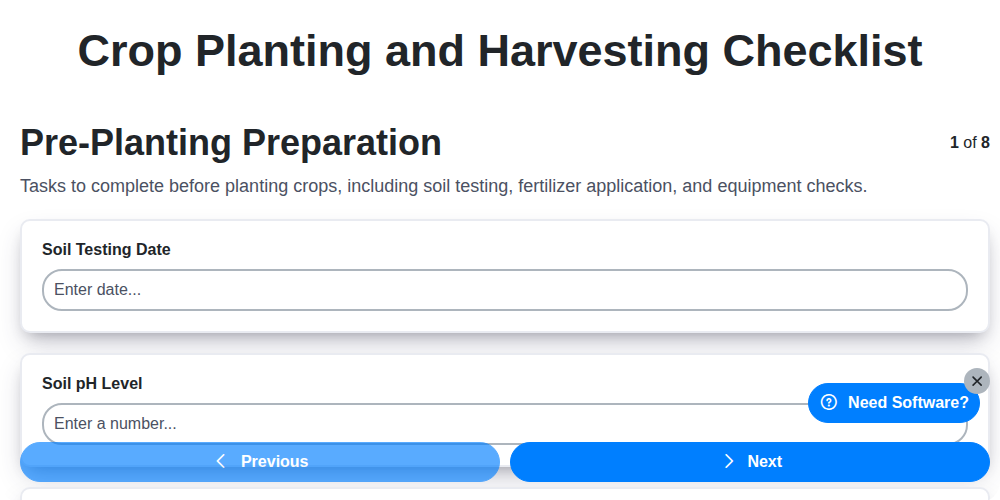
Table of Contents
- 1. Pre-Planting Preparation: Laying the Foundation for Success
- 2. Seed/Seedling Selection & Handling: Choosing Quality Starts
- 3. Planting Procedures: Getting Your Crops in the Ground
- 4. Crop Monitoring & Maintenance: Keeping a Watchful Eye
- 5. Harvest Readiness Assessment: Knowing When It's Time
- 6. Harvesting Procedures: Gathering Your Bounty
- 7. Post-Harvest Handling & Storage: Preserving Freshness
- 8. Equipment Maintenance & Cleaning: Ensuring Longevity
- 9. Troubleshooting Common Planting & Harvesting Challenges
- 10. Planning for Next Season: Reflecting and Refining
- Resources & Links
TLDR: Feeling overwhelmed by planting and harvesting? This checklist template breaks down the entire process - from soil prep to storage - into manageable steps. It's your go-to guide for a successful and organized growing season, minimizing stress and maximizing your harvest!
1. Pre-Planting Preparation: Laying the Foundation for Success
Before a single seed touches the soil, a solid foundation of preparation is crucial for a bountiful harvest. This initial phase sets the stage for healthy growth and minimizes potential issues down the line. Let's break down the essential pre-planting steps:
Soil Assessment & Improvement: Begin with a soil test to determine pH levels and nutrient deficiencies. Amend the soil accordingly - adding compost, manure, or specific fertilizers based on the test results. Consider the soil type; heavy clay might require amendments to improve drainage, while sandy soil might need organic matter to retain moisture.
Field Clearing & Tilling: Remove any debris, rocks, or weeds from the planting area. Tilling or no-till farming (depending on your approach) helps to loosen the soil, improve aeration, and create a suitable seedbed. Remember to account for the specific needs of your chosen crops; some thrive in undisturbed soil.
Planning & Layout: Develop a detailed planting plan, considering crop rotation, companion planting benefits, and space requirements. Accurate spacing is vital for optimal growth and light penetration. Mark out rows or beds clearly to ensure consistent planting.
Irrigation & Drainage: Assess your irrigation system and ensure it's functioning correctly. Address any drainage issues proactively to prevent waterlogging and root rot. Proper water management is key, especially in areas with unpredictable rainfall.
Weed Control: Implement pre-emergent weed control strategies to minimize competition for nutrients and sunlight. This can involve herbicides (used responsibly and according to label instructions) or manual methods like mulching.
2. Seed/Seedling Selection & Handling: Choosing Quality Starts
The foundation of a successful harvest begins long before you even break ground. Selecting high-quality seeds or seedlings is crucial for robust growth, disease resistance, and ultimately, a bountiful yield. Here's a breakdown of what to consider:
1. Source Matters: Choose reputable suppliers. Local nurseries often offer seedlings acclimated to your region's climate, while seed catalogs and online retailers offer a wider variety. Research the supplier's reputation and read reviews if possible.
2. Variety Selection: Consider your climate, soil type, and personal preferences. Research varieties known to perform well in your area. Factors like disease resistance, maturity time, and size are all important. Don't be afraid to experiment, but choose wisely!
3. Seed Quality Assessment: For seeds, check the expiration date. Older seeds may have a reduced germination rate. Perform a germination test if you're unsure - simply plant a few seeds and see how many sprout. Look for seeds that are uniform in size and color, without any signs of damage or insect infestation.
4. Seedling Inspection: When purchasing seedlings, examine them carefully. Look for healthy, vibrant green leaves. Avoid seedlings that are stunted, yellowing, or have signs of pests or diseases. Check the root system - it should be well-developed but not root-bound (circles tightly around the pot).
5. Proper Storage: Store seeds in a cool, dry, and dark place. Seed packets should be tightly sealed. Seedlings should be kept watered and protected from extreme temperatures.
6. Handling with Care: Handle seeds and seedlings gently to avoid damage. Avoid dropping or crushing them. When transplanting seedlings, minimize root disturbance.
By prioritizing seed and seedling quality, you're setting your crops up for a strong start and maximizing your chances of a thriving harvest.
3. Planting Procedures: Getting Your Crops in the Ground
This is arguably the most critical stage! A well-executed planting procedure sets the foundation for a successful harvest. Here's a breakdown of what to consider:
1. Timing is Everything: Refer back to your pre-planting preparation notes and weather forecasts. Planting too early can expose seedlings to frost or pests; too late, and you risk a shortened growing season. Consider your region's last frost date and the specific requirements of your chosen crops.
2. Soil Preparation - A Final Check: Before dropping that first seed, ensure your soil is properly tilled, amended, and leveled. Check for clods and debris that could hinder root development. A smooth, consistent seedbed promotes even emergence.
3. Planting Depth & Spacing: This is where accurate information is key. Consult seed packets or seedling tags for the recommended planting depth and spacing for each crop. Overcrowding leads to competition for resources, while planting too shallow can lead to drying out. Consider row spacing for efficient equipment operation later on.
4. Planting Method: Decide on your planting method - direct seeding (seeds sown directly into the soil) or transplanting (using seedlings started indoors or purchased). For direct seeding, use a seed planter or carefully hand-sow, ensuring even distribution. When transplanting, handle seedlings gently to avoid root damage and plant them at the same depth as they were previously growing.
5. Irrigation Immediately After Planting: Give your newly planted seeds or seedlings a good watering. This helps settle the soil, encourages germination (for seeds), and reduces transplant shock (for seedlings).
6. Mulching (Optional): Applying a layer of mulch after planting can help retain moisture, suppress weeds, and regulate soil temperature. Choose a mulch appropriate for your crops (straw, wood chips, or plastic sheeting).
4. Crop Monitoring & Maintenance: Keeping a Watchful Eye
Consistent monitoring and maintenance are crucial for a successful harvest. It's not enough to just plant and hope for the best! Regular observation allows you to identify and address potential problems before they impact your yield.
Here's what to focus on:
- Regular Scouting: Walk through your fields (or containers!) at least once a week. Look for signs of pests, diseases, and nutrient deficiencies. Use a scouting app or notebook to record your observations.
- Pest & Disease Management: Early detection is key. Implement preventative measures like crop rotation and introducing beneficial insects. If pests or diseases are present, act quickly using appropriate, environmentally conscious methods (organic sprays, hand-picking, etc.).
- Watering & Irrigation: Ensure consistent moisture levels. Consider soil type, weather conditions, and crop-specific needs. Invest in a soil moisture meter for accurate readings.
- Weed Control: Weeds compete with your crops for resources. Manual weeding, mulching, and appropriate herbicides (if used) are essential.
- Fertilization: Monitor plant health and adjust fertilization as needed. Soil testing can help determine nutrient levels and guide your feeding strategy. Consider foliar feeding for quicker results if needed.
- Support & Pruning: Depending on your crop, staking, trellising, or pruning may be necessary for optimal growth and fruit production.
Consistent attention to these areas will contribute to a healthier crop and a more abundant harvest.
5. Harvest Readiness Assessment: Knowing When It's Time
Rushing harvest can mean sacrificing quality and yield. Conversely, waiting too long can lead to over-ripening, pest infestations, and increased losses. A thorough harvest readiness assessment is crucial for maximizing your efforts.
Here's what to look for:
- Visual Cues: This is your primary guide. Each crop has specific visual indicators of ripeness. Research these for your specific varieties. Examples include color changes, size, firmness, and sugar content (often assessed by taste for fruits).
- Moisture Levels: High moisture content can lead to spoilage during storage. Use a moisture meter (if applicable for your crop) or rely on established methods for gauging moisture levels.
- Disease & Pest Pressure: Closely inspect plants for signs of disease or pest damage. A widespread infestation can significantly impact quality and harvest efficiency. Addressing these issues before harvest is vital.
- Weather Forecast: Keep a close eye on the weather. Anticipate potential rain or extreme temperatures that could damage crops during harvest. Planning harvest around favorable conditions minimizes losses.
- Record Keeping: Review your planting and growing records. Track key dates and growth stages. This historical data provides valuable insights for future harvest timing decisions.
By diligently assessing harvest readiness, you'll ensure you're reaping the rewards of your hard work at the optimal time.
6. Harvesting Procedures: Gathering Your Bounty
The moment you've been waiting for! Harvesting isn't just about pulling produce from the ground; it's a critical stage impacting quality and storage life. Here's a breakdown to ensure you gather your bounty effectively:
Timing is Everything: This is arguably the most important factor. Refer back to your crop-specific information for optimal harvest times. Overripe produce loses flavor and texture, while underripe produce may not fully develop. Look for visual cues like color change, size, and firmness. Taste-testing a small sample is always a reliable indicator!
Gentle Handling: Avoid bruising or damaging your crops during harvest. Handle them with care - think of it as delicately picking ripe fruit, not yanking them from the plant. Use clean hands, gloves (especially for thorny or fuzzy produce), or appropriate tools.
Tools of the Trade: Employ the right tools for the job. Knives, pruners, clippers, and even specialized harvesting tools can make the process easier and minimize damage. Keep these tools clean and sharp.
Harvesting Techniques: Different crops require different techniques.
- Root Vegetables: Loosen the soil around the root and gently pull upwards.
- Fruits & Vegetables on Vines: Use clippers or scissors to cut the stem, leaving a short stem attached to the fruit.
- Leafy Greens: Harvest outer leaves first, allowing the inner leaves to continue growing.
Batch Harvesting: If possible, harvest in smaller batches to ensure quicker processing and maintain freshness. This also helps prevent spoilage in bulk.
Field Baskets/Containers: Use clean, ventilated containers to collect your harvest. This promotes airflow and prevents overheating. Avoid piling produce too high, which can cause bruising.
Immediate Cooling: After harvest, cool your produce down as quickly as possible. This slows down respiration and enzymatic activity, extending shelf life. Water baths or cool air circulation are effective methods.
7. Post-Harvest Handling & Storage: Preserving Freshness
The hard work doesn't stop at harvest! Proper post-harvest handling and storage are crucial for minimizing losses, extending shelf life, and maintaining the quality of your crops. Here's a breakdown of key steps:
Immediate Actions:
- Gentle Handling: Minimize bruising and damage during collection. Handle produce carefully to avoid knocking, dropping, or rough handling.
- Cooling: Rapidly cool your harvested crops. Heat accelerates decay. Methods include:
- Hydrocooling: Submerging produce in cold water.
- Forced-Air Cooling: Using fans to circulate cold air around produce.
- Room Cooling: Placing produce in a refrigerated room.
- Sorting & Grading: Remove any damaged, diseased, or overripe produce. Sorting by size and quality further optimizes storage and marketability.
Storage Considerations:
- Temperature & Humidity Control: Different crops require different storage conditions. Research the optimal temperature and humidity levels for each of your crops. Consistent control is vital.
- Ventilation: Adequate ventilation prevents the buildup of ethylene gas (a ripening agent) and reduces moisture, preventing mold and rot.
- Storage Location: Choose a clean, dry, and pest-free storage area. Consider using ventilated crates or containers.
- Ethylene Management: Some crops (like tomatoes and avocados) produce high levels of ethylene. Store these separately from ethylene-sensitive crops (like leafy greens).
Specific Crop Needs:
- Root Vegetables (Potatoes, Carrots): Store in a cool, dark, and humid environment.
- Fruits (Apples, Berries): Refrigerate promptly and check regularly for signs of spoilage.
- Leafy Greens: Refrigerate immediately and maintain high humidity.
- Vegetables (Cucumbers, Peppers): Store in a cool, humid environment.
Regular Monitoring: Periodically check your stored produce for signs of spoilage, mold, or pests. Rotate stock to ensure older produce is used first.
8. Equipment Maintenance & Cleaning: Ensuring Longevity
Your equipment is a significant investment, and proper maintenance and cleaning are crucial for its longevity and reliable performance throughout the planting and harvesting seasons. Don't wait for breakdowns - proactive care saves time, money, and frustration.
Before, During, and After:
- Pre-Season Inspection: Before you even begin planting, thoroughly inspect all equipment. Check fluid levels (oil, coolant, hydraulic fluid), tire pressure, belts, hoses, and filters. Lubricate moving parts according to the manufacturer's recommendations.
- Regular Cleaning (During Season): Dirt, debris, and crop residue can wreak havoc on machinery. Clean planters, combines, tractors, and other tools after every use. Pay special attention to areas prone to build-up, like seed hoppers, bearings, and cutter bars. Compressed air is your friend here!
- Post-Harvest Deep Clean: Once harvesting is complete, a comprehensive cleaning is essential. Remove all remaining crop residue, dried mud, and debris. Consider a solvent bath for heavily soiled parts.
- Sharpening and Repair: Sharp blades and well-maintained components are vital for efficiency. Sharpen cutter bars, planter discs, and other cutting tools. Address any minor repairs immediately to prevent them from escalating into major problems.
- Storage Preparation: Before storing equipment for the off-season, drain all fluids, lubricate thoroughly, and cover or store it in a dry, protected area. This prevents rust and corrosion, extending the lifespan of your valuable tools.
- Record Keeping: Maintain a maintenance log to track repairs, cleaning schedules, and any issues encountered. This will help you anticipate future needs and optimize equipment performance.
By incorporating these simple maintenance practices, you're not just preserving your equipment; you're safeguarding your investment and ensuring a smoother, more productive farming operation year after year.
9. Troubleshooting Common Planting & Harvesting Challenges
Even with meticulous planning and a detailed checklist, unexpected issues can arise during crop planting and harvesting. Here's a look at some common problems and potential solutions:
Planting Problems & Fixes:
- Poor Germination: This could stem from old or improperly stored seeds, compacted soil, inconsistent moisture, or incorrect planting depth. Solution: Test seed viability before planting. Amend soil for better drainage and aeration. Ensure consistent watering and plant at the recommended depth. Consider seed treatments.
- Uneven Emergence: Often caused by variable soil conditions or inconsistent planting depth. Solution: Focus on even soil preparation. Calibrate your planter to ensure consistent depth and spacing.
- Pest & Disease Pressure Early On: Addressing this quickly is crucial. Solution: Implement preventative measures like crop rotation, resistant varieties, and biological controls. Monitor regularly and address infestations promptly with appropriate methods.
Harvesting Problems & Fixes:
- Premature Ripening/Overripening: Can be triggered by unusual weather patterns or nutrient imbalances. Solution: Adjust harvest schedule based on observed maturity. Consider foliar feeding to balance nutrient levels.
- Harvesting Difficulties (e.g., tangled vines, lodged plants): Can be caused by heavy rain, disease, or improper plant spacing. Solution: Choose varieties suited to your climate and growing conditions. Improve drainage. Space plants appropriately to prevent lodging.
- Harvesting Equipment Malfunctions: Downtime is costly. Solution: Regularly inspect and maintain harvesting equipment. Keep spare parts on hand for common issues. Have a backup plan for mechanical breakdowns.
- Post-Harvest Damage (bruising, splitting): Gentle handling is key. Solution: Train harvesting staff on proper handling techniques. Adjust harvesting speed to minimize damage. Consider using padding or cushioning during transport.
Remember to document any recurring issues and adapt your planting and harvesting practices accordingly to continuously improve your yields and minimize losses.
10. Planning for Next Season: Reflecting and Refining
The harvest is done, the fields are (mostly) cleared - it's easy to just kick back and relax. But the most savvy growers understand that the end of one season is the perfect springboard for the next. Taking the time to reflect on what worked and what didn't is invaluable for maximizing yield and efficiency next year.
Start by reviewing your planting and harvesting checklists. Did you miss any critical steps? Were there any areas where you felt rushed or unprepared? Consider the weather patterns - were there any unexpected challenges? Note these observations.
Beyond the checklist itself, think about seed varieties. Did any perform exceptionally well (or poorly) given your local conditions? Research new varieties or consider experimenting with different planting dates next season. Similarly, evaluate your post-harvest handling and storage methods - were there any losses due to spoilage or damage?
Finally, document your findings. A simple notebook or digital file dedicated to annual reflections can become a goldmine of knowledge, guiding your decisions and helping you continually improve your crop production practices. Don't just harvest your crops - harvest the lessons learned too!
Resources & Links
- Farmer's Almanac: Provides extensive gardening information, planting calendars, weather forecasts, and general agricultural advice. Useful for planning and timing.
- Garden.org: A comprehensive gardening resource with forums, plant databases, articles, and advice for all skill levels. Great for seed/seedling selection and troubleshooting.
- Burpee: A reputable seed company with detailed planting guides for their varieties, useful for specific crop information and best practices.
- Seed Savers Exchange: Focused on heirloom seeds and preserving genetic diversity. Offers valuable information about seed saving, selection, and handling.
- University of Minnesota Extension: Provides regionally specific gardening information and resources from a trusted university source. Good for understanding climate-appropriate planting and maintenance.
- Oregon State University Extension: Similar to the Minnesota Extension, this site provides localized gardening advice and resources for the Pacific Northwest, adaptable to similar climates.
- Royal Horticultural Society (RHS): A UK-based organization with a wealth of horticultural information, including planting guides, disease identification, and harvesting tips. Useful for broader understanding.
- The Spruce: A general home and garden website with numerous articles covering all aspects of gardening, helpful for understanding procedures and maintenance.
- Grow Veg: Offers videos and articles focusing specifically on vegetable gardening, often with practical demonstrations of planting and harvesting techniques.
- Agricultural Marketing Resource Center (AgMRC): Provides information related to post-harvest handling, storage, and marketing of crops. Relevant for sections on preserving freshness and planning for next season.
- Food and Agriculture Organization (FAO): A global organization with extensive resources on sustainable agriculture, crop management, and food security. Useful for deeper understanding of larger-scale farming principles.
- Home Depot: Provides access to gardening tools and equipment mentioned in the equipment maintenance section.
- Tractor Supply Co.: Another resource for gardening tools and equipment.
- Johnny's Selected Seeds: Another reputable seed company with extensive planting guides and valuable information for small-scale farmers and gardeners.
- Connecticut Agricultural Experiment Station: State specific agricultural resources which can be adapted.
Frequently Asked Questions
What is the purpose of this checklist?
This checklist provides a comprehensive, step-by-step guide to ensure successful crop planting and harvesting, minimizing errors and maximizing yields. It covers everything from pre-planting soil preparation to post-harvest storage.
Who is this checklist for?
This checklist is designed for gardeners, small-scale farmers, and anyone involved in growing crops, regardless of experience level. It's adaptable for various crop types and growing conditions.
Can I adapt this checklist to my specific crops?
Absolutely! This is a general guide. You should adjust the timings and specific tasks based on your particular crop varieties, climate, and growing region. Pay close attention to recommended planting and harvest dates for your chosen plants.
What does 'soil testing' involve, and why is it important?
Soil testing analyzes your soil's nutrient levels and pH. It's important because it allows you to amend the soil with the right fertilizers and amendments, ensuring your plants have the necessary nutrients to thrive. Kits are readily available at garden centers or through your local agricultural extension office.
What does 'amending the soil' mean?
Amending the soil involves adding organic matter (like compost, manure, or peat moss) or other materials to improve its structure, fertility, and drainage. The checklist provides examples of common amendments.
Why is crop rotation important, and how does this checklist help?
Crop rotation helps prevent soilborne diseases and pests and improves soil fertility. The checklist reminds you to plan your crop rotation cycle.
The checklist mentions 'hardening off' seedlings. What is this?
'Hardening off' is the process of gradually acclimatizing seedlings grown indoors to outdoor conditions. It prevents shock and increases their survival rate.
What are some signs that a crop is ready for harvest?
The checklist outlines general signs. However, specific indicators vary by crop. Consult reliable resources (like seed packets or online guides) for detailed harvest cues for your crops.
What's the importance of post-harvest handling and storage?
Proper handling and storage prevent spoilage, extend shelf life, and maintain the quality of your harvested crops. The checklist includes essential steps to ensure this.
Where can I find more detailed information on specific crops or growing techniques?
Your local agricultural extension office, online gardening resources (university websites, reputable blogs), and experienced gardeners are great sources for more detailed information.
Found this Article helpful?
Farm Management Solution Demo
Grow your farm smarter & more efficiently! ChecklistGuro streamlines crop planning, task management, & resource tracking. Maximize yields, reduce waste, & improve profitability. Manage it all with our Work OS.
Related Articles
Unlock Higher Yields: Your Precision Agriculture Checklist Template
The Ultimate Farm Safety Inspection Report Checklist Template

Irrigation System Checklist: Farm Water Management & Crop Yield Optimization

Livestock Health & Welfare Checklist: Your Farm Animal Care & Biosecurity Template
Crop Insurance Policy Review Checklist: A Farmer's Guide

Water Discharge Permit Compliance Checklist Template

The Ultimate GPS & Precision Farming Calibration Checklist Template
Mapping the Threat: A Checklist for Proactive Pest & Disease Pressure Management
We can do it Together
Need help with
Farm Management?
Have a question? We're here to help. Please submit your inquiry, and we'll respond promptly.