Cut & Fill Balance: Your Checklist Template for Project Success
Published: 09/02/2025 Updated: 12/13/2025
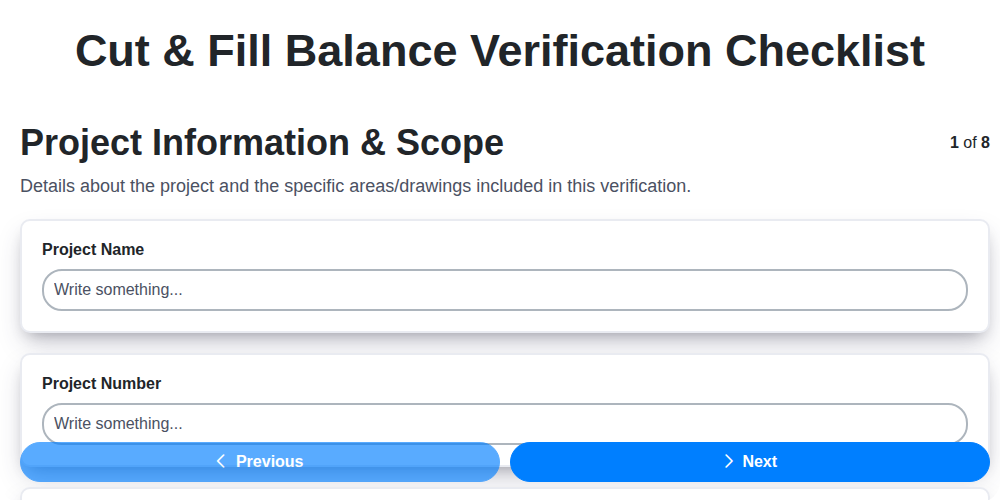
Table of Contents
- Why Cut & Fill Balance Matters
- Understanding the Risks of Imbalance
- Your Cut & Fill Balance Checklist: A Template
- Step 1: Project Scope & Data Identification
- Step 2: Defining Your Assumptions
- Step 2.5: Material Density - A Critical Detail
- Step 3: Volume Calculation Methodology
- Step 4: Comparing Cut and Fill Volumes
- Step 5: Establishing Tolerance Levels
- Step 5.5: Variance Analysis - Is Your Project Within Limits?
- Step 6: Addressing Discrepancies & Remedial Actions
- Step 7: Review, Approval, and Documentation
- Resources & Links
TLDR: Earthwork imbalances (cut & fill) can wreck your project's budget & timeline. This checklist template ensures accurate calculations & balance, saving you money and headaches. It guides you through data gathering, volume calculations, comparison, and corrective actions - a must-have for any construction project involving earthmoving!
Why Cut & Fill Balance Matters
Beyond the immediate cost implications, an unbalanced cut and fill situation can ripple through a project, impacting timelines and relationships. Imagine needing to scramble for emergency fill material mid-project - that delays other critical tasks, frustrates subcontractors, and can strain your project's reputation. Furthermore, discrepancies often signal deeper issues with the design or survey data, potentially masking larger, more complex problems that could lead to structural or environmental concerns. Accurate cut and fill balance isn't just about money; it's about ensuring a well-planned, well-executed project that meets its goals safely and sustainably.
Understanding the Risks of Imbalance
Ignoring the potential for imbalance in cut and fill operations isn't a gamble you can afford to take. The risks extend far beyond simple budget overruns. Imagine a scenario where you'd anticipated needing to import 5,000 cubic yards of fill, only to discover, mid-project, that you actually need 10,000. The sudden need for an additional 5,000 cubic yards triggers a frantic scramble for materials, often at inflated prices due to emergency procurement.
This isn't just about money, either. Significant imbalance can signal underlying design flaws - perhaps the grade isn't adequately considering existing conditions or drainage requirements. Unresolved design issues snowball into construction complications, potentially impacting the structural integrity of the project.
Furthermore, an imbalance frequently leads to environmental consequences. Excessive hauling of material increases your project's carbon footprint and contributes to localized traffic congestion. Inaccurate disposal estimations can lead to unexpected permit complications and potential fines. Failing to proactively manage cut and fill balance isn't just a construction oversight - it's a potential threat to your project's schedule, budget, reputation, and even its long-term viability.
Your Cut & Fill Balance Checklist: A Template
Here's a template to get you started. Remember to tailor it to your project's specific needs and contractual obligations. This isn't exhaustive; consider it a framework.
Project Identification:
- Project Name:
- Project Location:
- Phase of Verification: (e.g., Pre-Construction, During Construction)
- Date of Verification:
Data & Assumptions Log:
| Data Source | Description | Version/Date | Responsible Party |
|---|---|---|---|
| Topographic Survey | Existing Ground Surface Data | ||
| Design Drawings | Proposed Finished Grade | ||
| BIM Model (if applicable) | |||
| Material Density (Cut) | |||
| Material Density (Fill) |
Volume Calculation Details:
| Area/Zone | Cut Volume (CY) | Fill Volume (CY) | Calculation Method | Software Used |
|---|---|---|---|---|
Balance Comparison:
- Total Cut Volume:
- Total Fill Volume:
- Net Balance (Fill - Cut):
- Percentage Balance:
Tolerance & Acceptable Variance:
- Established Tolerance: +/- [Value]% or [Value] CY
- Justification for Tolerance: [Brief Explanation]
- Variance Status: Within Tolerance / Outside Tolerance
Discrepancy Resolution (If Applicable):
| Discrepancy Description | Root Cause Analysis | Corrective Action | Responsible Party | Completion Date |
|---|---|---|---|---|
Review & Approval:
- Reviewed By:
- Title:
- Date:
- Approval Status: Approved / Conditionally Approved / Rejected
- Comments/Recommendations:
Step 1: Project Scope & Data Identification
Clearly defining the project scope and identifying the necessary data is the bedrock of any successful cut & fill balance verification. Without a solid foundation, your calculations are built on shifting sand. Begin by meticulously outlining the area of analysis - is it the entire site, a specific zone for a building foundation, or a section of roadway? Accurately defining the boundaries prevents miscalculations and ensures everyone is on the same page.
Next, inventory your data sources. This includes the existing ground surface data (often derived from topographic surveys), the proposed finished grade data (from design plans or BIM models), and any geological reports that might influence material behavior. Critically, document where this data came from, the date it was collected, and its stated accuracy. A surveyor's report with a date of 2020 is vastly different from one dated 2024. Don't overlook seemingly minor details - the source and reliability of your data are paramount to an accurate balance verification. A table documenting these sources is an excellent practice to maintain traceability.
Step 2: Defining Your Assumptions
Defining your assumptions is arguably the most critical, and often overlooked, part of this process. It's not enough to just run numbers; you need to understand why those numbers are what they are. Every calculation rests on a foundation of assumptions, and documenting them explicitly is your safeguard against future disputes and costly surprises.
Think of assumptions as your what-ifs. What if the ground isn't exactly as the survey indicates? What if the material density is slightly different than expected? What if unforeseen bedrock is encountered? Documenting these potential scenarios-and the assumptions you're making instead-creates a transparent record and allows for more accurate risk assessment.
Your assumption log should include details like:
- Material Density: Specify the assumed density for both cut and fill materials, and the source of that data. Are you using bulk density or dry density? Why?
- Slope Calculations: Detail the method used for calculating slopes and the rationale behind it.
- Ground Conditions: Note any assumptions about the consistency of ground conditions. Are you assuming uniform soil type across the area?
- Weather Conditions: Acknowledge potential impacts of weather and what assumptions are being made about precipitation or freeze-thaw cycles.
- Bedrock Encounter: State explicitly whether you're assuming the absence of bedrock, or if bedrock is factored in. If factored in, document how.
Don't be afraid to over-document. A detailed assumption log demonstrates due diligence and provides a clear line of reasoning for your calculations. It's much easier to justify a number when you can explain exactly how you arrived at it.
Step 2.5: Material Density - A Critical Detail
Material density is often overlooked, but it's a cornerstone of accurate cut and fill volume calculations. Density, typically expressed in pounds per cubic foot (lbs/ft³) or kilograms per cubic meter (kg/m³), directly impacts the weight of the material being moved, and thus, the cost implications of your project. Using incorrect density values can lead to significant errors in volume estimations.
For example, a seemingly small difference in density - say, 10 lbs/ft³ - multiplied across thousands of cubic yards of material can easily translate into thousands of dollars in incorrect material purchasing or disposal costs.
Always verify density values with geotechnical reports, material specifications, or laboratory testing. Don't rely on generic or assumed values. Document your sources meticulously within your checklist (see Section 2. Data Sources & Assumptions). Consider using a range of densities to account for potential variations within the material. Finally, ensure consistency: use the same density value when calculating both cut and fill volumes.
Step 3: Volume Calculation Methodology
Calculating cut and fill volumes accurately requires a well-defined methodology. The best approach depends on project complexity, data availability, and your team's expertise. Here's a breakdown of common methods:
1. Digital Surface Modeling (DSM) and Software: This is the most prevalent and accurate approach. Specialized software like Civil 3D, Trimble Earthworks, or similar BIM tools utilize existing ground surface data (from surveys or LiDAR scans) and the design surface data to automatically calculate volumes. These programs offer powerful features like contouring, surface creation, and volume reporting. While the initial learning curve might be present, the efficiency and accuracy gains are considerable.
2. Grid-Based Methods: A simpler approach involves overlaying a grid over the project area and calculating the average elevation difference within each grid cell. This method is less precise than DSM-based calculations, especially with irregular terrain, and is generally suited for smaller projects or preliminary volume estimates. The grid size directly affects accuracy - smaller grids yield better results, but increase calculation time.
3. Contour-Based Calculations: This technique involves manually calculating volumes between contour lines on topographic maps. While historically significant, it's time-consuming, prone to errors, and rarely used in modern construction.
4. Cut Sheet Analysis: If your project has existing cut sheets or preliminary calculations, these can be reviewed and updated to account for design changes. This is useful for verifying existing estimates, but it's not a primary method for volume determination.
Important Considerations:
- Datum Consistency: Ensure all elevation data is referenced to the same vertical datum.
- Accuracy Requirements: Your chosen method should meet the project's required accuracy levels.
- Documentation: Thoroughly document the methodology and any assumptions made during the calculations.
Step 4: Comparing Cut and Fill Volumes
Calculating the cut and fill volumes is only half the battle. Now comes the crucial comparison. This step isn't just about looking at two numbers; it's about understanding the story those numbers tell about your project's earthwork plan.
Begin by clearly stating the total cut volume and the total fill volume. Then, calculate the net balance - the difference between the two (Fill - Cut). This net balance reveals whether you anticipate a surplus or deficit of material on site. A positive net balance indicates you're planning to have more fill than cut, likely requiring import of material or a need for a disposal plan. Conversely, a negative net balance suggests an expected cut surplus, potentially leading to needing to export material.
Next, calculate the percentage balance. This is a useful metric because it puts the net balance into context, accounting for the overall scale of the earthwork operation. A small net balance on a large project might be acceptable, while the same absolute difference on a smaller project could be a red flag. The formula is simple: (Net Balance / Average of (Cut Volume + Fill Volume)) * 100.
Finally, visually compare the numbers. A table summarizing the data - total cut, total fill, net balance, and percentage balance - is an excellent way to present the information clearly. Look for patterns or inconsistencies that warrant further investigation. Don't just accept the numbers at face value; critical thinking is key!
Step 5: Establishing Tolerance Levels
Defining acceptable variance is crucial - it's the line between a minor adjustment and a project-stopping discrepancy. Tolerance levels aren't arbitrary; they should be carefully considered based on several factors. These include the project's complexity, the accuracy of your survey data, the potential environmental impact of material import/export, and, critically, the contractual requirements outlined in your bidding documents.
A tighter tolerance (e.g., +/- 3%) is appropriate for projects with high precision requirements and reliable data, while a more generous tolerance (e.g., +/- 10%) might be acceptable for larger, less critical earthwork operations. Always consult the project specifications - the contract often explicitly defines allowable variance. Furthermore, consider the practicality of achieving zero variance. Small discrepancies are inevitable, and chasing perfection can be more costly than accepting a reasonable deviation. Document the reasoning behind your chosen tolerance - this provides transparency and defensibility should questions arise later.
Step 5.5: Variance Analysis - Is Your Project Within Limits?
Variance analysis isn't just about seeing a number; it's about understanding what that number means for your project. After comparing your cut and fill volumes, you'll have a net balance - the difference between your total fill and total cut. This is where your pre-defined tolerance level comes into play.
Is it within acceptable limits? Your contract documents or project specifications will likely outline a permissible variance. This isn't a free-for-all; it's a critical safeguard. A positive variance (more fill than cut) might indicate an overestimation of cut during the design phase, potentially leading to unnecessary material import costs. A negative variance (more cut than fill) could mean you're underestimating cut and facing costly material disposal challenges.
But don't just stop at a yes or no. Dig deeper. Even if your variance technically falls within the tolerance, analyze why it exists. Are the discrepancies localized to specific areas? Is there a pattern emerging? A seemingly small variance across a large area can still represent a significant cost impact. This investigation will inform your next steps - whether it's adjusting your import/export plan, revisiting design assumptions, or triggering a more detailed site investigation. Ignoring this critical analysis, even within tolerance, can lead to hidden costs and schedule delays later in the project.
Step 6: Addressing Discrepancies & Remedial Actions
Finding a significant imbalance during your comparison isn't a failure - it's an opportunity to catch a potential problem before it becomes a massive headache. The key here is a structured response. Don't panic; investigate.
First, identify the discrepancy precisely. Is it localized to a specific area, or is it a site-wide issue? Document exactly what the imbalance is: how much more cut than fill, or vice versa.
Next, conduct a root cause analysis. Common culprits include:
- Survey Errors: Were there inaccuracies in the existing ground survey or the design surface data? A re-survey of the affected area might be necessary.
- Design Errors: Was there a mistake in the design plans themselves? This requires coordination with the design team.
- Incorrect Assumptions: Did an initial assumption (like material density) prove inaccurate? Re-evaluate these assumptions and recalculate.
- Unforeseen Site Conditions: Did unexpected rock formations or buried debris affect the excavation?
- Software/Calculation Errors: Double-check your software settings and calculation methods. A simple typo can throw everything off.
Once you've identified the root cause, outline specific remedial actions. These could range from adjusting the design to re-excavating specific areas, importing fill material, or modifying the construction sequence. Document each action taken and who is responsible for its implementation.
Finally, assess the impact of these remedial actions on the project's schedule and budget. Will the fixes delay the project? Will they require additional expense? Proactive communication with stakeholders is vital at this stage to manage expectations and avoid surprises. A well-documented discrepancy resolution process demonstrates diligence and minimizes potential disputes.
Step 7: Review, Approval, and Documentation
The final step in your Cut & Fill Balance Verification is arguably the most important: review, approval, and thorough documentation. This isn't just about getting a signature; it's about establishing a clear audit trail and ensuring accountability.
Who Should Review? Ideally, the review should be conducted by someone independent of the original calculation team. This could be a senior project engineer, a lead surveyor, or a qualified third-party consultant. Their perspective helps identify potential oversights and confirms the overall accuracy of the work.
What to Look For: The reviewer shouldn't just glance at the numbers. They should:
- Verify Assumptions: Scrutinize the assumptions log - are they still valid? Have any conditions changed?
- Trace Calculations: Have the reviewer trace back key calculations to ensure they align with the project drawings and specifications.
- Assess Remedial Actions: If discrepancies were found and corrective actions taken, the reviewer must confirm that these actions effectively addressed the issues and didn't introduce new problems.
- Overall Consistency: Confirm that the findings are consistent with field observations and any other relevant data.
Documentation is Key: All review findings, approval status, and any comments or recommendations must be meticulously documented within the checklist itself. A dated and signed approval (or rejection) provides crucial legal protection and demonstrates due diligence. Retain this checklist as a permanent project record-it can be invaluable for resolving disputes or justifying decisions later on.
Resources & Links
- Trimble Construction : Trimble offers various construction technology solutions, including earthworks management software like Trimble Earthworks and Site Controller. These tools can significantly aid in cut & fill balance calculations, visualization, and reporting. Their website provides product information, case studies, and resources related to earthworks.
- Bentley Systems : Bentley Systems' offerings like ContextCapture, OpenRoads Designer, and StormCAD provide comprehensive earthworks design and analysis capabilities. Their website offers detailed information on their solutions, case studies, and white papers relevant to earthwork balancing.
- Autodesk Construction : Autodesk Civil 3D is a powerful BIM software used for infrastructure design, including earthworks. Autodesk's website provides resources on using Civil 3D for cut & fill calculations, surface modeling, and volume reporting. They offer tutorials and training materials.
- Hexagon Geospatial : Hexagon Geospatial provides software and solutions for geospatial analysis, including earthworks management. Their offerings, such as Leica Geo Suite, can be valuable for data processing and calculations. The website provides details on their products and services.
- Rocky Software : Rocky Software specializes in mining and earthwork calculations. Their software is specifically designed to handle complex cut and fill volumes. The website provides product information and demo opportunities.
- Foth : Foth is an engineering and consulting firm that often deals with earthwork projects. Their website provides insight into their expertise and might feature case studies or articles related to earthwork balance. Good for seeing real-world examples and challenges.
- Civil Engineering Center : The Civil Engineering Center at the University of Wisconsin-Madison is a research and outreach organization. Their website often publishes technical reports and guides on various construction topics, which could contain information relevant to earthwork management.
- Associated General Contractors of America (AGC) : AGC is a leading construction trade association. Their website provides resources, including best practices, articles, and training materials related to construction management, potentially covering aspects relevant to earthwork balance.
- American Society of Civil Engineers (ASCE) : ASCE is a professional organization for civil engineers. Their website provides access to technical papers, standards, and publications that may contain information on earthwork design and construction.
- Geoengineer.com : Geoengineer.com is a resource website for civil engineers, frequently publishing articles and tutorials on a wide range of topics, including earthwork and site development. It often provides practical tips and guidance.
Frequently Asked Questions
What is Cut and Fill Balance?
Cut and fill balance refers to the process of ensuring the volume of soil excavated (cut) is equal to the volume of soil needed to be placed (fill) on a construction project. It minimizes the need for importing or exporting materials, saving time, money, and reducing environmental impact.
Why is a Cut & Fill Balance Checklist Template Important?
A checklist template ensures consistency in calculations, identifies potential imbalances early on, minimizes costly errors and rework, facilitates better communication between project stakeholders, and allows for proactive mitigation strategies to avoid over-excavation or material shortages.
What information do I need to create a Cut & Fill Balance Checklist?
You'll need detailed topographic surveys (existing ground), final design grades (proposed ground), accurate volume calculation software or methods, geotechnical data for compaction factors, and a clear understanding of allowable cut/fill limits and disposal options.
What are the key elements typically included in a Cut & Fill Balance Checklist Template?
Common elements include site data, design elevations, cut/fill calculations (volume, area, slope), compaction factors, allowable limits for import/export, disposal/stockpile locations, approval signatures, and revision history.
How often should I update my Cut & Fill Balance Checklist?
The checklist should be updated regularly, ideally before each construction phase or whenever there are design changes. A minimum of weekly updates is recommended for larger projects, with daily updates during critical phases.
What does 'net cut' or 'net fill' represent in this context?
Net cut represents the total volume of material that needs to be removed from the site, while net fill represents the total volume of material that needs to be placed. A positive net cut indicates you need to excavate more than you have to fill, and vice versa.
What happens if my Cut & Fill Balance shows a significant imbalance?
A significant imbalance requires immediate investigation. Possible solutions include redesigning the project, adjusting grading plans, modifying drainage strategies, or arranging for material import/export. Thorough documentation of all changes is crucial.
Can I use different software to calculate Cut and Fill volumes?
Yes! Many software options are available, ranging from simple spreadsheets to specialized earthwork calculation software like Civil 3D, Surfer, or similar programs. The software choice depends on project complexity and budget.
How does compaction factor influence the Cut & Fill Balance calculations?
Compaction factor accounts for the increase in volume that occurs when soil is compacted. Failure to incorporate this factor leads to inaccurate calculations and potential material shortages or over-excavation.
Who should be responsible for maintaining and reviewing the Cut & Fill Balance Checklist?
Typically, the responsibility falls on the project's surveyor, civil engineer, or a designated earthwork specialist. Regular review and approval should involve the project manager and relevant stakeholders.
Found this Article helpful?
Construction Management Solution Demo
Build smarter, not harder! ChecklistGuro streamlines construction projects from planning to closeout. Manage tasks, inspections, safety protocols & more - all in one place. Reduce delays, improve communication, and deliver projects on time & on budget.
Related Articles

The Ultimate Concrete Vibration Checklist Template

Unlock Value: Your Free Value Engineering Checklist Template

The Ultimate HVAC Ductwork Installation Checklist Template

The Ultimate Rebar Placement Checklist Template

Your Concrete Mix Design Verification Checklist: A Step-by-Step Guide

Backfilling & Compaction Checklist: A Foundation's Best Friend

The Ultimate Concrete Delivery & Placement Checklist Template

Your Ultimate Stakeholder Communication Plan Checklist Template
We can do it Together
Need help with
Construction?
Have a question? We're here to help. Please submit your inquiry, and we'll respond promptly.