Mastering Grade Control: Your Free Checklist Template for Survey Accuracy
Published: 09/01/2025 Updated: 12/13/2025
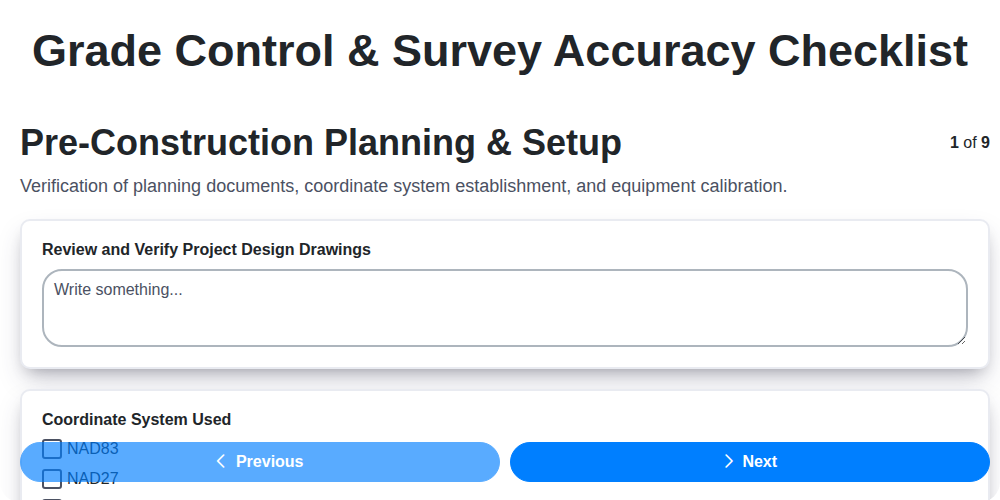
Table of Contents
- Why Grade Control Matters: The High Cost of Errors
- Introducing Your Free Grade Control Checklist Template
- Pre-Construction & Planning - Laying the Groundwork
- Establishing Control - Monuments and Grid Verification
- Stakeout & Monumentation - Precise Placement
- Earthwork Progress Monitoring - Staying on Track
- Concrete & Pavement Grade Control - Ensuring Structural Integrity
- As-Built Surveying: Creating Your Permanent Record
- Equipment Calibration & Maintenance: Keeping Your Tools Accurate
- Data Management & Documentation: Building a Traceable System
- Common Pitfalls & How to Avoid Them
- Beyond the Checklist: Continuous Improvement in Grade Control
- Resources & Links
TLDR: Ensure project accuracy and avoid costly errors with our free Grade Control & Survey Accuracy Checklist template! It guides you through critical steps - from initial planning and monumentation to as-built surveying - to maintain consistent grade control and guarantee survey precision. Download it now to streamline your workflow and build with confidence.
Why Grade Control Matters: The High Cost of Errors
The consequences of inaccurate grade control extend far beyond a minor aesthetic correction. Errors, seemingly small at the time, can cascade into significant financial burdens and project delays. Consider the cost of re-excavating incorrectly graded earthwork - not just the material itself, but the labor, equipment rental, and lost productivity. Similarly, a misaligned foundation can compromise the structural integrity of a building, leading to costly repairs or even demolition.
Beyond direct costs, inaccurate grade control can trigger contract disputes, damage a contractor's reputation, and even expose them to legal liability. Think about the potential for drainage issues caused by improperly sloped pavements - leading to water damage and further repair work. The cumulative effect of these seemingly isolated errors can quickly erode profit margins and jeopardize the success of an entire project. Investing in robust grade control procedures isn't just about minimizing risk; it's about protecting your bottom line and ensuring a lasting, reliable result.
Introducing Your Free Grade Control Checklist Template
Ready to put these principles into practice? We're excited to provide you with a head start! Below, you'll find a downloadable Grade Control & Survey Accuracy Checklist template, designed to be a practical guide for your construction projects. This template incorporates the key elements outlined in this article, providing a structured approach to ensure accuracy and minimize costly errors. Simply click the link below to access the document, which is formatted for easy customization. Feel free to adapt it to your specific project needs, adding project-specific checkpoints and adjusting frequencies as necessary. This is more than just a checklist; it's a tool to build confidence and deliver exceptional results.
Pre-Construction & Planning - Laying the Groundwork
Before a single earthmoving machine rolls, meticulous planning is paramount. This phase isn't just about drawing lines on paper; it's about establishing a framework for accuracy that will influence every stage of the project. Neglecting this crucial groundwork can lead to costly rework, delays, and even compromise the structural integrity of the final product.
So, where do you begin? It all starts with a deep dive into the project design. Thoroughly review all design drawings and specifications, paying close attention to grade requirements, tolerances, and clearly defined datum references. These documents serve as your blueprint for accurate execution.
Next, clearly define the control points - both primary and secondary - and outline their intended use throughout the project. Properly identifying these points and ensuring their accessibility are vital for ongoing monitoring and adjustments. Consider the equipment you'll need: is it equipped to handle the project's complexity? Proper equipment selection is an investment in accuracy. Finally, and perhaps most importantly, confirm that all personnel involved are adequately trained on equipment operation, data handling, and the specific quality control procedures that will be implemented. A well-trained team is your first line of defense against errors. This initial phase isn's just an administrative formality - it's the foundation upon which your entire project's accuracy is built.
Establishing Control - Monuments and Grid Verification
Establishing a robust control network is the bedrock of accurate grade control. This phase goes beyond simply staking out initial points; it's about ensuring those points remain stable and reliable throughout the project's duration. We begin with monumentation - the physical embodiment of our control. Monuments aren't just stakes in the ground; they are precisely located and securely anchored features, often using deep-driven rods, concrete bases, or even permanent benchmarks tied into existing infrastructure. The placement and type of monument will depend heavily on the soil conditions and anticipated disturbance levels - a rural site will allow for more permanent solutions than a bustling urban construction zone.
Following monument installation, rigorous grid verification is paramount. This involves independently checking the coordinates and elevations of our established control points using methods different from the initial setup. For example, if the initial layout used GPS, a subsequent check might involve a traversing loop with a total station. Discrepancies, even seemingly minor ones, must be investigated and corrected immediately. This isn't about pointing fingers; it's about proactively identifying and resolving potential problems before they propagate throughout the project. Documenting these verification results - dates, personnel, methods, and any corrective actions - is not just good practice; it's essential for traceability and liability protection. A reliable control network provides the confidence to proceed with subsequent phases, knowing that you're working from a solid and verifiable foundation.
Stakeout & Monumentation - Precise Placement
This phase is your first tangible opportunity to translate the design into reality and establishes the bedrock for all subsequent work. A poorly executed stakeout can ripple through the entire project, leading to costly corrections and delays. It's not just about placing stakes; it's about meticulous adherence to design specifications and unwavering accuracy.
The initial step involves transferring the design coordinates of key points - building corners, property lines, elevation contours, utility locations - from your digital plans to the physical site. This is typically accomplished using a total station or a GPS/GNSS rover. Regardless of the method, rigorous checks are paramount. Independent verification of stakeout points, comparing measured coordinates with design data, is non-negotiable.
Monumentation is the next crucial element. These monuments - often rebar, concrete posts, or other permanent markers - serve as reference points throughout the project's lifecycle and provide a lasting record for future maintenance or modifications. They need to be robust, stable, and clearly identifiable, resisting accidental disturbance or relocation. Proper depth of setting, protective casing, and clear labeling are essential. Don't underestimate the value of a well-placed, well-protected monument; it's an investment in long-term accuracy and avoids future headaches. Furthermore, thoroughly document the location and characteristics of each monument, creating a readily accessible reference for all project personnel.
Earthwork Progress Monitoring - Staying on Track
Keeping a vigilant eye on earthwork progress is paramount to avoiding costly delays and ensuring the final product meets design specifications. It's not enough to just move dirt; you need to verify that the cuts and fills are accurately reflecting the intended grades. This phase goes beyond simple volume calculations; it's about detecting and correcting deviations before they become significant problems.
Here's a breakdown of key steps and considerations for effective earthwork progress monitoring:
Spot Checks and Cross-Sections: Regular spot checks, utilizing a total station or GPS rover, should be taken across the site to compare existing grades with design elevations. These spot checks shouldn't be random; a grid system or pre-defined locations are essential for consistent data collection. Cross-sections, taken perpendicularly to the planned contours, provide a visual representation of the excavation and fill profiles, allowing for quick identification of areas that are out of tolerance. These cross-sections should be repeated at regular intervals or whenever significant earthmoving activity occurs.
Volume Calculations and Comparison: Accurate volume calculations are crucial for tracking progress and managing material costs. Utilize your surveying data to calculate cut and fill volumes. Compare these calculated volumes with the design quantities to identify discrepancies. Be mindful of the cut/fill calculation method used (e.g., average end areas, prismoidal formula) and ensure consistency throughout the project.
Deviation Analysis and Corrective Actions: When discrepancies are identified, don't ignore them. Thoroughly investigate the cause of the deviation. Is it due to inaccurate staking, improper equipment operation, or a change in site conditions? Once the cause is determined, implement corrective actions immediately. This might involve restaking, adjusting equipment settings, or modifying the excavation plan. Document all deviations and corrective actions in detail.
Real-Time Data and Communication: Integrating real-time data into your earthwork monitoring process can significantly improve efficiency and reduce errors. Utilize GPS rovers or total stations that can transmit data wirelessly to a central monitoring system. This allows project managers and operators to track progress in real-time and make informed decisions. Clear communication between surveyors, operators, and project managers is essential for ensuring that everyone is aware of the current status and any necessary adjustments.
Surface Modeling and Visualization: Creating a 3D surface model of the existing terrain can provide a powerful visualization tool for monitoring earthwork progress. Regularly update the surface model with new survey data to compare it to the design surface. This allows you to quickly identify areas where the existing terrain deviates from the intended grade and assess the magnitude of the deviation. Regularly compare the existing conditions model with the design model to verify the work completed.
Concrete & Pavement Grade Control - Ensuring Structural Integrity
Concrete and pavement work demand a laser focus on grade control. Deviations, even seemingly minor ones, can compromise the structural integrity, longevity, and performance of the finished product. This phase isn't just about aesthetics; it's about ensuring the concrete and pavement layers function as intended, distributing loads effectively and resisting environmental stresses.
The key here is proactive monitoring at every stage - from formwork setting to final compaction. Formwork elevation and alignment must be verified with absolute precision, referencing established benchmarks and control points. During concrete placement, continuous grade checks are vital to ensure proper thickness and slab flatness, often utilizing laser levels or automated grading systems. Slab flatness tolerances are crucial; exceeding these can lead to issues with flooring finishes, door operation, and equipment accessibility later on.
For pavements, similar rigor applies. Sub-base compaction is paramount - inadequate compaction will result in premature pavement failure. Thickness monitoring during paving is essential, along with precise slope and alignment checks to ensure proper drainage. Automated paving equipment combined with real-time grade control systems significantly improves accuracy and efficiency, but even with advanced technology, spot checks and independent verification remain essential. Failing to address grade discrepancies immediately can translate into expensive repairs and compromised project longevity. Finally, detailed documentation of all checks and adjustments made is critical for future reference and potential warranty claims.
As-Built Surveying: Creating Your Permanent Record
As construction nears completion, the responsibility shifts from building to documenting. As-built surveys are your permanent record, vital for future maintenance, renovations, and even legal disputes. They're essentially a "snapshot" of what was actually built, compared to the original design. Don't underestimate their importance!
Unlike initial surveys that establish control, as-builts focus on capturing the final location of all key features: building corners, utility lines, manholes, fire hydrants, equipment pads, and any deviations from the original plans. This isn't just about lines on a map; it's about creating a reliable reference for those who will interact with the project long after you're gone.
Accuracy here is paramount. Discrepancies, however small, can lead to significant problems later on. A misplaced utility line can necessitate costly excavation; an inaccurate building footprint can complicate future expansions. The process involves meticulous fieldwork, precise measurement techniques, and a consistent adherence to quality control procedures. Data is typically compiled into detailed drawings, often utilizing the original design as a base. These drawings aren't just a final product; they's a living document, subject to ongoing refinement and updates throughout the project's lifespan. Proper file management and clear labeling are critical for long-term usability. Remember, an accurate and accessible as-built survey is an invaluable asset, safeguarding the project's future and minimizing potential headaches.
Equipment Calibration & Maintenance: Keeping Your Tools Accurate
Think of your surveying equipment as the foundation of your project's accuracy. A slight drift in a total station's angle measurement, or a GPS rover's antenna bias, might seem insignificant on its own, but compounded over an entire site - across multiple measurements and operations - the cumulative error can become a costly problem. It's not just about ensuring equipment functions; it's about guaranteeing it provides reliable data.
Regular calibration isn't just a best practice - it's a vital safeguard against error. A properly calibrated total station ensures precise angle and distance measurements, a GPS rover provides accurate coordinates, and a level guarantees a true vertical line. Without these fundamentals, you risk misaligned structures, incorrect grading, and ultimately, project rework.
Beyond formal calibration schedules (typically annually for total stations, but always check manufacturer recommendations), a proactive maintenance regime is key. This includes regular cleaning, battery checks, secure connections, and visual inspection for wear and tear. A simple loose tripod screw can introduce substantial errors; a damaged prism can skew measurements.
Don't wait for a catastrophic error to surface. Consistent calibration and preventative maintenance are an investment in project quality, efficiency, and ultimately, your reputation. Keep your tools accurate, and your project on track.
Data Management & Documentation: Building a Traceable System
In construction, data isn't just numbers; it's a record of decisions, actions, and accountability. Robust data management and meticulous documentation are paramount, serving as your safety net against disputes, errors, and future modifications. A fragmented or inconsistent approach can quickly erode confidence and expose vulnerabilities.
Here's how to build a traceable system:
- Standardized File Naming Conventions: Adopt clear, consistent file naming conventions immediately. This ensures easy retrieval and understanding, even months or years later. Include project number, date, survey type (e.g., "Project123_Topo_20240315"), and revision number.
- Centralized Data Storage: Move away from scattered spreadsheets and individual hard drives. Implement a centralized data storage solution - a cloud-based platform is often ideal - with controlled access and regular backups.
- Version Control: Track revisions meticulously. Every change to a drawing, survey point, or calculation needs a clear audit trail. Use version control software or detailed notes within the file itself.
- Metadata Enrichment: Don't just store files; enrich them with metadata. Include details like surveyor name, equipment used, atmospheric conditions (temperature, pressure), and any observations that might influence the data's reliability.
- Secure Access Control: Limit access to sensitive data based on roles and responsibilities. Implement password protection, two-factor authentication, and regular security audits.
- Digital Field Notes: Embrace digital field notes. They're searchable, organized, and far less prone to loss or damage than paper notebooks. Integrate them directly with your surveying equipment for seamless data transfer.
- Regular Backups - Redundancy is Key: Automate regular data backups to multiple locations (cloud and local) to guard against data loss due to hardware failure or cyberattacks.
- Data Retention Policies: Establish clear data retention policies outlining how long data must be stored to comply with legal and contractual requirements.
By prioritizing data management and documentation, you're not just creating records; you're building a foundation of trust, accountability, and long-term project success.
Common Pitfalls & How to Avoid Them
Even with a robust checklist, mistakes happen. Recognizing common pitfalls and implementing preventative measures is crucial for maintaining grade control and survey accuracy. Here are a few frequent issues and how to dodge them:
1. Insufficient Monument Protection: Monuments are often the first casualty of construction activity. If disturbed, your entire project's foundation can shift. Avoid it by: Using robust monument cases, establishing a clear protection protocol (e.g., barrier tape, flagging), and conducting regular monument inspections.
2. Rushing Stakeout & Verification: A hastily performed stakeout can propagate errors throughout the project. Avoid it by: Allowing ample time for initial stakeout, performing meticulous checks against design data, and ensuring sufficient lighting and visibility.
3. Ignoring Weather Conditions: Heat, rain, or extreme temperatures can impact equipment performance and data accuracy. Avoid it by: Being aware of weather forecasts, adjusting equipment settings as necessary, and postponing surveying activities if conditions are unfavorable. Calibrate equipment more frequently in challenging environments.
4. Data Entry Errors: Simple typos and incorrect data entry can significantly impact calculations and layouts. Avoid it by: Implementing double-entry verification processes, using standardized data entry forms, and training personnel on proper data handling techniques.
5. Equipment Miscalibration: Overlooking routine calibration schedules can lead to systematic errors in measurements. Avoid it by: Establishing a strict calibration schedule, maintaining detailed calibration logs, and tracking equipment calibration dates.
6. Failure to Account for Terrain: Ignoring natural terrain features, slope changes, and existing utilities can introduce inaccuracies. Avoid it by: Conducting thorough site reconnaissance, utilizing topographic maps and data, and incorporating site conditions into surveying calculations.
7. Ignoring Design Changes: Late design revisions often lead to layout discrepancies. Avoid it by: Establishing a clear change management process, ensuring all stakeholders are notified of design changes, and updating field layouts promptly.
Beyond the Checklist: Continuous Improvement in Grade Control
Relying solely on a checklist, however comprehensive, can lead to complacency. True excellence in grade control isn't about simply ticking boxes; it's about fostering a culture of continuous improvement. This means proactively seeking out opportunities to refine processes and optimize accuracy.
Consider a few key approaches:
- Post-Project Reviews: After each project phase (or at completion), conduct a thorough review. What went well? What could have been better? Document lessons learned and incorporate them into future checklists.
- Technology Adoption: Stay abreast of emerging technologies. Drones, laser scanners, and advanced GPS systems offer enhanced data capture and processing capabilities. Evaluate whether these tools can improve efficiency and accuracy.
- Data Analysis: Don't just collect data; analyze it. Look for trends, identify potential sources of error, and use this information to adjust procedures. Are there consistent deviations in certain areas?
- Collaborative Feedback: Encourage open communication between surveyors, engineers, and field crews. Create an environment where concerns can be raised and suggestions for improvement are welcomed.
- Training & Development: Regularly provide training on new technologies, techniques, and best practices. Invest in the development of your team's expertise.
- Benchmark Against Industry Standards: Compare your performance against industry benchmarks and identify areas for improvement.
By embracing a mindset of continuous improvement, you can move beyond reactive checklist compliance and build a truly exceptional grade control system.
Resources & Links
- Trimble : A leading provider of surveying equipment, software, and solutions. Their website offers a wealth of information on grade control, GPS/GNSS technology, and related topics. They also offer training and support.
- Topcon Positioning Systems : Another major player in the surveying and construction technology space. Explore their website for information on grade control systems, robotic total stations, and software solutions.
- Leica Geosystems : Provides advanced surveying instruments, software, and solutions, including machine control systems and total stations for accurate grade control. Their website includes technical resources and product information.
- Surveying Resource : A website with a community forum, articles, and resources for surveyors. It's a good place to find discussions and practical tips related to grade control and surveying practices.
- National Society of Professional Surveyors (NSPS) : The NSPS is the professional organization representing licensed surveyors in the United States. Their website offers standards, best practices, and ethical guidelines relevant to surveying and grade control.
- American Society for Photogrammetry and Remote Sensing (ASPRS) : While focused on photogrammetry, ASPRS also addresses topics related to surveying and data acquisition, which often overlap with grade control applications. They provide education and standards.
- Civil Engineering World : This online magazine covers a broad range of civil engineering topics, including construction, surveying, and technology. Search for articles related to grade control, quality control, and site accuracy.
- Constructech : A media source dedicated to the construction technology industry. Their website features news, articles, and case studies related to surveying, BIM, and grade control software.
- MicroSurvey : Focuses specifically on CAD software for surveyors, which is crucial for processing and managing grade control data. They offer webinars and tutorials on using their software for accurate surveying and mapping.
- Bentley Systems : While known for BIM software, Bentley also has solutions relevant to surveying and site control, particularly for large infrastructure projects. Check for resources related to reality capture and digital twin technology.
- DPI, Inc. : Provides automated total stations and robotic digimizers used for grade control. Their website details their product features and applications in various construction projects.
- Fores : Offers a range of products and software aimed at automating the process of grade control, from staking out designs to monitoring earthwork progress. Their site contains examples of applications and data processing techniques.
Frequently Asked Questions
What is grade control and why is it important?
Grade control is the process of ensuring the surface of a site (like a construction site, mine, or quarry) matches the planned design elevations and slopes. It's crucial for ensuring project efficiency, reducing material waste, maintaining safety, and ultimately, achieving the desired final product. Inaccurate grades can lead to significant rework and cost overruns.
Who is this checklist template for?
This checklist is designed for surveyors, grade checkers, machine operators, and anyone involved in the grade control process. It's useful for both experienced professionals and those new to grade control.
What types of projects can I use this checklist for?
The checklist is versatile and can be applied to a wide range of projects, including construction (roads, buildings, foundations), mining, quarrying, and landscaping. The template can be adapted to specific project requirements.
Can I customize the checklist template?
Absolutely! The checklist is designed to be a starting point. We encourage you to customize it to reflect your specific project requirements, equipment, and procedures. Add or remove items as needed to ensure it accurately represents your workflow.
What information should I include when customizing the checklist?
Consider including details like project name, location, date, surveyor's name, equipment used (e.g., total station, GPS), design elevations, tolerance levels, and any specific procedures unique to your project.
What are some common errors in grade control that this checklist helps prevent?
The checklist helps prevent errors such as incorrect elevation readings, insufficient check shots, improper instrument setup, misinterpretation of design plans, and inadequate documentation of discrepancies.
What does 'tolerance' mean in the context of grade control?
Tolerance refers to the permissible deviation from the design elevation. It defines the acceptable range of error in the finished grade. The checklist helps ensure measurements fall within these defined tolerances.
Is the checklist a substitute for proper training and experience?
No. The checklist is a valuable tool, but it's not a substitute for proper training and experience in surveying and grade control techniques. It's designed to supplement, not replace, professional expertise.
Where can I find more resources on grade control?
The article provides links to additional resources, including professional organizations, industry publications, and online training courses, for further learning about grade control.
Found this Article helpful?
Construction Management Solution Demo
Build smarter, not harder! ChecklistGuro streamlines construction projects from planning to closeout. Manage tasks, inspections, safety protocols & more - all in one place. Reduce delays, improve communication, and deliver projects on time & on budget.
Related Articles

The Ultimate Concrete Vibration Checklist Template

Unlock Value: Your Free Value Engineering Checklist Template

The Ultimate HVAC Ductwork Installation Checklist Template

The Ultimate Rebar Placement Checklist Template

Your Concrete Mix Design Verification Checklist: A Step-by-Step Guide

Backfilling & Compaction Checklist: A Foundation's Best Friend

The Ultimate Concrete Delivery & Placement Checklist Template

Your Ultimate Stakeholder Communication Plan Checklist Template
We can do it Together
Need help with
Construction?
Have a question? We're here to help. Please submit your inquiry, and we'll respond promptly.