Stress-Free Inspections: Your Home Inspection Coordination Checklist Template
Published: 08/24/2025 Updated: 12/13/2025
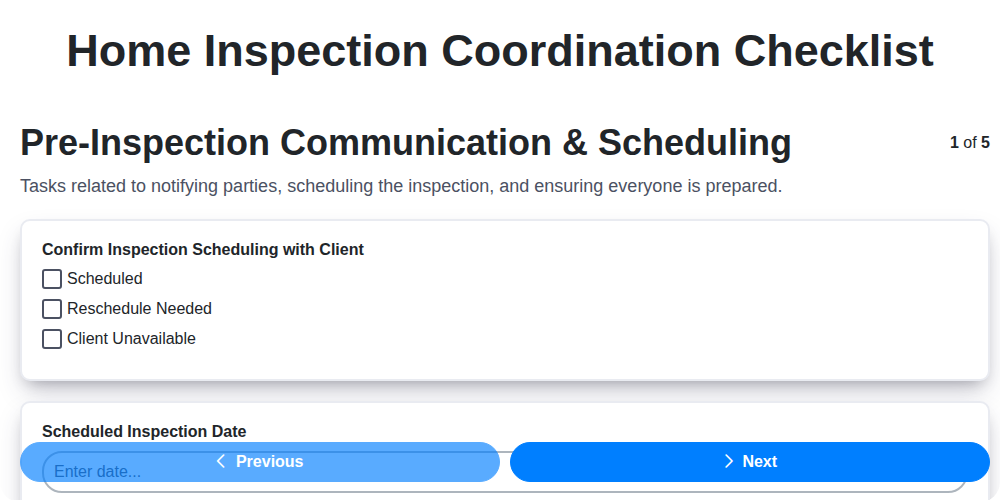
Table of Contents
- Why Coordination Matters: Setting the Stage for Success
- Finding the Right Inspector: Vetting and Selection
- Pre-Inspection Prep: Client Communication & Expectations
- Access & Logistics: Ensuring a Smooth Inspection Day
- The Inspection Report: Understanding and Next Steps
- Negotiating Repairs: A Coordinated Approach
- Post-Inspection Follow-Up: Documentation and Completion
- Template Download: Your Home Inspection Coordination Checklist
- Common Pitfalls & How to Avoid Them
- Resources & Links
TLDR: This free, customizable checklist template simplifies home inspection coordination! It guides you through pre-inspection prep, inspector selection, client communication, and post-inspection follow-up - saving you time, reducing stress, and ensuring a smooth transaction. Download it now to conquer your next inspection!
Why Coordination Matters: Setting the Stage for Success
A poorly coordinated home inspection isn't just an inconvenience; it can derail the entire transaction. Imagine this scenario: the inspector arrives to find the power off, preventing them from testing essential systems. Or perhaps the client wasn't informed about the inspection time, leading to a missed appointment and costly delays. These issues can breed mistrust between buyers and sellers, complicate negotiations, and even lead to the collapse of a deal.
Beyond the immediate frustration, lack of coordination can obscure crucial information. A rushed inspection, or one conducted without proper access, might miss vital defects that could impact the home's value or safety. Clear communication and thoughtful preparation are the cornerstones of a successful inspection - ensuring everyone is on the same page and maximizing the value of this critical process. It's about more than just checking boxes; it's about safeguarding everyone's interests and setting the stage for a smooth and positive real estate experience.
Finding the Right Inspector: Vetting and Selection
Not all home inspectors are created equal. Finding the right professional is about more than just picking the first name that pops up online. It's an investment in a thorough assessment that protects your client's (or your own) future. Here's what to look for when vetting and selecting a home inspector:
1. Credentials and Licensing: The Foundation of Trust
First and foremost, verify credentials. Most states require home inspectors to be licensed or registered. Confirm the inspector's license is active and in good standing with your state's licensing board. This ensures they're adhering to minimum standards and have met certain competency requirements. Don't hesitate to ask for their license number and verify it directly with the licensing agency. Beyond licensing, look for certifications from reputable organizations like the InterNACHI (International Association of Certified Home Inspectors) or ASHI (American Society of Home Inspectors). These certifications often signify a higher level of training and adherence to a code of ethics.
2. Experience Matters: Beyond the Basics
While a new inspector might be eager to prove themselves, experience often translates to a more comprehensive and insightful inspection. Consider how long the inspector has been in business and the types of properties they're familiar with. Do they specialize in older homes, new construction, or specific systems (like septic or well systems)? Ask about their typical inspection process and the types of issues they're most likely to uncover.
3. Scope of Inspection and Reporting Style: Clarity and Detail
Before hiring an inspector, carefully review their scope of inspection. What areas of the property will be inspected? What systems will be tested? Make sure it aligns with your needs and expectations. Equally important is their reporting style. Do they provide a detailed written report with photos? Are they willing to discuss the findings with you and answer your questions? Request sample reports to assess the level of detail and clarity.
4. Insurance Coverage: Protecting Yourself
Ensure the inspector carries adequate liability insurance and errors & omissions (E&O) insurance. This protects you from potential financial losses if something goes wrong during the inspection. Ask for proof of insurance and verify coverage limits.
5. References & Reviews: Hearing from Others
Don't be afraid to ask for references. Contacting past clients can provide valuable insights into the inspector's professionalism, thoroughness, and communication skills. Check online reviews on platforms like Google, Yelp, and Facebook, but remember to consider the source and look for patterns in the feedback.
Pre-Inspection Prep: Client Communication & Expectations
Before the inspector even sets foot on the property, clear and consistent communication with your client is paramount. This isn't just about scheduling; it's about setting realistic expectations and ensuring a smooth, productive inspection process.
For Buyers: Your inspector is your advocate - a trained professional looking out for potential issues. It's incredibly helpful to provide a preliminary list of concerns or areas you're particularly interested in. This allows the inspector to focus their attention and provide more targeted insights. Don't be afraid to ask questions! The inspection is an opportunity to learn more about the home's systems and potential maintenance needs.
For Sellers: Transparency is key. While you may be aware of certain issues, disclosing them upfront can avoid surprises and build trust. Providing access to any existing home records, such as appliance manuals, maintenance logs, or previous inspection reports, can provide valuable context for the inspector and demonstrate a commitment to property upkeep. Remember, addressing minor issues before the inspection can often lead to a quicker sale and a more favorable outcome.
Setting the Stage: Regardless of whether you're representing a buyer or a seller, take a few minutes to explain the purpose of the inspection. Reassure your client that the inspection is not about finding fault; it's about uncovering information that can inform decision-making and protect their investment. A little bit of upfront communication can go a long way towards a positive inspection experience for everyone involved.
Access & Logistics: Ensuring a Smooth Inspection Day
A seamless inspection hinges on easy access and thoughtful logistics. It's about making the inspector's job as straightforward as possible, which ultimately benefits everyone involved. Here's how to set things up for a smooth inspection day:
- Key or Code Accessibility: Ensure the inspector has a readily available key or gate code well in advance of the inspection time. A lockbox can be a convenient option, especially if you won't be present. Confirm the code is clearly communicated and works!
- Utilities On & Operational: Confirm that all essential utilities - water, electricity, and gas - are turned on and functioning correctly. An inspector needs these to properly evaluate appliances, plumbing, and HVAC systems. Don't underestimate the frustration (and potential inaccuracies) that arise from incomplete testing.
- Clear Pathways & Safe Access: Prioritize clear access to all areas of the property, including attics, basements, crawl spaces, and any outdoor features like decks or patios. Remove any obstacles, secure loose cords, and ensure walkways are free of hazards. A little tidying goes a long way.
- Pet Management: If you have pets, securely contain them before the inspector arrives. Anxious pets can be disruptive and even dangerous.
- Security System Awareness: Alert the inspector about any security systems and provide the necessary codes to deactivate them. A false alarm can be a significant time-waster.
- Communication is Key: Keep the inspector updated if there are any last-minute changes or issues affecting access to the property. Proactive communication prevents delays and misunderstandings.
The Inspection Report: Understanding and Next Steps
The inspection report is the culmination of the inspector's thorough assessment, and it can feel overwhelming to navigate. Don't panic! Think of it as a detailed conversation starter.
Breaking Down the Report Sections:
Most inspection reports follow a standard format. You're likely to find sections covering:
- General Information: This includes property details, inspector credentials, and the scope of the inspection.
- Exterior & Structural: Observations regarding the foundation, siding, roof, and other exterior components.
- Interior: Assessment of walls, ceilings, floors, windows, and doors.
- Systems: Evaluation of the electrical, plumbing, heating, and cooling systems.
- Summary/Recommendations: A concise overview of major findings and suggested repairs or further evaluation.
Decoding the Terminology:
Inspectors use specific terminology to describe conditions. Common designations you might see include:
- "No Issues Observed": Indicates a normal and acceptable condition.
- "Further Evaluation Recommended": Suggests a component requires more in-depth investigation by a qualified specialist (e.g., a structural engineer, electrician, or plumber).
- "Repair Recommended": Indicates a condition that should be addressed to prevent future problems.
- Defect: (This term is often legally defined and should be used cautiously - consult your legal counsel if you're unsure.) A condition that significantly impacts the property's value or safety.
What to Do After Receiving the Report:
- Read Carefully: Don't skim! Take your time to review the entire report.
- Ask Questions: If anything is unclear, contact the inspector to clarify.
- Prioritize Concerns: Distinguish between minor issues and major problems.
- Negotiate (if applicable): If you're a buyer, discuss the findings with your agent and consider negotiating repairs or a price reduction. If you're a seller, prepare to address issues or provide documentation.
- Get Estimates: Obtain estimates from qualified contractors to address recommended repairs.
- Document Everything: Keep records of all communications, repair estimates, and completed work.
Negotiating Repairs: A Coordinated Approach
The inspection report isn't a verdict; it's a starting point for discussion. Discovering issues - from a leaky roof to outdated electrical wiring - can feel overwhelming, but a well-coordinated negotiation can lead to a mutually agreeable resolution. Here's how to navigate this critical phase:
1. Understanding the Report & Severity: Not all findings require immediate action. Differentiate between minor cosmetic issues and significant structural concerns. Prioritize those impacting safety, functionality, or long-term value. The inspector's report often includes a severity rating - pay close attention to these.
2. Communication is Key: Open and transparent communication between the buyer, seller, and agents is paramount. Avoid accusatory language; focus on finding solutions. Maintain a respectful tone throughout the negotiation process.
3. Options for Resolution: There are several avenues to explore: * Seller Repairs: The seller commits to making the necessary repairs before closing. Obtain detailed repair scopes and timelines. * Price Reduction: A reduction in the purchase price to compensate for the buyer's responsibility to handle the repairs. * Closing Cost Credit: A credit at closing to offset the buyer's expenses for repairs. * Escrow Holdback: A portion of the funds placed in escrow to be released upon satisfactory completion of repairs. * Combination: A blended approach utilizing multiple options.
4. Written Agreements: Always document any agreements in writing through addendums to the purchase contract. This protects all parties involved and clarifies expectations. Include specifics about the scope of work, deadlines, and responsible parties.
5. Second Opinions: For complex or significant issues, consider recommending a second opinion from a qualified specialist (e.g., a structural engineer, a roofing contractor). This provides further insight and strengthens the negotiation position.
6. Remember the Bigger Picture: Keep the overall transaction in perspective. A collaborative and problem-solving approach, even when facing challenges, is more likely to lead to a successful closing for everyone.
Post-Inspection Follow-Up: Documentation and Completion
The inspection report is in - congratulations, you've reached a critical juncture! But the process doesn't end with delivery. Proper post-inspection follow-up ensures clarity, protects your interests, and fosters a smooth path forward. Here's how to handle it:
Report Review & Understanding: Encourage your client (buyer or seller) to thoroughly review the inspection report. Don't hesitate to schedule a brief call to walk them through the findings and answer any questions they have. Pay close attention to the severity ratings assigned to each issue - are they minor, moderate, or major?
Documentation is Key: Maintain meticulous records of everything. This includes the original inspection contract, the report itself, any correspondence with the inspector, and any subsequent discussions or agreements. Store these documents digitally and securely.
Negotiation & Remediation Planning: If the inspection revealed issues requiring attention, facilitate communication between the parties. This might involve negotiating repairs, credits, or price adjustments. Clearly document the agreed-upon remediation plan, including timelines and responsibilities.
Re-Inspection (If Applicable): If repairs or remediation work is completed, a re-inspection by the inspector might be necessary to verify that the work was performed correctly and to the agreed-upon standards. Ensure this is scheduled and documented appropriately.
Final Sign-Off & Closure: Once all issues are resolved, obtain a final sign-off from all parties confirming satisfaction. This provides a clear record that the inspection process has been completed and all outstanding items have been addressed.
Remember: proactive and thorough follow-up transforms an inspection from a potential headache into a confident step toward a successful real estate transaction.
Template Download: Your Home Inspection Coordination Checklist
Want to streamline your home inspection process and eliminate the stress? We're making it even easier for you! Below, you're able to download a printable and editable checklist designed to guide you through every step of coordinating a successful home inspection.
This template covers everything from pre-inspection communication and inspector vetting to post-inspection follow-up, ensuring a smooth and efficient experience for buyers, sellers, and real estate professionals alike.
Here's what you'll get:
- Printable PDF: A ready-to-use checklist you can take with you.
- Editable Word Document: Customize the checklist to fit your specific needs and preferences.
- Easy-to-Follow Format: Clear and concise steps to ensure nothing is missed.
Don't let the home inspection process overwhelm you. Download the template today and take control!
Common Pitfalls & How to Avoid Them
Even with the best planning, things can sometimes go sideways during the home inspection process. Here's a rundown of frequent missteps and how to steer clear of them:
1. Rushing the Inspector Selection: Choosing the first inspector you find online without proper vetting is a risky move. Avoidance: Take the time to research, read reviews, and verify credentials. Ask for recommendations and compare quotes. A few extra hours upfront can prevent costly surprises later.
2. Unclear Scope of Inspection: Assuming the inspector will cover everything without defining the scope leads to misunderstandings. Avoidance: Have a clear, written agreement outlining what is and isn't included in the inspection. Address specific concerns upfront.
3. Missing Details During the Walk-Through: Not adequately communicating concerns or areas of interest to the inspector means potential issues might be overlooked. Avoidance: Provide the inspector with a written list of concerns before the inspection. Be present (if possible) and actively engage in the walk-through.
4. Forgetting About Utilities: Failing to ensure utilities are on can hinder the inspector's ability to test crucial systems like HVAC, water heaters, and electrical outlets. Avoidance: Confirm with the seller/client that utilities will be active during the inspection.
5. Ignoring Red Flags in the Report: Dismissing minor issues or downplaying significant findings in the inspection report can lead to larger problems down the line. Avoidance: Thoroughly review the report with a qualified professional (real estate agent, contractor, or inspector) to understand the implications of each finding.
6. Poor Communication During Negotiations: Failing to facilitate clear and constructive communication between parties during remediation negotiations can stall the process and create unnecessary tension. Avoidance: Act as a facilitator, encouraging open dialogue and exploring mutually agreeable solutions.
Resources & Links
- ASHI (American Society of Home Inspectors) : The leading professional organization for home inspectors. Provides information on finding qualified inspectors, understanding standards of practice, and inspector credentials. A great resource for understanding what a reputable inspector should be doing and checking inspector qualifications.
- InterNACHI (International Association of Certified Home Inspectors) : Another large professional organization for home inspectors. Similar to ASHI, offering resources on inspector qualifications, education, and standards. Provides details about the Certified Home Inspector designation and related credentials.
- InterNACHI - Home Inspection Checklist : A detailed checklist, available from InterNACHI, covering a wide range of inspection areas. Useful for understanding the scope of a home inspection and verifying thoroughness.
- Federal Trade Commission (FTC) - Home Inspections : Provides consumer information regarding home inspections, including choosing an inspector, what to expect, and potential red flags. Useful for understanding your rights and protections as a consumer.
- National Association of REALTORS® : Provides information and resources related to the real estate process, including working with professionals like home inspectors. Can help understand the inspector's role in the overall transaction.
- IRS - Home Purchase Expenses : While not directly about inspections, this resource can be helpful for understanding potential tax implications related to home purchases and repairs identified during the inspection. (Consult a tax professional for personalized advice.)
- Choose Energy : Can be a resource for understanding energy efficiency aspects that might be evaluated during the home inspection, like HVAC systems and insulation. Useful for preparing questions to ask the inspector.
- Redfin - Home Inspection Guide : A general guide from Redfin covering home inspections, including what to expect and common issues. Provides a broader overview of the process.
- Angie's List (now Angi) : Allows users to search for and review local home inspectors. Provides a way to find inspectors and see what other customers have said about their services. Remember to verify credentials and read reviews critically.
- Thumbtack : Similar to Angi, Thumbtack allows you to find and compare local service providers, including home inspectors. Allows for price comparison and reading reviews. Verify credentials independently.
- HUD (US Department of Housing and Urban Development) : Provides information on housing programs and standards, which can be relevant if you're dealing with a HUD-insured loan or are concerned about compliance issues identified during the inspection.
Frequently Asked Questions
What is this checklist template for?
This checklist template is designed to help homeowners coordinate and prepare for a home inspection, ensuring a smooth and stress-free experience. It covers pre-inspection tasks, during-inspection actions, and post-inspection follow-up.
Who is this checklist for?
This checklist is for any homeowner who is about to have a home inspection, whether they are selling a property or considering a pre-purchase inspection.
How do I access and use the checklist template?
The article provides a link to download the checklist template. You can then print it out or use it digitally to track your progress and ensure you don't miss any important steps.
What should I do to prepare my home before the inspection?
The checklist includes steps like decluttering, providing access to utilities, identifying potential issues, and ensuring the inspector has a safe and clear path to all areas of the home.
What if I'm not home during the inspection? Can it still happen?
Yes, the inspection can proceed without you being present. The checklist outlines steps for granting access and providing necessary information to the inspector, such as providing a key or point of contact.
What should I do during the inspection?
The checklist suggests being available (if possible) to answer questions and provide context. If not present, it emphasizes being responsive to any requests from the inspector.
What happens after the inspection is complete?
The checklist prompts you to review the inspection report, ask clarifying questions, and understand any recommended repairs or further evaluations.
Is this checklist customizable?
Yes, the checklist is designed to be a guide. You can add or remove items based on your specific needs and the scope of your home inspection.
What if I disagree with something in the inspection report?
The checklist recommends seeking clarification from the inspector and potentially obtaining a second opinion or further evaluation from a qualified professional.
Found this Article helpful?
Audit/Inspection Management Solution Demo
Ensure compliance & improve performance! ChecklistGuro streamlines audit/inspection creation, execution, and reporting. Reduce risk, enhance quality, & maintain consistency. Manage it all with our Work OS.
Related Articles
The Ultimate Social Media Management Checklist Template
The Ultimate Website Maintenance Checklist Template
10 Essential Checks: Your Brokerage Policy Review Checklist
The Ultimate Office Opening/Closing Checklist Template
Your Ultimate AML Compliance Checklist Template
Rent Collection Checklist Template: Your Landlord's Guide
Your Complete Flood Zone Disclosure Checklist Template
Fair Housing Training Checklist Template: Your Guide to Compliance
We can do it Together
Need help with
Inspection Management?
Have a question? We're here to help. Please submit your inquiry, and we'll respond promptly.