Hydraulic System Leakage Check: Your Complete Checklist Template
Published: 09/02/2025 Updated: 12/13/2025
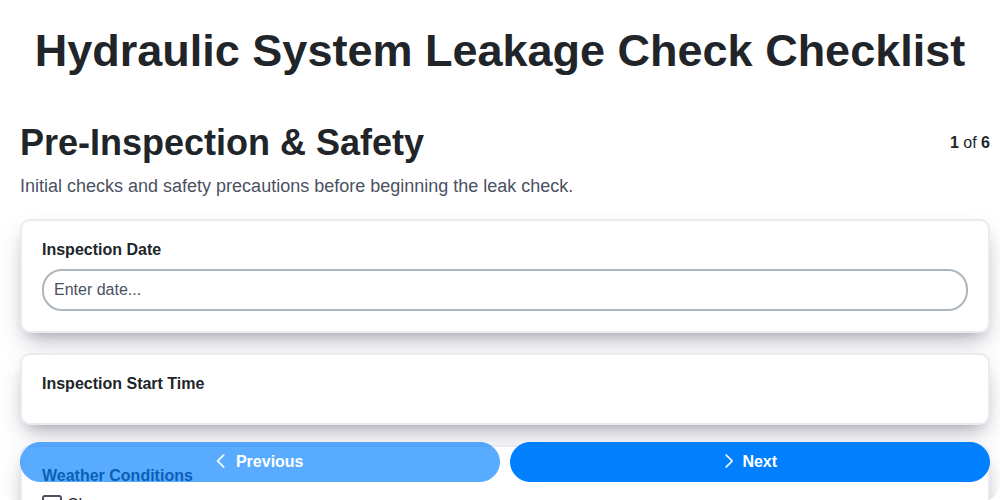
Table of Contents
- Introduction: Why Hydraulic Leak Checks Matter
- Safety First: Pre-Inspection Procedures
- Visual Inspection: Reservoir & Fill Points
- Hydraulic Lines & Fittings: A Close-Up Look
- Cylinder and Motor Inspection: Key Areas to Examine
- Optional Pressure Testing: When and How
- Documenting Your Findings: A Crucial Step
- Repair Recommendations & Follow-Up
- Hydraulic System Leakage Check Template Download
- Resources & Links
TLDR: Prevent costly downtime and safety hazards with this ready-to-use hydraulic system leakage check template! It guides you through a step-by-step process - from safety checks to detailed component inspection and pressure testing - ensuring you catch leaks early and keep your hydraulic systems running smoothly. Download it now and simplify your maintenance routine!
Introduction: Why Hydraulic Leak Checks Matter
Hydraulic systems are the unsung heroes of countless industries, powering everything from construction equipment and agricultural machinery to industrial presses and sophisticated robotics. They deliver immense force and precision, but their reliance on pressurized fluid makes them vulnerable to leaks. While a small drip might seem insignificant, ignoring it can trigger a cascade of problems - downtime, costly repairs, safety hazards, and even premature component failure. Regular hydraulic leak checks aren't just about preventing drips; they's about safeguarding your operations, extending equipment lifespan, and maintaining a safe working environment. Investing a little time for routine inspections can prevent major headaches down the line, ultimately saving you time, money, and frustration.
Safety First: Pre-Inspection Procedures
Before you even think about inspecting for leaks, prioritizing safety is paramount. A pressurized hydraulic system can be dangerous if mishandled. Always begin with a thorough pre-inspection to mitigate risks. This involves several key steps.
First, ensure you're wearing appropriate Personal Protective Equipment (PPE). This must include safety glasses to protect your eyes from fluid splashes and nitrile gloves, as hydraulic fluid can irritate skin. Depending on the potential for significant leaks, a face shield might also be warranted.
Next, and crucially, follow your company's Lockout/Tagout (LOTO) procedures if applicable. This ensures the system is de-energized and unable to be accidentally started during your inspection. If LOTO isn't applicable, always relieve pressure from the hydraulic system according to the manufacturer's recommendations before beginning any physical inspection. This prevents unexpected and potentially forceful fluid expulsion.
Finally, familiarize yourself with the type of hydraulic fluid in use. Knowing whether it's petroleum-based, synthetic, or biodegradable informs cleanup procedures in case of spills. A clean and well-lit workspace is also essential for visibility and preventing trips and falls. Remember, a safe inspector is a productive inspector.
Visual Inspection: Reservoir & Fill Points
The reservoir acts as the heart of your hydraulic system, so a thorough visual inspection is paramount. Begin by checking the fluid level against the marked 'full' line. A consistently low level is a significant clue of a leak somewhere in the system - make a note of it.
Next, carefully examine the reservoir itself for any signs of damage. Look for cracks, dents, corrosion, or any other visible imperfections that could compromise its integrity. Don't neglect the area surrounding the fill point. This is a common leak pathway, often overlooked. Use a bright light and a mirror to get a clear view, as drips can be tricky to spot.
Beyond the obvious leaks, pay attention to the condition of the fluid itself. A healthy hydraulic fluid is typically clear and relatively clean. Discoloration (darkening or cloudiness) or the presence of contaminants like dirt, metal shavings, or foam, indicates potential problems within the system that require further investigation. Consistent monitoring of the fluid's appearance provides valuable insight into the overall health of your hydraulic system.
Hydraulic Lines & Fittings: A Close-Up Look
Hydraulic lines and fittings are the arteries and connectors of your system, so their condition directly impacts its overall health. It's easy to overlook them, but a small crack or loose connection can quickly escalate into a significant leak. Here's what to look for:
Line Integrity: Examine each line along its entire length. Pay special attention to areas where lines bend, rub against other components (chafing), or pass through brackets or supports. Look for:
- Cracks: Even hairline cracks can lead to leaks under pressure.
- Kinks: Kinks restrict flow and put undue stress on the line, making it susceptible to failure.
- Abrasions/Chafing: Evidence of rubbing or wear indicates a potential weak point.
- Bulges/Swelling: These can indicate internal damage or weakening of the line's structure.
Fitting Scrutiny: Fittings are connection points that often experience stress and corrosion. Check for:
- Corrosion: Rust and corrosion weaken fittings, making them prone to leaks.
- Loose Connections: Even a slightly loose connection can lead to a slow drip.
- Damaged Threads: Stripped or damaged threads prevent a proper seal.
- Signs of Leakage: Look for stains or buildup of hydraulic fluid around fittings, a clear sign of past or present leakage.
- Proper Torque: Re-torque fittings according to the manufacturer's specifications. Over-tightening can be just as damaging as under-tightening.
Hose Routing Matters: Ensure hoses are routed correctly, avoiding sharp bends, tight spots, and contact with hot surfaces or moving parts. Proper routing minimizes stress and prevents premature failure.
Cylinder and Motor Inspection: Key Areas to Examine
Hydraulic cylinders and motors are powerhouses within the system, demanding careful scrutiny. When inspecting cylinders, the focus should be on the rod itself - look for any signs of scoring, scratching, or corrosion. These imperfections can compromise the seal and lead to leaks. Closely examine the cylinder body for cracks or bulges, indicating potential structural weaknesses. Don't overlook the rod seals; a slight weeping or visible fluid residue is a red flag. Ensure the cylinder is securely mounted and not experiencing unusual stress, which can prematurely wear components.
For hydraulic motors, begin by checking the housing for cracks, leaks, or corrosion. Pay close attention to the motor shaft seals, as these are common leak points. Examine the motor ports for cleanliness and signs of damage. Listen for unusual noises during operation; groaning or whining can indicate internal wear or cavitation. Finally, verify the mounting hardware is tight and secure, preventing unwanted movement and premature seal failure. A well-maintained cylinder and motor translate to a longer system lifespan and minimized downtime.
Optional Pressure Testing: When and How
Pressure testing offers a more definitive leak detection method, but it's not always necessary and demands a cautious approach. It's most beneficial when visual inspection reveals intermittent leaks, suspected leaks in hard-to-reach areas, or when troubleshooting a system experiencing unexplained performance issues. Consider pressure testing as part of your maintenance routine if the system operates in a critical application where downtime is exceptionally costly or if regulatory requirements mandate it.
The process itself involves gradually increasing system pressure-typically to 50-75% of the system's maximum working pressure-using a calibrated pressure gauge and pump. This should only be performed by experienced, trained personnel familiar with hydraulic systems and safety protocols. Improperly executed pressure testing can lead to component failure, injury, and system damage.
Before beginning, meticulously review the manufacturer's specifications for the system's rated pressure and any specific pressure testing procedures. Secure the system, ensuring all personnel are clear of the work area. Slowly apply pressure, carefully observing all fittings, hoses, cylinders, and motors for any signs of leakage. Marking suspected leak points with fluorescent dye prior to pressurization can greatly aid in pinpointing the source. Following the test, slowly release the pressure, and thoroughly inspect the system again. Detailed documentation of the test results, including pressure levels and locations of leaks, is crucial for ongoing maintenance and troubleshooting.
Documenting Your Findings: A Crucial Step
Accurate and detailed documentation is more than just good practice; it's the bedrock of a proactive maintenance program. Simply finding a leak isn't enough; you need a record of what you found, where you found it, and what actions were taken. This information allows you to track trends, anticipate future problems, and demonstrate the effectiveness of your maintenance efforts.
A well-documented hydraulic leakage check should include:
- Date and Time: Essential for tracking the frequency of inspections.
- Equipment Identification: Clearly identify the machine or component that was inspected (model number, serial number).
- Leak Location: Be precise! Don't just write "cylinder leak." Specify "Cylinder rod seal, near the base." Include photos if possible.
- Leak Severity: Use a consistent scale (e.g., minor drip, steady stream, significant loss of fluid).
- Component Condition: Briefly describe the condition of the surrounding components (corrosion, damage, wear).
- Actions Taken: Detail the repairs or adjustments made, including parts replaced and any specific procedures followed.
- Technician Signature: A signature verifies the accuracy of the findings and the work performed.
- Next Inspection Date: Schedule a follow-up inspection to ensure the issue is resolved and to monitor for any recurrence.
Utilize a standardized form (paper or digital) to ensure consistency and ease of analysis. This data becomes invaluable for preventative maintenance planning and troubleshooting recurring issues.
Repair Recommendations & Follow-Up
Identifying the leak is only the first step. Now comes the crucial part: implementing effective repairs and ensuring the problem doesn't return. Your repair strategy will depend heavily on the type and severity of the leak.
Prioritizing Repairs: Small, slow leaks might be manageable with a temporary fix (e.g., leak sealant - use with caution and as a temporary solution only). However, larger, rapidly leaking components demand immediate replacement. Consider the impact of downtime when prioritizing - a leak causing system failure takes precedence over a minor seep.
Common Repair Actions:
- Tightening Fittings: Often, a simple tightening of a fitting can resolve a leak. Use a torque wrench to ensure proper tension without damaging threads.
- Replacing Hoses & Fittings: Cracked, worn, or damaged hoses and fittings should be replaced immediately. Use high-quality components that meet or exceed the manufacturer's specifications.
- Seal Replacement: Worn or damaged seals (cylinder seals, rod seals, motor shaft seals) are a common source of leaks. Replacing these seals requires specialized tools and knowledge - consider professional assistance.
- Component Replacement: If a component (cylinder, motor, pump) is severely damaged or beyond repair, replacement is the only viable option.
- Addressing Root Causes: Don't just treat the symptom - investigate the cause of the leak. Is there excessive vibration? Are hoses routed incorrectly, leading to chafing? Addressing these root causes will prevent future leaks.
Follow-Up Inspections are Critical:
After any repair, a follow-up inspection is essential. This should be performed within a short timeframe (e.g., 1-2 weeks) to verify the repair's effectiveness and monitor for any new or recurring leaks. Document the follow-up inspection findings. A scheduled preventative maintenance program, including regular leak checks, is the best way to maximize equipment reliability and minimize downtime. Record all maintenance activities within a maintenance log for comprehensive tracking.
Hydraulic System Leakage Check Template Download
Keeping meticulous records is crucial for effective hydraulic system maintenance. This isn't just about knowing what was repaired, but when, by whom, and the overall health of your system over time. That's why we've created a comprehensive Hydraulic System Leakage Check Template, designed to streamline your inspection process and provide valuable insights into your equipment's performance.
Our template isn't just a simple checklist; it's a structured document allowing you to:
- Record Detailed Observations: Space to note the specific location, severity, and type of leak (if identifiable).
- Track Maintenance History: A clear record of inspections, repairs, and parts replaced.
- Identify Recurring Issues: Easily spot trends and patterns indicative of underlying problems.
- Ensure Consistency: Standardize inspection procedures across your team.
- Facilitate Reporting: Generate concise reports for management or regulatory compliance.
Download your free Hydraulic System Leakage Check Template today!
The template is provided in PDF, Excel, CSV formats, making it readily adaptable to your existing workflow. We've included sections for equipment identification, date/time of inspection, inspector's signature, and a detailed checklist aligned with the inspection steps outlined in this article. Start improving your preventative maintenance program and maximizing the lifespan of your hydraulic systems!
Resources & Links
- Bosch Rexroth : A leading supplier of hydraulic components and systems. Their website offers technical documentation, product information, and troubleshooting guides that can be invaluable for understanding hydraulic system behavior and diagnosing leaks. Offers a wide range of resources for hydraulic professionals.
- Parker Hannifin : Another major player in the hydraulics industry. Parker's website provides detailed product specifications, application guides, and training resources, aiding in leak identification and preventative measures. Good for understanding component functionality related to leakage points.
- Hydraulic Supermarket : Offers a broad catalog of hydraulic components and provides informational content. Their resources can help identify potential leak sources and understand component function.
- Fluid Power Journal : A trade publication covering hydraulics, pneumatics, and lubrication. Offers technical articles, case studies, and product reviews that often address leak prevention and detection techniques. Articles offer practical, real-world experience in leak troubleshooting.
- OSHA (Occupational Safety and Health Administration) : While not specifically about hydraulics, OSHA provides safety guidelines for working with pressurized systems, crucial for leak checks. Safety should always be the first consideration. Consult their resources for lockout/tagout procedures and other safety protocols.
- NFPA (National Fluid Power Association) : NFPA develops standards and provides resources related to fluid power systems, including safety and maintenance best practices. Relevant standards (like those for hose and fitting selection) can help prevent leaks.
- SPX Corporation : SPX offers a variety of hydraulic solutions and provides technical documentation and case studies that can be helpful in understanding hydraulic system performance and identifying potential leak points. Their products cover a range of hydraulic applications.
- Speroni : Specializes in hydraulic hose and fittings. Provides detailed information on proper hose selection, fitting types, and installation techniques - vital for preventing leaks. Includes resources on proper hose crimping.
- Danfoss : Offers a wide range of hydraulic components and solutions, along with technical resources and application guides. Focuses on efficiency and reliability; understanding these aspects can aid in leak prevention and diagnostic understanding.
- Technical Articles - Hydraulic Leak Detection and Prevention (Tnoonline.com) : A specific article detailing different methods and techniques for detecting and preventing hydraulic leaks. Offers practical advice and best practices.
Frequently Asked Questions
What is hydraulic system leakage and why is it a problem?
Hydraulic system leakage is the escape of hydraulic fluid from the system. It's a problem because it can lead to reduced system efficiency, increased operating costs (due to fluid replacement), safety hazards (slippery floors), and potential environmental concerns. It can also indicate a larger, underlying problem with the system's components.
Who should use this checklist?
This checklist is designed for maintenance personnel, hydraulic technicians, and anyone responsible for inspecting and maintaining hydraulic systems in various industries, including manufacturing, construction, agriculture, and more.
What types of leaks are covered by this checklist?
The checklist covers various types of leaks, including drips, sprays, seepage, and weep leaks. It aims to help identify the source and severity of each type of leakage.
How often should I perform a hydraulic system leakage check?
The frequency of checks depends on the system's criticality and operating environment. A good starting point is weekly for critical systems and monthly for less critical ones. More frequent checks may be needed for systems experiencing known issues or operating under harsh conditions.
What safety precautions should I take before starting a leakage check?
Always wear appropriate personal protective equipment (PPE) such as safety glasses, gloves, and potentially hearing protection. Ensure the system is properly depressurized before beginning the inspection. Consult the system's documentation for specific safety procedures.
What does 'visual inspection' entail according to the checklist?
Visual inspection involves carefully examining all components - hoses, fittings, cylinders, valves, pumps, and reservoirs - for signs of leakage, damage, corrosion, or wear. It's about looking for visible evidence of fluid loss or component degradation.
What does 'pressure test' mean, and when should it be performed?
A pressure test involves applying pressure to the hydraulic system above normal operating pressure to detect leaks that may not be apparent at normal operating conditions. This should be performed by a qualified technician and following established safety procedures.
What do I do if I find a leak during the inspection?
Document the leak's location, severity, and any associated symptoms. If the leak is minor, it may be possible to temporarily mitigate it. However, any significant leak requires immediate repair or replacement of the affected component. Always refer to the system's documentation for repair procedures.
What is 'reservoir fluid level' and why is it checked?
The reservoir holds the hydraulic fluid. Checking the fluid level indicates how much fluid the system has lost due to leakage or other factors. Consistent low fluid levels point to an ongoing leak or excessive fluid consumption.
Can I use this checklist as is, or should I modify it?
This checklist is a template. You should modify it to match the specific hydraulic system you are inspecting, including the components present, operating pressures, and safety procedures. Adding custom fields for your unique system is encouraged.
Where can I find more information about hydraulic system maintenance?
Refer to the hydraulic system's documentation, consult with a qualified hydraulic technician, or research reputable online resources and industry publications focused on hydraulic system maintenance and troubleshooting.
Found this Article helpful?
Agriculture Management Solution Demo
Running a farm or agricultural business is complex. ChecklistGuro's Work OS platform simplifies your operations, from crop planning and irrigation management to livestock tracking and harvest scheduling. Increase efficiency, reduce waste, and boost yields! See how ChecklistGuro can revolutionize your agriculture business.
Related Articles

10 Simple Steps to a Healthy Drainage System: Your Checklist Template

Mastering the Daily Crop Scouting Report: Your [Specific Crop] Checklist Template

Irrigation System Checklist: Farm Water Management & Crop Yield Optimization

Unlock Your Garden's Potential: A Soil pH Verification Checklist

PPE Usage Checklist Template: Your Guide to Safety

Water Discharge Permit Compliance Checklist Template

The Ultimate GPS & Precision Farming Calibration Checklist Template

Water Runoff Analysis Checklist Template
We can do it Together
Need help with
Agriculture?
Have a question? We're here to help. Please submit your inquiry, and we'll respond promptly.