The Ultimate Lighting Retrofit Assessment Checklist Template
Published: 09/02/2025 Updated: 12/13/2025
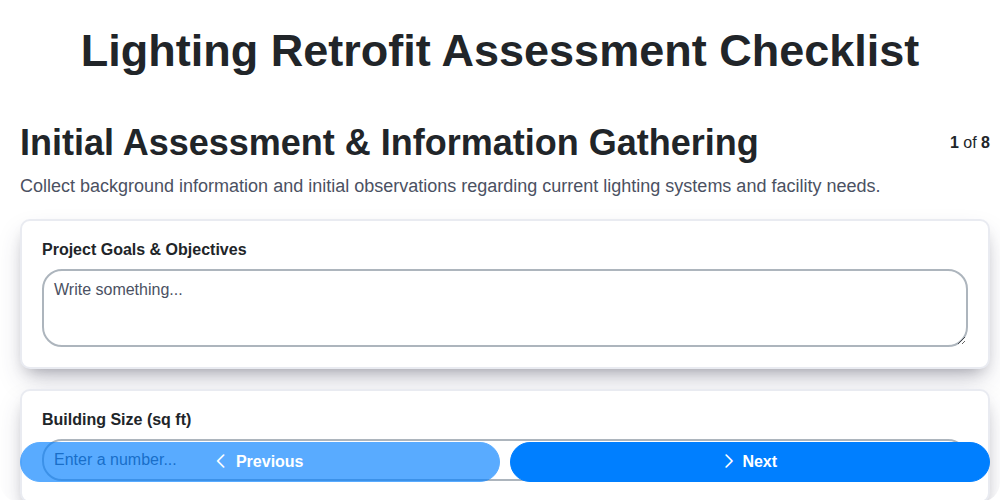
Table of Contents
- Why a Lighting Retrofit Assessment is Essential
- Step 1: Initial Building & Usage Assessment
- Step 2: Detailed Lighting Inventory & Mapping
- Step 3: Analyzing Existing Energy Consumption & Costs
- Step 4: Evaluating Current Lighting Levels & Quality
- Step 5: Exploring Retrofit Lighting Technology Options
- Step 6: Calculating Financial Savings & ROI
- Step 7: Developing a Retrofit Implementation Plan
- Step 8: Post-Retrofit Verification & Commissioning
- Step 9: Ongoing Monitoring & Optimization
- Common Pitfalls to Avoid During Assessment
- Tools & Resources for a Successful Assessment
- Checklist Template Download (PDF)
- Resources & Links
TLDR: Need to save energy and money on lighting? This checklist template guides you through a step-by-step assessment - from initial analysis and energy calculations to selecting the right LED upgrades and measuring the ROI. It's your shortcut to a successful lighting retrofit!
Why a Lighting Retrofit Assessment is Essential
A lighting retrofit isn't just about swapping out bulbs; it's a strategic investment in your building's efficiency and long-term cost savings. Skipping a thorough assessment beforehand is like driving cross-country without a map - you might get there eventually, but you're likely to take detours, waste fuel, and risk getting lost.
Without a proper assessment, you risk selecting the wrong technologies, failing to realize the full potential of energy savings, and potentially even creating new problems. For instance, you might install LEDs that don't provide adequate lighting levels for specific tasks, negatively impacting employee productivity or creating safety hazards. Or, you might overlook opportunities to integrate smart lighting controls that could further optimize energy consumption.
Furthermore, a detailed assessment provides a baseline of your current lighting system, allowing you to accurately measure the impact of the retrofit and justify the investment to stakeholders. It also helps identify hidden issues - like outdated ballasts or uneven light distribution - that might not be immediately apparent. In short, a lighting retrofit assessment is the foundation for a successful and impactful energy-saving project.
Step 1: Initial Building & Usage Assessment
Before diving into fixture counts and wattage calculations, understanding the why behind your lighting system is crucial. This initial assessment sets the foundation for a successful retrofit. It's more than just looking at the lights; it's about understanding how the building is used, who uses it, and when.
Start by reviewing existing building plans and any available lighting layouts. These documents provide a visual representation of the space and its intended function. Interview key personnel - facility managers, building owners, and even employees - to gain valuable insights into lighting usage patterns. Are there specific areas with high foot traffic? Are certain rooms used primarily during daylight hours? Do shift workers have unique lighting needs?
Pay close attention to operational hours - is the building occupied 24/7, or are there periods of inactivity? Identifying peak usage times will help prioritize areas for retrofitting and optimize lighting control strategies. Finally, note any existing issues occupants have reported, such as flickering lights, uneven light distribution, or complaints about glare. This initial groundwork will ensure your retrofit targets the most impactful areas and addresses any existing concerns, ultimately maximizing your return on investment.
Step 2: Detailed Lighting Inventory & Mapping
A thorough inventory isn't just about counting bulbs; it's about creating a comprehensive understanding of your existing lighting system. This detailed record forms the foundation for accurate energy savings projections and a tailored retrofit strategy. Here's how to build a robust lighting inventory:
1. Physical Inspection & Data Collection:
- Systematic Approach: Start at one corner of the building and systematically work your way through each area. This prevents overlooking fixtures.
- Record Key Details: For every fixture, note the following:
- Fixture Type: (e.g., Fluorescent Troffer, LED High Bay, Incandescent Downlight, Metal Halide Floodlight) - Be as specific as possible.
- Wattage: (Find this printed on the fixture or ballast)
- Lamp Type: (e.g., T8, CFL, LED, Halogen)
- Ballast Type & Factor: (For fluorescent fixtures - essential for determining ballast replacement costs) - Note the ballast factor.
- Quantity: How many of each fixture type exist in each area?
- Manufacturer and Model Number: This is helpful for sourcing replacements or finding technical specifications.
- Location: Note the specific room or area where the fixture is located.
- Photograph Each Fixture Type: Photos provide a visual reference and can be useful for later comparison.
2. Creating a Lighting Map:
- Base Map: Use a floor plan of your building as a base. You can often obtain this from building management or through online resources.
- Fixture Placement: Mark the location of each fixture on the map. Use different symbols or colors to represent different fixture types.
- Labeling: Clearly label each fixture on the map with its type, wattage, and any other relevant information.
- Digital vs. Paper: While a paper map is useful for initial assessment, a digital map (created using software like AutoCAD or even Google Sheets) allows for easier updates and sharing. Consider using a simple numbering system across both digital and physical maps for easy cross-referencing.
3. Inventory Spreadsheet:
- Organized Data: Create a spreadsheet (using Excel, Google Sheets, or similar) to consolidate all the data collected.
- Columns: Include columns for: Fixture ID, Location, Fixture Type, Wattage, Lamp Type, Ballast Type, Factor, Quantity, Photo Link (if using digital photos), and Notes.
- Consistency is Key: Using consistent terminology and formatting across the spreadsheet ensures accuracy and ease of analysis.
A well-documented lighting inventory and map not only informs your retrofit plan but also provides a valuable asset for ongoing maintenance and energy management.
Step 3: Analyzing Existing Energy Consumption & Costs
Understanding precisely how much energy your existing lighting system consumes and the associated costs is critical for justifying a retrofit investment. It's more than just looking at your electricity bill; it's about breaking down the lighting portion and identifying potential areas for improvement.
Here's a step-by-step approach to conduct a thorough energy consumption and cost analysis:
Utility Bill Review: Start by gathering at least 12 months of utility bills. This will provide a comprehensive view of seasonal variations in energy consumption. Carefully review each bill, noting the total kWh (kilowatt-hours) used each month. Many utility companies now offer online portals where this data is readily available.
Isolating Lighting Consumption: The challenge here is that your utility bill likely includes energy used for heating, cooling, and other equipment. Accurately isolating lighting consumption can be tricky. One approach is to estimate the percentage of your total electricity bill attributed to lighting. This can be a rough estimate based on your building type and lighting usage patterns. A more accurate method involves submetering your lighting circuits (installing a separate meter specifically for lighting). This provides precise data but requires a larger initial investment.
Calculating Annual kWh per Fixture: Once you have your total annual kWh for lighting, divide that number by the total number of lighting fixtures in your facility. This will give you an average kWh per fixture annually. For example, if your annual lighting kWh is 50,000 and you have 500 fixtures, each fixture consumes 100 kWh per year (50,000 / 500 = 100).
Determining the Cost per kWh: Refer to your utility bills to find the cost per kWh. This value fluctuates based on time of use rates and other factors. Consider the seasonal variations in energy pricing.
Calculating Annual Lighting Costs: Multiply the annual kWh per fixture by the cost per kWh to determine the annual cost per fixture. This number will provide a clear picture of the financial impact of your current lighting system.
Identifying Cost Drivers: Analyze your data to identify any significant drivers of energy consumption. Are there areas with unusually high energy use? Are certain types of fixtures consuming more energy than others? This information can guide your retrofit planning.
By following these steps, you'll gain a clear understanding of your current energy usage and cost profile, creating a solid foundation for justifying a lighting retrofit investment and tracking your savings after implementation.
Step 4: Evaluating Current Lighting Levels & Quality
Beyond simply counting the number of light fixtures, a thorough assessment involves evaluating whether the existing lighting is effectively serving its purpose. This goes beyond brightness and delves into the characteristics that impact visual comfort and task performance.
Measuring Foot-candles (Lux): The standard unit of illuminance, foot-candles (in the US) or lux (internationally), quantify the amount of light falling on a surface. We use a light meter to measure foot-candles in various areas of the building, comparing the readings to recommended levels established by the Illuminating Engineering Society (IES). These recommendations vary significantly depending on the task being performed - a warehouse requires less light than a surgical suite. Sub-standard lighting can lead to eye strain, headaches, and reduced productivity, while excessive lighting wastes energy and can cause glare.
Color Rendering Index (CRI): CRI indicates how accurately a light source renders colors compared to natural sunlight (which has a CRI of 100). A higher CRI (closer to 100) means colors appear more vibrant and natural. Low CRI lighting can distort colors, making it difficult to distinguish details or judge materials accurately. For retail spaces and areas where color perception is crucial, a CRI of 80 or higher is typically recommended.
Uniformity of Light Distribution: Uneven lighting can create dark spots and harsh transitions, causing discomfort and hindering visibility. Our assessment evaluates the uniformity of light across each space, noting any areas of excessive brightness or shadow.
Glare Evaluation: Glare occurs when a light source is too bright or is reflected off surfaces, making it difficult to see. We assess the potential for glare from existing fixtures and identify solutions to minimize its impact. This might involve adjusting fixture angles, adding diffusers, or applying anti-glare finishes to surfaces.
Ultimately, our goal is to ensure that your lighting not only meets the minimum required brightness but also provides a comfortable and productive environment for your occupants.
Step 5: Exploring Retrofit Lighting Technology Options
Choosing the right lighting technology is more than just swapping old bulbs for new ones. It's about optimizing performance, maximizing energy savings, and enhancing the overall lighting experience. Here's a breakdown of common retrofit options and considerations:
1. LED Retrofits - The Dominant Choice:
LEDs are almost universally recommended for lighting retrofits due to their superior energy efficiency, long lifespan, and reduced maintenance requirements. Several LED retrofit options exist:
- LED Tube Replacements (Plug & Play): These are designed to drop directly into existing fluorescent fixtures, often requiring no ballast modifications. Important: Ensure they are compatible with your existing fixtures and wiring.
- LED Troffers: These are complete replacements for existing troffer fixtures, offering a clean and efficient lighting solution.
- LED Downlights (Retrofit or New Construction): Options range from simple bulb replacements to more sophisticated new construction downlights with integrated drivers.
- LED High Bay/Low Bay Replacements: Ideal for warehouses, factories, and retail spaces, these provide high-intensity, energy-efficient lighting.
2. Smart Lighting Controls: More Than Just Dimming
Integrating smart lighting controls can significantly amplify energy savings and enhance functionality. Consider these options:
- Occupancy Sensors: Automatically turn lights on when a space is occupied and off when it's vacant.
- Daylight Harvesting: Adjusts artificial light levels based on the amount of natural light available.
- Networked Lighting Controls (NLC): Provides granular control over individual lighting fixtures, allowing for customized schedules, dimming, and reporting.
- Wireless Controls: Simplify installation and allow for flexible adjustments without extensive rewiring.
3. Considerations Beyond Efficiency:
- Color Temperature (CCT): Choose the appropriate color temperature to create the desired ambiance (warm, neutral, or cool).
- Color Rendering Index (CRI): Higher CRI values indicate more accurate color representation.
- Light Distribution: Ensure the selected fixtures provide adequate light coverage and minimize glare.
- Fixture Compatibility: Verify compatibility with existing fixtures, wiring, and building codes.
- Return on Investment (ROI): Calculate the potential cost savings and payback period for each option.
Investing time in evaluating these technologies and their compatibility with your specific needs will set your lighting retrofit project up for long-term success.
Step 6: Calculating Financial Savings & ROI
The heart of any successful lighting retrofit lies in demonstrating a tangible return on investment. A well-calculated financial analysis provides clear justification for the project and allows you to secure buy-in from stakeholders. Here's a breakdown of the key steps involved:
1. Estimating Energy Savings: This begins with understanding the difference in energy consumption between your existing lighting and the proposed LED replacements. Factors to consider include wattage reduction, ballast efficiency (if applicable), and the potential for incorporating lighting controls (occupancy sensors, daylight harvesting). Use your inventory data from Step 2 to calculate kilowatt-hour (kWh) savings per year.
2. Calculating Installation Costs: Be thorough! Include not only the cost of the new LED fixtures but also labor costs for installation, disposal of old fixtures, any necessary electrical modifications, and project management fees. Obtain multiple quotes from qualified contractors to ensure competitive pricing.
3. Factoring in Rebates & Incentives: Many utility companies and government agencies offer financial incentives for energy-efficient upgrades. Research and document all applicable rebates and incentives - these significantly reduce your upfront costs.
4. Determining the Simple Payback Period: This is a key metric that represents how long it takes for the energy savings to offset the initial investment. It's calculated as:
Installation Cost - Rebates/Incentives / Annual Energy Savings (in dollars)
A shorter payback period indicates a more attractive investment.
5. Calculating Return on Investment (ROI): ROI provides a broader picture of the project's profitability. It's calculated as:
(Net Profit / Cost of Investment) x 100
Where Net Profit is your total savings over the lifespan of the LEDs (energy savings minus maintenance costs) and Cost of Investment is the total project cost (installation - rebates). A higher ROI signifies a more profitable undertaking.
Beyond the Numbers: Don't forget to consider intangible benefits, such as improved lighting quality, reduced maintenance frequency, and enhanced employee productivity. While difficult to quantify precisely, these factors contribute to the overall value of the retrofit.
Example Scenario:
Let's say a retrofit costs $10,000, and you receive $2,000 in rebates. Your annual energy savings are $1,500.
- Simple Payback: ($10,000 - $2,000) / $1,500 = 5.33 years
- ROI (over a 10-year lifespan): ( ($1,500/year * 10 years) - $10,000) / $10,000 = 50%
Step 7: Developing a Retrofit Implementation Plan
A successful lighting retrofit isn't just about choosing the right LEDs; it's about how you implement the change. A poorly planned rollout can disrupt operations, annoy occupants, and ultimately undermine the project's benefits. This step is where the vision becomes reality.
Key Considerations for a Smooth Retrofit:
- Phased Approach: Unless your facility allows for a complete shutdown, a phased approach is almost always best. Prioritize areas with the highest energy consumption, greatest impact on occupants, or easiest access. Consider staggering the retrofit over several weeks or months to minimize disruption.
- Occupant Communication: Keep building occupants informed about the retrofit schedule and potential impact. Clear communication reduces anxiety and fosters buy-in. Use signage, email updates, and brief meetings to keep everyone in the loop.
- Contractor Selection & Coordination: Choose a qualified and experienced contractor with a strong safety record. Clearly define roles and responsibilities, and establish a communication plan to ensure seamless coordination.
- Safety Protocols: Implement strict safety protocols to protect workers and building occupants. This includes proper electrical lockout/tagout procedures, personal protective equipment, and hazard awareness training.
- Waste Disposal: Plan for the proper disposal of old lighting components, following environmental regulations. Many lamp manufacturers offer recycling programs.
- Post-Installation Testing: After the retrofit is complete, thoroughly test all new lighting fixtures and controls to ensure they are functioning correctly. Address any issues promptly.
- Contingency Planning: Prepare for unexpected challenges. Delays, material shortages, or unforeseen electrical issues can arise. Having backup plans in place minimizes disruption and keeps the project on track.
Step 8: Post-Retrofit Verification & Commissioning
The retrofit isn't complete until you're certain everything is working as intended and delivering the projected benefits. Post-retrofit verification and commissioning are critical steps often overlooked, but they guarantee a worthwhile investment and prevent costly issues down the line. This phase goes beyond a visual inspection; it involves rigorous testing and adjustments to fine-tune the new lighting system.
Here's what's involved:
- Energy Savings Validation: Compare actual energy consumption to pre-retrofit baseline data. Use utility bills and metering devices to accurately measure savings. Discrepancies require investigation and corrective action.
- Light Level & Uniformity Checks: Use a light meter to confirm lighting levels meet design specifications in all areas. Assess uniformity to eliminate dark spots or excessive glare. Adjust fixture placement or control settings as needed.
- Control System Commissioning: Verify that occupancy sensors, daylight harvesting systems, and dimming controls are functioning correctly. Ensure scheduling and setpoints are optimized for energy efficiency and occupant comfort.
- Occupant Feedback: Conduct a short survey or hold brief meetings with building occupants to gather feedback on the new lighting system. Address any concerns or requests for adjustments.
- Documentation: Meticulously document all verification findings, adjustments made, and final performance metrics. This provides a valuable record for future reference and troubleshooting.
Proper verification and commissioning ensure you're reaping the full rewards of your lighting retrofit-lower energy bills, improved lighting quality, and a more comfortable environment for occupants. It's the final piece of the puzzle for a truly successful project.
Step 9: Ongoing Monitoring & Optimization
The initial retrofit is just the beginning. To truly maximize your investment and sustain energy savings, ongoing monitoring and optimization are essential. This isn't a "set it and forget it" situation. Here's how to keep your lighting system performing at its peak:
Track Key Metrics: Regularly monitor your energy consumption data through your utility bills and, ideally, a building management system (BMS) if you have one. Compare your usage against pre-retrofit baseline data to quantify ongoing savings. Unexpected spikes could indicate issues like faulty controls or inefficient operation.
Regular Maintenance Checks: Schedule routine maintenance for your LED fixtures and controls. This might include cleaning fixtures (dust accumulation can impact light output), inspecting wiring, and ensuring proper ballast (for any remaining legacy fixtures) function.
Fine-Tuning Controls: Building occupancy patterns can shift. Take the time to adjust occupancy sensors and daylight harvesting settings based on evolving needs. A slight tweak can significantly impact energy savings.
Stay Informed: Lighting technology continues to evolve. Keep an eye on advancements in controls, LED efficacy, and smart building integration. New solutions could further optimize your system. Consider periodic reviews (every 3-5 years) with a lighting professional to identify potential upgrades or adjustments.
Feedback Loop: Continuously solicit feedback from building occupants regarding lighting quality and comfort. Addressing any concerns promptly can improve satisfaction and ensure optimal system performance.
Common Pitfalls to Avoid During Assessment
Rushing the initial walkthrough is a frequent mistake. It's tempting to quickly scan areas and move on, but overlooking subtle details - like fixtures in infrequently used storage rooms or specific lighting needs for specialized equipment - can lead to inaccurate assessments and missed opportunities for savings. Similarly, failing to account for non-lighting loads contributing to energy consumption can skew your baseline data. Don't underestimate the impact of outdated or incomplete building plans; relying on them can result in an inaccurate inventory and a miscalculation of potential savings. Finally, ignoring occupant feedback is detrimental. Those who interact with the lighting daily often have valuable insights into its performance and areas for improvement that might be missed by an external assessment team. Actively soliciting and incorporating their input will lead to a more effective and well-received retrofit solution.
Tools & Resources for a Successful Assessment
A thorough lighting retrofit assessment doesn't require a degree in engineering - but having the right tools and resources can certainly streamline the process and improve accuracy. Here's a breakdown of helpful instruments and information sources to consider:
1. Measurement & Analysis Equipment:
- Light Meter (Footcandle Meter): Essential for measuring light levels and ensuring compliance with industry standards. Consider a meter with data logging capabilities for comprehensive analysis.
- Power Meter: Useful for verifying the actual power consumption of existing and proposed lighting solutions.
- Digital Calipers/Tape Measure: For accurate fixture measurements and spatial analysis.
- Thermal Imaging Camera (Optional): Can help identify hotspots or inefficiencies in existing ballasts or fixtures.
2. Software & Online Platforms:
- Lighting Design Software (e.g., DIALux, AGI32): Allows for detailed lighting simulations and performance predictions. While professional versions exist, some free or trial versions may be suitable for initial assessments.
- Spreadsheet Software (e.g., Microsoft Excel, Google Sheets): Crucial for organizing data, calculating energy savings, and performing financial analyses.
- Utility Company Rebate Finders: Many utilities offer online tools to help identify available rebates and incentives. (Link to a resource for this)
- Energy Modeling Software (Optional): For more complex projects, energy modeling software can provide a holistic view of building energy performance.
3. Informational Resources:
- IES (Illuminating Engineering Society) Standards: The IES publishes a range of standards and guidelines for lighting design and performance. (https://www.ies.org/ )
- U.S. Department of Energy Lighting Resources: Provides valuable information on energy-efficient lighting technologies and best practices. (https://www.energy.gov/eere/lighting )
- Local Building Codes & Regulations: Ensure your retrofit complies with all applicable codes and regulations.
- Manufacturer Specifications: Refer to manufacturer datasheets for accurate performance data on lighting products.
Checklist Template Download (PDF)
Want to take the assessment process into your own hands? We're providing a convenient, printable checklist template as a valuable resource for your lighting retrofit journey. This PDF checklist mirrors the detailed 9-step assessment outlined in this article, allowing you to systematically evaluate your existing lighting system and plan for a more efficient and cost-effective upgrade. Simply download the checklist, fill it out as you progress through the assessment, and use it as a roadmap for a successful lighting retrofit.
(Please note: This checklist is intended as a guide. For a comprehensive and tailored assessment, consider contacting us for a professional lighting retrofit evaluation.)
Resources & Links
- U.S. Department of Energy - Lighting Building Optimization : Provides extensive information on lighting technologies, building optimization strategies, and resources for energy savings, covering assessment and retrofit planning. A central hub for understanding best practices.
- Building Science Corporation : While not exclusively about lighting, Building Science Corporation offers invaluable resources on building performance, thermal comfort, and lighting integration, important for holistic retrofit planning. Useful for understanding how lighting interacts with building envelope.
- ASHRAE (American Society of Heating, Refrigerating and Air-Conditioning Engineers) : ASHRAE standards and guidelines are crucial for energy-efficient lighting design and building systems. Their publications offer technical guidance and best practices for professionals. Pay attention to ANSI/ASHRAE/IES Standard 204 for lighting control.
- IES (Illuminating Engineering Society) : The IES is the authority on lighting design. They offer standards, publications, and continuing education on all aspects of lighting, vital for assessing lighting levels and quality and selecting appropriate retrofit technologies.
- Energy Star : Energy Star provides information on energy-efficient products, including lighting. Look for certified products and learn about rebates and incentives that can help offset retrofit costs.
- Lawrence Berkeley National Laboratory - Lighting Research : LBL conducts research on lighting technologies and energy efficiency. Their website has reports and data that can inform retrofit decisions and provide insights into emerging trends.
- Dialight : A leading manufacturer of LED lighting solutions, especially for industrial and hazardous location applications. Their website provides technical information, case studies, and product specifications.
- Acuity Brands : Another major lighting manufacturer, offering a broad range of LED lighting products and controls. Their website contains product specifications, design guides, and case studies that help evaluate retrofits.
- Philips Lighting : Offers lighting solutions and products, with comprehensive information and technical data, to support assessment and retrofit planning. A good source for understanding different technologies.
- Lutron Electronics : Specializes in lighting control systems. Understanding and implementing control strategies is crucial for optimizing energy savings in a lighting retrofit. Their website provides information on various control solutions and integration possibilities.
- Facility Lighting Innovations (FLI) : Offers consulting and resources for lighting retrofits, especially for facilities. They provide helpful checklists and best practices for different industries.
- LEDinside : Provides market research, news and technical insights specifically around LED lighting technologies. Helpful for staying current on advancements and pricing trends.
- EnerWise : Provides lighting retrofit services and assessment tools. Their website showcases their expertise and provides valuable resources for understanding the retrofit process.
Frequently Asked Questions
What is a lighting retrofit assessment and why is it important?
A lighting retrofit assessment is a comprehensive evaluation of your current lighting system to identify opportunities for upgrades that improve energy efficiency, reduce costs, and enhance performance. It's important because it helps you pinpoint the best solutions, maximizing ROI and minimizing unnecessary expenses before you invest in a lighting upgrade.
Who is this checklist template for?
This checklist template is designed for facility managers, building owners, energy consultants, and anyone responsible for assessing and planning lighting retrofit projects. It's beneficial for both small and large facilities.
What types of lighting systems does this checklist cover?
The checklist covers a wide range of lighting technologies, including fluorescent, LED, HID (metal halide, high-pressure sodium), and incandescent lighting, along with their associated controls and fixtures.
Can I customize this checklist template?
Absolutely! This template is meant to be a starting point. You can freely add, remove, or modify items to align with the specific needs and complexities of your facility. Tailor the checklist to your unique building characteristics and goals.
What kind of data should I collect during the assessment?
You're encouraged to collect information such as fixture type, wattage, lamp type, operating hours, maintenance schedules, dimming capabilities, control systems, and any existing issues or performance concerns. Quantity and cost data for both existing and proposed solutions are also vital.
What's the difference between a preliminary assessment and a detailed assessment?
A preliminary assessment provides a high-level overview to determine feasibility and potential savings. A detailed assessment delves deeper, analyzing specific fixture data, calculating precise energy savings, and providing more accurate ROI projections.
How does this checklist help with calculating ROI?
The checklist provides structured data points that allow you to accurately calculate the costs of existing lighting versus the cost of a retrofit solution. This enables you to project potential savings and calculate a return on investment based on those figures.
What are some common lighting control strategies covered by this checklist?
The checklist examines strategies like occupancy sensors, daylight harvesting, dimming controls, scheduling, and networked lighting systems to optimize energy usage and tailor lighting levels to specific needs.
Where can I find information about local rebates and incentives?
The checklist includes a reminder to investigate local utility rebates and incentives. Resources include your local utility company website, state energy offices, and the DSIRE database (dsireusa.org).
What do I do with the completed assessment?
The completed assessment serves as the foundation for a detailed retrofit plan. It enables you to prioritize upgrades, create a budget, and justify the investment to stakeholders. You should also keep it for future reference and ongoing monitoring.
Found this Article helpful?
Facility Management Solution Demo
Keep your facilities running smoothly! ChecklistGuro streamlines maintenance, inspections, and vendor management. Reduce downtime, optimize efficiency, & improve safety. Manage it all with our Work OS.
Related Articles
Industrial Floor Cleaning & Safety Checklist Template
Display Case Temperature Monitoring Checklist Template
The Ultimate Refrigeration Maintenance Checklist: Keeping Your Food Safe
Escalator & Moving Walkway Inspection Checklist Template
The Ultimate Guest Room Cleaning & Inspection Checklist Template

The Ultimate Security Camera Review Checklist Template
Forklift Inspection & Maintenance Checklist Template
Emergency Generator Load Testing Checklist Template
We can do it Together
Need help with
Facility Management?
Have a question? We're here to help. Please submit your inquiry, and we'll respond promptly.