Streamline Your Fertility: A Recordkeeping Checklist Template
Published: 09/02/2025 Updated: 12/13/2025
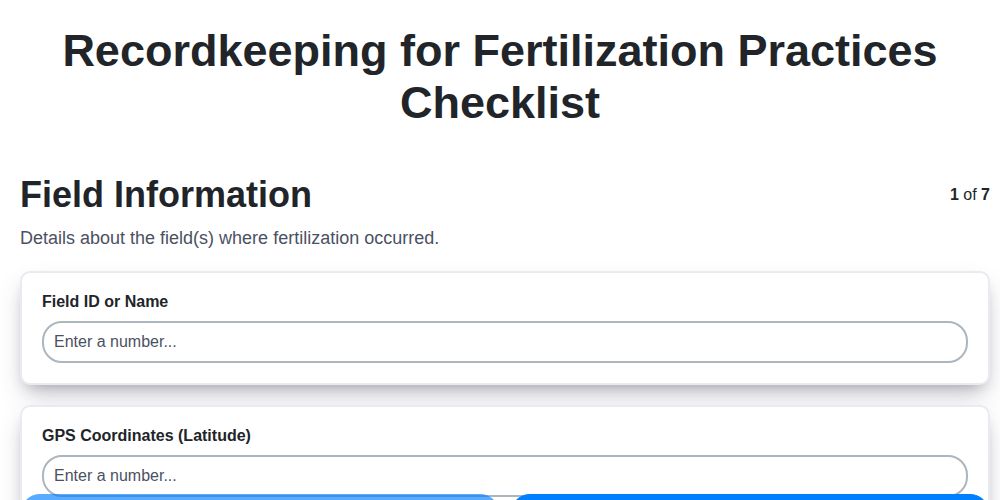
Table of Contents
- Why Recordkeeping Matters for Fertilizer Management
- Introducing the Streamlined Fertility Checklist Template
- Section 1: Field Identification and History
- Section 2: Fertilizer Product Details
- Section 2.1: Application Rate Calculations
- Section 3: Application Logistics
- Section 4: Equipment and Calibration
- Section 5: Environmental Conditions
- Section 6: Personnel and Certifications
- Section 7: Record Review & Verification
- Digital vs. Paper: Choosing Your Recordkeeping Method
- Leveraging Data: Turning Records into Actionable Insights
- Resources & Links
TLDR: This free checklist template simplifies fertilizer recordkeeping! It guides you through essential details like field info, product specifics, application methods, and weather conditions, ensuring compliance, optimizing fertilizer use, and protecting your farm's sustainability. Download it now to ditch the guesswork and streamline your fertility practices!
Why Recordkeeping Matters for Fertilizer Management
Beyond just ticking boxes for compliance, robust recordkeeping transforms fertilizer management from reactive guesswork to proactive optimization. Think of it as building a historical dataset of your field's response to nutrient inputs. This data allows you to pinpoint trends - perhaps a specific area consistently needs more phosphorus, or a particular application timing yields the best results for a certain crop. Without this historical perspective, you're essentially flying blind, potentially over- or under-applying fertilizer, wasting money, and increasing environmental risk. Detailed records empower you to fine-tune your nutrient plans, maximizing crop yield and quality while minimizing waste and environmental impact. It's the difference between treating symptoms and addressing the root cause of nutrient deficiencies or imbalances.
Introducing the Streamlined Fertility Checklist Template
Keeping track of every detail related to your fertilizer applications can feel overwhelming. That's why we're excited to introduce our Streamlined Fertility Checklist Template - a convenient and user-friendly tool designed to simplify your recordkeeping process. This template consolidates all the essential information outlined in the checklist above into a clear, organized format.
Forget scattered notebooks and complicated spreadsheets. Our template is designed for easy use, whether you're a seasoned farmer or just starting out. It's printable, editable, and structured to ensure you capture every critical detail, from field information and product specifics to weather conditions and personnel involved.
We're providing this template to help you meet regulatory requirements, optimize your nutrient management, and ultimately, boost your crop yields sustainably. Download it today and experience the difference a well-organized recordkeeping system can make!
Section 1: Field Identification and History
Accurate field identification is the bedrock of effective recordkeeping. Don't just jot down West Field; be precise. Use a combination of identifiers: field name (if applicable), GPS coordinates (highly recommended - these provide irrefutable location data), and a unique field number assigned by your farm operation. This layered approach minimizes confusion and ensures everyone involved understands exactly which area is being referenced.
Beyond the current location, understanding the field's history is equally crucial. Document the previous crop grown in that field. Residual nutrients from the previous crop can significantly impact fertilizer needs. Note any soil test results - including dates, sample locations, and nutrient levels - as these provide a baseline for making informed fertilization decisions. Also, document any significant past events affecting the field's fertility, like lime applications, manure spreading, or drainage improvements. This historical context allows for a more holistic understanding of the field's current nutrient status and informs future management practices.
Section 2: Fertilizer Product Details
Understanding the specific fertilizer product you're using is critical for accurate recordkeeping and optimizing nutrient delivery. It's more than just noting the brand name; delve into the formulation details. Record the exact product name as it appears on the bag or container. Equally important is the N-P-K ratio - this tells you the percentage of nitrogen (N), phosphorus (P), and potassium (K) by weight. For example, a fertilizer labeled 10-20-10 contains 10% nitrogen, 20% phosphorus pentoxide, and 10% potassium oxide.
Don't forget to note if the fertilizer contains secondary nutrients like sulfur, magnesium, or calcium, and any micronutrients such as zinc, iron, manganese, or copper. The source of these nutrients is also valuable information - is the nitrogen derived from urea, ammonium nitrate, or another source? Understanding the formulation allows you to better interpret soil test results, adjust application rates, and troubleshoot any nutrient-related issues that might arise. Lastly, document the supplier - this can be helpful for tracking product consistency and warranty information.
Section 2.1: Application Rate Calculations
Determining the correct application rate is crucial for maximizing crop yield and minimizing environmental impact. It's more than just a guess; it requires understanding your soil needs, crop requirements, and fertilizer properties. Here's a breakdown of how to calculate application rates, covering different scenarios.
Understanding the Units:
Before we dive into calculations, let's clarify common units:
- lbs/acre (pounds per acre): A common unit for solid fertilizers.
- kg/hectare (kilograms per hectare): Metric equivalent of lbs/acre.
- bushels/acre (bu/ac): Often used to estimate fertilizer needs based on expected yield.
- N-P-K: Represents the percentage of Nitrogen (N), Phosphorus (P₂O₅), and Potassium (K₂O) in the fertilizer.
Scenario 1: Based on Soil Test Recommendations
Your soil test report will typically provide recommendations for how much N, P, and K your crop needs. Let's say your soil test recommends 100 lbs of Nitrogen per acre.
- If using a fertilizer with a 21-0-0 NPK (21% Nitrogen): To apply 100 lbs of Nitrogen, you'd need to apply 100 lbs / 0.21 = 476 lbs of fertilizer per acre.
- Calculation: (Desired Nitrogen lbs) / (Percentage of Nitrogen) = Total Fertilizer lbs/acre
- If using a fertilizer with a 10-10-10 NPK: To apply 100 lbs of Nitrogen, you're actually applying 333.3 lbs of fertilizer per acre (100/0.10 = 1000). This is because you're also applying Phosphorus and Potassium. Consider if these are also needed.
Scenario 2: Estimating Rate Based on Expected Yield
Some farmers estimate fertilizer needs based on expected yield. This is a less precise method but can be useful. For example, a corn crop often needs around 1.2 lbs of Nitrogen per bushel of expected yield. If you expect 200 bushels/acre, you'll need 240 lbs of Nitrogen/acre.
Scenario 2a: Accounting for Application Equipment
Your application equipment (spreader, sprayer) may have limitations. Always verify your equipment's capacity and ensure you're not exceeding its maximum application rate. Some spreaders have calibration charts to help accurately apply fertilizer.
Example Calculation - Converting lbs/acre to kg/hectare
1 lb/acre = 0.4047 kg/hectare
Therefore, to apply 100 lbs of Nitrogen per acre, you'd apply approximately 40.47 kg/hectare.
Important Considerations:
- Overlapping: Account for any overlapping of fertilizer passes.
- Calibration: Regularly calibrate your application equipment to ensure accuracy.
- Weather Conditions: Adjust application rates based on weather conditions (e.g., rainfall).
- Variable Rate Application (VRA): If you're using VRA technology, the application rate will be determined by soil maps and prescriptions.
Section 3: Application Logistics
Successful fertilization isn't just about knowing what to apply; it's about how and when you do it. Precise application logistics are crucial for maximizing nutrient uptake and minimizing environmental impact. This section dives into the practical considerations that go beyond simply spreading fertilizer.
Calibration is King: Before any application, meticulously calibrate your equipment. Fertilizer spreaders and sprayers, if not properly adjusted, can deliver inconsistent rates, leading to over- or under-application. Record your calibration dates and settings for future reference - this demonstrates due diligence and helps troubleshoot any issues.
Field Access and Timing: Consider field conditions like soil moisture and compaction. Avoid applying fertilizer to saturated soils, as this increases the risk of runoff. Also, factor in potential traffic impacts - minimizing compaction from heavy machinery is essential for healthy root development.
Weather Windows: Pay close attention to weather forecasts. Wind speed is critical for preventing drift, which can damage non-target plants and create off-site environmental concerns. Rain shortly after application can lead to nutrient loss through leaching or runoff. Ideally, apply fertilizer when conditions are calm and dry.
Buffer Zones: Establish and adhere to appropriate buffer zones around sensitive areas like waterways, wells, and homes. These zones help prevent fertilizer from reaching unintended locations.
Traffic Management: When working with larger operations or shared fields, implement a clear traffic management plan to avoid conflicts and ensure efficient application.
Record Every Adjustment: Don't just record the planned application rate - note any adjustments made during the process due to terrain variations, equipment malfunctions, or other unforeseen circumstances. These details can be invaluable for refining future applications.
Section 4: Equipment and Calibration
Accurate fertilizer application hinges on properly functioning and calibrated equipment. Even with the perfect plan, inaccurate application rates due to faulty or uncalibrated machinery can lead to wasted fertilizer, environmental damage, and reduced crop yields.
Beyond Routine Checks: It's not enough to simply ensure your spreader or sprayer is running smoothly. Regular calibration is absolutely critical. Calibration confirms that the equipment is delivering the intended application rate under varying conditions.
What to Calibrate: This includes spreaders (broadcast and banded), sprayers (for foliar applications), and any other equipment used to apply fertilizer.
Calibration Steps (General Guidance - Consult Equipment Manuals):
- Read the Manual: Always refer to the manufacturer's instructions for your specific equipment.
- Gather Supplies: You'll need measuring containers, a known area (e.g., 100 sq ft), a timer, and a calculator.
- Initial Assessment: Observe the pattern of fertilizer distribution. Is it even? Are there gaps or overlaps?
- Rate Adjustment: Adjust the equipment settings according to the manual's instructions.
- Collection & Measurement: Collect the fertilizer dispensed by the equipment over the test area. Weigh the collected fertilizer to determine the actual application rate.
- Calculation: Compare the target application rate with the measured application rate. Adjust the equipment settings again if necessary. Repeat until the measured rate matches the target rate.
- Documentation: Record the calibration date, equipment settings used, and the person who performed the calibration.
Frequency: Calibration frequency depends on equipment usage and manufacturer recommendations. As a general rule, calibrate your equipment:
- Before each season.
- After any repairs or adjustments.
- At least once a year, even if no changes have been made.
Beyond Calibration: Maintenance Matters Properly maintained equipment distributes fertilizer more evenly and reliably. Regularly inspect and service your equipment to prevent breakdowns and ensure accurate application.
Section 5: Environmental Conditions
Understanding the environmental conditions at the time of fertilizer application is crucial for optimizing nutrient uptake and minimizing potential environmental impact. Factors like temperature, rainfall, wind speed, and soil moisture significantly influence how fertilizer behaves and is utilized by the crop.
Temperature: Air temperature directly affects the chemical reactions of fertilizers and their solubility. Extremely high temperatures can increase volatilization losses, particularly with nitrogen fertilizers.
Rainfall: Rainfall after application can lead to nutrient runoff and leaching into waterways. While a light rain can help incorporate fertilizers, heavy rainfall can result in significant nutrient losses. Application timing relative to expected rainfall is vital.
Wind Speed & Direction: Wind speed is critical for preventing fertilizer drift, which can impact non-target areas and potentially violate regulations. Pay close attention to wind direction to avoid unintended application to neighboring fields or sensitive ecosystems. Consider suspending application on windy days.
Soil Moisture: Soil moisture levels impact fertilizer solubility and availability to plants. Dry soil conditions might hinder nutrient uptake, while saturated soils can create anaerobic conditions that reduce fertilizer efficiency and increase the risk of denitrification (nitrogen loss). Ideally, apply fertilizer when the soil is adequately moist but not saturated.
Always check weather forecasts and soil moisture levels before and during fertilizer application to make informed decisions and adjust your practices accordingly.
Section 6: Personnel and Certifications
Proper fertilization practices often involve certified applicators and require documented supervision. This section outlines the personnel responsibilities and necessary certifications for ensuring legal and effective fertilizer application.
Applicator Certification: In many jurisdictions, anyone applying fertilizer beyond a small, personal-use area must hold a valid applicator's license or certification. These certifications demonstrate competency in safe and responsible fertilizer handling and application. Ensure the applicator's certification is current and reflects the specific type of fertilizer being applied (e.g., pesticide applicator license may not suffice). Always record the applicator's name, certification number, and expiration date on the application record.
Supervision: Even with certified applicators, supervision is frequently required, especially when dealing with larger-scale operations or sensitive environmental areas. The supervisor should be knowledgeable about nutrient management plans, fertilizer regulations, and proper application techniques. The supervisor's name and role should also be clearly documented.
Training: Periodic training for all personnel involved in fertilizer handling and application is highly recommended. This training should cover topics such as safety protocols, regulatory requirements, and best management practices. Keep records of training sessions attended.
Recordkeeping - Personnel Details: Be sure to record:
- Applicator's Full Name
- Applicator's Certification Number and Expiration Date
- Supervisor's Name and Role
- Dates of Training and Topics Covered
Section 7: Record Review & Verification
Recordkeeping isn't a one-and-done task; it's an ongoing process. Simply filling out forms isn't enough to ensure accuracy and effectiveness. Regular review and verification are vital to identify errors, track trends, and continuously improve your fertilization practices.
What to Review:
- Accuracy: Are dates, rates, and product names correct? A simple typo can lead to significant issues.
- Completeness: Do all required fields have information? Incomplete records are as problematic as inaccurate ones.
- Consistency: Do the records align with your Nutrient Management Plan (if you have one)?
- Trend Analysis: Over time, do you see any patterns in your fertilization performance? Are rates effective, or are adjustments needed?
Who Should Verify?
Ideally, a second person - perhaps a supervisor, agronomist, or fellow farm employee - should review the records. This independent check can catch errors that the original recorder might have missed. Document the reviewer's name and date of review on each record.
Frequency:
Establish a schedule for record review. Yearly reviews are a minimum, but more frequent checks (e.g., quarterly or after each major fertilization event) are highly recommended, especially when first implementing a recordkeeping system or if changes are made to fertilizer programs.
Corrective Actions: If discrepancies are identified during the review process, promptly document the corrective actions taken and by whom. This demonstrates a commitment to accuracy and continuous improvement.
Digital vs. Paper: Choosing Your Recordkeeping Method
The choice between paper and digital recordkeeping isn't just about preference; it's about aligning your method with your farm's size, complexity, and future goals. Both options offer distinct advantages and drawbacks.
Paper Recordkeeping: The Familiar Foundation
For smaller operations or those just starting with formal recordkeeping, a physical notebook or pre-printed forms can be a cost-effective and simple solution. It requires minimal initial investment and doesn't rely on technology or internet access. The tactile nature of writing can also aid memory and allow for quick annotations. However, paper records are prone to loss or damage, difficult to search and analyze, and can be time-consuming to compile into reports. Sharing data with consultants or regulatory agencies can also be cumbersome.
Digital Recordkeeping: Efficiency and Insight
Digital options, ranging from spreadsheets to dedicated farm management software, offer significant advantages in terms of efficiency and data analysis. Spreadsheets allow for basic calculations and charting. Farm management software often integrates with GPS systems for precision mapping, automated reporting, and even predictive analytics for optimizing fertilizer rates. Data is easily searchable, can be shared electronically, and is often backed up to prevent loss. However, digital systems require an initial investment in software or hardware, a reliable internet connection (for cloud-based solutions), and a willingness to learn new technologies. Data security is also a consideration.
Ultimately, the best method depends on your individual needs. Some farms even utilize a hybrid approach, using paper for quick notes and digital systems for long-term storage and analysis.
Leveraging Data: Turning Records into Actionable Insights
Simply having records isn't enough; the real power lies in analyzing them. Fertilizer records, when viewed collectively over time, transform from a compliance chore into a goldmine of information. Here's how to move beyond data collection and start extracting valuable insights:
Identify Trends: Look for patterns in your data. Are yields consistently higher with a particular fertilizer blend? Are certain application timings more effective for specific crops? Are there correlations between weather conditions and nutrient uptake? Charting application rates, yields, and soil test results over several seasons allows you to visualize trends and make informed decisions.
Optimize Fertilizer Rates: Analyze records to determine if you're over- or under-applying fertilizer. Excessive fertilizer use is costly and harmful to the environment. Conversely, inadequate fertilization limits yield potential. Data-driven adjustments to application rates can maximize efficiency and profitability.
Fine-Tune Application Timing: Determine the optimal timing for fertilizer applications based on crop development stage, weather patterns, and soil moisture conditions. Records help reveal if pre-plant, sidedress, or foliar applications are yielding the best results.
Evaluate Equipment Performance: Track equipment settings and application accuracy. Compare yield maps with application records to identify areas of uneven distribution and adjust equipment accordingly. Regular calibration logs become crucial here.
Improve Soil Health: Combine fertilizer records with soil test results to monitor soil nutrient levels, pH, and organic matter content. This helps you develop strategies to improve soil health and reduce reliance on synthetic fertilizers.
Predictive Modeling (Advanced): With enough data and appropriate software, you can even begin to build predictive models to forecast fertilizer needs based on historical data and weather forecasts. This allows for proactive nutrient management and optimized resource allocation.
By actively analyzing your fertilizer records, you're not just fulfilling a regulatory requirement; you're investing in the long-term health and productivity of your farm.
Resources & Links
- USDA Natural Resources Conservation Service (NRCS) : A primary source for information on soil health, nutrient management, and conservation practices. Provides guidance, tools, and resources related to fertilizer management and recordkeeping requirements, especially for compliance with regulations.
- Environmental Protection Agency (EPA) : Provides regulatory information and guidelines regarding fertilizer use and potential environmental impacts. Useful for understanding legal requirements related to fertilizer recordkeeping and best management practices.
- Purdue University Extension : Offers a wealth of agricultural resources, including publications and fact sheets on fertilizer management, soil testing, and nutrient application rates. Often provides practical, regionally-specific advice.
- Texas A&M AgriLife Extension Service : Similar to Purdue Extension, offers regionally-focused agricultural information, including resources on fertilizer best practices and recordkeeping, tailored to Texas conditions. (Substitute with your regional extension service if not in Texas)
- Cropsticks : Offers digital tools for precision agriculture and fertility management, including record keeping and mapping capabilities. Provides an example of a technology solution for streamline record keeping, potentially useful for showcasing digital options.
- MyFarmLife : A comprehensive resource hub for farmers. Search their site for articles and best practices on fertilizer management and recordkeeping.
- PrecisionAg : Dedicated to precision agriculture technologies and techniques. Provides insights into digital recordkeeping solutions and data-driven decision making in fertilizer management.
- Soil Testing Services : Provides information on soil testing methodologies and interpretations. Important for understanding nutrient needs and informing fertilizer application decisions. Consider listing a few specific soil testing labs as examples.
- AgSource Laboratories : An example of a reputable agricultural laboratory offering soil and plant tissue testing services. Provides a concrete example of a testing resource.
- University of Minnesota Extension : Offers a wide range of agricultural resources, covering topics from soil testing to nutrient management planning. Similar to Purdue and TAMU Extensions.
- Soil Health Institute : Promotes soil health practices, and while not strictly focused on recordkeeping, understanding soil health is crucial for optimizing fertilizer use and reducing environmental impact.
Frequently Asked Questions
What is the purpose of this fertility recordkeeping checklist template?
This template helps you systematically track your fertility signs and symptoms, providing valuable data for yourself and your healthcare provider to better understand your cycle and identify potential issues. It's designed to streamline the tracking process and improve accuracy.
Who should use this checklist?
Anyone trying to conceive, whether naturally or with medical assistance, can benefit from using this checklist. It's particularly helpful for those with irregular cycles or those undergoing fertility treatments.
What kind of information should I record in the checklist?
The checklist includes sections for tracking basal body temperature (BBT), ovulation predictor kits (OPKs), cervical mucus, cycle length, period start and end dates, symptoms like pain or spotting, and any medications or supplements taken. You can also add notes for any observations or concerns.
What is basal body temperature (BBT) and why is it important?
BBT is your temperature taken first thing in the morning before getting out of bed. It can indicate when ovulation has occurred. A slight rise in BBT suggests ovulation has happened.
I'm new to ovulation predictor kits (OPKs). How do I use them and what should I record?
OPKs detect the surge of luteinizing hormone (LH) that precedes ovulation. Record the results of each test, noting the date and time taken, and whether the test line is faint, positive, or control. Follow the specific instructions for the OPK brand you are using.
What is cervical mucus and why should I track it?
Cervical mucus changes throughout your cycle. Tracking its consistency, color, and amount can help predict ovulation. It becomes clear, slippery, and stretchy around ovulation (similar to egg whites).
Can I customize this checklist template?
Yes! This is designed to be a starting point. Feel free to add or remove sections to better suit your individual needs and preferences. You can add notes for specific medications, supplements, or observations that are relevant to you.
How long should I use this checklist?
Ideally, use the checklist for at least 2-3 cycles to get a good overview of your fertility patterns. You can continue using it throughout your fertility journey for ongoing monitoring.
Is there a specific time of day I should take my BBT?
Take your BBT immediately upon waking up, before you get out of bed or do anything that could affect your temperature. Try to take it at the same time each morning for accuracy.
Where can I find more information about fertility tracking?
Consult with your healthcare provider for personalized advice. There are also many reputable websites and books available online that provide detailed information about fertility tracking and conception.
Found this Article helpful?
Agriculture Management Solution Demo
Running a farm or agricultural business is complex. ChecklistGuro's Work OS platform simplifies your operations, from crop planning and irrigation management to livestock tracking and harvest scheduling. Increase efficiency, reduce waste, and boost yields! See how ChecklistGuro can revolutionize your agriculture business.
Related Articles

10 Simple Steps to a Healthy Drainage System: Your Checklist Template

Mastering the Daily Crop Scouting Report: Your [Specific Crop] Checklist Template

Irrigation System Checklist: Farm Water Management & Crop Yield Optimization

Unlock Your Garden's Potential: A Soil pH Verification Checklist

PPE Usage Checklist Template: Your Guide to Safety

Water Discharge Permit Compliance Checklist Template

The Ultimate GPS & Precision Farming Calibration Checklist Template

Water Runoff Analysis Checklist Template
We can do it Together
Need help with
Agriculture?
Have a question? We're here to help. Please submit your inquiry, and we'll respond promptly.