Science Lab Ventilation System Checklist Template
Published: 09/01/2025 Updated: 12/13/2025
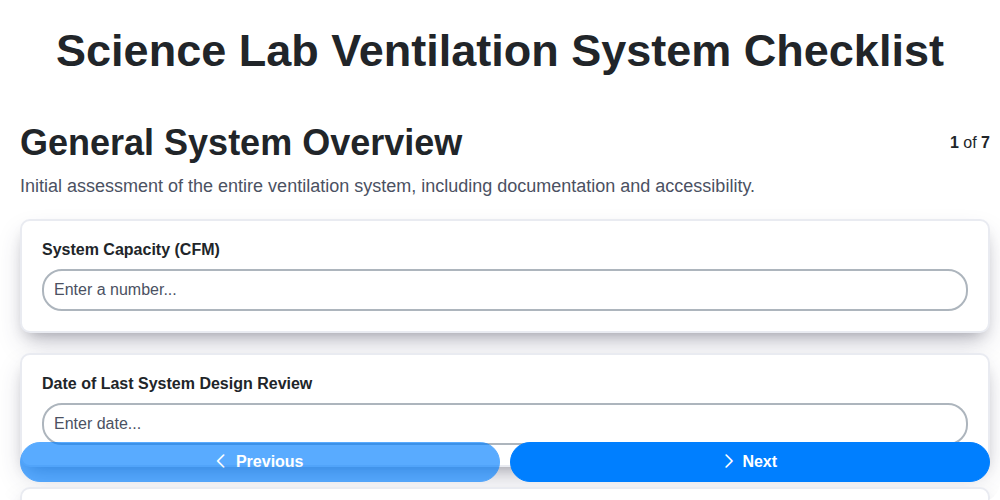
Table of Contents
- Introduction: Why a Ventilation Checklist Matters
- Template Overview: Sections and Key Components
- Section 1: General System Assessment
- Section 2: Supply Air System Inspection
- Section 3: Exhaust Air System Evaluation
- Section 3.1: Fume Hood Performance Checks
- Section 4: Air Filtration System Maintenance
- Section 5: Alarm System and Monitoring
- Section 6: Record Keeping and Documentation
- Section 7: Troubleshooting Common Issues
- Conclusion: Ensuring a Safe and Compliant Lab Environment
- Resources & Links
TLDR: This free checklist template helps you keep your science lab's ventilation system safe and compliant. It covers everything from fume hood face velocity to filter replacements, ensuring proper airflow and protecting researchers. Download it today to simplify your lab safety routine!
Introduction: Why a Ventilation Checklist Matters
The air we breathe in a science lab isn't always what it seems. While groundbreaking research and innovation fill the space, so too can hazardous chemicals, volatile organic compounds (VOCs), and potential biological contaminants. A properly functioning ventilation system acts as your lab's first line of defense, diligently removing these airborne threats and protecting researchers, preserving data integrity, and ensuring compliance. However, a ventilation system isn's a set it and forget it piece of equipment. Regular maintenance and verification are essential to guarantee its continued effectiveness. This is where a comprehensive checklist becomes your invaluable tool - a structured approach to proactively identifying and addressing potential issues before they compromise safety or experimental results. Ignoring ventilation maintenance can lead to serious health risks, inaccurate research findings, and costly repairs down the line. This article will guide you through a detailed checklist, empowering you to create a safer and more reliable laboratory environment.
Template Overview: Sections and Key Components
Our comprehensive ventilation system checklist is structured to cover all critical aspects of your lab's air handling. Here's a breakdown of the sections and what they address:
General System Overview: This initial assessment establishes a baseline understanding. It involves reviewing system schematics, identifying all key components (fans, filters, ducts, fume hoods), and observing the system's overall function for any immediate concerns like unusual noises or vibrations.
Supply Air System: This section focuses on the air entering the lab. We examine the air intake location for obstructions, inspect ductwork for leaks and damage, and monitor fan performance. Crucially, we measure static pressure to ensure adequate airflow is being delivered.
Exhaust Air System: Mirroring the supply air section, this concentrates on the air being removed from the lab. We check exhaust hoods for integrity, inspect ductwork, evaluate fan performance, and confirm the exhaust discharge point is clear and compliant.
Air Filtration System: Protecting your lab from contaminants is paramount. This section details the inspection and replacement of air filters, alongside measuring pressure drop to gauge filter efficiency.
Laboratory Fume Hoods: As critical containment devices, fume hoods receive a detailed assessment. This includes measuring face velocity (a key indicator of performance), checking sash operation, and inspecting the hood liner.
Airflow Monitoring & Alarms: Ensuring that alarms function properly is vital for early detection of problems. We verify sensor functionality and test alarm systems to confirm notification procedures are working.
Maintenance Records Review: A retrospective analysis provides valuable insights into system performance and identifies trends for proactive maintenance. Calibration records are also examined.
Section 1: General System Assessment
A comprehensive understanding of your lab's ventilation system starts with a thorough overview. This initial assessment isn't about diving into technical specifics; it's about establishing a baseline and ensuring everyone involved knows what they're dealing with. Begin by locating and reviewing the system's schematics - these are your roadmap. Confirm that the schematics are accurate and readily accessible to authorized personnel. Next, visually verify that all labeled components, from supply and exhaust fans to ductwork and filtration units, are present and accounted for. Note any discrepancies between the schematics and the physical system. A simple walk-through, listening for unusual noises, feeling for vibrations, and observing the overall condition of the equipment can reveal potential issues before they escalate. Finally, if your lab utilizes a Building Management System (BMS) for ventilation control, verify its connection and functionality. This ensures the system is operating as intended and provides valuable data for monitoring and analysis. Document everything - observations, discrepancies, and the date of the assessment - to create a record for future reference and trend analysis.
Section 2: Supply Air System Inspection
The supply air system is the lifeline of your lab's air quality. Ensuring a consistent and clean supply of air is paramount for both researcher safety and accurate experimental results. This section focuses on verifying the integrity and efficiency of this critical system.
Begin by visually inspecting the air intake location. Ensure it's clear of any obstructions like overgrown vegetation, bird nests, or accumulated debris. Even seemingly minor blockages can significantly impact airflow. Next, thoroughly examine the supply air ductwork for any signs of leaks, damage (corrosion, dents, cracks), or compromised insulation. Duct tape is not a long-term solution - any leaks should be properly sealed or repaired.
Pay close attention to the supply air fans. Monitor their operational status, noting any unusual noises (grinding, squealing) or vibrations. Record the amperage draw and compare it to the manufacturer's specifications. Deviations can indicate motor issues or increased system load. Measuring static pressure within the ductwork is a crucial step. This measurement indicates the resistance to airflow and provides insight into the overall system performance. A drop in static pressure can signal clogged filters, ductwork restrictions, or fan degradation. Maintain meticulous records of these measurements and compare them to baseline data to identify trends and potential issues before they become critical.
Section 3: Exhaust Air System Evaluation
The exhaust air system is your lab's primary defense against harmful airborne contaminants, so its integrity is paramount. A thorough evaluation involves more than just a cursory glance; it requires a systematic approach to ensure efficient removal of fumes and pollutants.
Visual Inspection & Leak Detection: Begin with a detailed visual inspection of the entire exhaust system, starting at the fume hoods and extending to the exhaust fan discharge point. Look for any signs of damage - cracks, corrosion, or loose connections - in ductwork and hood housings. Even small cracks can significantly impact airflow and safety. Consider using a smoke stick or tracer gas to identify subtle leaks in duct connections, especially in areas that are difficult to access.
Fan Performance Assessment: Similar to the supply air system, exhaust fans need regular checks. Monitor their speed and amperage draw, noting any deviations from baseline values. Unusual noises - grinding, squealing - can indicate bearing issues or other mechanical problems that need immediate attention. A drop in airflow can signify a failing fan or obstructions in the ductwork.
Exhaust Hood Integrity: Pay special attention to the exhaust hoods themselves. Ensure the capture velocity (typically measured at the hood face) remains within acceptable ranges (usually 80-100 fpm). A compromised hood can allow fumes to escape into the lab. Inspect hood liners for any signs of chemical degradation or corrosion, which can indicate exposure to aggressive substances.
Discharge Point Verification: Finally, confirm the exhaust fan discharge point is unobstructed. Vegetation, debris, or even improperly placed equipment can impede airflow, reducing the system's effectiveness and potentially creating hazardous conditions. Verify that the discharge meets all applicable regulations and does not negatively impact the surrounding environment.
Section 3.1: Fume Hood Performance Checks
Laboratory fume hoods are your primary defense against airborne contaminants, so ensuring their optimal performance is non-negotiable. These checks aren't just about following protocol; they're about protecting your researchers and maintaining the integrity of your experiments. Here's a detailed breakdown of critical fume hood performance checks you should conduct regularly, ideally monthly.
1. Face Velocity Measurement - The Cornerstone
Face velocity, the speed of air entering the hood, is arguably the most vital indicator of fume hood function. It needs to be within the established safety range, typically between 80 and 100 feet per minute (fpm), although this range can vary based on the hood's design and applicable regulations.
- Equipment: You'll need a calibrated anemometer. Ensure its calibration is current.
- Procedure: Measure face velocity at multiple points across the hood opening. Focus on the center, corners, and areas where you frequently work. Take multiple readings at each point to account for variations.
- Documentation: Record all measurements, the date, and the anemometer's calibration date. Any readings falling outside the acceptable range necessitate immediate investigation and corrective action.
2. Sash Position and Operation
The sash, the vertical sliding window, plays a crucial role in airflow patterns and containment.
- Check Sash Alignment: Ensure the sash moves freely and seals tightly against the hood frame. Any gaps compromise containment.
- Verify Sash Position: Many hoods have alarms that trigger if the sash is opened beyond a designated limit. Test these alarms to confirm proper functionality.
- Evaluate Sash Condition: Inspect the sash for damage, corrosion, or obstructions that may impede its movement.
3. Airflow Visualization (Smoke Testing - Recommended Annually)
While not required monthly, annual smoke testing provides a visual assessment of airflow patterns. This involves introducing a non-toxic smoke source inside the hood and observing how the smoke behaves. It helps identify disturbances, recirculation zones, or other airflow anomalies that might not be detected by simple velocity measurements. This test should be performed by a qualified professional.
4. Hood Liner and Interior Condition
- Inspect the Liner: Regularly examine the hood liner for signs of corrosion, cracks, or excessive buildup of chemicals. Damage to the liner compromises its containment properties.
- General Cleanliness: Maintain a clean interior to prevent buildup of chemicals that could react and create hazardous conditions. Remove unnecessary equipment to minimize obstructions to airflow.
Remember, consistently performing these checks and documenting the results is vital for maintaining a safe and productive lab environment.
Section 4: Air Filtration System Maintenance
Air filters are the unsung heroes of your lab's ventilation. They silently remove particulate matter, chemicals, and biological contaminants, ensuring clean air for everyone. However, like any component, they don's last forever and require regular maintenance. Neglecting this critical step can lead to reduced airflow, increased energy consumption, and, most importantly, compromised safety.
Understanding Your Filter Types
Before diving into maintenance, familiarize yourself with the types of filters used in your lab. Common types include:
- Pre-filters: These capture larger particles like dust and pollen, extending the life of more expensive filters. Typically fiberglass or polyester.
- HEPA (High-Efficiency Particulate Air) Filters: These are essential for removing fine particulate matter, including bacteria and viruses.
- Activated Carbon Filters: Used to adsorb chemical vapors and odors.
- ULPA (Ultra-Low Penetration Air) Filters: Offer even higher filtration efficiency than HEPA filters, used in more sensitive environments.
The Maintenance Routine: Visual Inspection & Replacement
The cornerstone of air filter maintenance is regular visual inspection. Check filters at least quarterly, and more frequently (monthly) in labs with heavy usage or known contamination sources. Look for:
- Discoloration: Significant discoloration indicates filter saturation.
- Excessive Dirt Accumulation: Visible dirt buildup hinders airflow.
- Damage: Look for tears, cracks, or deformations.
Replacement Frequency: Consult manufacturer specifications for recommended replacement intervals. These are often based on operating hours and expected contaminant load. Don't simply replace filters on a calendar basis - assess their condition. Keep detailed records of filter types, replacement dates, and observations.
Pressure Drop Monitoring: A key indicator of filter loading is pressure drop. Regularly measure the pressure drop across the filter using a manometer. Increasing pressure drop signifies reduced airflow and indicates the need for replacement.
Important Safety Note: Always wear appropriate personal protective equipment (PPE), including gloves and a respirator, when handling used filters, as they may contain hazardous materials. Dispose of used filters according to your facility's hazardous waste disposal procedures.
Section 5: Alarm System and Monitoring
Your lab's ventilation system isn't just about airflow; it'll be worthless if you're not alerted to problems. A robust alarm and monitoring system is the critical safety net ensuring timely intervention. Here's what to look at:
Types of Alarms & Sensors:
Modern lab ventilation systems incorporate a variety of sensors to detect deviations from normal operating conditions. Common alarms include:
- Low Airflow Alarms: These trigger when airflow drops below a predefined threshold, potentially indicating a blocked duct, failing fan, or filter overload.
- High Static Pressure Alarms: These alert to obstructions or issues that are restricting airflow, potentially stressing system components.
- Temperature Sensors: Monitoring air temperatures can reveal inefficiencies or potential equipment malfunctions.
- CO/VOC Sensors (Optional): For labs working with volatile chemicals, dedicated carbon monoxide and volatile organic compound sensors provide an additional layer of protection, alerting to leaks and unsafe concentrations.
Regular Testing is Paramount:
- Monthly Simulated Alarms: Simulate alarm conditions (e.g., temporarily obstructing an exhaust hood) to verify the alarm system's functionality, audible/visual notifications, and response procedures. Document the testing process and results.
- Sensor Calibration: Ensure all sensors are calibrated according to manufacturer recommendations. Poorly calibrated sensors provide inaccurate data and can lead to false alarms or, more dangerously, a failure to detect a real problem.
- Notification Procedures: Confirm that alarms trigger the appropriate notifications to designated personnel, including lab managers, safety officers, and maintenance teams. Regularly review and update these procedures.
- Alarm History Review: Maintain a detailed log of all alarms, including the date, time, type of alarm, corrective actions taken, and personnel involved. Analyze this history for trends and potential areas for improvement. Don't just clear alarms; investigate why they occurred.
Section 6: Record Keeping and Documentation
A comprehensive ventilation system checklist is only as valuable as the records you keep. Consistent and detailed documentation isn't just good practice; it's a vital component of regulatory compliance, troubleshooting, and demonstrating due diligence. Here's what your record-keeping should encompass:
- Inspection Logs: Date and time of each inspection, personnel conducting the inspection, specific findings (including measurements and observations), and any corrective actions taken.
- Filter Replacement Records: Dates of filter replacements, filter types used, and purchase order information (if applicable). Maintain a stock of spare filters!
- Maintenance Records: Detailed reports of all maintenance performed, including repairs, calibrations, and adjustments. Include contractor information and warranty details.
- Alarm Event Logs: Dates and times of alarms, descriptions of the conditions that triggered the alarm, and the actions taken to resolve the situation.
- Calibration Certificates: Maintain copies of all calibration certificates for measuring equipment (anemometers, pressure gauges, etc.).
- System Modifications: Document any modifications made to the ventilation system, including design changes, equipment upgrades, and changes to operating procedures.
- Trending Data: Regularly review recorded data to identify trends and potential issues. This proactive approach can prevent minor problems from escalating into major repairs.
These records should be readily accessible to authorized personnel and stored securely, both electronically and in hard copy. A well-organized record-keeping system provides invaluable insight into the performance of your ventilation system, enabling you to optimize its efficiency and ensure a safe laboratory environment for everyone.
Section 7: Troubleshooting Common Issues
Even with a robust maintenance program, unexpected issues can arise. Here's a rundown of frequently encountered problems and initial troubleshooting steps you can take. Remember: If you're uncomfortable performing any of these steps, or if the issue persists, always contact a qualified HVAC professional.
1. Low Airflow from Fume Hoods:
- Possible Cause: Clogged filters, blocked exhaust duct, malfunctioning fan.
- Troubleshooting: Visually inspect filters (replace if dirty). Ensure the exhaust duct isn't blocked by debris. Check the fan's amperage draw - a significant deviation from the normal range indicates a potential problem. Re-measure face velocity after each step to assess effectiveness.
- Note: Low airflow compromises containment and increases the risk of exposure.
2. Unusual Noises from Fans:
- Possible Cause: Bearing failure, debris caught in fan blades, ductwork vibration.
- Troubleshooting: Carefully inspect the fan blades for obstructions. Check for loose ductwork connections that might be causing vibration. A grinding or rattling sound often signals bearing failure, requiring professional repair or replacement.
- Note: Ignoring unusual noises can lead to complete fan failure and system downtime.
3. Sudden Drop in Supply Air Temperature:
- Possible Cause: HVAC system malfunction, damper issues, sensor failure.
- Troubleshooting: Verify the building's overall HVAC system is functioning correctly. Check damper positions to ensure proper airflow. Inspect air temperature sensors for damage or disconnection.
- Note: Uneven temperatures can affect experimental conditions and potentially damage sensitive equipment.
4. Alarm Activation with No Obvious Cause:
- Possible Cause: Sensor malfunction, wiring issues, programming errors.
- Troubleshooting: Carefully review alarm logs to identify patterns or specific error codes. Inspect sensor wiring for damage or disconnection. Consult the system's programming documentation to verify proper configuration.
- Note: Don't dismiss alarm activations; they've been triggered for a reason. Thoroughly investigate and document the findings.
5. Condensation on Ductwork or Fume Hoods:
- Possible Cause: High humidity, inadequate insulation, temperature differentials.
- Troubleshooting: Evaluate the building's overall humidity levels. Check ductwork insulation and repair any damaged sections. Ensure adequate ventilation in the lab to reduce moisture buildup.
- Note: Condensation can lead to microbial growth and corrosion, impacting air quality and equipment longevity.
Conclusion: Ensuring a Safe and Compliant Lab Environment
Maintaining a robust and reliable lab ventilation system isn't merely a procedural task; it's a fundamental commitment to the safety of your researchers and the integrity of your scientific endeavors. By consistently implementing a comprehensive checklist like the one outlined above, you proactively mitigate risks, ensure regulatory compliance, and foster a thriving research environment. Remember that regular inspections, meticulous record-keeping, and a collaborative approach involving lab personnel and qualified HVAC professionals are key to long-term success. Prioritizing lab ventilation isn't just good practice; it's an investment in a safer, more productive, and ultimately, more successful future for your institution.
Resources & Links
- Occupational Safety and Health Administration (OSHA) : OSHA provides regulations and guidelines related to laboratory safety, including ventilation requirements. Crucial for understanding legal compliance and best practices. Look for publications on laboratory standard 29 CFR 1910.145.
- Environmental Protection Agency (EPA) : The EPA deals with environmental protection, which includes regulations impacting lab ventilation, especially concerning emissions and air quality. Check for relevant standards and resources on laboratory waste management and hazardous air pollutant control.
- American National Standards Institute (ANSI) : ANSI develops consensus standards, some of which are highly relevant to laboratory ventilation system design and safety. While standards themselves often require purchase, ANSI's website provides information on related standards and committees.
- American Society of Heating, Refrigerating and Air-Conditioning Engineers (ASHRAE) : ASHRAE provides technical guidance and standards for HVAC systems, including those used in laboratories. Their publications address ventilation rates, air quality, and energy efficiency - particularly relevant for Section 2 and Section 3.
- American Industrial Hygiene Association (AIHA) : AIHA focuses on industrial hygiene and occupational health and safety. Their resources can help with assessing ventilation effectiveness and identifying potential hazards, aligning with the troubleshooting section and general system assessment.
- Lab Manager : Lab Manager is a website focused on laboratory management and equipment. Search their website for articles and resources related to ventilation systems, maintenance, and safety protocols - useful for practical application and best practices.
- ScienceDirect : ScienceDirect provides access to a large database of scientific and engineering journals. Search for articles on laboratory ventilation design, performance, and maintenance. May require subscription or institutional access. Relevant for deeper technical details across the document.
- National Institute of Standards and Technology (NIST) : NIST develops standards and provides guidance on measurement and testing. While direct ventilation standards may be less common, their methodologies can be applied to evaluate ventilation performance - especially relevant for fume hood performance checks (Section 3.1).
- Centers for Disease Control and Prevention (CDC) : The CDC offers information on biosafety and chemical safety in laboratories. This is helpful in understanding the purpose of ventilation and ensuring containment of hazardous materials; especially relating to alarm systems and record keeping (Section 5 and 6).
- Engineering Toolbox : A comprehensive online resource for engineers. Useful for calculating ventilation rates, understanding air flow principles, and selecting appropriate filters and equipment - relevant throughout the checklist template.
- Specialty Equipment Company : This website caters to lab equipment and supplies, including ventilation systems and related components. Offers a view on practical equipment used in lab ventilation - useful for understanding components and their maintenance (Section 3).
Frequently Asked Questions
What is the purpose of a science lab ventilation system?
Science lab ventilation systems remove hazardous fumes, dust, and airborne contaminants generated by experiments, ensuring a safe and healthy environment for students and staff. They maintain air quality and prevent the buildup of dangerous substances.
Why do I need a checklist template for my lab ventilation system?
A checklist ensures consistent maintenance and inspection of your ventilation system. It helps identify potential problems early, preventing costly repairs, downtime, and most importantly, protecting the health and safety of everyone in the lab.
What types of ventilation systems are covered by this checklist?
The checklist is designed to be adaptable for various ventilation systems, including fume hoods, local exhaust ventilation (LEV), general lab ventilation systems, and dedicated exhaust systems. Specific details may need to be adjusted based on your lab's unique setup.
How often should I use this checklist?
We recommend using the checklist at least monthly for routine checks. More frequent inspections (weekly or even daily) may be necessary for labs with high-risk activities or a history of ventilation issues. Quarterly or annual deep inspections are also recommended.
What information should I record on the checklist?
Record all observations, including equipment status (operational/not operational), readings (e.g., airflow velocity, static pressure), maintenance performed, any deficiencies found, and corrective actions taken. Dates and initials of the person performing the inspection are crucial.
What does 'face velocity' refer to in the fume hood section of the checklist?
Face velocity is the speed of the air moving across the opening of a fume hood. It's a critical measurement of fume hood performance. The checklist provides guidance on acceptable ranges, but always consult your lab's safety protocols.
If I find a problem during the inspection, what should I do?
Immediately document the issue on the checklist. Notify the designated lab supervisor or safety officer, and follow your lab's established procedures for reporting and resolving ventilation problems. Do not use the equipment until the issue is rectified.
Can I customize this checklist template?
Yes, absolutely! The checklist is designed to be a starting point. Feel free to add or remove items to reflect the specific equipment, procedures, and safety requirements of your science lab. Consider adding custom alerts or reminders.
Where can I find more information about science lab ventilation safety?
Consult relevant safety regulations (OSHA, EPA), your institution's safety manuals, and industry best practices for science lab ventilation. The Safety Data Sheets (SDS) for chemicals used in your lab often contain ventilation requirements.
What is the difference between local exhaust ventilation (LEV) and general lab ventilation?
General lab ventilation provides overall air exchange and dilution of contaminants. LEV systems, like fume hoods, directly capture contaminants at their source before they spread into the lab air, offering more targeted and effective control.
Found this Article helpful?
Facility Management Solution Demo
Keep your facilities running smoothly! ChecklistGuro streamlines maintenance, inspections, and vendor management. Reduce downtime, optimize efficiency, & improve safety. Manage it all with our Work OS.
Related Articles
Industrial Floor Cleaning & Safety Checklist Template
Display Case Temperature Monitoring Checklist Template
The Ultimate Refrigeration Maintenance Checklist: Keeping Your Food Safe
Escalator & Moving Walkway Inspection Checklist Template
The Ultimate Guest Room Cleaning & Inspection Checklist Template

The Ultimate Security Camera Review Checklist Template
Forklift Inspection & Maintenance Checklist Template
Emergency Generator Load Testing Checklist Template
We can do it Together
Need help with
Facility Management?
Have a question? We're here to help. Please submit your inquiry, and we'll respond promptly.