Soil Compaction Assessment Checklist Template
Published: 09/01/2025 Updated: 05/11/2026
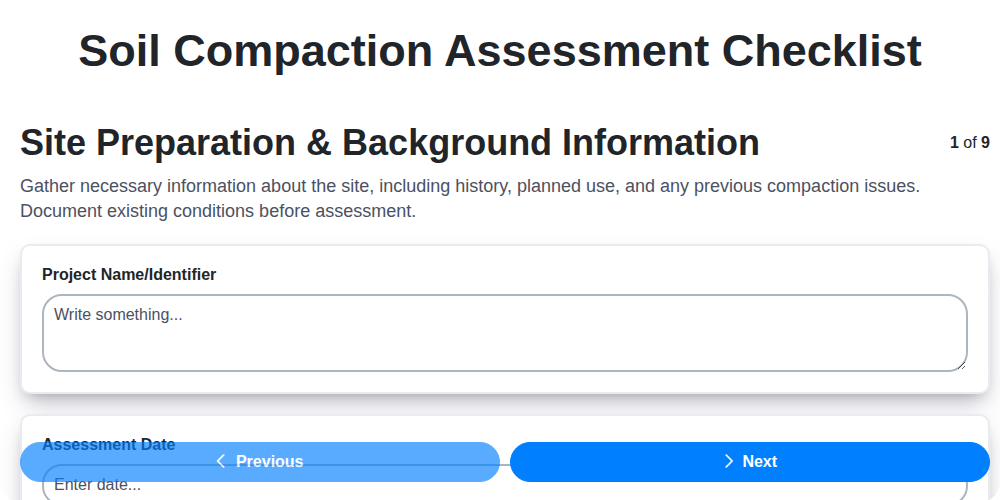
Table of Contents
- Introduction: Why Soil Compaction Matters
- Understanding the Soil Compaction Assessment Process
- Template Overview: Key Sections and Purpose
- Section 1: Project Background and Site Information
- Section 2: Equipment and Tools Checklist
- Section 3: Visual Inspection and Documentation
- Section 3.1: Surface Observations
- Section 3.2: Potential Issue Indicators
- Section 4: Compaction Testing Methods
- 4.1 Penetrometer Testing
- 4.2 Nuclear Density Gauge (NDG) Testing
- 4.3 Sand Cone Testing
- 4.4 Proctor Compaction Testing
- Section 5: Data Recording and Analysis
- Section 6: Reporting and Recommendations
- Section 7: Record Keeping and Documentation
- Resources & Links
TLDR: Need to make sure your soil is solid before building? This checklist template breaks down soil compaction assessment into easy-to-follow steps, covering everything from visual checks to lab testing. It's your guide to avoiding costly problems down the road - download it and build on a strong foundation!
Introduction: Why Soil Compaction Matters
Beneath the surface of any successful construction project lies a foundation - often overlooked, yet critically important: the soil. While architectural design and material selection rightfully garner attention, the stability and performance of your structure are fundamentally linked to the quality of the ground it rests upon. Soil compaction, the process of increasing the density of soil, is a cornerstone of this foundation. Without proper compaction, projects can face a cascade of issues, from uneven settlement and structural instability to increased maintenance costs and even potential failure. This isn't just about aesthetics; it's about ensuring long-term safety, durability, and the responsible stewardship of our resources. Understanding why soil compaction matters is the first step toward building a solid future - quite literally.
Understanding the Soil Compaction Assessment Process
The soil compaction assessment process isn't a single, straightforward test; it's a layered approach designed to provide a comprehensive picture of the soil's density and stability. It begins with a thorough review of project plans and specifications to understand the required compaction levels and testing frequency. Following this, a visual inspection is conducted, looking for any obvious signs of segregation, voids, or uneven settlement. This is often complemented by quick, indicative testing using a penetrometer. For more precise measurements, Nuclear Density Gauges (NDGs) are frequently employed, providing data on both density and moisture content. In critical applications or when highly accurate results are needed, undisturbed soil samples are collected and sent to a certified laboratory for Proctor compaction testing. The entire process is iterative, with results from one step informing the need for further investigation or corrective action. Ultimately, the goal is to ensure the soil is adequately compacted to support the intended structure and prevent long-term issues.
Template Overview: Key Sections and Purpose
Our Soil Compaction Assessment Template is structured to guide you through a thorough and compliant evaluation. Here's a breakdown of the key sections and their purpose:
- Project Information: This section captures essential details such as project name, location, engineer of record, and date of assessment - providing context for all subsequent findings.
- Site Conditions & Background: Documents initial observations, soil type identification, and any relevant historical data impacting compaction requirements.
- Equipment Calibration Records: Ensures the validity of testing results by recording calibration dates and certificates for all equipment used.
- Visual Assessment Log: Provides a structured way to document visual observations - segregations, voids, uneven settlement - with space for photographs.
- Penetrometer Data Table: Organizes penetrometer readings, providing a quick, comparative assessment across different areas.
- Nuclear Density Gauge (NDG) / Sand Cone Data Table: (Conditional - depending on testing method) - Records in-situ density and moisture content readings, alongside location data.
- Laboratory Testing Results: (Conditional) - Provides a consolidated view of Proctor compaction test results from a certified laboratory.
- Compaction Summary & Analysis: This crucial section consolidates all data, compares it against project specifications, and flags any deviations.
- Recommendations & Corrective Actions: Details proposed solutions for any compaction deficiencies, along with responsible parties and timelines.
- Signatures & Approvals: Ensures accountability with signature fields for assessor, engineer, and relevant stakeholders.
Section 1: Project Background and Site Information
Understanding the context of your project is the cornerstone of any successful soil compaction assessment. Before even touching a penetrometer or NDG, a thorough review of the project's background and site information is essential. This includes confirming the intended use of the site - a driveway, a building foundation, or a roadway will all demand different compaction levels. Scrutinize the project plans and specifications; these documents will outline the required compaction values, acceptable tolerances, and frequency of testing. Furthermore, investigate the site's history. Has the area been previously disturbed, used for agriculture, or subjected to fill material? Existing utility maps and any available geotechnical reports will provide valuable insights into potential subsurface conditions. Finally, a careful observation of the surrounding environment, including vegetation and drainage patterns, can reveal clues about the soil's natural properties and potential vulnerabilities. Documenting all findings is critical for creating a comprehensive assessment and ensures everyone involved has a shared understanding of the project's scope and challenges.
Section 2: Equipment and Tools Checklist
Having the right equipment and tools is crucial for a thorough and accurate soil compaction assessment. Here's a detailed breakdown of what you'll need, ensuring you're well-equipped to tackle any soil conditions:
- Penetrometer: A relatively inexpensive and easy-to-use tool for a quick, qualitative assessment of soil resistance. Different types (e.g., hand-operated, electronic) offer varying levels of detail.
- Nuclear Density Gauge (NDG): For faster, non-destructive density and moisture content measurements. Requires specialized training and licensing for operation. Ensure the unit is regularly calibrated and maintain proper safety protocols.
- Sand Cone Test Kit: An excellent alternative to an NDG, especially for smaller projects or when budget constraints are a factor. Provides density measurements based on a calibrated sand cone.
- Shovels and Trowels: Essential for excavating soil profiles, collecting representative samples, and preparing testing areas.
- Moisture Content Determination Equipment: This is critical. Options include:
- Oven: The standard method - allows for precise determination of moisture content by weight difference after drying.
- Moisture Meter: Faster, but less accurate. Use for preliminary assessments or large-scale projects.
- Safety Gear: Never compromise on safety! This includes:
- Hard Hat
- Safety Glasses
- Gloves (appropriate for soil type)
- Steel-toed Boots
- Measuring Tools: Tape measure, ruler, or similar for accurate measurements.
- Calibration Records: Keep meticulous records of equipment calibration dates and results. This ensures data reliability and demonstrates due diligence.
- Field Notebook and Pens: For recording observations, test data, and any deviations from standard procedures.
- Camera: For documenting the process and site conditions. Photographs provide valuable visual records.
Section 3: Visual Inspection and Documentation
A keen eye is your first and most accessible tool. Visual inspection isn't a substitute for quantitative testing, but it provides valuable context and can flag potential issues that warrant closer examination. Start by observing the overall surface of the soil - look for obvious signs of unevenness, settlement, or distress. Pay close attention to the soil profile, noting any layering or segregation of different soil types, which can indicate inconsistent compaction. Look for voids or air pockets, which compromise stability. Cracks, fissures, or surface erosion are also red flags. Document everything meticulously. Take numerous photographs from various angles, capturing both the overall view and close-up details. Detailed notes, including observations of the soil color, texture, and any unusual features, are essential. Accurate record-keeping at this stage saves time and provides a baseline for future comparisons. Even seemingly minor details can become significant when viewed in conjunction with other data.
Section 3.1: Surface Observations
A thorough visual assessment begins with a walk-around of the compacted area. Look beyond the obvious; subtle signs can indicate underlying issues. Note the overall uniformity of the surface - are there noticeable dips, humps, or variations in elevation? Observe the soil's texture and color; unusual color variations can suggest the presence of foreign materials or inconsistencies in the soil profile. Look for signs of segregation, where different soil layers have separated during the compaction process. Pay attention to any cracking, settling, or heaving-these can be indicators of instability or inadequate compaction. Document everything with photographs, noting the location and severity of any observed anomalies. A keen eye and meticulous documentation at this stage can save significant troubleshooting later on.
Section 3.2: Potential Issue Indicators
Sometimes, the most valuable insights come from careful observation. Before even breaking out the testing equipment, a thorough visual inspection can reveal potential compaction issues. Here's what to look for:
- Surface Cracking: Extensive or widespread cracking across the compacted area is a significant warning sign, suggesting insufficient compaction or underlying instability.
- Settlement Patterns: Noticeable depressions, unevenness, or tilted structures indicate differential settlement, often linked to inconsistent compaction.
- Dry, Dusty Appearance: Excessively dry soil suggests inadequate moisture content, hindering proper compaction.
- Visible Segregation: Distinct layers or pockets of different soil types (segregation) can compromise the uniformity of compaction.
- Spongy or Unstable Feel: When walking on the compacted surface, a spongy or unstable feeling signals insufficient density.
- Low Penetrometer Readings: Consistently low readings from a penetrometer suggest poor compaction.
- High Moisture Content Variations: Significant variations in moisture content across the testing area point to uneven compaction.
- NDG Readings Below Specified Density: Any density measurements from an NDG that fall below the required compaction level demand immediate investigation and corrective action.
- Laboratory Proctor Test Results Outside Specified Range: Proctor test results that don't meet the specified compaction range highlight a need to re-evaluate the compaction process.
Section 4: Compaction Testing Methods
Choosing the right compaction testing method depends on the project's scale, budget, and required level of accuracy. Here's a breakdown of common approaches:
1. Visual Inspection: While not a quantitative measurement, a thorough visual assessment is the first crucial step. Look for signs of segregation, voids, or uneven settlement. Document observations with photographs - these can be invaluable later.
2. Penetrometer Testing: This is a quick and easy method for a relative indication of soil resistance. Penetrometers measure the force required to drive a cone into the soil. Lower resistance generally suggests lower compaction. However, penetrometer testing is not a definitive compaction measurement and is primarily used for preliminary screening.
3. Nuclear Density Gauges (NDGs): NDGs provide a relatively fast and non-destructive way to measure in-situ density and moisture content. They work by emitting gamma radiation and measuring its attenuation. Important: Operation of NDGs requires specialized training, certification, and adherence to strict safety protocols. NDGs are ideal for large projects or when frequent monitoring is required.
4. Sand Cone Testing: A more traditional method, the sand cone test, is often used as an alternative to NDGs, particularly on smaller projects. It involves measuring the volume of a hole excavated in the soil and then comparing it to a known volume of sand. While less rapid than NDGs, sand cone testing is a reliable option when NDG equipment isn't available or practical.
5. Proctor Compaction Testing (Laboratory Testing): For the most accurate determination of compaction characteristics, laboratory Proctor tests are performed. Soil samples are compacted in a mold under controlled conditions, and the resulting dry density is measured. This establishes the optimum moisture content and maximum dry density for the specific soil type. While laboratory-based, Proctor testing serves as the benchmark against which field compaction is evaluated.
4.1 Penetrometer Testing
A penetrometer provides a quick and relatively inexpensive way to get a general sense of the soil's resistance to penetration. While not a definitive compaction measurement, it offers a valuable, indicative assessment of the soil's density.
Procedure:
- Selection: Choose a penetrometer appropriate for the soil type. Different types exist for cohesive (clay-rich) and cohesionless (sand/gravel) soils.
- Insertion: Position the penetrometer vertically and drive it into the soil using a calibrated force. A manual hammer is often used, but some models have powered insertion capabilities.
- Reading the Scale: Observe and record the depth or force required to drive the penetrometer a specific distance (e.g., 1 inch or 25mm). Lower readings generally suggest lower compaction.
- Multiple Readings: Take multiple readings at different locations within the area being assessed and calculate an average. This helps account for variations in soil density.
- Documentation: Record the penetrometer type, reading date/time, location, soil type (if known), and the force/depth values.
Important Considerations:
- Soil Type: Penetrometer readings are highly dependent on soil type. What constitutes a "good" reading for sand will be different than for clay.
- Calibration: Ensure the penetrometer is properly calibrated to ensure accuracy.
- Limitations: Penetrometer testing should be used as a screening tool only. More rigorous testing methods (like NDG or laboratory compaction tests) are needed for definitive compaction verification.
4.2 Nuclear Density Gauge (NDG) Testing
Nuclear Density Gauges (NDGs) offer a rapid and relatively non-destructive method for determining in-situ soil density and moisture content. These gauges utilize gamma radiation emitted from a radioactive source to measure the density of the surrounding soil. The emitted radiation interacts with the soil, and the gauge measures the amount of radiation that returns. This data is then processed to calculate the soil's dry density and moisture content.
Benefits of NDG Testing:
- Speed: NDG testing is significantly faster than traditional methods like sand cone tests, allowing for greater coverage within a shorter timeframe.
- Non-Destructive: Minimizes disturbance to the compacted soil layer.
- Real-Time Data: Provides immediate results, enabling quicker adjustments to compaction efforts.
- Moisture Content Measurement: Simultaneously provides data on moisture content, crucial for optimizing compaction.
Important Considerations & Safety:
- Licensing & Training: Operation of an NDG requires specialized training, certification, and adherence to strict regulatory guidelines due to the use of radioactive materials. Never attempt to operate an NDG without proper authorization and training.
- Safety Protocols: Adhere to all safety protocols, including maintaining appropriate distance from the gauge, utilizing shielding, and complying with radiation exposure limits.
- Calibration: Regular calibration of the NDG is essential to ensure accurate and reliable results.
- Regulatory Compliance: Comply with all applicable federal, state, and local regulations regarding the use and transportation of radioactive materials.
4.3 Sand Cone Testing
Sand cone testing offers a cost-effective and accessible alternative to Nuclear Density Gauges, particularly suitable for smaller projects or situations where NDG operation isn't feasible or permitted. This method, often used for quality control purposes, provides a reasonable estimate of in-situ density.
The process involves excavating a small hole in the soil, carefully measuring its volume, and then filling it with sand of known density while allowing it to flow from a cone at a controlled rate. The amount of sand required to fill the hole is directly related to the in-situ density of the soil.
Here's a simplified breakdown of the steps:
- Hole Excavation: Carefully excavate a hole in the soil according to the standard dimensions (typically 12 inches in diameter and 6 inches deep). Ensure the bottom and sides are smooth and vertical.
- Volume Measurement: The volume of the hole is determined using a template or by measuring the dimensions and calculating the volume.
- Sand Flow: Using a specialized sand cone apparatus, allow dry, uniformly graded sand to flow into the hole until it is completely filled and level with the surrounding soil surface.
- Mass Determination: Carefully measure the mass of the sand used to fill the hole.
- Density Calculation: Use the known density of the sand and the mass of sand used to calculate the in-situ dry density of the soil, following established formulas.
Important Considerations:
- Sand Quality: The sand used must be clean, dry, and uniformly graded.
- Cone Flow Rate: The sand must flow freely from the cone at a consistent rate.
- Operator Skill: Proper technique and attention to detail are crucial for accurate results.
- Soil Type Limitations: Sand cone testing is most reliable for granular soils (sands and gravels). It's less accurate for cohesive soils (clays and silts).
4.4 Proctor Compaction Testing
Proctor compaction testing, formally known as ASTM D698 or ASTM D1557, is widely considered the gold standard for determining the optimum moisture content and maximum dry density of a given soil type. This lab-based test provides the critical data needed to establish compaction specifications for field operations.
How it Works:
The Proctor test involves compacting a soil specimen in layers within a mold of known volume, using a standardized hammer and drop height. Several moisture contents are tested, each resulting in a different dry density. A compaction curve is then generated, plotting dry density against moisture content. The peak of this curve represents the optimum moisture content (OMC) and the corresponding maximum dry density (MDD) for that soil.
Why it's Important:
- Field Compaction Goals: The OMC and MDD values from Proctor testing directly inform the target compaction levels required during field operations.
- Equipment Selection: Helps determine the appropriate type and size of compaction equipment needed for the job.
- Quality Control: Serves as a benchmark against which field compaction is evaluated. Passing field density tests should demonstrate compaction to at least 95% of the MDD, as determined by Proctor testing.
- Soil Classification: Proctor testing can also provide insights into the soil's behavior and properties.
Section 5: Data Recording and Analysis
Accurate and thorough data recording is the bedrock of any successful soil compaction assessment. It's not enough to just perform the tests; you must meticulously document the process and analyze the results to draw meaningful conclusions.
Consistent Record-Keeping: Establish a standardized data recording sheet or digital template before beginning testing. Include fields for: date and time, tester's name, equipment ID, location of test, soil type (if known), moisture content (critical!), test results (penetrometer readings, NDG data, lab compaction values), and any observations (e.g., unusual soil conditions, equipment malfunctions). Photographs are invaluable - document the testing area, sample collection, and any irregularities.
Calculating Compaction: Lab compaction tests (Proctor tests) provide the maximum dry density achievable for a given soil. Field density results are compared to this maximum to determine the percentage of maximum density. This is a key performance indicator. For example, a specification might require 95% of maximum dry density.
Trend Analysis: Record data over time to identify trends. Are compaction levels consistent across the site? Are they improving or declining with repeated passes of the compaction equipment? If discrepancies are detected, investigate the cause (e.g., uneven moisture distribution, equipment malfunction, improper technique).
Statistical Analysis (Optional): For larger projects, consider using statistical methods to analyze compaction data and assess variability. This can help identify areas of concern and optimize compaction procedures.
Data Correlation: Compare results from different testing methods. Do the penetrometer readings correlate with NDG data? Discrepancies can indicate issues with equipment calibration or testing technique, prompting further investigation.
Reporting & Review: Compile all recorded data into a clear and concise report. Include summary tables, graphs, and a narrative explaining the findings. Regularly review the data with the project team to ensure the compaction process is meeting the specified requirements.
Section 6: Reporting and Recommendations
The reporting phase isn't just about presenting numbers; it's about translating those numbers into actionable insights. A well-structured report should clearly outline the testing methodology, detail the results obtained from each method (penetrometer readings, NDG data, lab compaction test results), and compare those results against the project specifications and required compaction levels. Visual aids like graphs and charts can be incredibly effective in illustrating trends and highlighting areas of concern.
If results fall short of the specified compaction standards, the recommendations section is crucial. These recommendations should be specific and practical, detailing corrective actions to achieve the desired results. For example:
- Moisture Adjustment: If the soil is too dry, recommend adding water and re-compacting. Conversely, if it's too wet, suggest allowing it to dry before proceeding.
- Compaction Equipment Passes: Suggest increasing the number of passes with the compaction equipment.
- Equipment Selection: Consider using a different type of compaction equipment more suited to the soil type.
- Layer Thickness: Adjusting the layer thickness during compaction can significantly impact results.
- Soil Amendment: In some cases, soil amendment (e.g., adding stabilizing agents) may be necessary.
Each recommendation should be accompanied by a rationale explaining why it's being suggested and an estimate of the time and resources required. Remember, the goal is to empower the project team to make informed decisions and ensure the long-term stability of the structure. Regularly scheduled follow-up testing is also recommended to verify the effectiveness of corrective actions.
Section 7: Record Keeping and Documentation
Thorough record keeping and meticulous documentation aren't just good practices - they're essential for project accountability, quality control, and potential dispute resolution. A well-organized system ensures that everyone involved understands the compaction process and its outcomes.
Here's what your record-keeping system should include:
- Field Logs: Detailed notes for each testing day, including date, time, weather conditions, equipment used (with serial numbers and calibration dates), operator names, and observations.
- Test Data Sheets: Copies of all test data sheets, whether from penetrometer readings, NDG results, or lab reports. Ensure these are clearly labeled with project name, location, and test date.
- Photographic Evidence: A comprehensive photo log documenting the soil conditions before, during, and after compaction. These visuals can be invaluable in illustrating progress and addressing concerns.
- Equipment Calibration Records: Keep copies of all equipment calibration certificates readily accessible. This demonstrates due diligence and verifies the reliability of your data.
- Corrective Action Reports: If corrective actions are required (e.g., additional compaction passes), document the actions taken, the rationale behind them, and the resulting improvements.
- Digital Organization: Consider using a cloud-based storage system to organize your records electronically, making them easily accessible and shareable.
- Retention Policy: Establish a clear retention policy for your records, complying with relevant legal and contractual requirements.
Resources & Links
- Federal Highway Administration (FHWA) : Provides extensive resources, guidelines, and publications related to soil mechanics, compaction, and construction practices relevant to road and infrastructure projects. Offers technical information, reports, and manuals useful for understanding soil compaction requirements and testing methods.
- American Society of Civil Engineers (ASCE) : ASCE offers standards, technical publications, and continuing education courses on geotechnical engineering, including soil compaction and testing procedures. Useful for ensuring adherence to industry best practices.
- American Society of State Geologists (ASSG) : While not solely focused on compaction, the ASSG's website provides valuable geological information and resources that can contextualize soil conditions and potential compaction issues on a site. May include information on regional soil types and potential challenges.
- International Organization for Standardization (ISO) : ISO develops and publishes international standards that relate to geotechnical testing and soil compaction methods. Search for relevant ISO standards (e.g., related to compaction testing, density measurement) to ensure compliance with globally recognized practices.
- Terra Materials : A soils testing laboratory that provides resources and information regarding geotechnical engineering principles and lab testing procedures. Offers insights into compaction testing and soil analysis techniques.
- Geosynthetics Magazine : While focused on geosynthetics, the magazine often covers topics related to soil stabilization and compaction, especially in challenging conditions. Provides practical examples and case studies.
- WermCO : Offers compaction control products and provides technical resources related to soil compaction testing and equipment, including guides on proper testing techniques and equipment calibration.
- York Soil Compaction Equipment : Provides information and specifications for compaction equipment, useful for understanding the different types of machinery used for soil compaction and their capabilities. Useful for section 1 and 2 of the blogpost
- Dynamic Materials : Offers Sand Cone Testing equipment, provides information related to sand cone testing, its principles, procedures, and applications. Relevant to Section 4.3
- Proctor Compaction Testing Laboratories : Although a laboratory, their name reflects the Proctor testing method. Their site contains helpful information about Proctor testing, its importance, and how it's conducted. Useful for Section 4.4.
- Dynamic Test : Provides information and products related to Nuclear Density Gauges. Offers details about the technology, usage, and considerations when using NDGs for compaction assessment. Useful for Section 4.2
Frequently Asked Questions
What is soil compaction and why is it important to assess it?
Soil compaction refers to the process where soil particles are pressed together, reducing pore space. Assessing it is crucial because compacted soil hinders root growth, water infiltration, and air circulation, impacting plant health and overall soil function. It can also lead to structural issues in construction projects.
Who is this checklist template for?
This checklist is designed for anyone involved in soil management, including landscapers, farmers, construction workers, golf course superintendents, and environmental professionals. It's useful for assessing existing soil conditions or monitoring the impact of activities that can cause compaction.
What tools are needed to use this checklist?
Primarily, you'll need a soil compaction meter (also known as a penetrometer). Different types exist (e.g., static cone penetrometer, dynamic penetrometer). The checklist also indicates when visual observations and simple hand tests are sufficient for initial assessments. A measuring tape or ruler might be useful for some observations.
What are the typical soil compaction values considered acceptable?
Acceptable compaction levels vary based on soil type and intended use. Generally, for agricultural land, values below 150% of maximum dry density are desirable. For lawns and gardens, lower values (around 100-120%) are ideal. Construction sites have different requirements, often aiming for specific compaction percentages outlined in project specifications. The checklist provides guidance, but consulting with a soil specialist is recommended.
How often should I perform soil compaction assessments?
The frequency of assessments depends on the context. For agricultural land, annual or bi-annual assessments are common. Construction sites require assessments before, during, and after soil manipulation. Areas susceptible to heavy traffic or machinery use should be monitored more frequently.
Found this Article helpful?
Agriculture Management Solution Demo
Running a farm or agricultural business is complex. ChecklistGuro's Work OS platform simplifies your operations, from crop planning and irrigation management to livestock tracking and harvest scheduling. Increase efficiency, reduce waste, and boost yields! See how ChecklistGuro can revolutionize your agriculture business.
Related Articles

10 Simple Steps to a Healthy Drainage System: Your Checklist Template

Mastering the Daily Crop Scouting Report: Your [Specific Crop] Checklist Template

Irrigation System Checklist: Farm Water Management & Crop Yield Optimization

Unlock Your Garden's Potential: A Soil pH Verification Checklist

PPE Usage Checklist Template: Your Guide to Safety

Water Discharge Permit Compliance Checklist Template

The Ultimate GPS & Precision Farming Calibration Checklist Template

Water Runoff Analysis Checklist Template
We can do it Together
Need help with
Agriculture?
Have a question? We're here to help. Please submit your inquiry, and we'll respond promptly.