The Ultimate Tire Pressure & Condition Checklist Template
Published: 09/01/2025 Updated: 04/03/2026
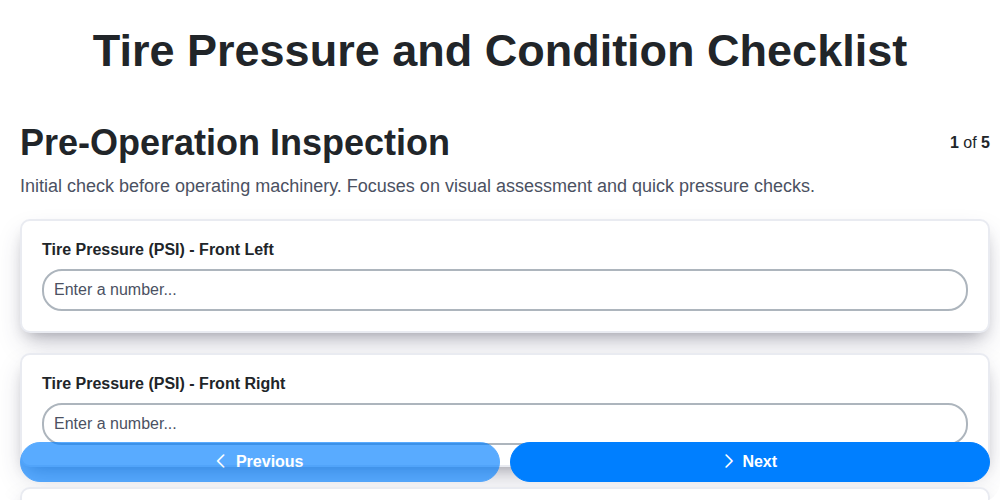
Table of Contents
- Why Tire Maintenance Matters
- Your Ultimate Checklist: A Step-by-Step Guide
- Pre-Trip Visual Inspection: A Quick Scan
- Tire Pressure Verification: Getting it Just Right
- Assessing Tire Condition: Beyond the Pressure
- Post-Trip Checks: Addressing Unusual Circumstances
- Record Keeping: Tracking Your Tire Health
- Diagnosing & Addressing Common Tire Problems
- Resources & Further Reading
- Resources & Links
TLDR: Keep your tires safe and your car running smoothly with this simple checklist! It guides you through quick inspections for pressure, condition (tread depth, sidewall damage), and helps you spot potential problems *before* they become costly repairs. Download the template and make tire maintenance a regular habit!
Why Tire Maintenance Matters
Beyond just keeping you safely on the road, consistent tire maintenance delivers a surprising ripple effect of benefits. Underinflated tires significantly increase rolling resistance - that's the friction between your tires and the road. This forces your engine to work harder, directly impacting your fuel economy and increasing your carbon footprint. Conversely, properly inflated tires roll more efficiently, saving you money at the pump and contributing to a greener planet. It's not just about immediate savings either; neglecting your tires leads to premature wear and tear, increasing the frequency of replacements and the overall cost of vehicle ownership. Furthermore, tires in poor condition dramatically compromise your vehicle's handling and braking capabilities, especially in challenging weather conditions like rain, snow, or ice, putting you and your passengers at increased risk. So, maintaining your tires is an investment in your safety, your wallet, and the environment.
Your Ultimate Checklist: A Step-by-Step Guide
Let's dive into the practical details. This isn't just about knowing what to check; it's about doing it correctly. Follow this step-by-step guide for a thorough tire assessment.
Phase 1: Pre-Trip Visual Scan (5 Minutes)
Before you even start the engine, take a quick walk around your vehicle. Look closely at each tire, paying attention to the sidewalls and tread. Are there any obvious signs of damage? Look for:
- Bulges or Blisters: These indicate internal tire damage and require immediate attention.
- Cuts or Lacerations: Even small cuts can lead to slow leaks and potential blowouts.
- Embedded Objects: Nails, screws, glass, or rocks can be embedded in the tire, causing a puncture.
- Uneven Wear (Quick Glance): Note any significant differences in tread depth between the inside and outside edges of the tire.
Phase 2: The Tire Pressure Check - Cold & Accurate (10-15 Minutes)
- Gather Your Tools: You're going to need a reliable tire pressure gauge (digital is best!) and access to an air compressor.
- Locate the Recommended Pressure: Don't use the number on the tire sidewall! Find the correct pressure on the driver's side doorjamb sticker or in your vehicle's owner's manual.
- Check When Cold: Tire pressure increases as tires warm up. Check before driving or at least 3 hours after.
- The Process: Remove the valve cap from the first tire. Press the gauge firmly onto the valve stem until the reading stabilizes. Record the pressure. Repeat for all tires, including the spare.
- Inflate or Deflate: If the pressure is too low, add air in short bursts, rechecking the pressure after each addition. If it's too high, release air slowly.
- Don't Forget the Spare! It's easy to overlook but crucial for emergencies. Ensure it's inflated to the pressure specified in your owner's manual.
Phase 3: Tread Depth Inspection - The Penny Test (2 Minutes)
This simple test is a quick way to determine if your tires have enough tread.
- Grab a Penny: Yes, a U.S. penny!
- Insert the Penny: Place the penny upside down into a tread groove.
- Check Lincoln: If you can see the top of Abraham Lincoln's head, your tires are nearing the legal tread depth limit (2/32 inch) and should be replaced soon. If Lincoln's head is completely covered, you have sufficient tread.
Phase 4: Sidewall and Overall Tire Assessment (5 Minutes)
- Sidewall Cracks: Look for small cracks, especially near the tire beads (where the tire meets the rim). This can be a sign of aging and potential failure.
- Uneven Wear Patterns: Take a closer look at the overall wear. Is one side more worn than the other? This could indicate alignment issues.
- Foreign Objects: Scan the tire surface for any lodged debris.
Pre-Trip Visual Inspection: A Quick Scan
Before you even grab your tire pressure gauge, a quick visual inspection can catch potential problems before they become serious. Walk around your vehicle and take a few moments to observe your tires. Look for any obvious signs of damage - bulges, cuts, sidewall cracks, or anything embedded in the tire's surface, like nails, screws, or glass. Don't just focus on the tires themselves; glance at the surrounding area too. Are there any signs of leaks pooling beneath the vehicle? Even a seemingly minor detail, like a small piece of debris stuck to the tire, could be a warning sign. This quick scan is your first line of defense against unexpected tire trouble.
Tire Pressure Verification: Getting it Just Right
Knowing where to find the correct tire pressure is the first, and often most confusing, step. Don't fall into the trap of looking at the numbers stamped on the tire sidewall! Those figures represent the maximum pressure the tire can handle, not the ideal pressure for your vehicle. Overinflating to that maximum can lead to a harsh ride, uneven wear, and reduced grip.
Instead, locate the recommended tire pressure on one of these reliable sources:
- Driver's Side Door Jamb Sticker: This is your best bet. It's a sticker usually located on the doorjamb itself, or sometimes on the door edge. It provides the manufacturer's recommended pressure for optimal performance and safety.
- Owner's Manual: Your vehicle's owner's manual will also contain this crucial information.
- Fuel Door: Some newer vehicles now display the recommended pressure directly on the fuel door or surrounding area.
Once you have the correct pressure, use a quality tire pressure gauge to check each tire, including the spare. Remember to check when the tires are cold-before driving or at least three hours after. A slight deviation from the recommended pressure can impact your fuel efficiency, handling, and tire lifespan, so accuracy is key!
Assessing Tire Condition: Beyond the Pressure
Beyond a simple pressure reading, a thorough tire condition assessment reveals potential issues that can impact safety and longevity. Visual inspection is key, but knowing what to look for elevates your understanding. Start with the tread. While the penny test is a good quick check for legal tread depth, look for uneven wear. Edge wear often indicates underinflation, while center wear suggests overinflation. Diagonal wear can point to alignment problems, and consistent wear across the entire tread suggests proper inflation and alignment, but may still indicate a need for tire replacement soon.
Don't neglect the sidewalls. Cracking, bulging, or any signs of cuts or abrasions can compromise the tire's structural integrity. Even small nicks can lead to slow leaks or, worse, sudden blowouts. Carefully examine the entire sidewall, paying close attention to areas that contact the road during turns.
Embedded objects are a common culprit for tire trouble. Nails, screws, glass fragments - these can often be hidden from a casual glance. Regularly scan the entire tire surface for any signs of foreign objects. If you find something, don't attempt to remove it yourself. Take the vehicle to a professional for repair or replacement.
Finally, consider the tire's age. Even if the tread looks good, tires degrade over time due to exposure to UV rays, heat, and oxidation. Most tire manufacturers recommend replacing tires after six to ten years from the date of manufacture, regardless of tread depth. This date is stamped on the tire sidewall (look for the DOT code).
Post-Trip Checks: Addressing Unusual Circumstances
Sometimes, your tire performance isn't just about routine checks; it's about responding to what happened during your drive. Certain conditions demand a more thorough post-trip assessment. Here's what to look for:
Driving on Gravel or Unpaved Roads: These surfaces are notorious for kicking up rocks and debris. After a drive on gravel or dirt, immediately inspect your tires for punctures, embedded objects (like small stones or metal fragments), and cuts. A quick visual sweep is essential. Even if you didn't notice anything during the drive, a post-trip inspection can reveal subtle damage.
Severe Weather Encounters (Heavy Rain, Snow, Ice): Driving in adverse weather significantly increases the risk of tire damage. Check for cuts from debris kicked up by other vehicles, bulges (which can indicate internal tire damage), and any signs of irregular wear patterns that might have developed due to reduced traction or increased stress.
Near-Miss Situations: Did you have to swerve to avoid an obstacle or experience a sudden impact (like hitting a pothole)? Even if there were no immediate signs of trouble, a post-trip inspection is vital. Internal tire damage can sometimes be delayed, manifesting later as a slow leak or a compromised tire.
Unusual Noises or Vibrations: Did you hear hissing, thumping, or feel a persistent vibration during your drive? These are red flags. A post-trip inspection is crucial to pinpoint the source of the issue, whether it's a puncture, a separated belt, or another internal problem. Don't ignore these symptoms - they could indicate a serious issue that requires immediate attention.
Record Keeping: Tracking Your Tire Health
Maintaining a consistent record of your tire health goes beyond just checking the pressure - it's about understanding trends and proactively addressing potential issues. While a quick glance at your tires is good, a record provides valuable context.
Here's why record keeping matters and how to do it effectively:
Why Bother?
- Identify Slow Leaks: Pressure fluctuations over time can indicate a slow leak that might otherwise go unnoticed.
- Spot Seasonal Changes: Tire pressure naturally decreases in colder weather. Records help you track these changes and adjust accordingly.
- Track Wear Patterns: Consistent monitoring of wear patterns (edge, center, diagonal) provides early warning signs of alignment or suspension problems.
- Documentation for Commercial Use: Many commercial drivers are legally required to keep meticulous vehicle maintenance records, including tire inspections.
- Peace of Mind: Knowing you're on top of your tire health provides added confidence and safety.
Simple Ways to Keep Track:
- Notebook & Pen: The simplest method. Date each entry and note the tire pressure for each tire, along with any observations (e.g., slight edge wear on front tires, added 3 PSI to rear tires).
- Spreadsheet (Excel, Google Sheets): Allows for easy sorting, graphing, and analysis of data. Include columns for date, tire position (front left, rear right, etc.), pressure, and notes.
- Mobile App: Several apps are designed specifically for vehicle maintenance tracking, including tire pressure monitoring. Search your app store for tire tracker or vehicle maintenance app.
- Digital Logbook: If you are a professional driver, using a dedicated digital logbook can seamlessly integrate tire maintenance records with other vehicle data.
No matter the method you choose, consistency is key. Even a few minutes of record-keeping each month can make a significant difference in your vehicle's safety and longevity.
Diagnosing & Addressing Common Tire Problems
Finding an issue with your tires can be unsettling, but often the solutions are straightforward. Here's a breakdown of some frequent problems and what they might indicate:
1. Slow Leak - The Hiss & Soft Tire
- Possible Causes: Small puncture (nail, screw), faulty valve stem, bead leak (where the tire meets the rim).
- What to Do: Visually inspect the tire for punctures. Try soapy water applied to the valve stem and around the rim; bubbles indicate a leak. If you can't find the source, take it to a tire shop for professional diagnosis and repair.
2. Rapid Air Loss - The Obvious Flat
- Possible Causes: Larger puncture, sidewall damage, rim damage.
- What to Do: Immediately pull over to a safe location and replace the flat with your spare. It's critical to have the damaged tire professionally inspected and repaired (if possible) or replaced. Don't drive on a severely damaged tire.
3. Cupping (Scalloped Wear)
- What it Looks Like: The tire surface has a wavy or scalloped pattern.
- Possible Causes: Worn suspension components (shocks, struts), unbalanced tires, misalignment.
- What to Do: Have your vehicle inspected by a mechanic to diagnose and repair the underlying suspension or alignment issues. New tires may be needed after the repair.
4. Edge Wear (Shoulder Wear)
- What it Looks Like: The outer edges of the tire are more worn than the center.
- Possible Causes: Underinflation.
- What to Do: Check and adjust tire pressure to the recommended level. Regularly monitor tire pressure.
5. Center Wear
- What it Looks Like: The center of the tire is more worn than the edges.
- Possible Causes: Overinflation.
- What to Do: Adjust tire pressure to the recommended level. Regularly monitor tire pressure.
6. Bulges or Blisters
- What it Looks Like: Raised areas on the tire sidewall.
- What it Means: Tire structure damage. This is extremely dangerous.
- What to Do: Immediately replace the tire. Do not attempt to repair it.
Important Reminder: If you're unsure about the cause of a tire problem or are uncomfortable performing repairs yourself, always consult a qualified tire professional. Safety should always be your top priority!
Resources & Further Reading
Want to dive deeper into tire care and vehicle maintenance? Here are some helpful resources to get you started:
- National Highway Traffic Safety Administration (NHTSA): https://www.nhtsa.gov/ - A wealth of information on vehicle safety, including tire safety recalls and best practices.
- Rubber Manufacturers Association (RMA): https://rma.org/ - Provides technical information and consumer resources related to tires and rubber products.
- Your Vehicle's Owner's Manual: Seriously, read it! It contains specific recommendations for your vehicle's tires.
- Tire Retailer Websites (e.g., Tire Rack, Discount Tire): Often provide informative articles and guides on tire selection, maintenance, and safety. https://www.tirerack.com/
- YouTube Channels: Search for tire maintenance tutorial to find visual guides and demonstrations.
Resources & Links
- National Highway Traffic Safety Administration (NHTSA) : The official website for US traffic safety. Provides extensive information on tire safety, recalls, and regulations. A critical resource for accurate and up-to-date information.
- Tire Safety : A website dedicated solely to tire safety. Contains articles, videos, and resources for consumers on all aspects of tire maintenance and safety.
- AAA (American Automobile Association) : AAA provides roadside assistance and automotive information. Their website includes guides on tire care, pressure recommendations, and finding approved service centers.
- Bridgestone Tires : A major tire manufacturer's website. Offers helpful guides, FAQs, and information on tire technology and maintenance best practices.
- Michelin : Another leading tire manufacturer with extensive information on tire pressure, condition, and safety. They often have specific recommendations based on vehicle type.
- Goodyear Tires : Provides tire information, sizing guides, and safety tips. They often have videos demonstrating tire maintenance procedures.
- Discount Tire : A large online tire retailer. While primarily a sales platform, they also offer valuable articles and resources on tire selection, maintenance, and safety.
- YourMechanic : A platform connecting car owners with qualified mechanics. Offers diagnostic articles and repair guides that often address tire-related issues.
- Car Care Council : Promotes car care education and provides resources for DIY maintenance, including information on tire health and safety.
- Continental Tires : Another significant tire manufacturer. Their website contains information regarding tire technology and maintenance, often emphasizing safety and performance.
Frequently Asked Questions
What is this checklist template for?
This checklist template is designed to help you regularly inspect and maintain your tires, ensuring optimal performance, safety, and fuel efficiency. It covers pressure checks, tread depth, sidewall condition, and more.
Why is tire pressure so important?
Proper tire pressure improves fuel economy, extends tire lifespan, enhances handling and braking performance, and reduces the risk of tire failure.
How often should I use this checklist?
We recommend using this checklist at least once a month, and before any long trips or changes in driving conditions (e.g., seasonal changes).
Where can I find the correct tire pressure for my vehicle?
The correct tire pressure for your vehicle is typically found on a sticker located on the driver's side doorjamb, in your owner's manual, or sometimes inside the fuel door. *Do not* use the maximum pressure listed on the tire sidewall - that's the *maximum* it can handle, not the recommended pressure for your vehicle.
What does 'tread depth' refer to, and why is it important?
Tread depth is the amount of rubber between the tire's surface and the reinforcement cords. Adequate tread depth is crucial for grip, particularly in wet or snowy conditions. Less tread reduces traction and increases the risk of hydroplaning.
How can I measure tread depth?
You can measure tread depth using a tread depth gauge, a coin (the 'penny test' - if you can see all of Lincoln's head, your tread is too low), or a tread depth measuring tool available at most auto parts stores.
What does 'sidewall condition' refer to?
Sidewall condition refers to the physical state of the tire's sidewalls. Look for cracks, bulges, cuts, or any signs of damage. These can indicate structural weakness and potential failure.
What do I do if I find a tire with damage?
If you identify any significant damage to your tires, such as a large cut, bulge, or crack, consult a qualified tire professional immediately. Do not continue driving on a damaged tire.
Is this checklist suitable for all types of vehicles?
This checklist is generally applicable to most passenger vehicles, SUVs, and light trucks. However, specific tire maintenance requirements may vary for commercial vehicles or specialized equipment. Always refer to the manufacturer's recommendations for your specific vehicle.
Can I modify this checklist?
Yes, feel free to adapt the checklist to suit your specific needs and vehicle. You can add or remove items as necessary, but ensure you are covering all critical aspects of tire maintenance.
Found this Article helpful?
Logistics Management Solution Demo
Tired of shipping delays, lost packages, and inefficient routes? ChecklistGuro's Work OS platform streamlines your entire logistics operation, from warehouse management and order fulfillment to route optimization and delivery tracking. Gain real-time visibility, reduce costs, and improve customer satisfaction. Learn how ChecklistGuro can transform your logistics business!
Related Articles

10 Simple Steps to a Healthy Drainage System: Your Checklist Template

Mastering the Daily Crop Scouting Report: Your [Specific Crop] Checklist Template

Irrigation System Checklist: Farm Water Management & Crop Yield Optimization

Unlock Your Garden's Potential: A Soil pH Verification Checklist

PPE Usage Checklist Template: Your Guide to Safety

Water Discharge Permit Compliance Checklist Template

The Ultimate GPS & Precision Farming Calibration Checklist Template

Water Runoff Analysis Checklist Template
We can do it Together
Need help with
Logistics?
Have a question? We're here to help. Please submit your inquiry, and we'll respond promptly.